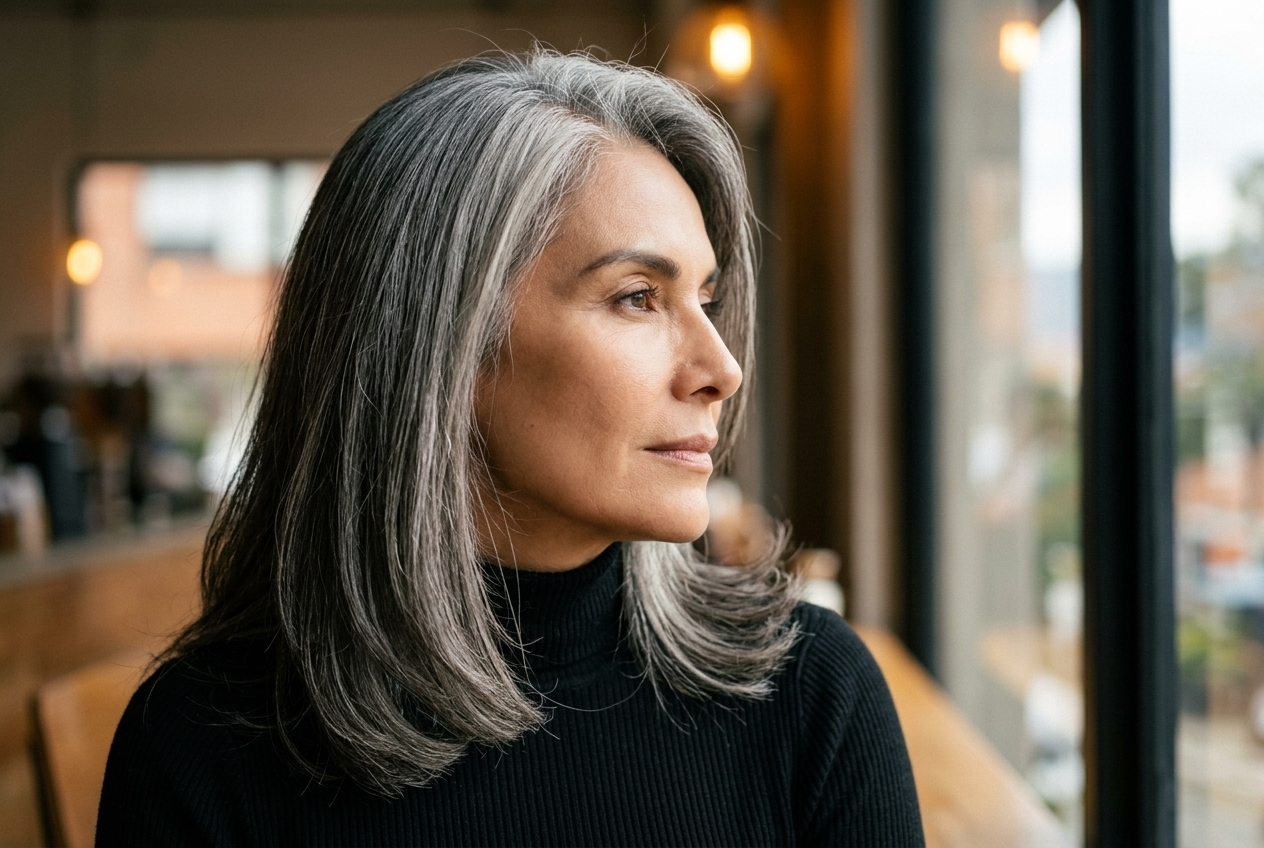
Silver hair has shed its old reputation. What used to be something women rushed to cover at the first sign of a strand is now one of the most requested looks in the salon chair, and colorists are getting genuinely creative with how they bring it in.
If you’re staring at your part line wondering whether to fight the gray or work with it, blending is usually the answer that keeps everyone happy — your colorist, your budget, and your mirror. It softens the line where your natural color meets your gray so the change looks deliberate instead of accidental.
There are more ways to do this than most beginners realize, and the right one depends on how much gray you have, your hair type, and how much salon time you’re willing to give it. Here are ten blending techniques worth bringing up at your next appointment.
- French Blending Is the Gentlest Way to Start Going Silver
- Why Balayage Might Be the Lowest-Maintenance Option You'll Try
- The Highlight-and-Lowlight Combo That Erases Harsh Root Lines
- Babylights Give Fine or Thinning Hair a Softer Silver Transition
- Money Piece Blending Focuses Your Gray Where It Shows Most
- What to Ask Your Colorist So You Actually Get the Look You Want
- Silver Toning Keeps Your Blend From Turning Brassy or Yellow
- Root Smudging Softens Regrowth Without a Full Color Service
- Chunky Lowlights Work Best If You Have Curly or Coily Texture
- The Color Melt Technique Blends Multiple Tones Into One Gradient
- Reverse Balayage Adds Dark Pieces Back Into Hair That's Gone Very Gray
- Finding Your Own Silver Without Rushing the Process
- Frequently Asked Questions
French Blending Is the Gentlest Way to Start Going Silver
French blending is built for women who aren’t ready to commit to anything dramatic. A colorist paints soft, low-contrast pieces close to your natural root color, so the gray coming in looks like it was always part of your color story rather than an intruder.
This technique works because it doesn’t fight your base shade. Instead of lightening broad sections, the colorist matches tones so closely that the eye can’t find a hard edge to latch onto. That’s what makes it forgiving for a first appointment.
Most stylists recommend French blending for women who are under 30% gray, since there’s enough of your original color left to anchor the technique. It also tends to require fewer touch-ups than a full highlight service, which makes it an easy entry point if you’re testing the waters.
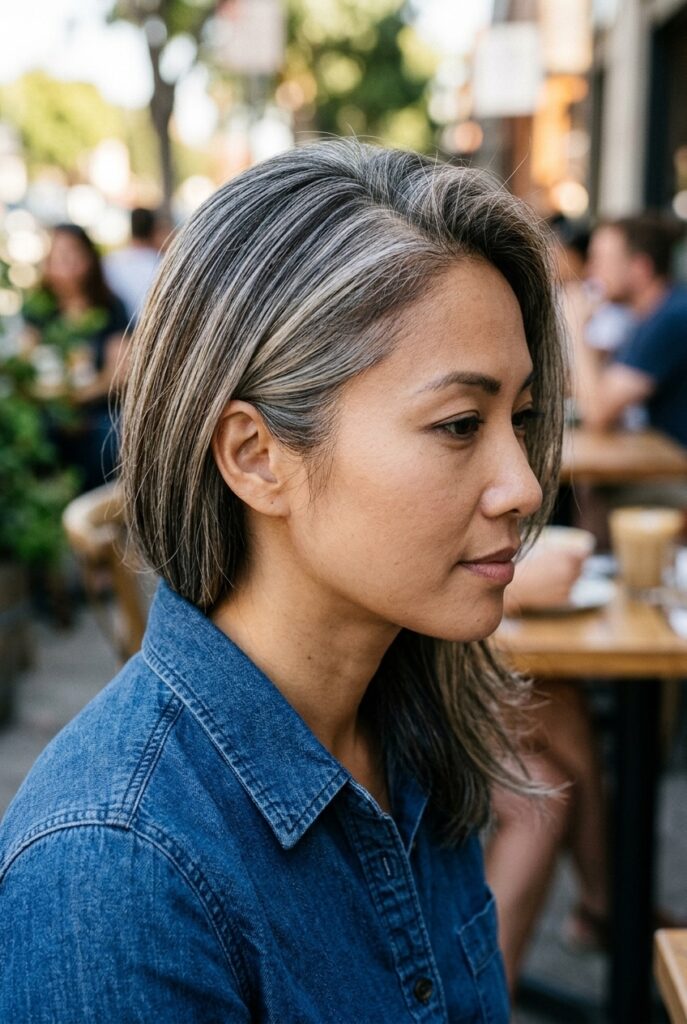
Why Balayage Might Be the Lowest-Maintenance Option You’ll Try
Balayage is hand-painted rather than foiled, which means the color is placed with a gradient instead of a hard line. For gray blending specifically, that gradient effect lets your silver grow in without ever creating an obvious regrowth stripe.
Because the lightness is concentrated more toward the mid-lengths and ends, your roots can grow out for months before anyone notices a change. This is part of why balayage has become the go-to referral for women who don’t love salon visits every six weeks.
It works on medium to long hair best, since there needs to be enough length for the gradient to read properly. On shorter cuts, the effect can look choppy rather than smooth, so ask your colorist honestly whether your length supports it before you book.
The Highlight-and-Lowlight Combo That Erases Harsh Root Lines
Pairing highlights with lowlights is one of the most common gray blending methods, and for good reason — it works from both directions at once. Highlights brighten sections to meet your gray halfway, while lowlights darken other sections so the remaining natural color doesn’t look flat next to the silver.
The result is dimension. Rather than one block of dark hair sitting next to one block of gray, you get a woven, multi-tonal effect that reads as intentional. It’s the technique most likely to be recommended if you have a mix of gray concentrated at the temples and hairline with darker hair underneath.
A few things to keep in mind before your appointment:
- Ask for cool-toned lowlights if your gray leans silver, and warmer lowlights if it leans more salt-and-pepper.
- This combo typically needs a refresh every eight to twelve weeks depending on how fast your gray comes in.
- It suits nearly every hair color, from black to medium brown, which is part of why it’s so widely used.
For women who want their gray to look like a deliberate color choice rather than a stage they’re passing through, this remains one of the most reliable options a colorist can offer.
Babylights Give Fine or Thinning Hair a Softer Silver Transition
Babylights are essentially highlights done in miniature — finer sections, placed closer together, for a much subtler effect than traditional foils. For gray blending, this matters because thick chunks of highlight can look heavy or artificial on finer hair textures.
If your hair has thinned with age, which is common alongside graying, babylights avoid the “stripey” look that bigger sections sometimes create. The tiny pieces mimic how gray actually grows in naturally, scattered rather than clumped.
This technique takes longer in the chair since there are simply more sections to place, so budget extra time for your first appointment. Many colorists also charge a bit more for babylights than standard highlights because of the added labor involved.
Money Piece Blending Focuses Your Gray Where It Shows Most
The “money piece” refers to the two face-framing sections right at your hairline, and this is often where gray shows up first and most visibly. Rather than blending your whole head, this technique concentrates lighter, gray-matching pieces exactly there.
It’s a smart option if your gray is still patchy or concentrated near your part and temples while the rest of your hair holds onto its original color. You get the visual softening exactly where you need it without committing to a full-head service or its price tag.
Because it only touches a small section, money piece blending is also one of the faster and more affordable ways to start. Many women use it as a stepping stone before deciding whether to expand the blend across their whole head later.
What to Ask Your Colorist So You Actually Get the Look You Want
Walking into a consultation without the right language can lead to a result you didn’t picture. Colorists hear “just blend my gray” constantly, and it means something different to every client, so being specific matters more than most beginners expect.
Bring reference photos, but also be ready to describe your maintenance tolerance honestly. Telling your colorist you can realistically make it in every twelve weeks, not every six, changes which technique they’ll suggest.
It also helps to mention your gray pattern specifically — whether it’s concentrated at the temples, scattered evenly, or coming in as one solid streak. Say whether you want to look less gray overall or simply softer around the edges, since those are two very different goals that call for different placement.
Silver Toning Keeps Your Blend From Turning Brassy or Yellow
Toner doesn’t create your blend, but it’s often what makes or breaks how it looks a few weeks later. Gray hair is more porous than pigmented hair, which means it grabs and holds unwanted warmth from the sun, hard water, and even certain shampoos.
A demi-permanent gloss applied after your blending service neutralizes that warmth and keeps your silver looking clean rather than dingy. Without it, even a perfectly placed blend can start reading yellow or brassy within a month.
Most colorists recommend refreshing your toner every four to six weeks, separate from your actual color appointments. At home, a purple or blue-toned shampoo used once or twice a week extends the effect between salon visits.
Root Smudging Softens Regrowth Without a Full Color Service
A root smudge is a quick technique where your colorist blurs the line between your natural root and your existing color using a soft, low-contrast shadow. For gray blending, it buys you time between bigger appointments by softening that first inch of visible regrowth.
It’s not a standalone gray blend on its own — think of it as damage control between your real blending sessions. If your calendar gets busy and you miss an appointment window, a quick root smudge can hold you over for a few extra weeks without an obvious line appearing.
This makes it a favorite add-on for women already doing balayage or highlight-based blending, since it extends the life of the original service. Ask your colorist whether they offer it as a shorter, lower-cost appointment separate from a full color visit.
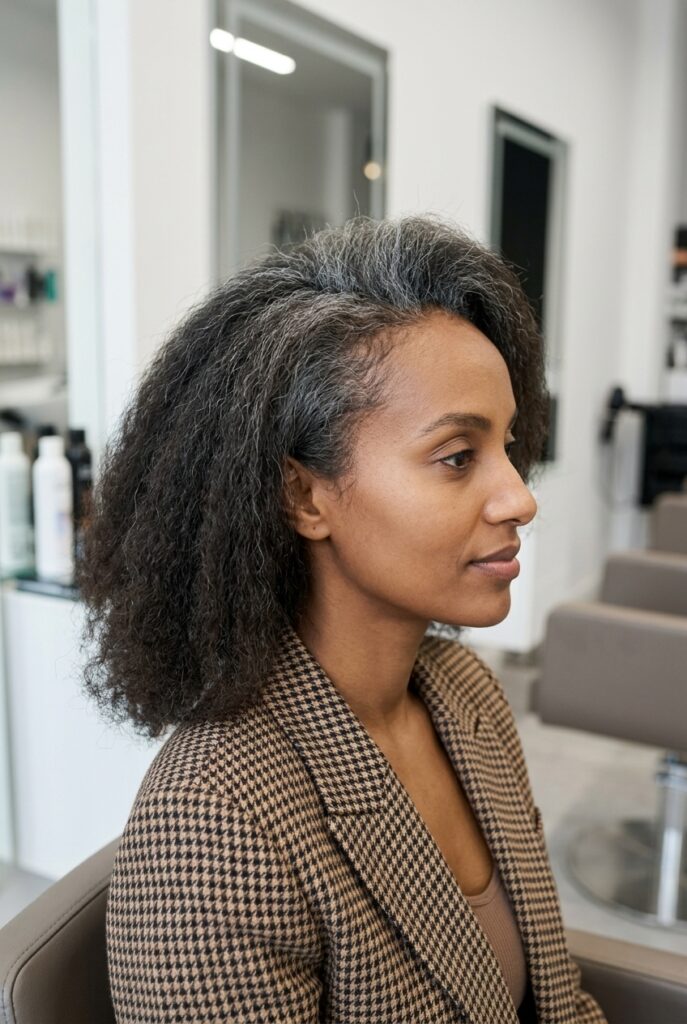
Chunky Lowlights Work Best If You Have Curly or Coily Texture
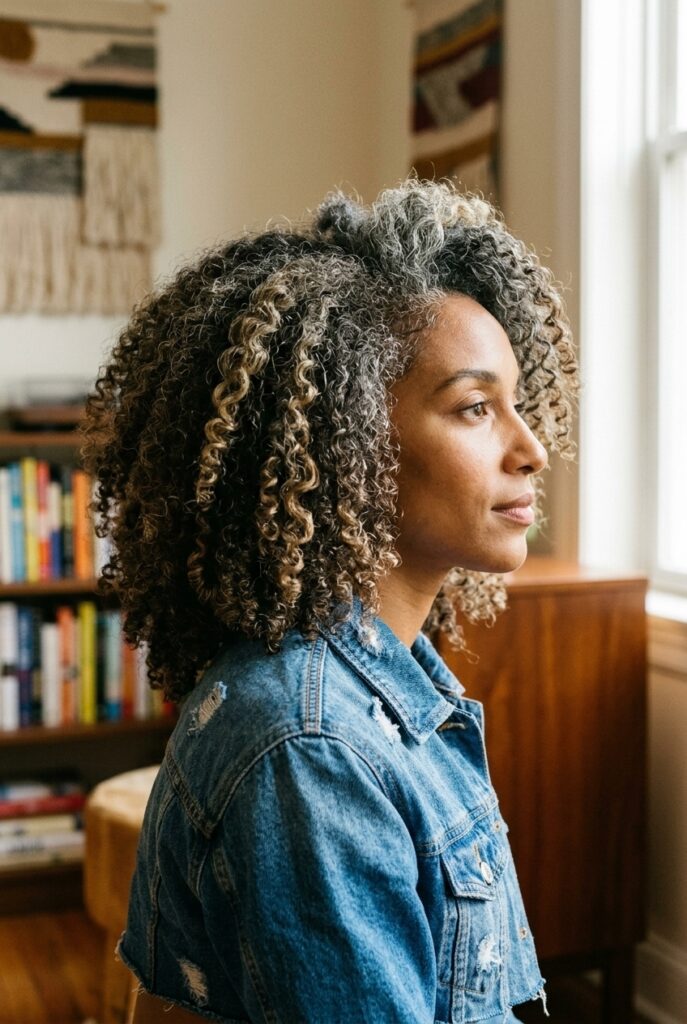
Fine, delicate highlight work can get lost in curl pattern, which is why colorists often recommend thicker, more visible lowlight sections for curly and coily hair. The added texture of a curl already breaks up light in ways that straight hair doesn’t, so subtlety tends to disappear.
Chunkier sections hold up against that texture instead of getting swallowed by it. They also do double duty by softening the line of regrowth, since curls naturally camouflage roots better than pin-straight strands do anyway.
If you’ve tried a fine, subtle blend before and felt like it “didn’t show up” on your curls, this is likely why. Bringing this technique up by name at your next appointment can save you a service that won’t read the way you’re hoping.
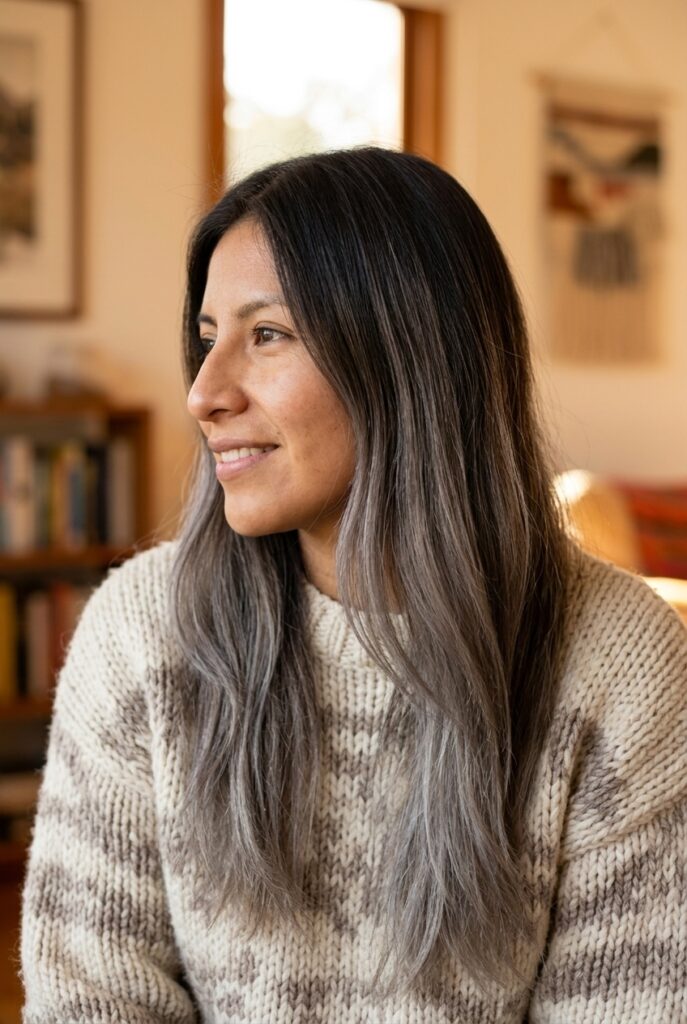
The Color Melt Technique Blends Multiple Tones Into One Gradient
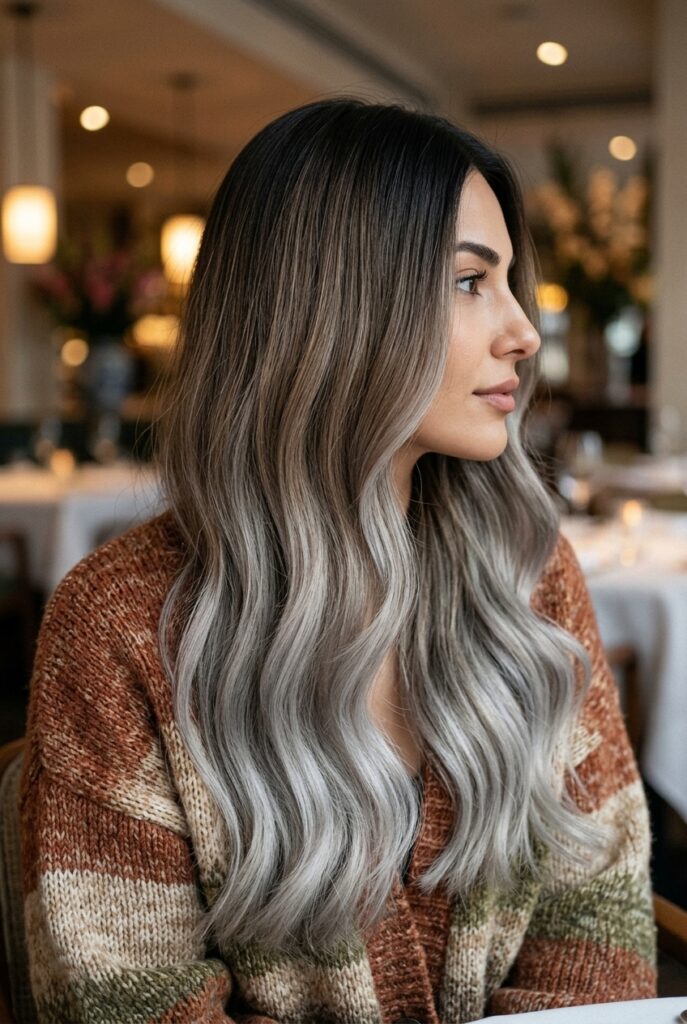
A color melt uses several shades applied and blended together so they transition smoothly from dark to light with no visible break between them. For gray blending, this means your natural color, a transitional tone, and your gray can all exist in one continuous gradient rather than separate sections.
It’s a more advanced, time-intensive technique, and not every salon offers it, so it’s worth asking specifically rather than assuming it’s included in a standard blending service. The payoff is a genuinely seamless look, especially for women with longer hair where a gradual transition has room to unfold.
Because of the extra blending work involved, expect a longer appointment and a higher price point than basic highlights. Many women reserve this one for a special first “reveal” appointment before switching to simpler maintenance techniques afterward.
Reverse Balayage Adds Dark Pieces Back Into Hair That’s Gone Very Gray
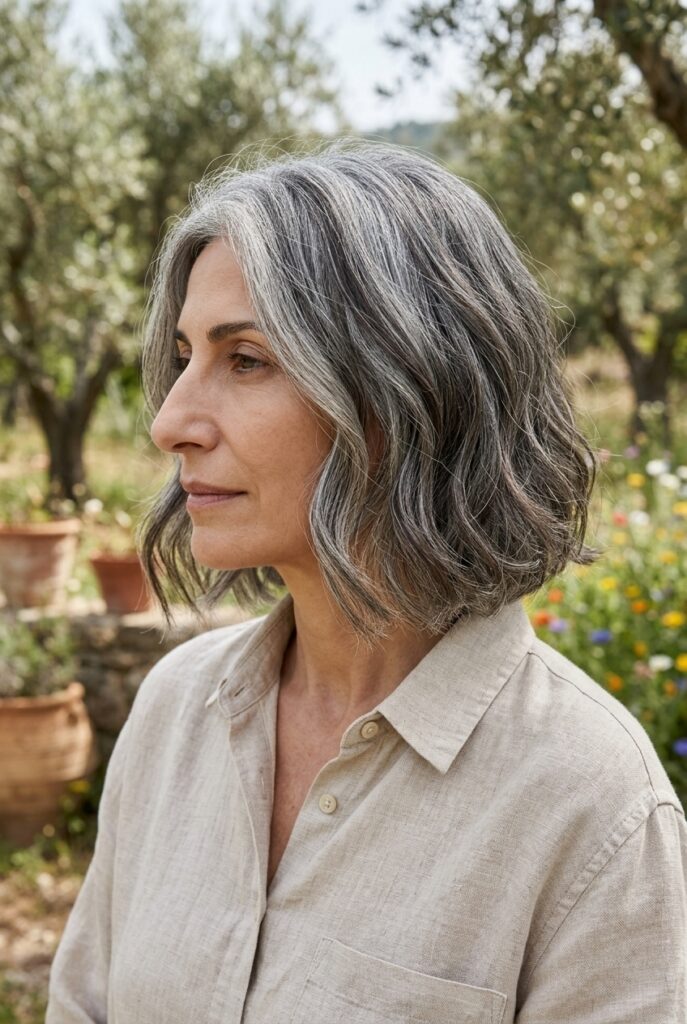
Once you’re more than 50% gray, the challenge flips. Instead of trying to hide dark hair under lightness, you may need dark lowlights woven back in to keep an all-silver head from looking flat or one-dimensional.
Reverse balayage hand-paints darker tones into predominantly gray hair, creating the same kind of multi-tonal depth that highlights give darker hair. It’s a technique many women don’t know exists, since most gray blending content assumes you’re starting from dark hair rather than ending near-fully silver.
This approach works particularly well if your gray has come in with warm, yellow-ish undertones you want to counteract, since the darker pieces can be chosen to add cool contrast. It’s worth a specific conversation with your colorist if your hair has crossed that halfway mark and started to feel monotone.
Finding Your Own Silver Without Rushing the Process
Going gray isn’t a single decision made once at the salon — it’s a series of smaller choices about pace, technique, and how much upkeep fits your actual life. The technique that flatters your best friend’s hair might not suit your texture, your gray pattern, or your patience for appointments, and that’s completely fine.
Start with a conversation, not a commitment. Bring this list to your next consultation, ask which two or three techniques your colorist thinks fit your hair specifically, and let the transition unfold at whatever pace feels right to you.
Frequently Asked Questions
Q: What’s the difference between gray blending and gray coverage? A: Gray blending integrates your natural gray into your existing color using highlights, lowlights, or balayage, while gray coverage fully conceals your gray by dyeing it to match your original shade.
Q: How much gray do I need before I can start blending? A: There’s no minimum. Some women start blending with just a few visible grays at the temples, while others wait until they have more noticeable coverage before booking their first appointment.
Q: How often will I need touch-ups once I start blending? A: It depends on the technique. Balayage and color melts can go ten to sixteen weeks between visits, while highlight-and-lowlight combos usually need a refresh every eight to twelve weeks.
Q: Can I blend gray hair at home instead of going to a salon? A: Toning products and root touch-up sprays can help maintain a blend between appointments, but the actual blending techniques require a colorist’s hand to place color correctly and avoid an uneven result.
Q: Will gray blending work on curly or coily hair? A: Yes, though chunkier lowlight sections tend to show up better against curl pattern than very fine, subtle highlights, which can get lost in the texture.
Q: What if my gray comes in with yellow or brassy undertones? A: A demi-permanent silver toner applied after your blending service neutralizes warmth, and a purple or blue shampoo used weekly at home helps maintain that cool tone between visits.
Q: Is there a technique for hair that’s already more than half gray? A: Reverse balayage, which weaves darker pieces back into predominantly gray hair, adds dimension once you’ve passed the halfway point and your hair starts to look flat or monotone.
Q: How do I explain what I want to my colorist if I’m not sure of the terminology? A: Bring reference photos, describe your gray pattern honestly, and be clear about how often you’re realistically willing to book appointments, since that affects which technique they’ll suggest.
Q: Does gray blending cost more than regular highlights? A: It depends on the technique. Finer methods like babylights or a full color melt take more chair time and typically cost more, while a money piece service touches less hair and tends to be more affordable.
Q: Can I switch techniques later if my first blend doesn’t work for me? A: Yes. Many women start with a smaller technique like a money piece or root smudge, then move to a more involved method like balayage or a color melt once they know how much gray they want visible.