Finding flattering hairstyles can feel challenging for women with round faces. The soft curves and equal proportions need specific cuts that add length and definition. Shag haircuts offer the perfect solution with their textured layers and face-framing pieces that work beautifully to create balance.
This heavily layered style has returned with modern updates that make it more versatile than ever. The choppy cuts and textured ends add movement while creating angles that complement fuller cheeks. Face-framing layers draw attention to your best features and help elongate your face shape naturally.
Below you’ll find five stunning variations of this cut that work specifically well for your face shape. Each style offers different benefits and styling options to match your personal preferences and lifestyle needs.
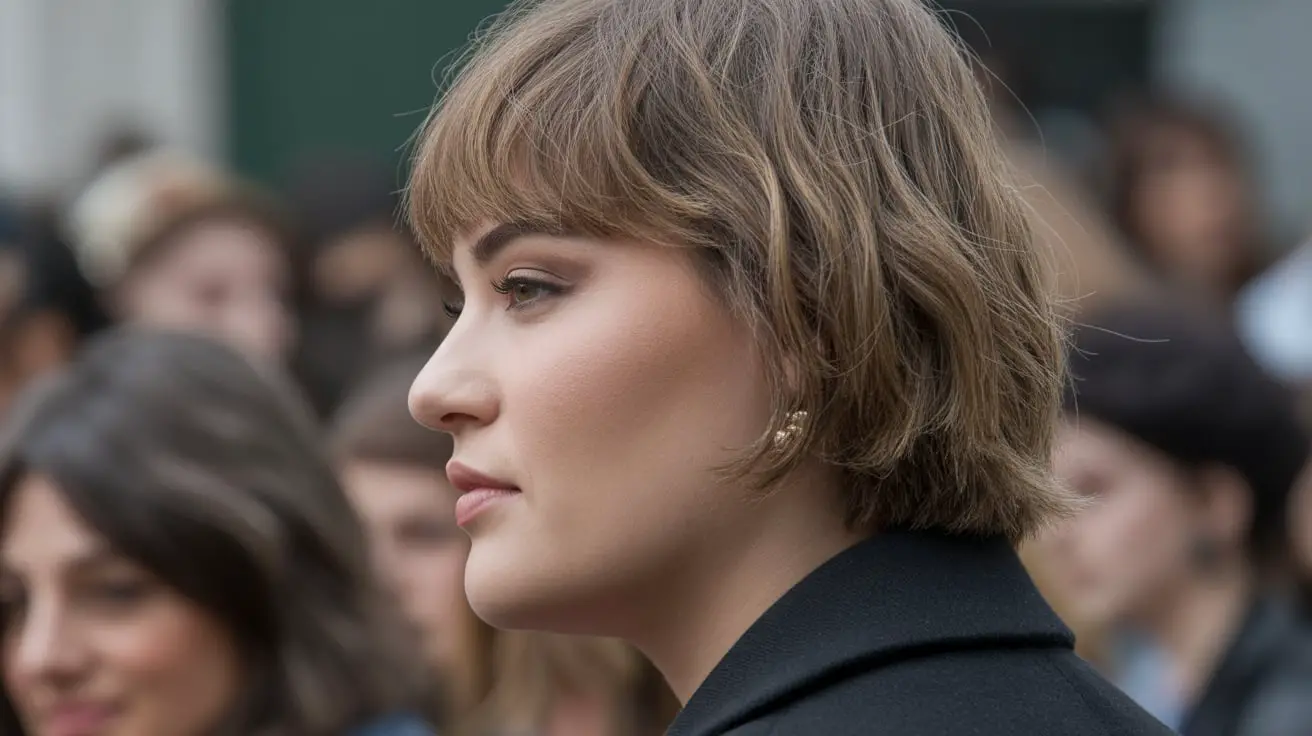
Curtain Bangs Shag
The combination of a textured cut with parted fringe creates one of the most flattering styles for fuller faces. Your bangs split down the middle and sweep to each side, framing your features while opening up your forehead. This creates vertical lines that make your face appear longer and slimmer.
Why This Cut Works
The center part draws the eye vertically rather than horizontally across your face. This optical trick helps balance the width of your cheeks and creates better proportions. The layers start just below your chin and cascade down, keeping volume away from the widest part of your face.
Styling Options
You can air-dry this cut for a natural, relaxed look or use a round brush while blow-drying to add extra volume at the roots. A texturizing spray enhances the choppy layers without making your hair feel stiff or heavy. For special occasions, loosely curl sections away from your face to emphasize the lengthening effect.
What about maintenance? This style needs trims every 6-8 weeks to keep the layers fresh and the bangs at the right length. Between salon visits, you can easily touch up your fringe at home with small scissors if needed.
Best Features
Here are the key benefits of this particular style:
Versatile Length: Works well at shoulder length or slightly longer, giving you options for updos when needed.
Low Daily Effort: The natural texture means you can skip heat styling on most days and still look polished.
Flattering Frame: The bangs highlight your eyes and cheekbones while minimizing the appearance of a wider forehead.
Texture Boost: Fine hair gains body and movement from the layers, while thick hair loses heaviness without sacrificing fullness.
Women with straight to wavy hair find this cut easiest to manage. Curly-haired women can also rock this look but may need a curl cream to define the layers and control frizz.
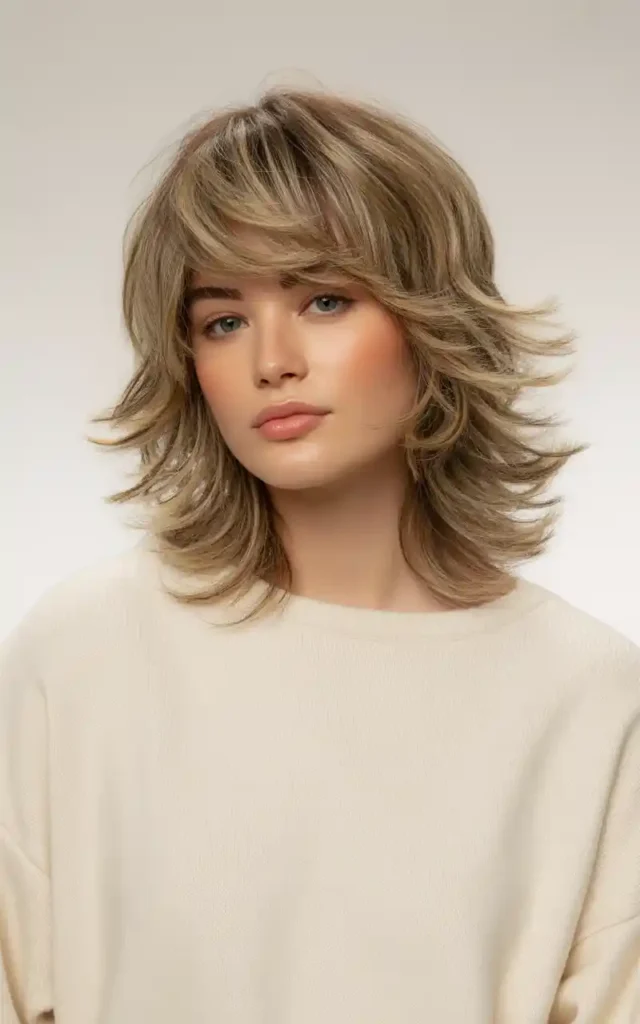
Layered Lob Shag
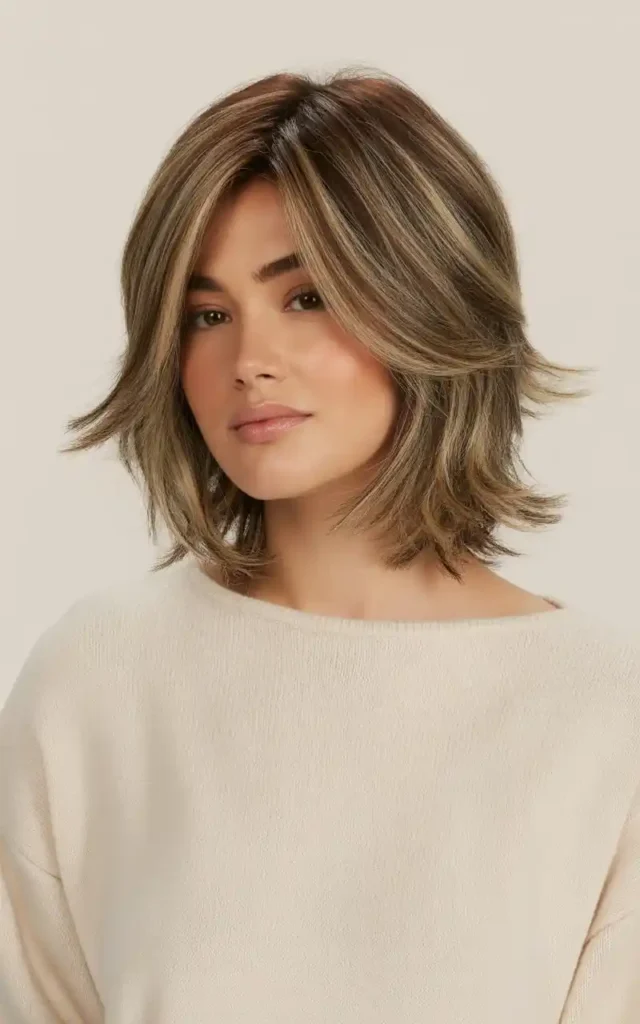
A longer bob that sits between your chin and shoulders provides the perfect canvas for shaggy layers. This length visually elongates your neck and face while the layers prevent the blunt weight that can emphasize roundness. The cut sits in that sweet spot where it’s professional enough for work yet casual enough for weekends.
The front pieces stay longer than the back, creating an A-line shape that guides the eye downward. This forward angle helps slim your face shape naturally. Multiple layers throughout add dimension and prevent the flat, heavy look that can make round faces appear wider.
Creating Movement
The key to this style lies in the layering technique. Your stylist uses point cutting or razoring to create soft, feathered ends rather than blunt lines. These textured ends move beautifully with minimal effort and catch the light to add depth.
How do you style it daily? Start with damp hair and apply a volumizing mousse from roots to mid-lengths. Blow-dry with your head flipped upside down for the first few minutes to build volume at the crown. Finish by directing the airflow down and forward around your face.
Color Enhancements
This cut works beautifully with various color techniques. Balayage highlights around your face brighten your complexion and add dimension to the layers. Darker roots with lighter ends create vertical interest that further lengthens your face shape.
Can you wear it curly? Absolutely. Natural waves or loose curls emphasize the shaggy texture and add a romantic, effortless vibe. Use a diffuser attachment on your dryer to enhance your natural curl pattern without creating frizz.
The layered lob shag suits women who want length without the commitment of truly long hair. It’s also perfect if you’re growing out a shorter cut and need shape during the awkward in-between phase. Thick hair benefits most from this style since the layers remove bulk while maintaining fullness.
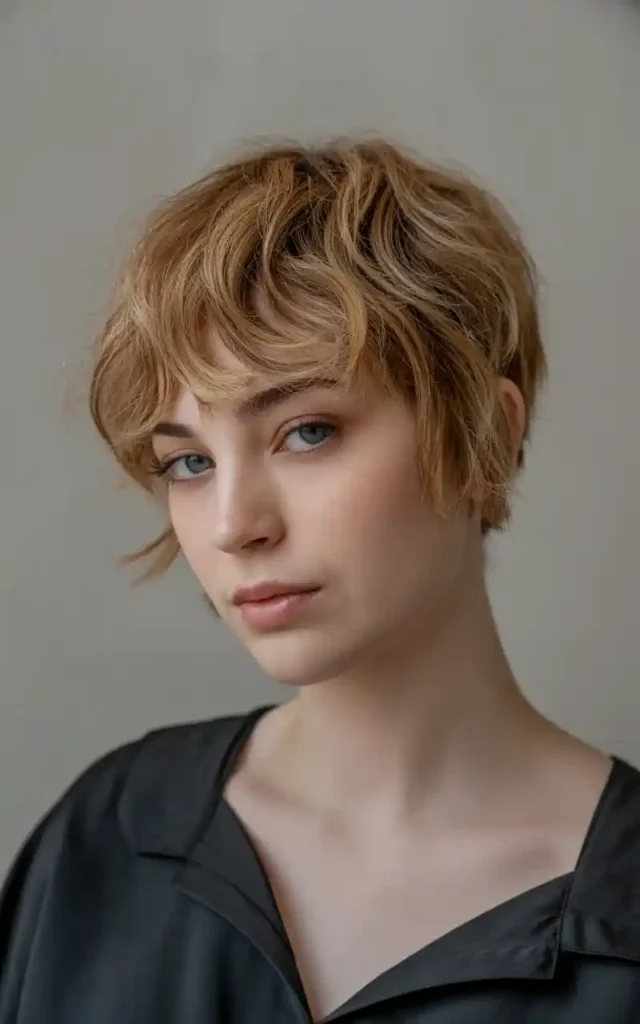
Short Choppy Shag
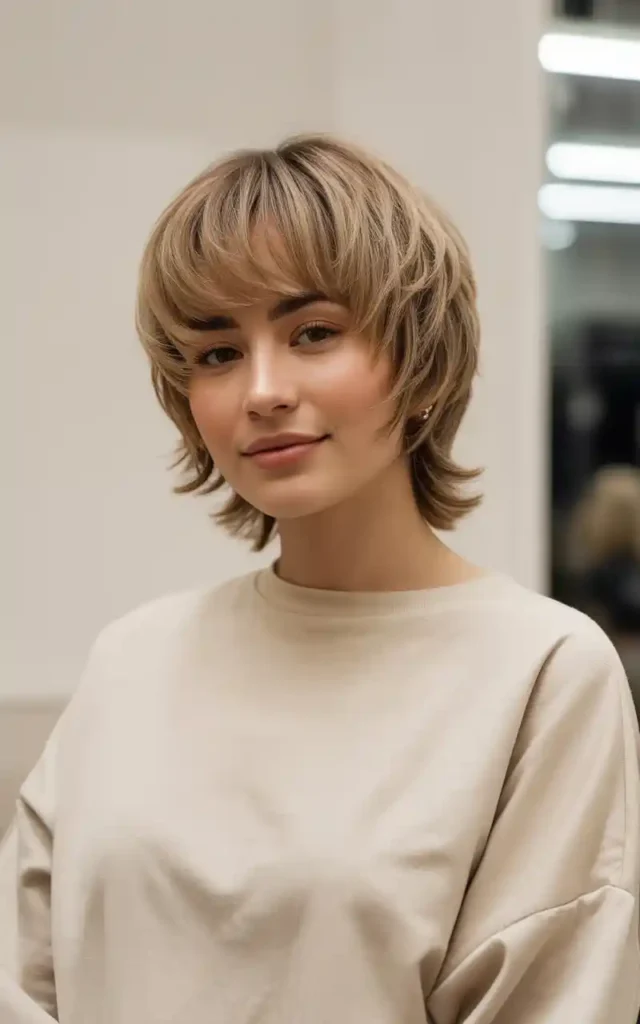
Going shorter with your shaggy cut creates an edgy, modern look that draws attention to your facial features. The length typically falls just above or at ear level, with heavily textured layers throughout. This style makes a bold statement while still being practical for busy lifestyles.
The Shape
Short shags rely on strategic layering to create their signature messy, lived-in appearance. The crown area has shorter pieces that create height and volume, which visually lifts your face. Longer pieces around your ears and at the nape create movement and soften the overall shape.
Piece-y bangs or a side-swept fringe typically accompany this cut. These fringe styles break up the horizontal line across your forehead and add asymmetry that balances round faces. The bangs can be textured and choppy to match the rest of the cut or slightly softer depending on your preference.
Styling Techniques
This cut shines with minimal styling effort. After washing, apply a small amount of styling cream to damp hair and scrunch gently. Let it air-dry or use a diffuser for faster results. The natural texture and layers create volume without requiring precise blow-drying techniques.
For added definition, wrap random sections around a small curling iron once your hair is completely dry. Don’t curl every piece or create uniform curls. The goal is messy, textured waves that enhance the choppy layers. Finish with a light-hold texturizing spray.
Women with naturally straight hair can achieve a sleek version of this cut by blow-drying smooth with a paddle brush. The layers still provide movement and shape even without the textured styling. This versatility makes it suitable for different occasions and moods.
Maintenance Considerations
Short cuts require more frequent trims, typically every 4-6 weeks, to maintain their shape. The choppy texture can look scraggly rather than intentionally messy if you let it grow too long between appointments. However, the daily styling time you save often makes up for the extra salon visits.
This style works best on fine to medium hair textures. Very thick or coarse hair might become too bulky in a short shag unless your stylist uses significant thinning techniques.
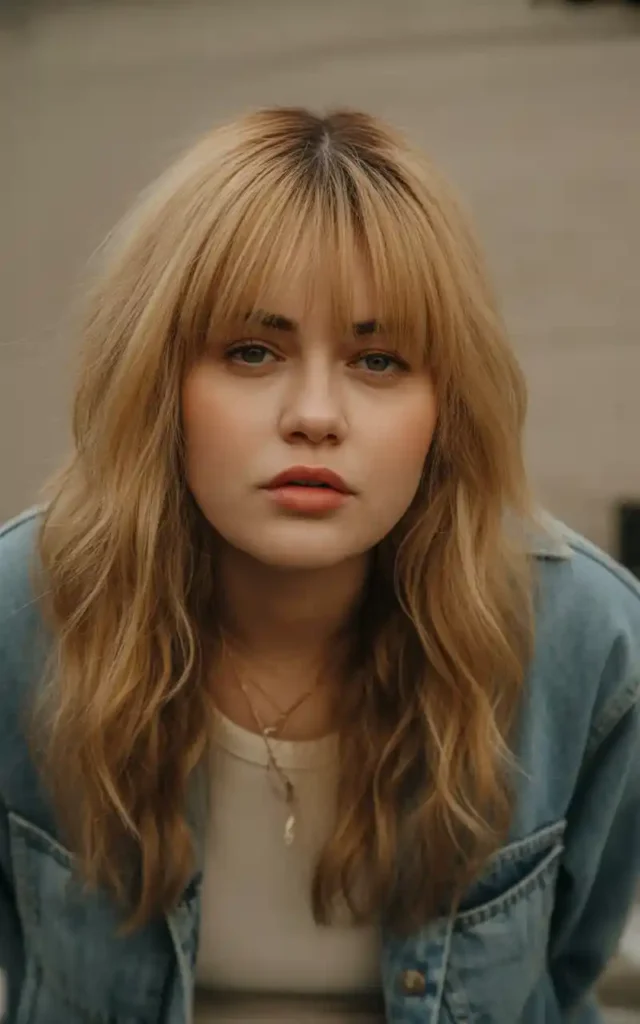
Long Layers Shag
Keeping significant length while adding shaggy layers gives you the best of both worlds. Your hair falls past your shoulders or even to your mid-back, but the layers prevent it from looking heavy or dragging down your face. This option suits women who love their long hair but need shape and movement.
The layers in this style start well past your chin, typically beginning around your collarbone. This placement keeps fullness away from your cheeks while still providing the shaggy texture throughout your length. Face-framing pieces cut shorter around your face create definition without sacrificing overall length.
Volume and Texture
Long hair can sometimes look flat and lifeless, especially if you have fine hair. The shaggy layers solve this problem by removing weight and allowing your hair to move freely. The different lengths create natural volume as shorter pieces lift longer ones.
Do you need to style it every day? Not necessarily. Many women with this cut simply let their hair air-dry with a leave-in conditioner and texturizing spray. The layers create natural movement and prevent the stringy look that can happen with one-length long hair.
Versatility Benefits
Here’s what makes this style so adaptable:
Updo Options: You have enough length for ponytails, buns, and braids, with the shorter layers creating soft, romantic pieces that frame your face.
Heat Styling Freedom: The length allows for various curl sizes and wave patterns, from beachy waves to more defined ringlets.
Color Dimension: More length means more canvas for color techniques like ombre or balayage that add visual interest.
Professional Appearance: Long, layered hair reads as polished and put-together in conservative work environments while still being stylish.
For special events, you can curl the layers to create cascading volume that looks glamorous and feminine. Daily styling can be as simple as running your fingers through damp hair and letting it dry naturally. This flexibility makes it ideal for women with varying schedules and lifestyle needs.
The long layers shag requires trims every 8-12 weeks to maintain shape and prevent split ends. Between cuts, regular deep conditioning treatments keep your hair healthy and manageable at this length.
Wolf Cut Shag
This hybrid style combines elements of the mullet with shaggy layers to create a distinctive, fashion-forward look. The top layers are significantly shorter and more voluminous, while the bottom stays longer and softer. This dramatic contrast creates a unique silhouette that’s gained popularity on social media.
Understanding the Shape
The wolf cut features heavy layers throughout with the shortest pieces concentrated at the crown and around your face. These create a voluminous, almost fluffy appearance on top. The hair then transitions to longer, thinner pieces at the bottom, creating that signature mullet-inspired shape.
The dramatic layering works well for round faces because it adds height at the crown, which elongates your face shape. The shorter layers around your face create angles and movement that slim your cheeks. The longer bottom pieces keep the style from reading as too severe or masculine.
How does it differ from other shags? Traditional shags have more evenly distributed layers, while the wolf cut features more extreme variation in length. This creates a bolder, more intentional statement that stands out in a crowd.
Styling and Care
This cut requires some styling effort to look its best. The top layers need volume to create the proper shape, which means blow-drying with a round brush or using hot rollers at the crown. The bottom can be left straighter or slightly waved depending on your preference.
Start by applying a volumizing mousse to damp hair, concentrating on the roots. Blow-dry the top sections while lifting them up and away from your head to create height. The bottom sections can be dried smooth or with loose waves. Finish with a texturizing spray to define the layers and add hold.
Can you wear it without heat styling? Yes, but the shape won’t be as pronounced. Natural texture helps, so women with wavy or slightly curly hair can achieve a decent look with air-drying and scrunching products.
This style makes a statement and suits women who aren’t afraid to stand out. It’s trendy and youthful, working particularly well for those in creative fields or anyone who enjoys expressing themselves through their appearance. The wolf cut works on various hair textures but shows best on medium to thick hair that can support the volume at the crown.
Your Perfect Shag Awaits
These five variations prove that shaggy cuts can work beautifully for round face shapes. The key lies in choosing the right layer placement and length for your specific features and lifestyle. Face-framing pieces and strategic layering create the angles and definition that complement softer facial contours.
Consider your daily routine and styling abilities when selecting your cut. Some styles require more maintenance and styling time than others. Think about your hair texture too, as certain variations work better on specific hair types. Book a consultation with a stylist experienced in layered cuts to discuss which option suits your needs best.
Frequently Asked Questions
Q: Will a shag haircut make my round face look wider?
A: No, when cut properly with layers that start below your chin and face-framing pieces, shags actually create length and angles that slim round faces. Avoid blunt, chin-length cuts that can emphasize width.
Q: How often do I need to trim a shag haircut?
A: Short shags need trims every 4-6 weeks, while medium to long versions can go 6-12 weeks between cuts. Regular trims maintain the shape and prevent the layers from looking scraggly.
Q: Can I wear a shag if I have fine, thin hair?
A: Yes, shags work well on fine hair because the layers create volume and movement. Ask your stylist to avoid excessive thinning at the ends to maintain fullness.
Q: What’s the difference between a shag and a wolf cut?
A: A wolf cut has more dramatic length variation with very short, voluminous top layers and longer bottom pieces, creating a mullet-inspired shape. Traditional shags have more evenly distributed layers throughout.
Q: Do shag haircuts work on curly hair?
A: Absolutely. Curly hair enhances the textured, messy nature of shags. The layers remove bulk while allowing your curls to spring up and create natural volume.
Q: What styling products work best for shag haircuts?
A: Texturizing sprays, volumizing mousses, and lightweight styling creams work well. Avoid heavy products that weigh down the layers and reduce movement.
Q: Can I pull a shag haircut into a ponytail?
A: Medium to long shags can be pulled back, though you’ll have shorter pieces that fall out around your face. Short shags typically don’t have enough length for ponytails.
Q: Will bangs with my shag make my face look rounder?
A: Full, blunt bangs can emphasize roundness, but curtain bangs or side-swept fringe that frames your face creates length and works well with round face shapes.