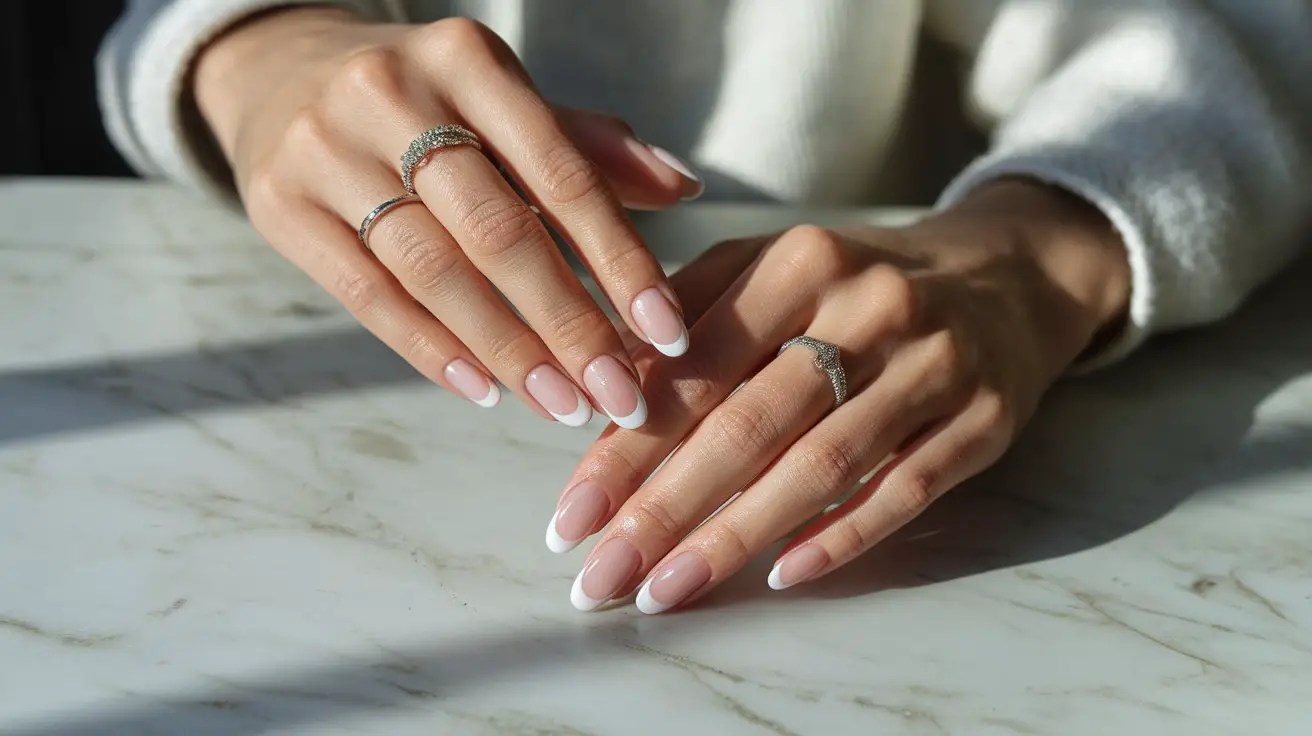
French manicures have long held their place as a classic nail design that never truly goes out of style. The crisp white tips against a natural or soft pink base create a polished look that works for everything from boardroom meetings to weekend brunches. Today’s nail art scene has transformed this traditional technique into something far more creative, introducing color transitions that add a modern twist to the timeless design.
Creating these elegant designs at home has become increasingly popular, especially as nail art tools and techniques have become more accessible. You’ll find that achieving salon-quality results in your own space not only saves money but also gives you complete control over the colors and intensity of your gradient effect. The process itself becomes a relaxing ritual, allowing you to experiment with different color combinations and techniques at your own pace.
This guide will walk you through everything you need to know about creating stunning white French manicures with color transitions. From selecting the right tools and preparing your nails properly to mastering the gradient technique and ensuring your manicure lasts, you’ll discover professional secrets that make DIY nail art both achievable and enjoyable. Let’s transform your nails into miniature works of art that reflect your personal style.
- What Makes a White French Manicure with Color Transitions Special
- Essential Tools and Products for Creating Color Transitions
- How to Prepare Your Nails for the Perfect Canvas
- Step-by-Step Technique for Smooth Color Transitions
- Professional Finishing Touches and Long-Lasting Tips
- Your Beautiful Gradient Journey Awaits
- Frequently Asked Questions
What Makes a White French Manicure with Color Transitions Special
The evolution from traditional French tips to gradient designs marks a significant shift in nail artistry. While classic French manicures rely on a stark line between the white tip and natural base, color transitions create a softer, more contemporary effect. This blending technique adds depth and dimension that catches light differently throughout the day, creating an almost ethereal quality on your fingertips.
Traditional vs Modern French Designs
Traditional French manicures follow strict guidelines – white tips with a clear demarcation line and a nude or pink base. The modern interpretation breaks these rules beautifully. Instead of harsh lines, you’ll create a gradual fade from white into your chosen colors, whether that’s soft pastels, bold jewel tones, or even metallic shades. This approach offers more flexibility in matching your nails to different outfits and occasions.
The beauty of this updated style lies in its versatility. You can adjust the intensity of the gradient, making it barely noticeable for professional settings or dramatic for special events. Some women prefer starting with pure white at the tips and fading into a soft pink or peach, while others choose bolder combinations like white transitioning into lavender or mint green.
Color Gradient Techniques
Several methods exist for achieving smooth color transitions, each offering different levels of control and finish. The sponge technique remains the most popular for at-home applications, allowing you to dab and blend colors seamlessly. Brush blending works well for those with steadier hands and creates a more painted effect. The airbrush method, though requiring special equipment, produces the smoothest gradients possible.
Understanding color theory helps tremendously when selecting transition shades. Colors next to each other on the color wheel blend most naturally – think white to pale yellow to soft orange, or white to light blue to deeper azure. Contrasting colors can work too, but they require more careful blending to avoid muddy areas where they meet.
Visual Impact and Versatility
The visual appeal of gradient French manicures extends beyond simple aesthetics. These designs create the illusion of longer, more slender fingers, especially when the gradient runs vertically along the nail. The white tips maintain that clean, polished appearance associated with French manicures, while the color transition adds personality and modern flair.
Different gradient styles suit various nail shapes and lengths. Short nails benefit from subtle transitions that don’t overwhelm the nail bed, while longer nails can handle more dramatic color changes. Square and squoval shapes showcase horizontal gradients beautifully, while almond and oval shapes complement diagonal or curved transition patterns.
Professional vs DIY Results
Many assume professional results require salon visits, but home applications can achieve equally stunning effects with practice and the right techniques. The key differences often come down to product quality and application patience rather than skill level. Salons may use professional-grade polishes with better pigmentation, but consumer brands have significantly improved their formulas in recent years.
The main advantage of DIY application is the ability to perfect your technique through repetition without the pressure of time constraints or cost concerns. You can take breaks between hands, redo sections that aren’t quite right, and experiment with different color combinations until you find your signature look.
Nail Health Considerations
Gradient techniques can actually be gentler on nails than traditional French manicures when done correctly. The blending process typically uses thinner polish layers, reducing the weight and stress on your natural nails. This lighter application also means easier removal, minimizing the damage often associated with thick polish layers.
Proper preparation and aftercare become even more important with gradient designs. The multiple polish layers required for smooth transitions can dry out nail beds if protective base coats aren’t used. Regular moisturizing between manicures helps maintain nail flexibility and prevents brittleness that might lead to breaks or splits.
Essential Tools and Products for Creating Color Transitions
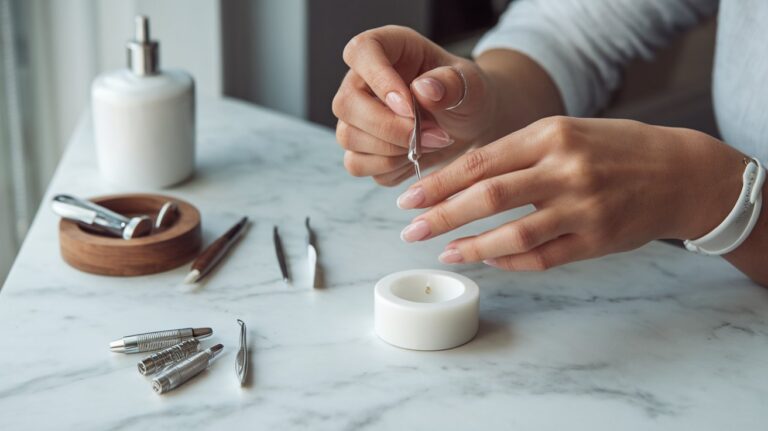
Success with gradient French manicures starts long before the first stroke of polish. Having the right tools and understanding their purposes transforms a potentially frustrating experience into an enjoyable creative process. Quality doesn’t always mean expensive – many affordable options perform just as well as high-end alternatives when you know what to look for.
Base and Top Coat Selection
Your base coat serves as the foundation for everything that follows, making its selection crucial for long-lasting results. Look for formulas that specifically mention adhesion properties and nail protection. Ridge-filling base coats work particularly well for gradient designs, creating a smooth canvas that helps colors blend more evenly.
Some base coats contain strengthening ingredients like calcium or keratin, which benefit weak or damaged nails. Others focus on preventing staining, particularly important when working with highly pigmented colors. For this technique, a slightly tacky base coat that doesn’t dry completely smooth can actually help the gradient adhere better.
Top coats for gradient designs need different qualities than standard manicures require. Self-leveling formulas work best, as they smooth out any texture created during the sponging process. Quick-dry versions might seem appealing, but slower-drying options often provide better durability and shine. Gel-effect top coats without UV lamps offer an excellent middle ground, providing high shine and extended wear.
White Polish Qualities
Not all white polishes perform equally in gradient applications. The ideal formula strikes a balance between opacity and blendability. Pure white works best for dramatic contrasts, while slightly tinted whites (with hints of pink or blue) create softer transitions. Cream finishes blend more smoothly than pearl or shimmer formulas, though metallic whites can add interesting dimension to your gradient.
Consistency matters significantly here. Thick, gloopy whites create uneven gradients and take forever to dry. Thin, watery formulas require too many coats and may streak during blending. The perfect white polish should apply smoothly in two coats and maintain its opacity even when sponged.
Testing your white polish before starting the full manicure saves time and frustration. Apply it to one nail and try your blending technique – if it streaks excessively or loses opacity, consider using a different brand or adding a white base layer before creating the gradient.
Color Selection for Transitions
Choosing colors for your gradient involves both aesthetic preferences and practical considerations. Polishes with similar consistencies blend more easily than mixing thick and thin formulas. Sheer or jelly polishes create subtle, buildable gradients perfect for beginners, while opaque colors produce bold, defined transitions.
Here’s what to consider when selecting transition colors:
Undertones Matter: Warm whites blend best with warm colors (peaches, corals, warm pinks), while cool whites suit cool tones (blues, purples, cool pinks).
Finish Compatibility: Mixing cream and shimmer finishes adds dimension, but too many different finishes can look chaotic rather than cohesive.
Opacity Levels: Semi-sheer colors create smoother gradients than highly opaque shades, which may require more blending work.
Drying Times: Colors that dry at similar rates prevent smudging and allow for better blending control.
Blending Tools and Sponges
The humble makeup sponge revolutionized at-home gradient manicures, but not all sponges work equally well. Dense, fine-pored sponges create the smoothest gradients, while coarse sponges leave obvious texture. Cutting sponges into small triangles gives you better control and wastes less polish.
Latex-free makeup wedges work wonderfully and cost less than specialized nail art sponges. Kitchen sponges can work in a pinch if cut into small pieces, though they tend to absorb more polish. Some nail artists prefer stippling brushes or silicone tools for certain gradient effects, particularly when working with gel polishes.
Beyond sponges, you’ll need tweezers for holding sponge pieces, a palette or piece of foil for mixing colors, and possibly a small fan brush for very subtle blending. Having multiple sponge pieces ready prevents having to clean between color changes, speeding up the process considerably.
Clean-up Essentials
Gradient techniques inevitably get polish on the skin surrounding your nails, making cleanup tools essential rather than optional. Liquid latex or peel-off base coat applied around nails before starting creates a barrier that peels away easily, taking excess polish with it. This method works particularly well for beginners still perfecting their technique.
Small, flat brushes dipped in acetone or polish remover allow precise cleanup without disturbing the gradient itself. Angled eyeliner brushes work perfectly for this purpose and cost far less than specialized nail art brushes. Cotton swabs tend to be too large and imprecise, often removing more polish than intended.
Cuticle oil plays a dual role in gradient manicures – it helps prevent polish from adhering to skin during application and nourishes nails after acetone exposure during cleanup. Apply it sparingly before starting and generously after finishing for best results.
How to Prepare Your Nails for the Perfect Canvas
The difference between a gradient manicure that lasts two weeks and one that chips within days often comes down to preparation. Your natural nails need proper conditioning to hold onto multiple polish layers while maintaining flexibility. This preparation phase might seem tedious, but it directly impacts both the application process and the final result’s longevity.
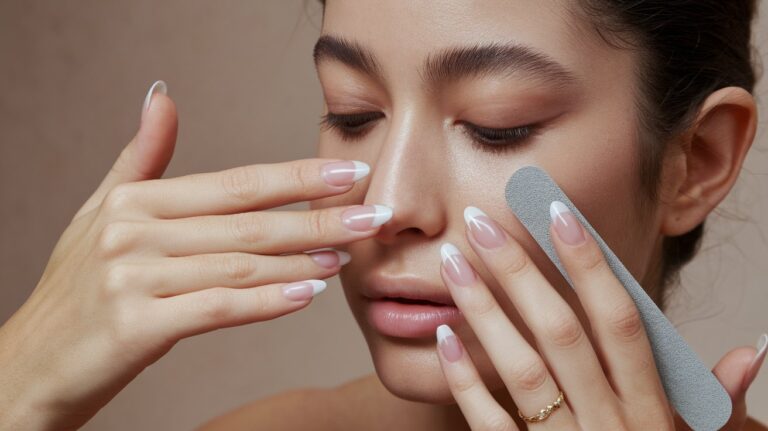
Nail Shaping Techniques
Creating uniform nail shapes across all ten fingers provides the ideal foundation for gradient designs. File in one direction rather than sawing back and forth, which can cause splitting and peeling. Glass or crystal files work best for natural nails, sealing the edge as they shape rather than leaving it rough like traditional emery boards.
For gradient French manicures, slightly rounded shapes like oval or squoval complement the soft color transitions beautifully. Square shapes can work too, but the harsh corners might compete visually with the gentle gradient effect. Consider your lifestyle when choosing shapes – rounded edges survive daily activities better than sharp corners.
Length consistency matters more than achieving extreme length. Even short nails look polished and elegant with well-executed gradients. If one nail breaks, consider filing all nails to match rather than having one obviously different length that disrupts the overall aesthetic.
The free edge (the white part extending past your fingertip) should be smooth and even. Any roughness here will cause the white polish to apply unevenly, creating a jagged appearance in your gradient starting point. Spend extra time perfecting these edges, as they’re most visible in the final design.
Cuticle Care Methods
Healthy cuticles frame your gradient design, while ragged ones detract from even the most perfectly executed color transition. Start by softening cuticles with warm water or cuticle remover, then gently push them back with an orange stick or rubber-tipped pusher. Never cut living tissue – only remove actual hangnails or clearly dead skin.
Cuticle oil isn’t just for after your manicure. Applying it during prep and allowing it to absorb for several minutes creates a barrier that makes cleanup easier later. Jojoba oil closely mimics natural nail oils, while vitamin E oil provides extra nourishment for dry, damaged cuticles.
Some women find that applying cuticle oil the night before their manicure yields better results than same-day application. This timing allows deep absorption without leaving residual oil that might prevent polish adhesion. If you do this, still push back cuticles on manicure day for the neatest appearance.
Surface Preparation Steps
Even naturally smooth nails benefit from light buffing before polish application. This process removes shine and creates mild texture that helps base coat adhere. Buff gently in X-shaped motions across the nail plate, avoiding aggressive buffing that thins nails and causes sensitivity.
Ridges and imperfections become more noticeable under multiple polish layers, especially with gradient techniques that draw the eye along the nail. If you have pronounced ridges, consider using a ridge-filling base coat or doing an extra buffing session focusing on problem areas. Just remember that over-buffing weakens nails, so find the balance between smoothness and nail integrity.
Dehydration plays a crucial role that many overlook. Nails naturally contain moisture and oils that can prevent polish adhesion. Rubbing alcohol or nail dehydrator removes these temporarily, creating an ideal surface for base coat application. Apply it just before base coat for maximum effectiveness, but avoid overuse as it can dry out nail beds with repeated application.
Base Coat Application
The base coat application technique affects how well your gradient adheres and how long it lasts. Apply thin, even coats rather than one thick layer. Wrap the tip by running the brush along the free edge – this prevents chipping and provides extra adhesion for the white tips that receive the most wear.
Allow base coat to dry until tacky but not completely dry. This slight stickiness helps the first polish layer bond better. If base coat dries completely, the polish sits on top rather than bonding with it, leading to premature peeling. Most base coats reach this ideal tackiness after 60-90 seconds.
Quality base coats might cost more initially but save money long-term by extending manicure life. Look for formulas mentioning “adhesion technology” or “bonding ingredients.” Some base coats also contain strengtheners or treatments, providing nail care benefits alongside improved polish wear.
Moisture Balance
Nails that are too dry crack and peel, while overly moist nails cause polish to bubble or not adhere properly. Finding the right moisture balance takes observation and adjustment based on your individual nail chemistry. Most women benefit from moisturizing regularly between manicures but avoiding heavy creams immediately before polish application.
Environmental factors affect nail moisture significantly. Heating and air conditioning dry out nails, while humid weather can cause excess moisture. Adjust your preparation routine accordingly – use more cuticle oil in winter, less in summer. Some women find that washing dishes without gloves the day before a manicure helps remove excess oils naturally.
The type of soap used during preparation matters too. Moisturizing soaps leave residue that prevents proper polish adhesion, while harsh soaps over-dry nails. A gentle, residue-free cleanser followed by thorough drying provides the ideal starting point for your gradient masterpiece.
Step-by-Step Technique for Smooth Color Transitions
Creating seamless color transitions requires patience, the right technique, and understanding of how polishes interact during blending. Each step builds upon the previous one, so taking time to perfect each phase results in a more professional-looking gradient. The process might seem complex initially, but muscle memory develops quickly with practice.
White Tip Application
Starting with perfect white tips sets the foundation for your entire gradient. Apply white polish to the tips using steady, confident strokes rather than tentative dabbing. The white should extend about one-third down the nail for long nails, or one-quarter for shorter lengths. This proportion creates visual balance without overwhelming the nail bed.
The first white coat often appears streaky or uneven – this is completely normal. Resist the urge to overwork it or apply thick coats to achieve opacity immediately. Let this first layer dry completely (about 3-5 minutes) before adding the second coat. The second application usually provides full opacity and smooths out any streaking from the first coat.
French tip guides or tape can help achieve crisp lines if you prefer defined tips before blending. However, freehand application works fine for gradients since you’ll be blending the harsh line anyway. If using guides, remove them while polish is still slightly wet to prevent pulling and chipping.
Some nail artists recommend applying white to a sponge first, then dabbing onto tips. This method creates a softer edge from the start, making blending easier. Experiment with both direct application and sponging to discover which technique gives you better control and results.
Color Gradient Creation
The gradient effect happens through strategic layering and blending of colors. Paint stripes of white and your chosen color(s) side by side on a makeup sponge, slightly overlapping where they meet. The overlap zone becomes your blend area, so adjust its width based on how gradual you want the transition.
Dabbing motion, not dragging, creates the smoothest gradients. Press the sponge gently onto the nail and lift straight up. Repeat this dabbing motion, slightly rolling the sponge each time to prevent obvious texture patterns. Work quickly but deliberately – the polish on the sponge dries fast, especially in warm or dry conditions.
Build the gradient gradually through multiple thin layers rather than trying to achieve full opacity immediately. Each layer should dry for about a minute before adding the next. This might seem time-consuming, but thin layers dry faster and blend more smoothly than thick applications. Usually, 3-4 sponging sessions create a beautiful, opaque gradient.
The angle at which you hold the sponge affects the gradient’s appearance. Perpendicular placement creates horizontal transitions, while angled placement produces diagonal gradients. Experiment with different angles to find what looks best on your nail shape and length.
Blending Methods
Several techniques exist for achieving smooth color transitions, each producing slightly different effects. The most common involves overlapping colors on the sponge, but you can also apply colors directly to the nail and blend them while wet. This direct method requires speed and confidence but can produce stunning results.
Here are proven blending approaches for different effects:
Classic Sponge Blend: Apply colors to sponge with slight overlap, dab onto nail repeatedly until desired opacity achieved.
Wet-on-Wet Technique: Apply colors directly to nail while previous layer is still wet, use clean brush to gently blend where they meet.
Gradient Layering: Start with the lightest color as base, add progressively darker shades toward tip using decreasing coverage area.
Stippling Method: Use nearly dry brush or sponge to create textured gradient through stippling motion.
Rolling the sponge slightly between dabs prevents harsh lines from forming. Some artists prefer twisting motions, while others use gentle rocking movements. The key is maintaining consistent pressure and avoiding dragging, which smears rather than blends.
Temperature affects blending success significantly. Polish blends best at room temperature – too cold and it becomes thick and unworkable, too warm and it dries before proper blending occurs. If your room is particularly warm, consider using polish thinner or slow-dry drops to extend working time.
Common Mistakes to Avoid
The most frequent error involves impatience – rushing through steps or applying thick coats to speed up the process. Thick layers take forever to dry, increase the risk of smudging, and often create uneven gradients. Remember that several thin layers always look better and last longer than fewer thick ones.
Over-sponging creates muddy colors where transitions meet. Once you achieve the desired blend, stop. Additional sponging when polish has begun drying disturbs the gradient rather than improving it. If you’re not satisfied with the blend, let it dry completely and add another thin layer rather than overworking the current one.
Neglecting cleanup between color changes leads to contaminated gradients. Wipe excess polish from skin immediately using a small brush dipped in remover. Allowing polish to dry on skin makes removal harder and risks damaging the gradient during cleanup. Change sponge sections or use fresh pieces when switching between contrasting colors.
Using incompatible polish formulas causes various problems. Mixing regular and gel polishes without proper curing, combining quick-dry and regular formulas, or layering water-based over solvent-based polishes all lead to peeling, bubbling, or poor adhesion. Stick to similar formulas within the same manicure for best results.
Finishing Touches
The final steps transform a good gradient into a great one. After the last gradient layer dries completely (wait at least 5 minutes), assess whether any areas need touching up. Small imperfections can be corrected with a detail brush barely loaded with polish.
Clean up any polish on surrounding skin before applying top coat. Even tiny specks of polish on skin will be sealed in by top coat, making removal nearly impossible without damaging the manicure. Use acetone or polish remover on a small brush, working carefully around the gradient edges.
Apply top coat generously but carefully, using as few strokes as possible to prevent dragging the still-soft gradient colors. Start with a bead of top coat at the base and push it toward the tip in one smooth motion. Cap the free edge by running the brush along the nail tip to seal everything.
Consider applying a second top coat layer after 24 hours for extended wear. This refresh layer restores shine and adds protection right when the manicure becomes fully cured and most vulnerable to chipping. Some women apply fresh top coat every 2-3 days, significantly extending their gradient manicure’s life.
Professional Finishing Touches and Long-Lasting Tips
The difference between a gradient manicure that maintains its beauty for two weeks versus one that chips within days lies in the finishing techniques and maintenance routine. Professional nail technicians rely on specific methods to ensure longevity, and these same techniques work perfectly for at-home applications when applied correctly.
Seal and Protect Methods
Proper sealing extends beyond simply applying top coat. The technique used determines how well the gradient withstands daily wear. Start by ensuring complete coverage from cuticle to free edge, paying special attention to the nail tips where chipping typically begins. The sides of nails often get missed, creating weak points where peeling starts.
Double-sealing involves applying top coat in two phases. First, seal the gradient with a thin layer, focusing on smooth coverage rather than shine. After this dries completely (about 10 minutes), apply a second, slightly thicker layer for durability and glass-like finish. This method prevents the top coat from disturbing the gradient while providing maximum protection.
The temperature of your hands affects how top coat settles and cures. Warm hands cause top coat to flow more readily, potentially creating thin spots at the tips. If your hands run warm, consider cooling them briefly under cold water (dry thoroughly afterward) before the final top coat application. This helps the formula maintain even thickness across the entire nail.
Some professionals swear by the “float” technique for top coat application. Instead of touching the brush to the nail, they float a bead of top coat across the surface, allowing it to self-level. This prevents brush strokes from showing and reduces the risk of dragging gradient colors.
Daily Maintenance Routine
Your gradient manicure faces constant challenges throughout the day. Water exposure, typing, handling objects – all these activities stress the polish. Implementing simple protective habits significantly extends wear time without requiring major lifestyle changes.
Wearing gloves during household tasks provides obvious protection, but the type of gloves matters. Rubber gloves trap moisture, potentially loosening polish if worn too long. Cotton-lined gloves or wearing thin cotton gloves under rubber ones prevents this issue. For quick tasks, fingertip protectors offer protection without the bulk of full gloves.
Moisturizing plays a dual role in manicure maintenance. Dry nails and cuticles lead to cracking and peeling that affects the polish above. Apply cuticle oil daily, massaging it into the nail bed and surrounding skin. This keeps the nail flexible, preventing the rigid polish from cracking as the nail naturally bends during use.
Avoid using nails as tools, even for simple tasks like opening cans or scraping labels. These actions create micro-fractures in the polish that eventually become visible chips. Keep appropriate tools handy – letter openers, jar grippers, and label scrapers – to preserve your gradient design.
Quick Fix Solutions
Minor chips and wear don’t necessarily mean starting over. Strategic touch-ups can restore your gradient’s appearance and extend its life several more days. Keep the original polishes handy for these repairs, as matching colors later proves nearly impossible.
For tiny chips at the tips, carefully dab matching polish onto the damaged area using a detail brush or toothpick. Build up thin layers rather than applying one thick glob. Once dry, blend the edges using a barely damp brush with polish remover, then seal with top coat.
Here’s how to address specific issues:
Minor Tip Wear: Refresh white tips using a thin brush, blend lightly into existing gradient, seal with top coat.
Small Chips Mid-Nail: Fill with clear polish first, then carefully recreate gradient in that section using minimal polish on nearly dry sponge.
Dulling or Scratches: Buff very gently with finest grit buffer, apply fresh top coat layer.
Lifting at Edges: Carefully trim lifted portion with small scissors, seal edge with base coat, then top coat.
When gradient colors begin looking muddy or undefined, a strategic refresh can revive them. Apply the lightest gradient color very sparingly to areas that have darkened, using an almost dry sponge for subtle color deposit. This technique works particularly well for maintaining white tips that have yellowed slightly.
Removal Process
Gradient manicures involve multiple polish layers, making removal more challenging than standard manicures. Proper removal technique preserves nail health for your next gradient creation. Rushing this process or using improper methods can damage nail beds, leading to peeling and weakness.
Start by filing off the top coat seal at the free edge. This breaks the protective barrier and allows remover to penetrate more effectively. Some women prefer buffing the entire surface lightly to break through the top coat, but this requires careful attention to avoid buffing natural nails.
The soak-off method works best for multi-layered manicures. Saturate cotton pads with acetone or polish remover, place them on each nail, and wrap fingertips with aluminum foil. Let this sit for 5-10 minutes. The foil creates warmth that speeds dissolution while preventing evaporation.
After soaking, gently push polish off using an orange stick or rubber cuticle pusher. Never force or scrape aggressively – if polish doesn’t slide off easily, soak for a few more minutes. Gradient polishes sometimes come off in satisfying sheets when properly soaked, making removal surprisingly quick.
Follow removal with immediate nail care. Acetone severely dries nails and surrounding skin. Apply cuticle oil generously, massaging it into nails and cuticles. Consider using a strengthening treatment for a few days before your next gradient application, especially if you notice any weakness or peeling.
Design Variations
Once you master basic gradient techniques, endless creative possibilities emerge. Seasonal variations keep your manicures fresh and relevant throughout the year. Spring calls for white transitioning to pastels, summer loves white to bright corals or turquoises, fall suits white to warm oranges or deep purples, and winter sparkles with white to icy blues or silver.
Accent nail variations add interest without overwhelming. Try reversing the gradient on ring fingers, starting with color at the base and transitioning to white at tips. Or create a sideways gradient on thumbs while keeping traditional vertical gradients on other fingers. These subtle differences create visual interest while maintaining cohesion.
Incorporating nail art elements elevates basic gradients. Simple additions like a thin metallic stripe where colors meet, tiny rhinestones at gradient transition points, or delicate stamped patterns over dried gradients transform everyday manicures into special occasion designs. Just remember that additional elements require extra top coat for security.
Texture play offers another dimension for experimentation. Matte top coat over gradients creates sophisticated, modern looks. Apply it selectively – perhaps matte on the colored portion while keeping white tips glossy – for striking contrast. Sand-effect or textured polishes work beautifully as gradient components, adding tactile interest to visual beauty.
Your Beautiful Gradient Journey Awaits
Creating elegant white French manicures with color transitions at home opens up a world of personalized nail artistry. The techniques you’ve discovered here – from proper nail preparation and tool selection to gradient blending and long-lasting finishing methods – provide everything needed for salon-quality results in your own space. With practice, these methods become second nature, allowing you to experiment freely with colors and styles that reflect your personality.
The beauty of mastering gradient techniques extends beyond just this specific design. These skills translate to countless other nail art possibilities, from sunset gradients to galaxy nails. Each manicure you create builds your confidence and refines your technique. Whether you prefer subtle transitions for everyday wear or bold color combinations for special occasions, you now possess the knowledge to bring your nail art visions to life.
Frequently Asked Questions
Q: How long should I wait between each gradient layer when sponging?
A: Wait approximately 30-60 seconds between gradient layers. The polish should be dry to the touch but not completely cured. This timing allows layers to bond while preventing smudging.
Q: Can I create gradients with regular nail polish or do I need special gradient polish?
A: Regular nail polish works perfectly for gradients. No special gradient polish exists – the technique creates the effect, not the polish type. Just ensure your polishes have similar consistency for easier blending.
Q: Why does my gradient look muddy where the colors meet?
A: Muddy transitions usually result from over-sponging or incompatible color choices. Use colors closer on the color wheel, apply fewer sponging layers, and ensure each layer dries slightly before adding the next.
Q: What’s the best way to clean up the polish that gets on my skin during sponging?
A: Apply liquid latex or petroleum jelly around nails before starting. For cleanup after sponging, use a small brush dipped in acetone. Work while polish is still wet for easiest removal.
Q: How many days does a gradient French manicure typically last?
A: With proper preparation and sealing, gradient manicures last 7-14 days. Using quality base and top coats, avoiding water exposure immediately after application, and daily cuticle oil application maximize longevity.
Q: Should I use a makeup sponge wet or dry for gradient application?
A: Use sponges slightly damp, not wet. Lightly mist with water and squeeze out excess. This prevents the sponge from absorbing too much polish while still allowing smooth application.
Q: Can I do gradients on natural nails or do I need extensions?
A: Natural nails of any length work beautifully for gradients. Short nails suit subtle transitions, while longer nails accommodate more dramatic color changes. Adjust gradient proportions to complement your nail length.
Q: What’s the minimum number of colors needed for an effective gradient?
A: Two colors (including white) create beautiful gradients. Adding a third transition color between white and your chosen shade often produces smoother blends, but it’s not mandatory.