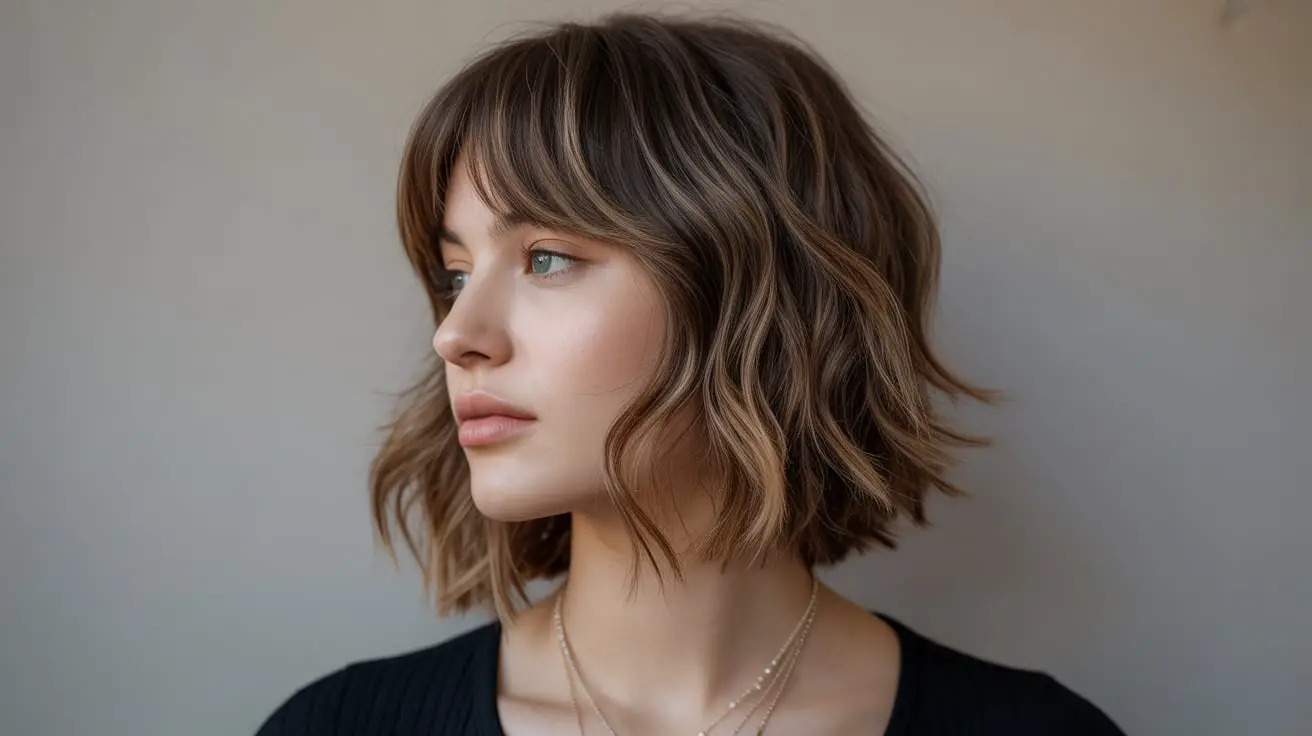
The shaggy lob with bangs has become one of those hairstyles that perfectly balances effortless cool with sophisticated style. This modern take on the classic lob adds textured layers throughout, creating movement and dimension that works beautifully with various bang styles. Whether you’re looking to refresh your current look or make a bold change, this versatile cut offers something special for every woman.
What makes this particular hairstyle so appealing is its ability to flatter different face shapes while requiring minimal daily styling effort. The combination of choppy layers and face-framing bangs creates a lived-in texture that looks amazing whether you spend five minutes or thirty minutes on your hair. Plus, the length hits that sweet spot between short and long, making it manageable for busy lifestyles while still offering enough hair to play with different looks.
Throughout the following sections, we’ll walk through everything you need to know about rocking this trendy cut. From understanding what defines the style to mastering daily styling techniques and choosing the perfect bang variation for your face shape, you’ll discover how to make this versatile hairstyle work for you. Ready to transform your look? Let’s get started.
What Defines a Shaggy Lob with Bangs?
A shaggy lob sits somewhere between your shoulders and collarbone, featuring multiple layers cut at various lengths to create that signature piece-y, textured look. Unlike traditional bobs that often have clean, blunt lines, this style incorporates choppy ends and disconnected layers that give hair natural movement and volume. The “shag” element comes from the way layers are cut – think feathered ends, lots of texture, and an overall undone aesthetic that looks intentionally messy yet put-together.
Length and texture characteristics
The ideal length for this cut typically falls about two to four inches below the chin, though it can extend slightly past the shoulders for those who prefer more length. What really sets it apart is the layering technique. Your stylist will use point cutting and razor techniques to create varying lengths throughout, with shorter pieces around the crown for volume and longer layers underneath for weight and movement.
The texture should feel light and airy rather than heavy or blunt. This is achieved through strategic thinning and texturizing, which removes bulk while maintaining body. The ends appear slightly shattered or piece-y, creating that effortlessly tousled effect that defines modern shag cuts.
Different bang styles that work
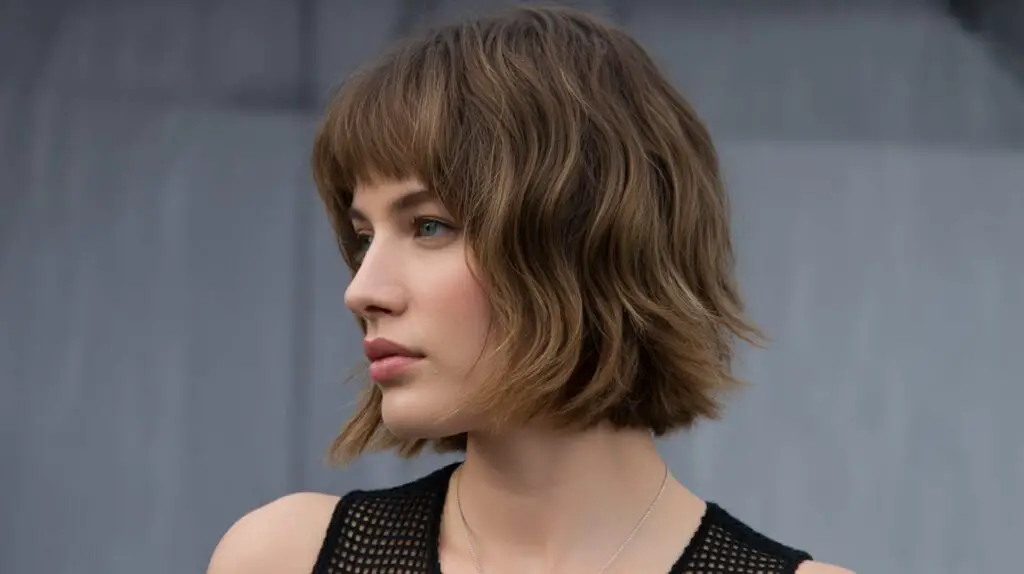
Several bang options complement this haircut beautifully. Curtain bangs remain the most popular choice, as they seamlessly blend with the layered texture while framing the face softly. These longer, swept-aside bangs work particularly well because they mirror the overall relaxed vibe of the cut.
Wispy, textured bangs offer another excellent option. Cut with the same choppy technique as the rest of the hair, they maintain consistency throughout the style. Some women prefer shorter, micro bangs for a more dramatic contrast, while others opt for side-swept variations that gradually blend into face-framing layers.
Face shapes that benefit most
While this versatile cut works for many face shapes, certain ones particularly shine with this style. Oval faces can pull off virtually any variation, from heavy bangs to wispy curtains. Round faces benefit from the added height at the crown and the elongating effect of side-swept or curtain bangs.
Square faces find the soft, textured layers help balance strong jawlines, especially when paired with wispy or side-swept bangs that create diagonal lines. Heart-shaped faces look stunning with this cut as the volume at chin level balances a narrower jaw, while the bangs minimize forehead width.
Key elements that make it “shaggy”
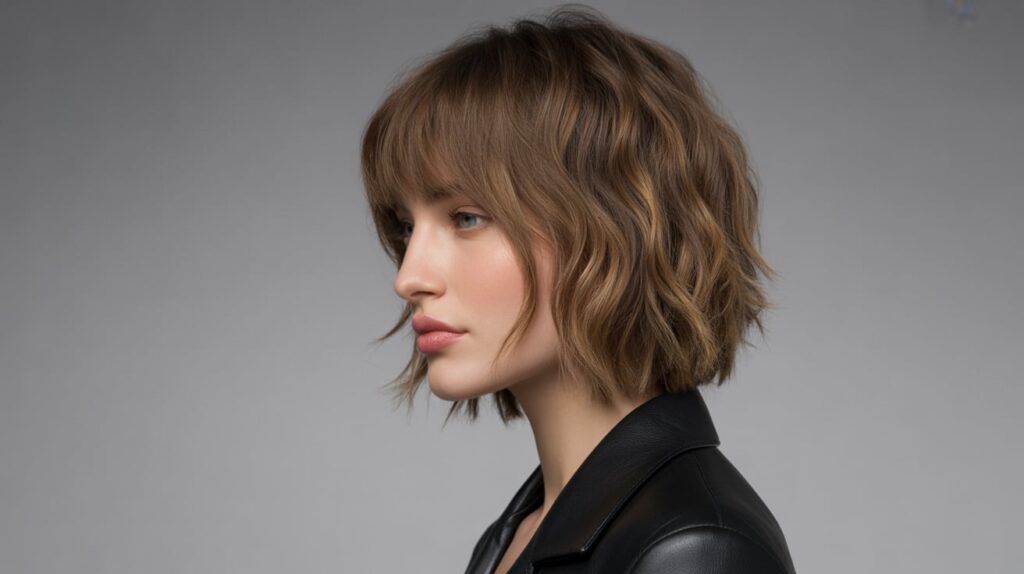
The shag factor comes from several specific cutting techniques. Layers start high on the head, often beginning around the cheekbones or even higher. These aren’t uniform layers – they’re cut at different angles and lengths to create maximum texture and movement.
Point cutting plays a crucial role, creating those soft, feathered ends that move independently. The overall silhouette should appear slightly messy and lived-in, never too polished or perfect. Think rock-and-roll meets modern sophistication.
How it differs from regular lobs
Traditional lobs typically feature cleaner lines and more uniform layering. They often have a sleeker, more polished appearance with weight concentrated at the bottom. The shaggy version breaks all these rules with its emphasis on texture over perfection.
Regular lobs might have subtle layers for movement, but shaggy lobs take this to another level with dramatic layering throughout. The maintenance differs too – while traditional lobs need frequent trims to maintain their shape, shaggy versions actually improve as they grow out, developing even more texture and character over time.
Is a Shaggy Lob with Bangs Right for Your Hair Type?
Understanding how this cut works with your specific hair type makes all the difference between loving and struggling with your new style. Each texture brings its own advantages and challenges, but with the right approach, virtually anyone can rock this look successfully.
Fine hair considerations
Women with fine hair often worry about losing precious volume with layered cuts, but this style actually creates the illusion of fuller, thicker hair when executed properly. The key lies in strategic layering that adds movement without removing too much weight.
Your stylist should focus on creating texture through the mid-lengths and ends while keeping some weight at the roots. This approach prevents the hair from falling flat against your head. Shorter layers around the crown area lift away from the scalp, creating volume where you need it most. The choppy texture throughout makes fine hair appear denser by breaking up the uniform appearance that can make thin hair look even thinner.
Product selection becomes crucial for fine-haired women. Lightweight texturizing sprays and volumizing mousses work wonders without weighing down delicate strands. Skip heavy creams or oils that might make your hair look greasy or limp. Instead, focus on products that add grip and texture while maintaining that airy, effortless feel.
Thick hair styling tips
Thick hair benefits enormously from this cut’s built-in texture and layer work. The multiple layers help remove bulk strategically while maintaining the style’s signature fullness and movement. Your stylist will likely use thinning shears and razor cutting techniques more liberally to prevent the dreaded triangle shape that can occur with thick hair in shorter styles.
The natural volume of thick hair means you can achieve that perfectly imperfect shaggy texture with minimal effort. However, you’ll want to invest in good smoothing products to control any unwanted puffiness while maintaining the intentionally messy aesthetic. A lightweight smoothing serum applied to damp hair before styling helps manage bulk without sacrificing texture.
Styling thick hair in this cut often requires less product and manipulation than you might expect. The layers do most of the work, allowing your natural texture to shine through. Focus on enhancing what you have rather than fighting against it.
Wavy and curly hair adaptations
Natural waves and curls bring built-in texture to this style, often requiring less styling effort than straight hair. The key is working with your curl pattern rather than against it. Your stylist should cut the layers while your hair is dry and in its natural state to ensure the lengths work with your specific curl pattern.
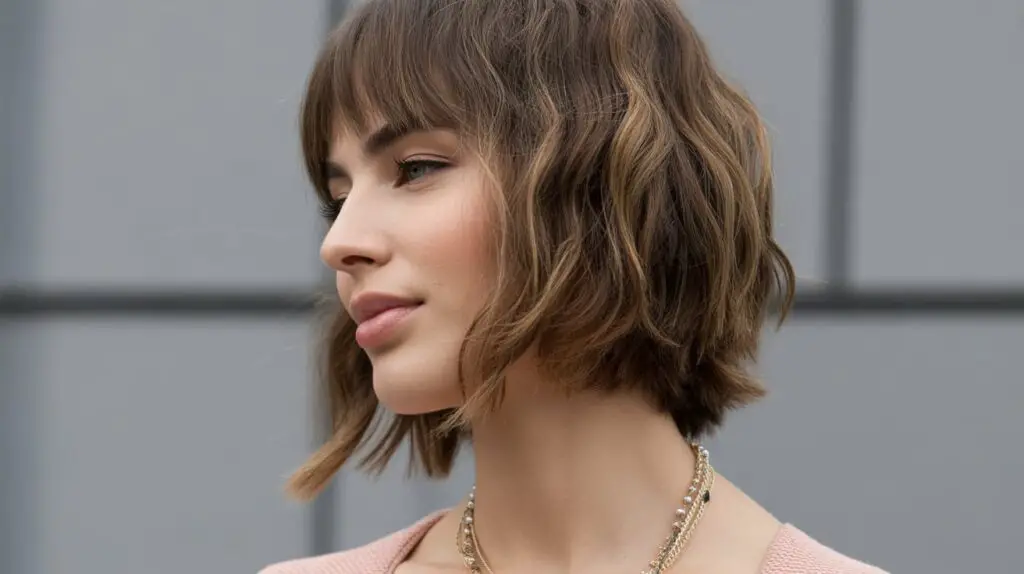
For wavy hair, the shaggy layers enhance natural movement beautifully. You might find that your waves become more defined and bouncy with the removed weight from strategic layering. Curly-haired women should ensure their stylist understands how to cut curls properly – each layer needs to be cut individually to account for shrinkage and spring.
The bangs require special consideration with textured hair. Curtain bangs work particularly well as they can be styled to blend with your natural pattern. Some women with very curly hair prefer to keep their bang area slightly longer, allowing for shrinkage while still achieving the face-framing effect.
Straight hair texture tricks
Straight hair might seem like the most challenging texture for achieving that effortlessly tousled shag look, but with the right techniques, it can look absolutely stunning. The key is adding texture through both cutting techniques and styling products.
Your stylist should incorporate lots of point cutting and potentially some razor work to create movement in naturally straight hair. Disconnected layers become even more important, as they prevent the hair from hanging too uniformly. Consider asking for some subtle internal layers that add movement without creating obvious lines. Below are essential products for straight-haired women wanting to achieve textured perfection:
Sea Salt Spray: Creates gritty texture and enhances natural movement
Texture Powder: Adds grip at the roots for volume and throughout for piece-y definition
Dry Shampoo: Not just for oil absorption – adds texture and lift
Light-Hold Hairspray: Maintains texture without stiffness
Texturizing Paste: Defines individual pieces and adds separation
Managing different hair densities
Hair density – how many strands you have per square inch – affects how this cut looks and behaves differently than hair thickness. Low-density hair benefits from keeping layers longer and less dramatic to maintain fullness. The goal is creating movement without sacrificing the appearance of volume.
Medium-density hair offers the most flexibility with this style. You can play with more dramatic layering and varied lengths without worrying about the hair looking too thin or too bulky. This density typically achieves the ideal shaggy texture most easily.
High-density hair needs the most careful approach to layering. Even if individual strands are fine, the sheer amount of hair can create bulk. Your stylist should focus on internal layering and texturizing techniques that reduce weight without creating a choppy appearance on the surface. Regular maintenance appointments every 6-8 weeks help manage regrowth and maintain the style’s shape.
How to Style Your Shaggy Lob with Bangs?
Mastering the daily styling of your shaggy lob can make the difference between looking effortlessly chic and appearing genuinely disheveled. The beauty of this cut lies in its versatility – you can achieve great results with minimal effort or create more polished looks for special occasions.
Morning routine basics
Your styling routine starts in the shower with the right products. Use a volumizing shampoo if you have fine hair, or a smoothing formula for thicker textures. Conditioning should focus on mid-lengths to ends, avoiding the roots to prevent flatness.
After washing, gently squeeze out excess water with a microfiber towel. Regular terry cloth towels can rough up the cuticle and create unwanted frizz. Apply your styling products to damp hair, starting with a heat protectant if you plan to use hot tools.
The way you dry your hair sets the foundation for your style. For maximum volume and texture, flip your head upside down while blow-drying with a diffuser attachment. Use your fingers to scrunch and lift sections as you dry, creating natural movement and preventing the hair from drying too flat against your head.
For the bangs, dry them first while they’re still quite damp. Use a small round brush to direct them where you want them to fall, whether that’s straight down, swept to the side, or parted in the middle for curtain bangs. Getting the bangs right while they’re damp saves time and frustration later.
Product recommendations by hair type
Different hair types require different product approaches to achieve the perfect shaggy texture. Fine hair thrives with lightweight formulas that add texture without weight. Start with a volumizing mousse at the roots, followed by a texturizing spray through the lengths. Finish with a light-hold hairspray that won’t make hair crunchy or stiff.
Thick hair benefits from products that control without eliminating texture. A smoothing cream applied to damp hair helps manage bulk, while a texturizing paste worked through dry hair creates definition and separation. Don’t overload with product – thick hair can handle more, but too much will weigh down the style’s signature movement.
Curly and wavy hair needs moisture-rich products that enhance natural texture. Leave-in conditioners keep curls defined and frizz-free, while lightweight gels or mousses provide hold without crunchiness. The goal is enhancing your natural pattern while maintaining the piece-y, undone aesthetic.
Straight hair requires products that create texture from scratch. Sea salt sprays, texture powders, and dry shampoos become your best friends. Layer these products for maximum effect – spray first for base texture, add powder at the roots for lift, then finish with a texturizing paste to define individual pieces.
Heat styling techniques
While this cut looks great air-dried, heat styling can enhance texture and create different looks. When blow-drying, use a medium heat setting and keep the dryer moving to prevent damage. Scrunching sections while drying creates natural-looking waves and enhances the shaggy texture.
For more defined waves, try the twist-and-dry method. Twist small sections of damp hair, then blow-dry each twisted section. Once dry, release the twists and gently separate with your fingers. This creates soft, natural-looking waves that complement the cut’s relaxed vibe.
Flat irons aren’t off-limits but use them strategically. Instead of straightening every strand, run the iron quickly through random sections, leaving others untouched. This creates interesting texture variation. You can also use the iron to create subtle bends and waves by twisting your wrist as you glide down each section.
Curling wands work wonderfully for special occasions when you want more polished waves. Wrap sections around the wand in alternating directions, leaving the ends out for that modern, undone finish. Once cooled, break up the curls with your fingers and finish with texture spray.
Air-dry methods for texture
Many women find their shaggy lob looks best when air-dried, taking advantage of natural texture and movement. The key is setting your hair up for success while it’s still damp. Apply your products evenly, then use various techniques to encourage texture as it dries.
Scrunching remains the most effective method for creating natural waves and volume. Cup sections of hair in your palms and squeeze upward repeatedly. This encourages curl formation and prevents hair from drying too straight. For extra texture, try the plop method – flip your head forward and lower your hair onto a microfiber towel, then wrap and let it sit for 10-15 minutes.
Braiding damp hair creates beautiful waves without heat damage. Try multiple small braids for tighter texture or one or two loose braids for softer waves. Leave them in until hair is completely dry, then gently separate with fingers. The result perfectly complements this cut’s effortless aesthetic.
Space buns offer another heat-free texture option. Divide damp hair into sections and twist each into a high bun. The twisting action creates natural waves while the bun placement adds volume at the roots. Once dry, release the buns and shake out your hair for instant texture.
Quick refresh tips
Second or third-day hair often looks even better with this cut, as natural oils add to the piece-y texture. However, bangs might need daily attention. Keep a small flat iron or mini straightener handy for quick bang touch-ups without washing your entire head.
Dry shampoo does double duty – absorbing oil while adding texture. Spray it at the roots before bed and let it work overnight. In the morning, massage it in for instant volume and freshness. Focus on the crown area and around your bangs where oil tends to accumulate first.
For midday refreshing, carry a small bottle of texture spray or sea salt spray. A quick spritz and scrunch can revive flat sections and enhance separation. If your bangs lose their shape throughout the day, dampen them slightly with water and restyle with a blow dryer – this takes less than two minutes but makes a huge difference.
When time is really tight, strategic accessories save the day. A textured headband can disguise greasy roots while complementing the style’s bohemian vibe. Hair clips placed asymmetrically add interest while controlling unruly sections. The key is working with the cut’s inherent messiness rather than fighting for perfection.
What Are the Best Bang Variations for Your Face Shape?
Choosing the right bang style can transform your entire look, especially with a textured cut like the shaggy lob. The perfect bangs enhance your best features while creating balance and harmony with your face shape. Understanding which styles work best for your unique features helps you make confident decisions at the salon.
Before diving into specific recommendations, remember that these are guidelines rather than rigid rules. Personal style, hair texture, and lifestyle all play important roles in determining your ideal bang style. The best approach combines flattering techniques with your individual preferences and daily routine requirements.
Round face framing options
Round faces benefit from bang styles that create the illusion of length and angular lines. Side-swept bangs work beautifully, as the diagonal line across the forehead adds visual length while breaking up the circular shape. Keep them longer and wispy rather than blunt or heavy, which can emphasize roundness.
Curtain bangs deserve special mention for round faces. When cut properly, they create a natural part that draws the eye vertically while the curved shape adds flattering angles around the cheekbones. The key is ensuring they’re long enough to hit below the cheekbones, creating a slimming effect.
Avoid straight-across, heavy bangs that hit right at eyebrow level. These create a horizontal line that emphasizes face width. If you love the look of fuller bangs, ask your stylist to add texture and irregular lengths that break up the solid line. Piece-y, textured bangs with varying lengths create movement and prevent the widening effect of blunt cuts.
Consider asymmetrical bang options too. A deep side part with longer bangs swept dramatically to one side creates beautiful angles while adding sophistication to your shaggy lob. This style particularly suits women who want a more polished look for professional settings while maintaining the cut’s inherent edge.
Long face balancing tricks
Long faces shine with bang styles that create horizontal lines and add width visually. Full, straight-across bangs work wonderfully here, creating a frame that shortens the face appearance. Unlike round faces that should avoid this style, long faces benefit from the width-adding effect.
Thick, textured bangs hitting just above or at the eyebrows create ideal proportions for long faces. Don’t shy away from fullness – the more substantial the bangs, the better the balancing effect. Your stylist can add texture to prevent them from looking too heavy while maintaining enough weight to create that crucial horizontal line.
Curved or arched bangs offer another flattering option. Cut slightly shorter in the center and longer at the sides, they create a soft frame that adds width while maintaining femininity. This shape works particularly well with the shaggy lob’s textured layers, creating cohesion throughout the style.
Whatever bang style you choose, avoid extremely short or micro bangs if you have a long face. These can actually emphasize length by creating too much open space on the forehead. Similarly, center parts with no bangs or very wispy, thin bangs won’t provide enough visual weight to balance proportions.
Square face softening styles
Square faces feature strong jawlines and similar width at the forehead and jaw. The goal with bangs is softening these angular features while creating more oval-like proportions. Wispy, textured bangs excel at this task, providing coverage without adding harsh lines.
Long, side-swept bangs create beautiful diagonal lines that counteract the square shape’s natural angles. Keep them soft and feathered rather than blunt cut. The sweeping motion draws attention away from the jawline while the irregular texture prevents any harsh edges that might emphasize squareness.
Curtain bangs again prove their versatility for square faces. The soft, curved shape creates roundness that balances angular features. Make sure they’re cut with plenty of texture and movement – rigid, perfectly styled curtain bangs can look too severe on square faces.
Avoid very short, straight bangs that hit high on the forehead. These can make the face appear more box-like by creating another strong horizontal line. If you prefer shorter bangs, ensure they have plenty of texture and perhaps a slight asymmetry to maintain softness.
Heart-shaped face complementing cuts
Heart-shaped faces, wider at the forehead and narrower at the chin, look stunning with bang styles that balance these proportions. Side-swept bangs work magnificently, especially when they’re fuller at the sides to minimize forehead width while adding visual weight near the narrower jaw area.
Curtain bangs cut with a center or slightly off-center part create beautiful balance for heart-shaped faces. The way they frame the face adds width at the jaw level while partially covering the wider forehead area. Keep them long enough to graze the cheekbones for the most flattering effect.
Wispy, piece-y bangs that aren’t too heavy also complement heart-shaped faces well. The key is avoiding anything too thick or blunt that might make the forehead appear even wider. Texture and movement are your friends here. Below are bang styles that work particularly well:
Long Curtain Bangs: Create width at jaw level while minimizing forehead
Textured Side-Sweep: Adds asymmetry and balances proportions
Graduated Bangs: Shorter in center, longer at sides for perfect framing
Choppy Fringe: Matches the shaggy lob’s texture while softening the forehead
Oval face versatility
Oval faces hit the genetic jackpot when it comes to bang options – almost every style works beautifully. This balanced face shape can experiment freely with different bang lengths, textures, and styles without worrying about creating imbalance.
Blunt, straight-across bangs create a bold, fashion-forward look on oval faces without disrupting natural proportions. You can go as thick or as wispy as you like, depending on your personal style and hair texture. The shaggy lob’s textured layers provide interesting contrast to sleek, geometric bangs.
Curtain bangs enhance oval faces’ natural symmetry while adding a romantic, effortless quality that perfectly complements the shaggy lob aesthetic. Whether parted centrally or slightly off-center, they frame the face beautifully without hiding its balanced proportions.
Don’t hesitate to try trend-driven bang styles like micro bangs or asymmetrical cuts. Oval faces can handle these bold choices without looking unbalanced. The key is ensuring the bang style harmonizes with your overall cut – maintain consistent texture throughout for the most cohesive look.
Even no bangs at all works wonderfully for oval faces. The exposed forehead showcases balanced proportions while the shaggy layers provide plenty of movement and interest. This option particularly suits women who prefer low-maintenance styles or enjoy frequently changing their look with different styling techniques.
How to Maintain Your Shaggy Lob Between Salon Visits?
The beauty of a well-cut shaggy lob lies in its grow-out potential – this style actually improves with time as layers settle and develop more natural movement. However, strategic maintenance keeps it looking intentional rather than overgrown. With the right techniques and timing, you can extend the life of your cut while keeping it fresh and stylish.
Trimming bang basics at home
Bangs grow faster than you might expect, often requiring attention between regular salon appointments. While major bang reshaping should stay in professional hands, minor maintenance trims keep them from obscuring your vision or losing their shape.
Invest in a pair of sharp hair-cutting scissors – using regular scissors damages hair and creates uneven cuts. When trimming, always cut less than you think you need. You can always take more off, but you can’t put it back. Work on dry hair so you can see exactly where the length falls.
The point-cutting technique works best for maintaining textured bangs at home. Hold scissors vertically and make small snips into the ends rather than cutting straight across. This maintains the piece-y texture that complements your shaggy layers. For curtain bangs, focus on the center section that tends to grow into your eyes first.
Never attempt bang trimming when you’re emotional, rushed, or have had alcohol. These situations lead to impulsive decisions and unsteady hands. Choose a well-lit area and take your time. If you’re unsure, wait for your salon appointment – better to deal with slightly long bangs than to create a hair emergency.
Texture refreshing techniques
As your shaggy lob grows, you might notice the texture becoming less defined. Several techniques can revive that piece-y, lived-in texture without requiring a salon visit. The twist-and-point-cut method works wonders – take small sections of dry hair, twist them, then carefully snip into the twist with scissors held vertically. This creates irregular lengths that enhance texture.
Razor combs offer another option for texture maintenance. These tools thin and texturize simultaneously, perfect for refreshing grown-out layers. Use them on dry hair, working through sections systematically. Start conservatively – you can always remove more hair if needed.
For a temporary texture boost, try the braid-and-cut technique. Braid a small section loosely, then carefully snip into the braid at various points. When you unbraid, you’ll have created natural-looking layers and texture. This works particularly well for adding movement to the lower sections of your lob.
Sometimes all your texture needs is better styling rather than cutting. Switching up your products or trying new techniques can revive seemingly flat layers. Experiment with different application methods – sometimes texture spray works better on damp hair, other times on dry. Don’t assume you need a trim when different styling might solve the issue.
Product rotation strategies
Using the same products continuously can lead to buildup and diminished results. Your hair becomes accustomed to certain formulas, making them less effective over time. Rotating between different product lines keeps your style fresh and prevents residue accumulation.
Consider having two or three different texturizing products in your rotation. Use a sea salt spray for two weeks, then switch to a texture powder, followed by a texturizing cream. Each formula works slightly differently, preventing your hair from becoming too accustomed to one approach.
Clarifying treatments deserve a place in your routine too. Once every two to three weeks, use a clarifying shampoo to remove product buildup. This resets your hair, allowing styling products to work more effectively. Follow clarifying with a deep conditioning treatment to restore moisture.
Pay attention to seasonal changes as well. Summer humidity might require anti-frizz formulas and lighter textures, while winter calls for more moisturizing products. Adjusting your product lineup seasonally keeps your shaggy lob looking its best year-round.
Dealing with grow-out phases
The period between cuts can feel awkward, but understanding grow-out patterns helps you work with changes rather than against them. Shaggy lobs typically grow out more gracefully than precision cuts, with layers blending naturally as they lengthen.
Around week four to six, you might notice the overall shape becoming less defined. This is when styling techniques become crucial. Add more texture through styling products and heat-free methods like braiding or twisting. The goal is enhancing the naturally developing texture rather than fighting for the original shape.
Bangs often create the biggest grow-out challenge. When they reach that awkward length between bang and not-bang, get creative with styling. Pin them back with decorative clips, braid them into a crown, or train them to blend into curtain bangs. This transition period offers opportunities to experiment with new looks.
Accessories become invaluable during grow-out phases. Headbands, scarves, and strategic clips can disguise awkward lengths while adding style. Choose accessories that complement the relaxed aesthetic – think textured fabrics, natural materials, and undone styling rather than sleek, perfect placement.
When to book appointments
While shaggy lobs grow out well, regular maintenance keeps them looking intentional. Most women find scheduling appointments every 8-12 weeks maintains the style without over-cutting. This timeline allows layers to develop and settle while preventing the shape from becoming completely lost.
Your specific timeline depends on several factors:
Hair Growth Rate: Faster-growing hair needs more frequent trims
Bang Style: Blunt bangs require attention every 3-4 weeks
Texture Goals: Very shaggy styles can go longer between cuts
Personal Preference: Some women enjoy the grown-out look more than others
Watch for signs that indicate trim time – when bangs constantly fall in your eyes, when layers lose all definition despite good styling, or when split ends become noticeable. These signals suggest professional attention would refresh your style.
Book appointments proactively rather than waiting until your hair feels unmanageable. Many salons book weeks in advance, and trying to squeeze in when you’re desperate often means settling for less convenient times. Mark your calendar for rebooking when leaving each appointment.
Consider mini-appointments between full cuts. Many salons offer bang trims or quick texture refreshes at reduced prices. These 15-minute sessions can extend the life of your cut significantly, especially if bangs are your main concern. Some stylists even offer complimentary bang trims between full appointments – just ask about your salon’s policy.
Your Perfect Shaggy Lob
After exploring all aspects of the shaggy lob with bangs, you’re now equipped with everything needed to rock this versatile, modern hairstyle. From understanding the cut’s defining features to mastering daily styling and long-term maintenance, you have the knowledge to make this trendy style truly your own. The combination of textured layers and customizable bangs creates endless possibilities for expressing your personal style while flattering your unique features.
The journey to your perfect shaggy lob starts with a great consultation with your stylist, armed with clear ideas about the bang style and texture level you want. Remember that this cut’s beauty lies in its imperfection – those piece-y layers and lived-in texture that make you look effortlessly cool. Whether you’re drawn to dramatic curtain bangs or prefer a subtle side-swept fringe, this adaptable style grows with you, literally improving over time as layers settle and develop natural movement. Your shaggy lob awaits – time to book that salon appointment and transform your look.
Frequently Asked Questions
Q: How often should I wash my hair with a shaggy lob?
A: Most women find washing every 2-3 days ideal for this style. The textured, piece-y look actually improves with natural oils, and overwashing can make hair too clean and slippery to hold texture.
Q: Can I straighten my naturally curly shaggy lob occasionally?
A: Absolutely! Straightening creates a completely different look while maintaining the cut’s shape. Just use heat protectant and don’t straighten too frequently to prevent damage to your textured layers.
Q: What’s the minimum length needed to achieve a shaggy lob?
A: Your hair should reach at least your shoulders when straight. This gives stylists enough length to create the layered, textured effect while maintaining the lob silhouette.
Q: Will a shaggy lob work with very fine, thin hair?
A: Yes, when cut properly with strategic layering that maintains density while adding movement. The key is keeping layers longer and less dramatic, plus using volumizing products designed for fine hair.
Q: How do I know if my bangs are too heavy for my face?
A: Bangs feel too heavy when they overwhelm your features or feel like a solid curtain across your forehead. They should frame and enhance your face, not hide it. Ask your stylist to add more texture if needed.
Q: Can I wear a shaggy lob in professional settings?
A: Definitely! Style it sleeker with smoothing products and controlled waves for a polished look. The cut’s versatility means you can adapt it from boardroom-appropriate to weekend-casual with different styling approaches.
Q: What’s the best way to grow out a shaggy lob?
A: Maintain regular trims every 10-12 weeks to keep ends healthy while letting length accumulate. The layered nature means it grows out more naturally than blunt cuts, eventually transitioning into a longer shag style.
Q: How do I prevent my bangs from separating in the middle?
A: Train them while damp by blow-drying in the desired direction, use a light pomade at the roots for hold, and avoid touching them throughout the day. Sometimes a tiny hidden bobby pin at the part solves persistent separation.
Q: Is there an age limit for rocking a shaggy lob with bangs?
A: Not at all! This style suits women of all ages. The key is adapting elements like bang thickness and layer placement to complement your features and lifestyle at any stage of life.