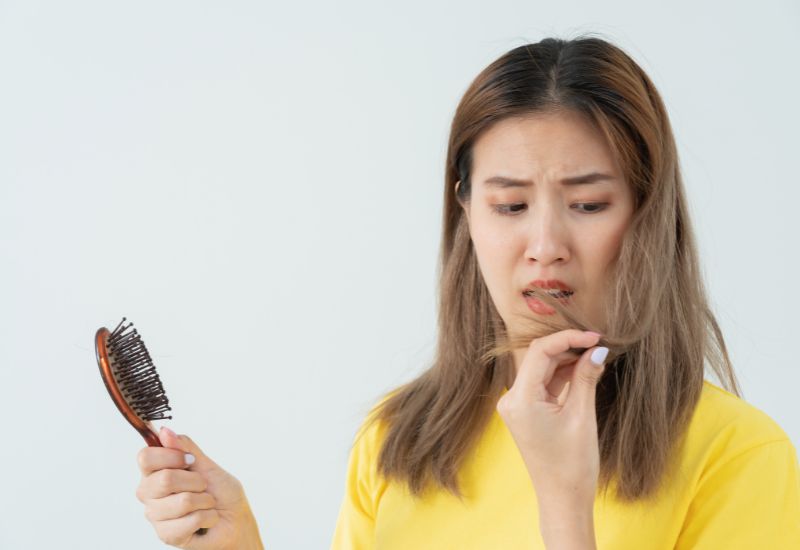
Hair that looks dry, feels rough, and breaks easily is something many women deal with at some point. Heat styling, chemical treatments, and even simple daily brushing can leave strands weak and lifeless. The good news is that you don’t have to accept brittle, unhealthy hair as your reality. There are proven ways to bring back softness, strength, and shine.
Understanding what causes hair to become damaged helps you choose the right repair methods. Excessive heat from blow dryers and flat irons lifts the outer layer of each strand, releasing moisture and creating a rough texture. Chemical services like bleaching and coloring open up the hair shaft, making it porous and prone to breakage. Even mechanical stress from tight hairstyles or rough brushing contributes to the problem.
The methods below offer practical solutions you can start using right away. Some involve simple changes to your daily routine, while others require specific products or professional help. Each approach targets different types of hair concerns, so you can pick what works best for your specific situation.
Deep Conditioning Hair Masks
Your hair needs moisture to stay healthy and strong. Deep conditioning masks deliver concentrated hydration that regular conditioner simply can’t match. These thick formulas sit on your strands longer, giving ingredients time to penetrate the hair shaft and fill in damaged areas.
Why Deep Conditioning Works
Think of your hair like a sponge. Damaged hair has gaps and cracks that need filling. Regular conditioner provides surface-level moisture, but masks go deeper. They contain higher concentrations of nourishing ingredients like vitamins, proteins, and natural oils. This intensive treatment helps seal the cuticle layer, making hair appear smoother and feel softer.
How to Apply a Hair Mask
Start with clean, damp hair. Squeeze out excess water with a towel. Apply the mask from mid-length to ends, avoiding the roots unless your scalp is very dry. Use a wide-tooth comb to distribute the product evenly. Leave it on for 10-30 minutes depending on the product instructions. Some masks work better with heat, so consider wrapping your hair in a warm towel.
Rinse thoroughly with lukewarm water. Your hair should feel noticeably softer after just one use. For best results, use a deep conditioning treatment twice a week. If your hair is extremely dry or damaged, you might benefit from more frequent applications. The key is consistency—regular treatments provide better results than occasional use.
Protein Treatments
Hair is made of keratin, a type of protein. Chemical processing, heat damage, and environmental factors break down these protein bonds. Protein treatments help rebuild the hair’s structure from within.
How does protein repair hair? These treatments deposit amino acids onto damaged strands. The proteins bond to the hair shaft, filling in weak spots and strengthening the overall structure. This makes hair more resistant to breakage and helps restore elasticity.
Choosing the Right Protein Treatment
Not all protein treatments are the same. Some provide light protein for maintenance, while others offer intensive repair for severely damaged hair. Read product labels carefully. Look for ingredients like hydrolyzed keratin, silk protein, or wheat protein.
Application Tips
Apply protein treatments to clean, towel-dried hair. Focus on the most damaged areas, typically the mid-lengths and ends. Leave the treatment on for the recommended time—usually 5-20 minutes. Rinse well with cool water to seal the cuticle. Here’s what protein treatments can do:
Rebuild Structure: Fills in damaged areas along the hair shaft for stronger strands.
Reduce Breakage: Strengthened hair is less likely to snap during styling or brushing.
Improve Elasticity: Healthy hair stretches without breaking, a sign of good protein balance.
Don’t overdo protein treatments. Too much protein can make hair stiff and brittle. Use these treatments once or twice a month, or as directed on the product packaging. If your hair starts feeling dry or straw-like, reduce frequency and add more moisture.
Regular Trimming
Split ends can’t be repaired. Once the hair shaft splits, the damage travels up the strand. The only real solution is cutting them off. Regular trims prevent this upward progression and keep hair looking healthy.
How often should you trim? Most stylists recommend every 6-8 weeks. This timeline works for preventing split ends before they worsen. If you’re growing your hair out, you might stretch this to 10-12 weeks, but don’t wait too long. Skipping trims means you’ll eventually need to cut off more length.
What Happens During a Trim
A professional stylist examines your ends and removes damaged portions. Even a quarter-inch trim can make a big difference in how your hair looks and feels. Freshly cut ends appear neater and reduce tangling.
Can you trim your own hair? While possible, it’s tricky to see all angles and achieve an even cut. Consider professional trims for the best results. Between salon visits, you can carefully snip individual split ends you spot, but don’t attempt a full trim without proper tools and technique.
Regular trimming doesn’t make hair grow faster—that’s a myth. It does prevent breakage from traveling up the strand, which means you can retain more length over time. Healthy ends also look fuller and more polished. Schedule your next trim before your ends start looking scraggly. Prevention beats correction every time.
Heat Protection Strategies
Hot tools damage hair by lifting the cuticle and evaporating moisture inside the strand. This creates brittleness and dullness. Protecting your hair from heat is one of the most effective ways to prevent further damage.
Lower the Temperature
Many women set their flat irons and curling wands too hot. Most hair types don’t need temperatures above 350-380°F. Fine or damaged hair should stay below 300°F. Check if your tools have adjustable heat settings and turn them down. This simple change reduces damage significantly.
Use Heat Protectant Products
Heat protectants create a barrier between your hair and hot tools. These products contain silicones or polymers that shield strands from extreme temperatures. Apply protectant spray or serum to damp hair before blow-drying, or to dry hair before using flat irons or curling tools.
Look for products specifically labeled as heat protectants. Regular styling creams don’t provide the same level of protection. Spray products distribute easily, while serums work well on thick or coarse hair. Apply evenly from roots to ends, making sure every section gets covered.
Air Dry When Possible
Give your hair a break from heat styling several days a week. Let it air dry naturally or use the lowest heat setting on your blow dryer. If you must use heat daily, rotate between different styling methods to avoid concentrating damage in the same areas. Your hair will thank you for these heat-free days with improved texture and strength.
Cool Water Rinse
Hot showers feel relaxing, but they’re terrible for your hair. High water temperatures strip away natural oils and leave strands dry and frizzy. Switching to cooler water makes a noticeable difference.
Why does water temperature matter? Hot water opens the hair cuticle, causing moisture to escape. This makes hair look dull and feel rough. Cool water does the opposite—it closes the cuticle, sealing in moisture and creating a smoother surface. The result is shinier, more manageable hair.
Making the Switch
You don’t need ice-cold water to see benefits. Lukewarm or cool water works fine. Start your shower with warm water if you prefer, but finish your hair rinse with cooler water. Focus the cool rinse on your hair, not necessarily your entire body. Here’s what happens with a cool rinse:
Seals Cuticles: Closed cuticles create a smoother, shinier surface.
Locks in Moisture: Prevents water and conditioning treatments from escaping.
Reduces Frizz: Smooth cuticles mean less flyaway hair and better manageability.
Extends Color: Cooler water helps prevent color from fading as quickly.
The temperature change might feel uncomfortable at first. Gradually decrease the heat over several washes until you find a comfortable cool temperature. Most women adjust within a week or two. The visible improvement in shine and texture makes the slight discomfort worthwhile.
Leave-In Treatments
Leave-in conditioners and treatments protect hair all day long. Unlike rinse-out products, these formulas keep working after you apply them. They’re especially helpful for damaged hair that needs constant moisture and protection.
Benefits of Leave-In Products
These treatments act like bodyguards for your strands. They create a protective coating that shields hair from environmental damage, friction, and breakage. Many leave-ins contain ingredients that smooth the cuticle, reduce frizz, and add shine. Some also offer heat protection or UV protection.
Apply leave-in treatment to damp, towel-dried hair. Start with a small amount—about a dime-sized portion for shoulder-length hair. Rub the product between your palms, then distribute evenly through your hair, focusing on ends and avoiding roots. Comb through with a wide-tooth comb for even coverage.
Choosing Your Formula
Leave-in treatments come in different forms. Sprays work well for fine hair that gets weighed down easily. Creams suit thick or coarse hair that needs more moisture. Serums add shine and control frizz on most hair types. Try different formulas to find what works for your hair texture and damage level.
Use leave-in products daily or as needed. They’re particularly useful before heat styling, swimming, or spending time in the sun. Some women apply them only to ends between washes, while others use them every time they wet their hair. Adjust frequency based on how your hair responds.
Natural Oil Therapies
Plant-based oils have been used for hair care for centuries. Coconut oil, olive oil, argan oil, and jojoba oil can all help repair damaged strands. These natural treatments moisturize hair and smooth the cuticle without harsh chemicals.
How Oils Help Hair
Oils penetrate the hair shaft and provide fatty acids that strengthen and protect. They also coat the outside of each strand, creating a barrier against moisture loss and environmental damage. Different oils offer different benefits, so experiment to find your favorite.
Coconut oil works particularly well because its molecular structure allows it to penetrate deeper than other oils. Olive oil adds moisture and softness. Argan oil provides vitamin E and antioxidants. Jojoba oil closely resembles the natural oils your scalp produces.
Application Methods
For a deep treatment, warm a small amount of oil in your hands. Apply to damp or dry hair, working from ends to mid-shaft. Avoid the roots unless your scalp is very dry. Cover your hair with a shower cap and leave on for 30 minutes to several hours, or even overnight. Shampoo thoroughly to remove the oil—you may need to lather twice.
You can also use oils as a light finishing product. Rub a tiny amount between your palms and smooth over dry hair to tame frizz and add shine. A little goes a long way. Too much oil will make hair look greasy. Start with just a few drops and add more only if needed. Weekly oil treatments combined with daily small applications can transform dry, damaged hair into soft, manageable strands.
Professional Salon Treatments
Sometimes at-home care isn’t enough for severely damaged hair. Professional treatments contain higher concentrations of active ingredients and target specific types of damage. Stylists can assess your hair’s condition and recommend the best option.
What makes salon treatments different? They use professional-grade formulas not available in stores. These concentrated treatments work at the molecular level to repair bonds broken by chemical services or heat damage. Many salons offer keratin treatments, bond-building systems, or intensive moisture therapies.
Keratin Treatments
Keratin treatments smooth the hair cuticle and reduce frizz. The stylist applies a keratin-based formula to clean hair, then uses heat to seal it in. Results last several weeks to months, depending on the specific treatment. Your hair becomes easier to style and feels noticeably smoother.
Bond-Building Systems
These treatments rebuild the internal structure of damaged hair. They’re especially effective for hair that’s been bleached, colored, or chemically processed. The formula strengthens broken bonds within the hair shaft, making strands more resilient and less prone to breakage.
Expect to spend more time and money on professional treatments compared to at-home products. However, the results are often dramatic and long-lasting. Many women schedule salon treatments quarterly or bi-annually, depending on their hair’s condition and budget. Between professional treatments, maintain results with recommended at-home products. Your stylist can suggest specific shampoos, conditioners, and treatments that work with your salon service.
Silk Pillowcases
You spend roughly eight hours a night with your hair against your pillowcase. Cotton pillowcases create friction that damages hair while you sleep. The rough texture catches on strands, causing breakage, split ends, and frizz. Switching to silk or satin makes a real difference.
Why Silk Protects Hair
Silk has a smooth surface that allows hair to glide without catching. This reduces friction dramatically. Less friction means less breakage and fewer tangles in the morning. Silk also doesn’t absorb moisture the way cotton does, so your hair retains its natural oils and any leave-in treatments you’ve applied.
Satin pillowcases offer similar benefits at a lower price point. While true silk costs more, it’s worth the investment if you struggle with damaged hair. Both materials help preserve hairstyles longer too—your blowout or curls will look fresher in the morning.
Additional Nighttime Protection
Consider wrapping your hair in a silk scarf before bed. This provides even more protection than just a pillowcase. Loosely gather your hair and wrap it in the scarf, securing with a loose tie. Alternatively, try a loose braid or bun using a silk scrunchie. Avoid tight hairstyles that create tension and breakage.
Never go to bed with wet hair. Wet strands are more vulnerable to damage from friction and stretching. Let your hair air dry completely, or use a blow dryer on low heat if you must sleep soon after washing. Combine silk pillowcases with these nighttime habits for maximum protection. Here are the key benefits:
Reduces Breakage: Less friction means fewer broken strands.
Prevents Tangles: Smooth fabric keeps hair from knotting overnight.
Maintains Moisture: Doesn’t absorb oils and treatments like cotton does.
Preserves Styles: Hair looks better in the morning with less re-styling needed.
Spacing Chemical Services
Chemical treatments like bleaching, coloring, perming, and relaxing break down the hair’s natural structure. These processes open the cuticle and alter internal bonds. Too many chemical services too close together cause serious damage that’s difficult to reverse.
How long should you wait between treatments? Most professionals recommend 6-8 weeks minimum between color services. For bleaching or major chemical changes, wait even longer—10-12 weeks if possible. This gives your hair time to recover and rebuild strength.
Types of Chemical Damage
Permanent hair color uses ammonia or similar chemicals to lift the cuticle and deposit pigment. This process makes hair porous, causing it to lose moisture and become brittle. Bleach is particularly harsh because it strips natural melanin from the hair shaft, leaving it weak and prone to breakage.
Perms and relaxers restructure the hair by breaking and reforming bonds. These services cause significant stress to strands. Combining multiple chemical treatments—like coloring and perming—in a short timeframe compounds the damage.
Safer Chemical Treatment Practices
If you must have frequent chemical services, take precautions. Use conditioning treatments regularly between appointments. Consider semi-permanent or demi-permanent color instead of permanent formulas—they’re less damaging because they don’t lift the cuticle as aggressively. Ask your stylist about bond-protecting treatments that can be mixed into color or applied during processing.
Touch up roots only rather than applying color to all your hair each time. This limits chemical exposure to just the new growth. Space different services apart—if you want both color and a perm, wait at least two weeks between them. Your hair needs recovery time between chemical assaults to maintain any level of health.
Gentle Brushing Methods
Brushing seems simple, but the wrong technique or tools cause substantial damage. Aggressive brushing breaks strands, pulls hair from follicles, and creates split ends. Learning to brush properly protects your hair from unnecessary stress.
Choosing the Right Brush
Your brush matters more than you might think. Natural boar bristles distribute oils and create shine without pulling. Wide-tooth combs work best for detangling wet hair. Paddle brushes with flexible bristles massage the scalp while being gentle on strands. Avoid brushes with metal or plastic bristles that have rough edges or balls on the tips.
Wet hair is extremely fragile. Using a regular hairbrush on wet strands causes severe breakage. Instead, use a wide-tooth comb or a specialized wet brush designed with flexible bristles. Start at the ends and work your way up, holding the hair above the section you’re detangling to reduce pulling on the scalp.
Proper Brushing Technique
Never rip through tangles. Work slowly and gently, separating knots with your fingers before brushing. Hold a section of hair above where you’re brushing to minimize tension on roots. Brush from ends to roots, not roots to ends. This method prevents tangles from tightening as you work through them.
How often should you brush? Once or twice daily is enough for most women. Over-brushing stimulates oil production and can cause breakage. If you have curly hair, skip brushing when dry—it creates frizz and disrupts curl pattern. Instead, detangle in the shower with conditioner and a wide-tooth comb. Straight or wavy hair benefits from gentle brushing to distribute oils and remove shed hairs. The goal is detangling and smoothing, not aggressive scrubbing of the scalp.
Reclaim Your Hair’s Health
Damaged hair doesn’t happen overnight, and fixing it takes time and patience. The methods outlined above work together to rebuild strength, restore moisture, and protect against future damage. You don’t need to implement every strategy at once. Start with one or two changes that address your specific concerns, then add more as you see results.
Consistency matters more than perfection. Using a deep conditioning mask once won’t transform your hair, but regular treatments over weeks and months will. The same applies to heat protection, gentle brushing, and all the other techniques discussed. Small daily choices add up to significant improvements in hair health and appearance. Your hair can recover—it just needs the right care and enough time to repair itself.
Frequently Asked Questions
Q: How long does it take to repair damaged hair?
A: The timeline varies based on damage severity and the methods you use. Minor damage might improve in 2-3 weeks with consistent care. Severely damaged hair can take 2-3 months or longer to show significant improvement. Hair grows about half an inch per month, so growing out damaged sections while maintaining healthy new growth is part of the process.
Q: Can I repair split ends without cutting them?
A: No, split ends cannot be permanently repaired. Products can temporarily seal them and make them less visible, but the damage remains. Once hair splits, the only real solution is trimming off the damaged portion. Regular trims prevent splits from traveling up the hair shaft.
Q: Should I use protein treatments or moisture treatments for damaged hair?
A: Most damaged hair needs both, but not at the same time. Protein treatments rebuild hair structure and work best for hair damaged by chemicals or heat. Moisture treatments add hydration and suit dry, brittle hair. Alternate between the two based on your hair’s response. Too much protein makes hair stiff; too much moisture makes it limp.
Q: Is it better to air dry or blow dry damaged hair?
A: Air drying is gentler because it doesn’t expose hair to heat. However, wet hair is fragile, so leaving it wet for long periods can also cause damage from friction and stretching. If you blow dry, use the lowest heat setting and a heat protectant. Keep the dryer moving and hold it at least six inches from your hair.
Q: How often should I wash damaged hair?
A: Washing too frequently strips natural oils that protect and moisturize hair. Most women with damaged hair benefit from washing 2-3 times per week. Use dry shampoo between washes if needed. If your scalp gets oily quickly, focus shampoo on roots only and use conditioner from mid-length to ends.
Q: Do natural oils work as well as commercial hair treatments?
A: Natural oils provide excellent moisture and protection, but they don’t address all types of damage. They work well for dry, brittle hair but won’t rebuild broken bonds the way protein treatments can. Use oils as part of a complete routine that includes targeted treatments for your specific damage type.
Q: Can I color my hair if it’s already damaged?
A: You can, but proceed carefully. Choose demi-permanent or semi-permanent color instead of permanent formulas. Use a bond-protecting treatment during coloring. Go to a professional colorist who can assess your hair’s condition and minimize damage. Wait until your hair is in better condition before making drastic color changes like bleaching.
Q: Why does my hair feel worse after using protein treatments?
A: Too much protein makes hair stiff, brittle, and prone to breakage. This happens when you use protein treatments too frequently or if your hair doesn’t actually need protein. Balance protein with moisture treatments. If your hair feels hard after protein, follow up with a deep conditioning mask and reduce protein treatment frequency.
Q: Are expensive salon products worth the money for damaged hair?
A: Professional products often contain higher concentrations of active ingredients and better formulations than drugstore options. However, some affordable products work quite well. Read ingredients lists and reviews. The most important factor is using products consistently and choosing formulas appropriate for your specific type of damage.
Q: Will my hair ever feel completely normal again after severe damage?
A: Severely damaged sections may never fully recover because hair is made of dead cells that can’t regenerate. However, you can significantly improve the appearance and feel of damaged hair with proper care. As healthy new hair grows in and you trim damaged ends, your overall hair quality will improve substantially over time.