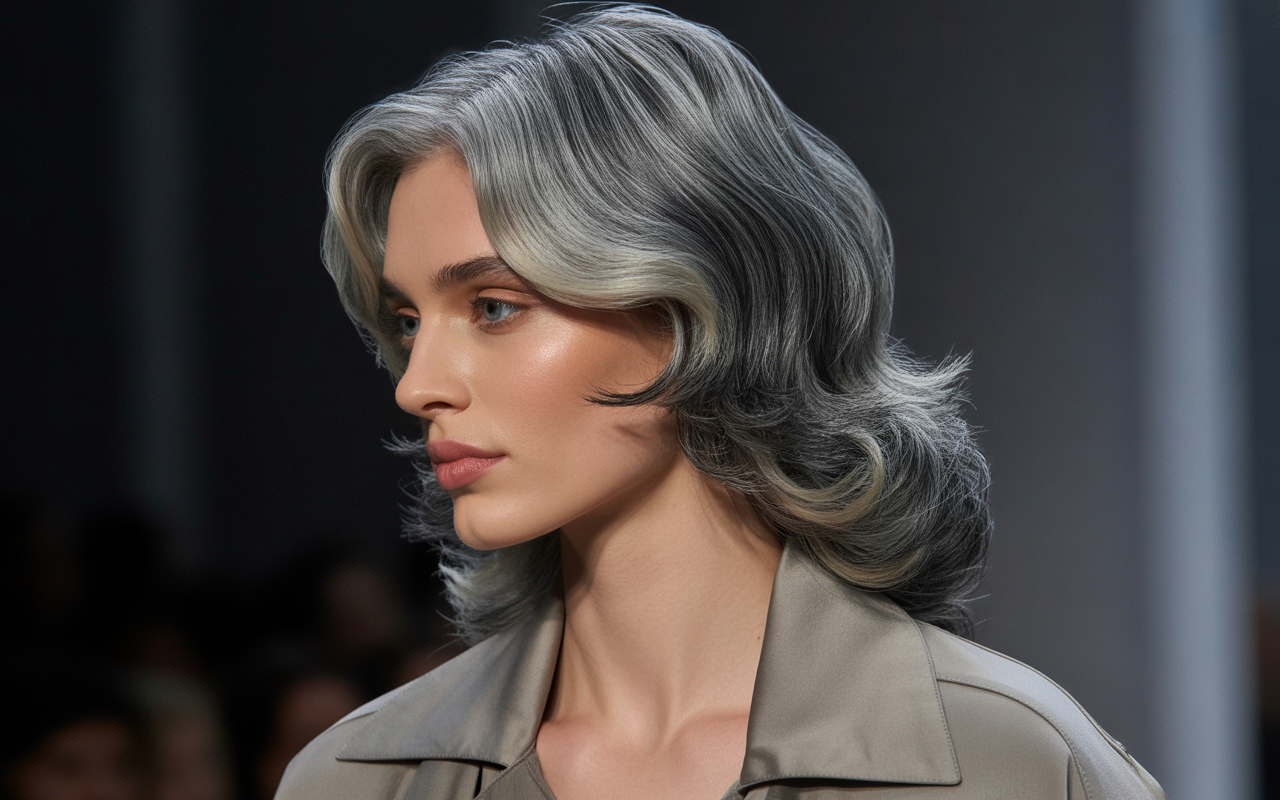
Gray hair doesn’t have to mean choosing between full coverage or letting silver strands take over. Many women find themselves stuck in a cycle of frequent root touch-ups that leave harsh lines of demarcation after just a few weeks. These stark contrasts draw attention to regrowth and make grays more visible, not less. The solution lies in strategic color placement rather than solid dye application.
Highlights and lowlights work differently than traditional coloring. Instead of covering every strand, these techniques create dimension that allows gray to blend naturally with your overall color. The scattered light and dark pieces confuse the eye, making individual silver strands disappear into the overall pattern. This approach extends time between salon visits from four weeks to sometimes three months or more.
The nine professional methods below transform how gray appears in your hair. Each technique offers different benefits depending on your percentage of gray, natural base color, and how much maintenance you want to handle. Some work best for minimal silver scattered throughout, while others handle significant coverage needs. The right choice depends on your specific situation and desired end result.
- Strategic Placement of Face-Framing Highlights
- Lowlights for Dimensional Depth
- Balayage Technique for Natural Gray Blending
- Root Smudging Method
- Foilayage for Precision Coverage
- Babylights for Subtle Gray Camouflage
- Color Melting Technique
- Reverse Balayage Approach
- Dual-Tonal Highlighting Strategy
- Flawless Results Through Smart Selection
- Frequently Asked Questions
Strategic Placement of Face-Framing Highlights
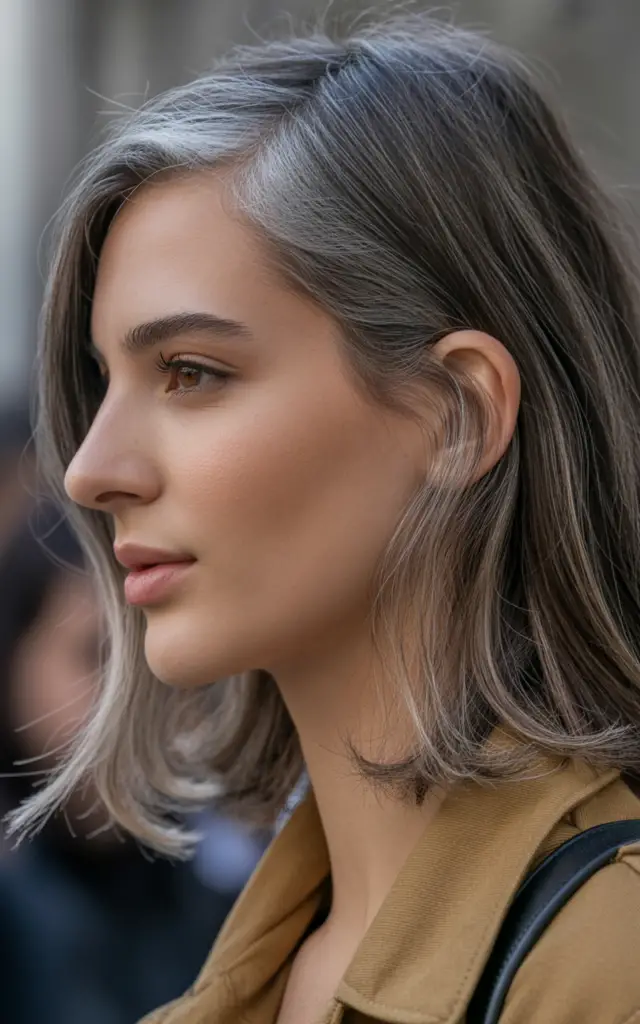
Your face draws attention first, which makes this area critical for gray coverage strategy. Highlights placed around the face work as camouflage for scattered silver strands in this high-visibility zone. The lightened pieces catch the eye before grays do, creating an optical illusion that softens their appearance.
Placement Matters More Than Color
A colorist who understands this technique will section out strands closest to your hairline and around your cheekbones. These pieces get lightened to create ribbons of brightness that frame your features. The pattern should feel random rather than uniform, mimicking how sun naturally lightens hair. Foils or balayage application both work, but the positioning stays consistent.
The magic happens in the contrast pattern. When you have both highlighted sections and natural base color near your face, any gray growing in reads as part of the highlight rather than regrowth. Your roots show a mix of three tones instead of a hard two-tone line.
How It Handles Different Gray Percentages
Women with under 30% gray see the best results with this method alone. Those darker base strands still dominate, while highlights and grays create texture together. Beyond that percentage, you’ll want to combine face-framing with additional techniques. The front sections still benefit from strategic lightening even when you need more comprehensive coverage elsewhere.
Maintenance stays reasonable at eight to ten weeks between sessions. Growth appears gradual since the highlighted sections already create a varied color pattern at the root. You can extend this further with toning glosses between full appointments.
Choose cool-toned highlights if your gray appears silver-white. Warm-toned pieces work better when your silver has yellow undertones. Your colorist should match the highlight tone to how your natural gray presents, not fight against it. This creates the most believable blend as everything grows out together.
Lowlights for Dimensional Depth
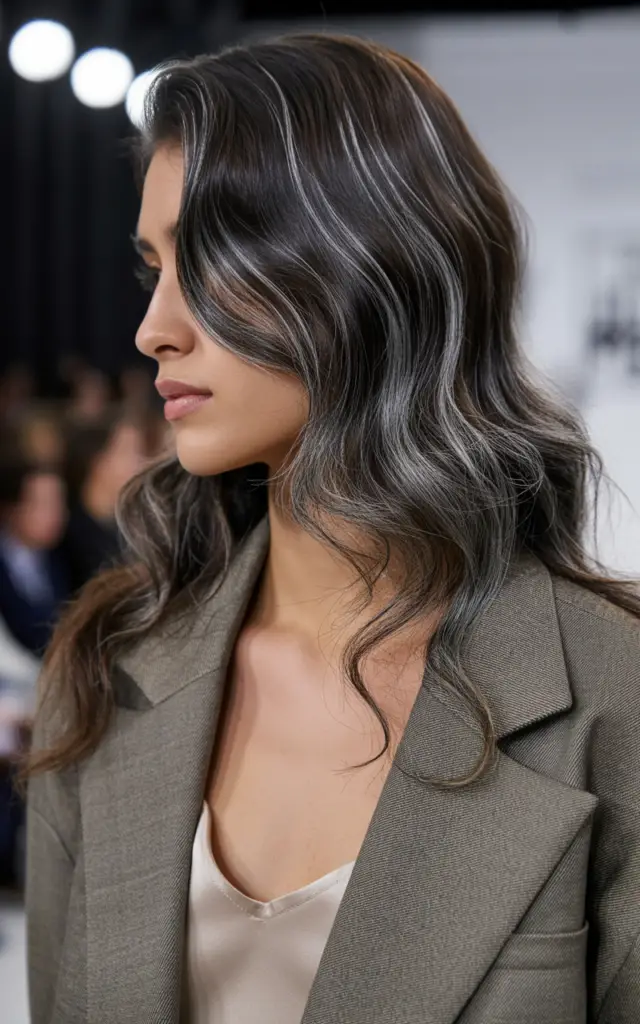
Darker pieces strategically woven through your hair create shadows that hide gray instead of trying to match it. This technique sounds counterintuitive but works brilliantly for women with naturally dark brown or black hair. The lowlights add richness that makes scattered silver look intentional rather than accidental.
Why Darker Works for Coverage
Gray hair lacks pigment completely, making it lighter than your colored strands. Adding lowlights creates multiple dark tones throughout, so when gray grows in, it appears as another dimension rather than stark regrowth. Your eye registers variety instead of noticing individual silver strands.
The color used typically sits one or two shades deeper than your natural base. Any more contrast becomes too heavy and obvious. Your colorist applies these through fine weaving in foils or hand-painting for a softer finish. The goal stays consistent: create depth that absorbs the appearance of gray into the overall pattern.
Best Applications by Hair Color
Brunettes with 20-50% gray see dramatic results. The darker ribbons restore richness lost as hair grays while making remaining silver strands less noticeable. Redheads can use copper or auburn lowlights to maintain warmth and disguise white hairs. Black hair presents challenges since going darker offers limited options, but rich espresso tones still add useful dimension.
Processing time runs shorter than highlights since you’re depositing color rather than lifting. This means less damage overall. Touch-ups can wait ten to twelve weeks because the grow-out blends naturally with your darker base color showing through.
Key benefits of lowlights include:
Fights Brassiness: Gray hair often develops yellow tones. Darker lowlights neutralize this warmth.
Adds Thickness Illusion: Multiple dark tones create depth that makes fine hair appear fuller.
Preserves Natural Look: Hand-painted lowlights mimic natural shadow patterns in thick hair.
You can combine lowlights with highlights for maximum gray concealment. The interplay between light and dark pieces creates such variety that silver becomes part of the color story rather than something you’re fighting. This combination approach handles even 70% gray when done skillfully.
Balayage Technique for Natural Gray Blending
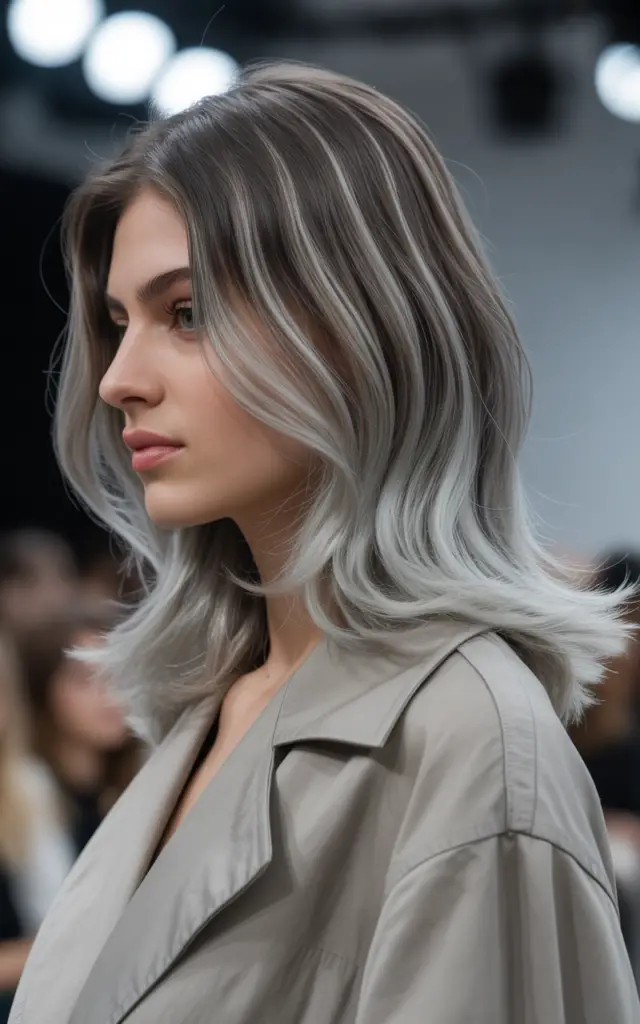
Hand-painted color swept through mid-lengths and ends creates the softest transition from roots to tips. Balayage avoids the uniform pattern of foils, instead building a custom placement that works with your specific gray distribution. The freehand application allows your colorist to skip areas without gray and concentrate color where you need it most.
How Application Differs From Foils
Your stylist sections hair then paints lightener or color starting several inches from the scalp. The sweeping motion creates gradual transitions rather than distinct lines. This matters significantly for gray coverage because your roots show a natural mix of base color, gray, and the beginning of painted sections.
The technique works in reverse too. Darker color can be painted onto roots and melted down into lighter ends for women embracing gray at the crown while keeping brightness below. This reverse application method has gained popularity for those transitioning to natural silver.
Balayage on gray hair should start closer to the root than typical applications. Traditional placement begins four or five inches down, but for coverage needs, starting two inches from the scalp creates better blending. Your colorist feathers the product up toward roots for the softest possible gradient.
Maintenance Timeline and Upkeep
Expect twelve to fourteen weeks between balayage sessions. The hand-painted gradient means regrowth appears as part of the designed color melt. Between appointments, your roots will need separate touch-ups every six to eight weeks if you want gray fully covered there.
Some women skip root coverage entirely and rely solely on balayage to diffuse their gray. This works when silver is scattered rather than concentrated at the crown. The painted sections draw the eye while gray blends into the overall dimension.
Choose balayage over foils if you want maximum grow-out time or if your gray appears in patches rather than evenly distributed. The customizable placement addresses your specific pattern. Skip this method if you need bright, uniform highlights throughout or have very dark hair requiring significant lift.
Root Smudging Method
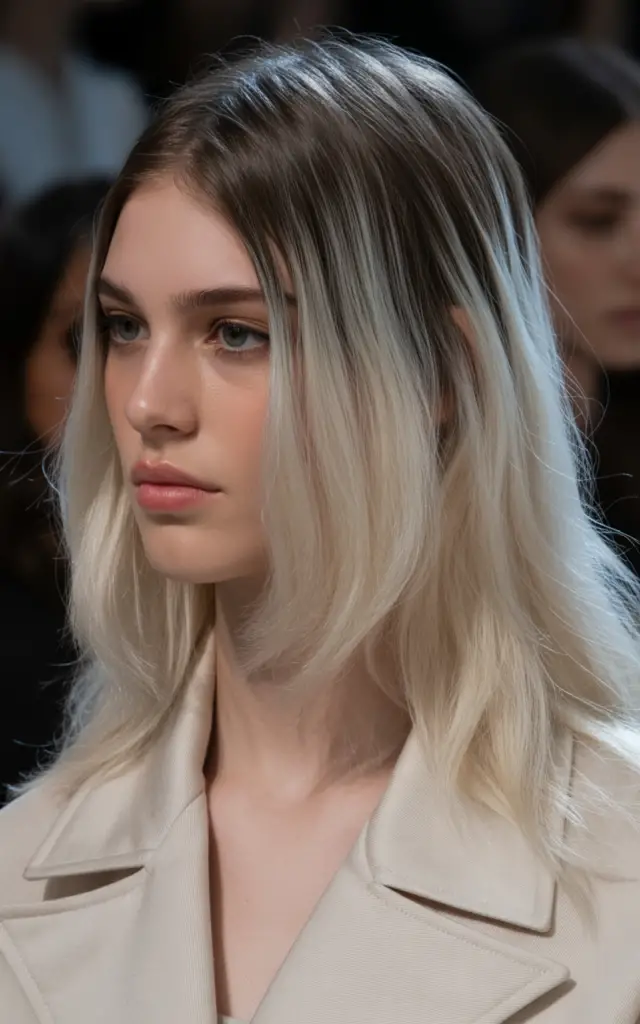
A smudge applies semi-permanent color at your roots to blur the line between base color and highlighted hair. This creates a shadow effect that makes regrowth appear gradual rather than sudden. For gray coverage, smudging serves two purposes: it deposits color onto silver strands while creating a buffer zone between natural roots and lighter ends.
The Smudge Application Process
After highlighting, your colorist mixes a demi-permanent shade slightly lighter than your natural base. This gets brushed onto the first inch or two of your roots, then pulled down to meet the highlights. The result shows depth at the scalp that fades into brightness below.
The smudging happens on damp hair after your highlights have been rinsed. Your colorist applies the formula quickly because processing time runs short, typically 10-15 minutes maximum. The shade choice matters enormously. Too dark and you create a harsh line. Too light and gray shows through immediately.
Gray Coverage Specifics
For women with salt-and-pepper regrowth, root smudging can extend time between full color services dramatically. The smudge color deposits onto gray hairs at the root, giving them tone that better matches your base. This prevents the stark white line that typically appears after four weeks.
The technique works particularly well for blondes who want to avoid brassy roots. A cool-toned smudge neutralizes yellow undertones in gray while creating smooth transitions to highlighted pieces. Brunettes benefit from added richness that makes scattered grays disappear into the overall depth.
Results last six to eight weeks before you notice regrowth again. The faded smudge still provides some coverage even as it wears, unlike permanent color that creates harsh lines. Many women come in for smudge-only appointments between full highlighting sessions, making this a budget-friendly maintenance option.
You should choose this method if you have existing highlights and want to reduce how often you need root touch-ups. It pairs beautifully with balayage or foils. Skip smudging if you prefer very light, bright roots or if you’re trying to match gray coverage to darker lowlights.
Foilayage for Precision Coverage
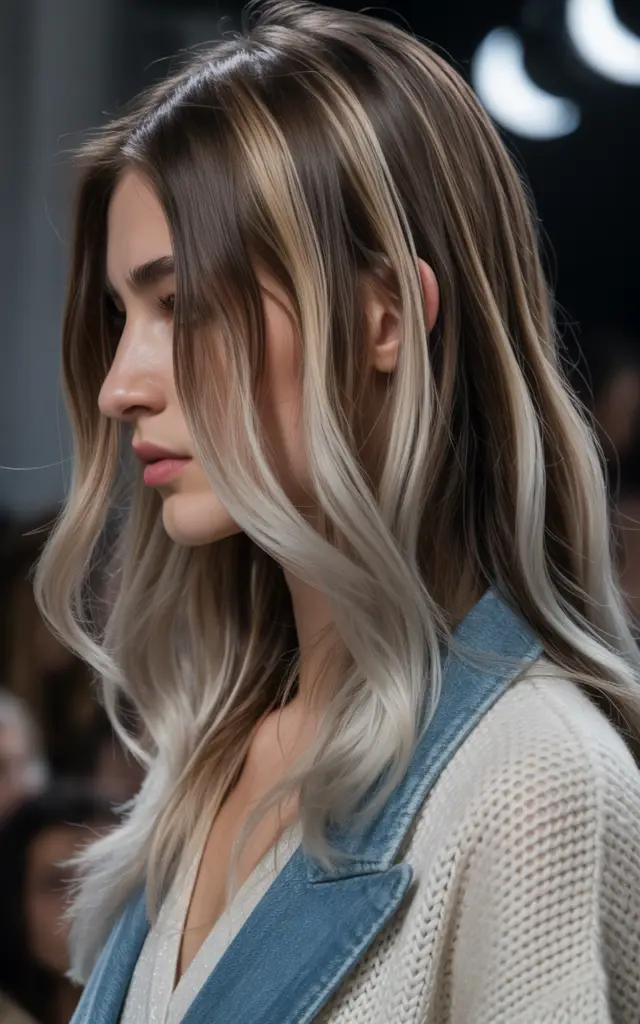
This hybrid combines balayage’s hand-painted application with the heat processing of traditional foils. The technique delivers brighter results than open-air balayage while maintaining the natural, graduated effect. For gray coverage, foilayage offers control over which sections lift enough to match surrounding silver.
Combining Two Techniques
Your stylist paints color or lightener onto selected sections using balayage technique. Instead of leaving these to process in open air, each painted section gets wrapped in foil. The foil traps heat, intensifying the lift and allowing the product to process more quickly and brightly.
This matters for gray because some silver strands resist color stubbornly. The extra heat helps lift these resistant areas more effectively than open-air processing. The hand-painted application still provides custom placement where you need it most.
Sections are often thinner than traditional foil highlighting. Your colorist takes smaller weaves to create more natural dimension. The painted then foiled approach means you get brightness near the root without the stripy look of classic highlights.
Ideal Candidates
Women with dark hair and moderate to heavy gray see excellent results. The foil processing provides enough lift to lighten darker bases significantly. Balayage alone might not achieve sufficient brightness on very dark hair, but adding foils bridges that gap.
The technique also works beautifully for creating face-framing brightness. Those front sections get painted then foiled for maximum impact while the rest of your hair receives subtler treatment. This combination addresses gray where you see it most while keeping processing time reasonable.
Maintenance falls between balayage and traditional foils, around ten to twelve weeks. The hand-painted graduation means regrowth looks intentional, but the brightness near the root means gray shows slightly faster than with standard balayage. Budget more time at the salon since foilayage combines the application of balayage with the processing needs of foiling.
Choose this method when balayage alone won’t give you enough lift or when you need brighter results that still look natural. Skip it if you want the absolute lowest maintenance option or if your hair is already quite light.
Babylights for Subtle Gray Camouflage
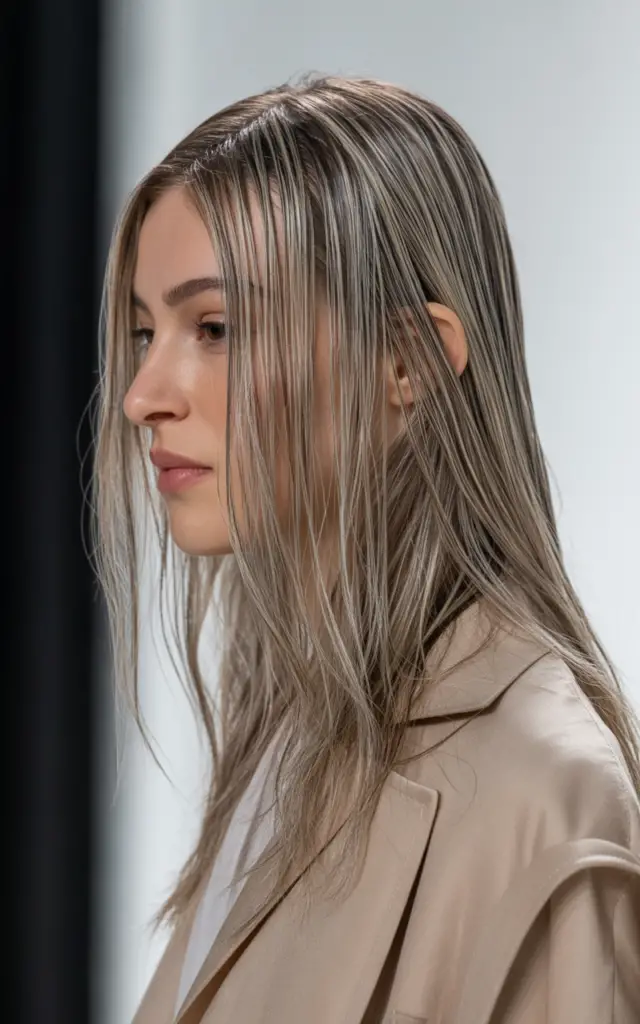
Micro-fine highlights scattered throughout the top layers create the most delicate coverage possible. These tiny sections mimic natural sun-kissed pieces you might have had in childhood, hence the name. For gray coverage, babylights work best for women with minimal silver who want to prevent it from becoming noticeable.
Your colorist takes sections no thicker than a toothpick, weaving out extremely fine pieces. These get lightened and processed in foils or on a board. The application focuses on areas where you part your hair and the crown where gray typically appears first. The result looks completely natural, as if you’ve spent time in the sun rather than at a salon.
Volume and Placement Strategy
The magic of babylights lies in quantity over size. While each section stays tiny, your stylist places many of them throughout the target area. This creates an almost 3D effect where light and shadow play together. Gray hairs become part of this intricate pattern rather than standing out.
Processing time stays moderate since you’re only lightening fine sections. The delicate application does require skill and patience though. Expect to spend more time in the chair than with chunkier highlighting methods. The results justify the investment for many women.
Gray Percentage Limitations
This technique shines for women under 20% gray. Beyond that percentage, you need more substantial coverage methods. Babylights can supplement other techniques beautifully though, adding surface dimension after you’ve addressed coverage with lowlights or balayage.
The scattered micro-highlights also help transition women into gray hair gracefully. As your natural silver increases, the babylights make it look intentional rather than like neglected roots. You can gradually reduce the amount of babylighting over time while your natural gray takes over.
Maintenance needs stay low at twelve to sixteen weeks. The fine sections and strategic placement mean regrowth appears as natural variation. Some women alternate between babylights sessions and gloss treatments to extend time further. Choose this method for the most natural-looking result when you have minimal gray. Pick something more substantial if coverage is your primary concern rather than subtle enhancement.
Color Melting Technique
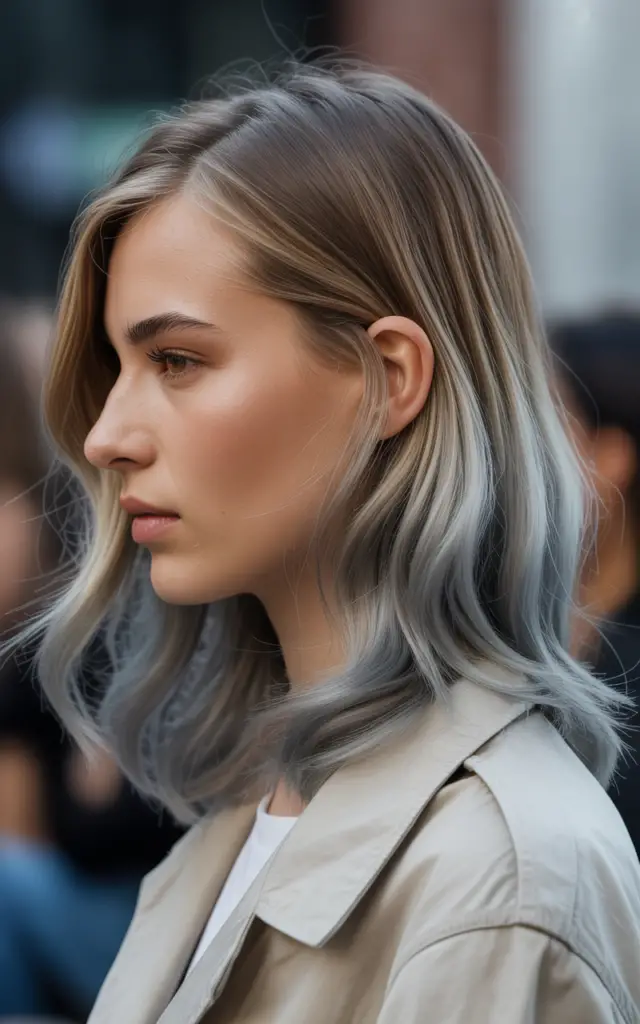
Multiple tones blended seamlessly from roots to ends create a gradient that makes gray disappear into the overall color flow. This technique goes beyond basic root smudging by using two or three shades that melt together. The transitions become so soft that new gray growth simply adds to the multidimensional effect rather than creating obvious regrowth.
Think of color melting as painting with multiple brushes at once. Your colorist applies different formulas to different zones. Root area receives one shade, mid-lengths another, and ends perhaps a third. These get blended where they meet to create invisible transitions. The melted effect means you never see a line of demarcation as hair grows.
Choosing Your Color Story
The shades selected should stay within two levels of each other. Going from very dark roots to platinum ends creates too much contrast and defeats the purpose. For gray coverage, your base color typically anchors the darkest tone while lighter shades progress toward the ends.
Women with significant gray at the crown might choose a medium tone there that melts into both the darker base color below and any remaining natural gray above. This three-way melt makes the silver look intentional. The mid-tone acts as a bridge that connects everything together.
Processing happens on damp, freshly washed hair. Your stylist applies each formula to its designated zone then uses a brush or fingers to blend the meeting points. Some colorists use a technique called “feathering” where they paint the lighter shade upward and the darker shade downward until they merge. The key stays in making those transitions completely invisible.
What makes color melting special:
Wet Application: Working on damp hair helps colors blend more smoothly.
Multiple Formulas: Using 2-3 shades creates realistic dimension.
No Harsh Lines: The technique eliminates visible color breaks.
Results last eight to twelve weeks depending on the contrast level. The melted gradient grows out looking like you planned it that way. Between appointments, a toning gloss can refresh the shades without requiring full reapplication. Choose color melting when you want dimensional color that handles gray while looking completely natural. Skip it if you prefer bold, high-contrast looks or if you want the absolute lowest maintenance approach.
Reverse Balayage Approach
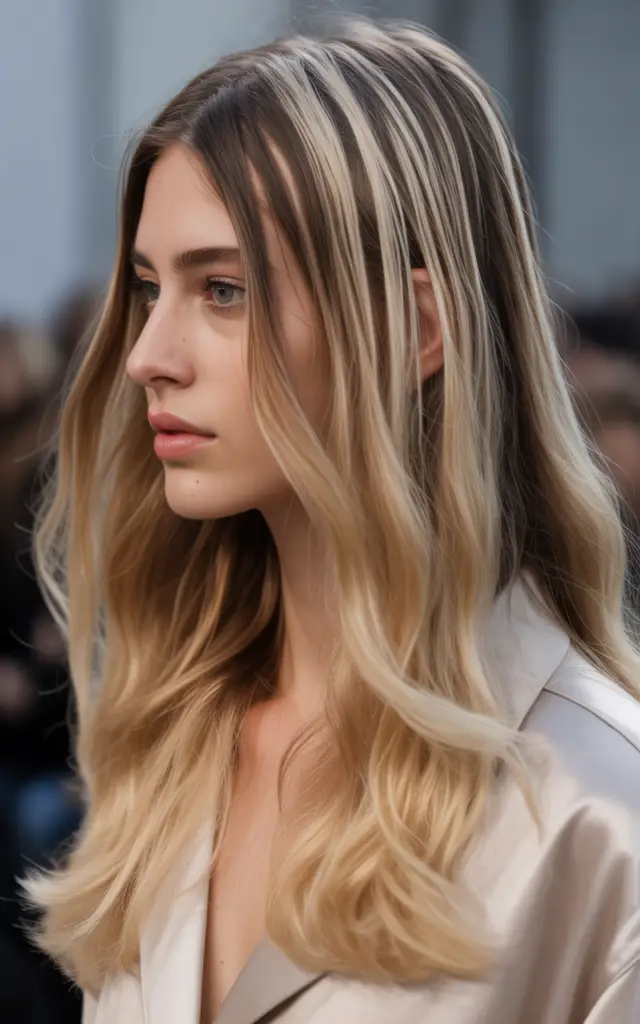
Instead of lightening pieces, reverse balayage darkens them. This technique works brilliantly for women with existing highlights who are developing more gray. The darker pieces get strategically painted to cover gray while maintaining the dimensional effect of the original highlights.
Your stylist paints darker semi-permanent color onto gray areas, particularly at the roots and crown. The application mirrors balayage technique but in reverse – adding depth instead of brightness. This painted color gets blended down into your existing lighter pieces to create smooth transitions.
Why Darkening Helps
Gray hair mixed with old highlights often looks washed out or brassy. Adding strategic darkness restores richness and creates contrast that makes remaining highlights pop. The dark pieces cover gray while the light pieces stay bright, giving you multidimensional color that doesn’t require constant maintenance.
The reverse application works particularly well for blondes watching their natural base darken with age and gray. Instead of fighting to keep everything light, you add controlled darkness that looks intentional. The result appears more natural than trying to lighten every strand.
Application Details
Processing time stays short since you’re depositing color, not lifting. Most reverse balayage applications complete in under two hours from start to finish. Your colorist paints the darker formula onto dry hair, focusing on areas with the most gray. The product gets worked through and blended before processing.
Some stylists combine reverse balayage with traditional highlighting in a single session. They’ll paint dark pieces to cover gray, then add fresh bright pieces to maintain overall dimension. This comprehensive approach handles both coverage and brightness in one appointment.
Maintenance extends to ten to fourteen weeks. The painted dark sections grow out naturally since they blend with your base color. Touch-ups focus on new gray growth rather than needing to redo the entire head. Choose reverse balayage if you have existing highlights and increasing gray. It works best when you want to add depth while keeping some brightness. Skip this method if you prefer all-over light color or if you’re just starting to develop gray.
Dual-Tonal Highlighting Strategy
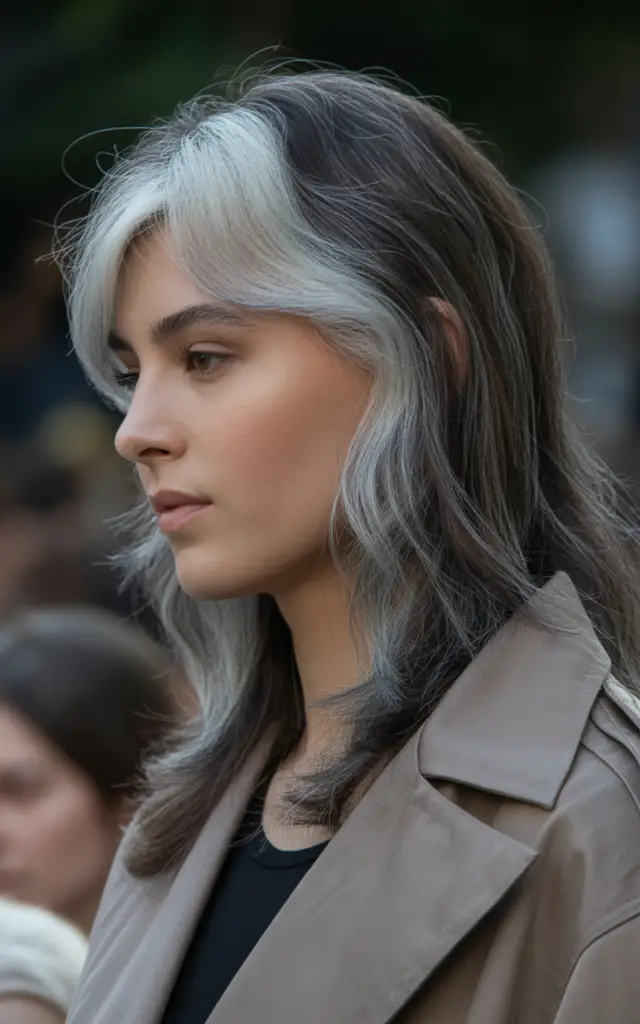
Using both warm and cool-toned highlights simultaneously creates the most sophisticated gray camouflage possible. The temperature contrast confuses the eye, making it skip over individual gray strands. This advanced technique requires a skilled colorist who understands undertones and how they interact.
The strategy involves placing cool-toned pieces where your gray appears most heavily. These match the silver’s natural temperature and blend with it rather than fighting against it. Warm-toned highlights go in areas with less gray to add brightness and dimension. The interplay between temperatures creates interest that holds attention away from regrowth.
Temperature Theory in Practice
Cool highlights use ash or platinum bases with no warmth. These sit perfectly alongside natural gray without creating color clashes. Warm highlights contain gold, honey, or caramel tones that add richness to your base color. Together, the temperatures create a complex pattern that gray simply melts into.
Your colorist maps your gray pattern first. Crown areas with heavy concentration receive cool pieces. Underneath sections and sides with minimal gray get warm highlights. Some stylists alternate warm and cool foils in areas with moderate gray to create maximum blending effect.
The technique requires using two or three different formulas during one highlighting session. Processing times may vary between the warm and cool pieces, adding complexity to the service. The results justify the extra effort for women seeking premium coverage that looks expensive rather than obviously colored.
Maintenance and Results
Touch-ups every eight to ten weeks keep the dual-tonal effect fresh. Between services, you might need a toner to maintain the cool highlights since they tend to warm up over time. The warm pieces stay more stable but can develop brassiness if your water has high mineral content.
This method works for all base colors but excels on medium brown hair where both warm and cool highlights show distinct contrast. Very dark hair may struggle to achieve enough lift for cool platinum pieces. Very light hair might not show enough difference between the two temperatures.
Choose dual-tonal highlighting when you want the most sophisticated gray coverage possible and you’re willing to invest in regular maintenance. Skip it if you prefer simple, easy-to-explain color or if finding a skilled colorist in your area proves difficult.
Flawless Results Through Smart Selection
Mastering gray coverage comes down to matching technique to your specific needs. Your percentage of gray, natural base color, and maintenance tolerance all factor into which method serves you best. Some women benefit from combining multiple techniques in a single session for comprehensive coverage that still looks dimensional.
The professional approaches outlined above move beyond basic single-process color that creates harsh lines after a few weeks. Strategic highlight and lowlight placement creates patterns that gray naturally blends into as it grows. This shift in thinking transforms gray from a problem to simply another element in your multidimensional color story.
Frequently Asked Questions
Q: How long do highlights and lowlights last for gray coverage?
A: Most techniques provide 8-12 weeks of good coverage before you need a touch-up. Babylights and balayage can extend to 12-16 weeks since they create softer regrowth lines. Root smudging alone lasts 6-8 weeks but costs less to refresh.
Q: Will highlighting damage my gray hair more than regular dye?
A: Highlighting typically causes less damage than full coverage color when done correctly. You’re only processing selected sections rather than your entire head. Gray hair is more porous though, so proper bond-building treatments during and after coloring protect the integrity.
Q: Can I do these techniques at home?
A: Root smudging and simple balayage can work as DIY projects if you have experience. Foilayage, dual-tonal highlighting, and color melting require professional skill for proper placement and blending. Attempting complex techniques at home often results in uneven coverage or unwanted brassiness.
Q: Which method works best for 50% or more gray?
A: Combining lowlights with highlights or using color melting provides the most comprehensive coverage for heavy gray. Single techniques may not create enough dimension at that percentage. Reverse balayage also works well if you have existing lighter pieces to build from.
Q: How do I prevent highlights from turning brassy on gray hair?
A: Gray hair lacks natural pigment and grabs warm tones easily. Use purple or blue-toned products between appointments to neutralize brass. Ask your colorist for cool-toned formulas rather than warm golds. Quality toners applied during your service also prevent initial brassiness.
Q: Does gray hair need special care after highlighting?
A: Yes. Gray hair is naturally coarser and more porous than pigmented hair. Use hydrating masks weekly and sulfate-free shampoos to maintain moisture. Bond-building treatments help strengthen processed gray strands. Minimize heat styling to prevent additional dryness.
Q: Can I transition to natural gray while using these techniques?
A: Absolutely. Many women use babylights or reverse balayage to gradually blend into their natural silver. The techniques create such soft transitions that growing out becomes painless. Reduce the amount of coverage with each appointment while letting natural gray take over.
Q: How much do these techniques cost compared to regular root touch-ups?
A: Initial sessions cost more, typically $150-400 depending on your location and hair length. Regular root touch-ups run $60-100 every 4-6 weeks. Over a year, the highlighting approaches often cost less due to longer intervals between services. The reduced frequency also saves significant time.
Q: Will these methods work on very dark or black hair?
A: Dark hair can use lowlights, reverse balayage, and root smudging successfully. Bright highlights require significant lifting which risks more damage. Foilayage provides controlled lift for dark bases when you need lighter pieces. Very dark hair benefits most from adding dimension through darker tones rather than bright highlights.
Q: How do I choose between these methods?
A: Schedule a consultation with an experienced colorist who can assess your gray percentage, base color, and hair health. Bring photos of looks you like and discuss your maintenance tolerance honestly. A skilled professional will recommend the approach or combination that serves your specific situation best.

