The long pixie cut has become one of the most requested styles in salons across the country, striking the perfect balance between short and manageable. This versatile haircut offers the edginess of a pixie with enough length to style in multiple ways, making it an ideal choice for women who want a dramatic change without going ultra-short. Professional cuts can cost anywhere from $50 to $150, depending on your location and stylist, which is why many women are turning to DIY solutions.
Learning to cut your own hair might sound intimidating at first, but with the right guidance and tools, creating a beautiful long pixie at home is entirely achievable. The key lies in understanding the basic structure of this haircut and working methodically through each section. Unlike shorter pixie cuts that require precise clipper work, the longer variation gives you more room for minor adjustments and corrections as you go.
Here’s everything from determining if this style suits your face shape to mastering the cutting techniques professionals use. You’ll learn the tools that make the biggest difference, how to avoid common pitfalls, and ways to style your new look. Whether you’re trimming an existing pixie or transforming longer hair into this chic style, these step-by-step instructions will help you achieve salon-worthy results from your own bathroom.
What Defines a Long Pixie and Is It Right for You?
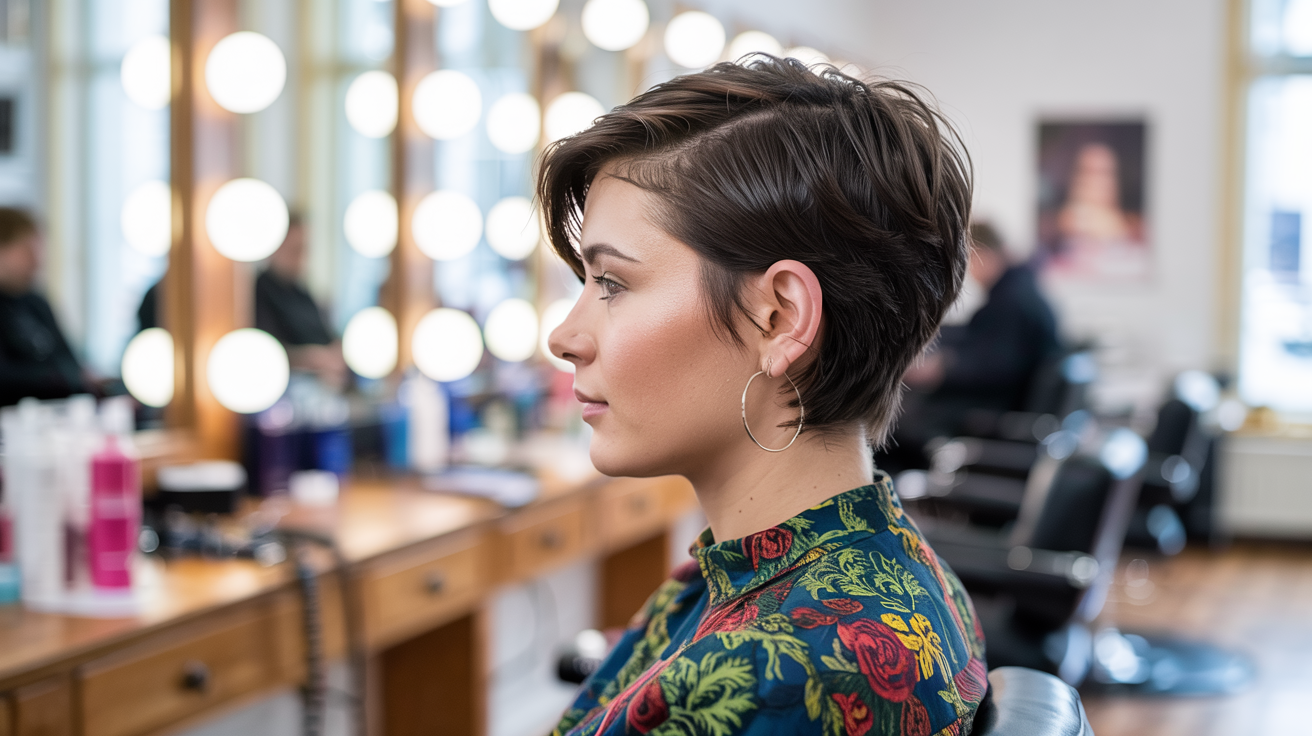
A long pixie typically ranges from 3 to 6 inches in length on top, with shorter sides and back that create the signature shape. This length variation sets it apart from traditional pixie cuts, offering more versatility in styling while maintaining that distinctive short-hair silhouette. The beauty of this particular style lies in its adaptability – you can sweep it to the side, spike it up, or smooth it down depending on your mood and occasion.
Understanding the long pixie length
The top section of a long pixie usually measures between your eyebrows and the tip of your nose when pulled straight down. This extra length compared to a classic pixie provides coverage and movement, making it less severe and more feminine. The sides typically fall somewhere between the middle of your ear and your earlobes, while the back tapers from the occipital bone down to the nape of your neck.
Many women find this length particularly flattering because it frames the face without overwhelming delicate features. The graduated layers create dimension and movement, preventing the flat, helmet-like appearance that can happen with one-length cuts. This style also transitions beautifully as it grows out, giving you more time between trims.
Face shapes that work best
Oval faces can wear virtually any variation of the long pixie, from sleek and sophisticated to tousled and textured. The balanced proportions of an oval face shape allow for experimentation with different lengths and styling options without throwing off facial harmony. Square faces benefit from longer pieces around the temples and crown, which soften angular jawlines and create a more rounded appearance.
Heart-shaped faces look stunning with volume concentrated at the crown and longer wispy pieces around the forehead. This approach balances a wider forehead with a narrower chin, creating beautiful proportions. Round faces shine with height at the crown and slightly longer sides that create vertical lines, elongating the face shape naturally.
Hair texture considerations
Fine hair actually works wonderfully with a long pixie because the shorter length creates an illusion of fullness and body. The layered structure prevents thin hair from lying flat against the head, and strategic cutting can maximize whatever natural volume you have. Women with fine hair often report feeling like they have twice as much hair after switching to this style.
Thick hair requires thoughtful thinning and texturizing to prevent the cut from becoming too bulky or triangular. The key is removing weight from the right areas while maintaining the overall shape. Curly and wavy textures can create absolutely gorgeous long pixies, though they require different cutting techniques than straight hair to account for shrinkage and natural movement patterns.
Maintenance expectations
One of the biggest advantages of choosing a long pixie is the relatively low maintenance compared to longer styles. Daily styling typically takes 5-10 minutes with the right products and techniques. However, the cut does require regular trims every 4-6 weeks to maintain its shape, especially around the ears and neckline where growth becomes most noticeable.
The growing-out process is also more manageable than with shorter pixies. Because you’re starting with more length, you can transition into a bob or longer style without going through as many awkward stages. Many women find they can stretch their salon visits to every 6-8 weeks once they master basic maintenance trimming at home.
Your lifestyle plays a significant role in determining if this cut works for you. Active women appreciate how it stays out of their face during workouts, while professionals love its polished appearance with minimal effort. The versatility means you can look put-together for the office with a sleek style, then transform it into something edgier for evening plans.
Essential Tools and Preparation for Your DIY Cut
Success in cutting your own long pixie depends heavily on having the right tools at your disposal. While you might be tempted to grab any scissors from your drawer, investing in proper equipment makes an enormous difference in achieving professional-looking results. The right tools not only ensure cleaner cuts but also protect your hair from damage and make the entire process significantly easier.
Professional scissors vs regular scissors
Hair-cutting scissors feature razor-sharp blades specifically designed to slice through hair cleanly without crushing or bending the hair shaft. Regular household scissors, even sharp ones, tend to push hair away as they cut, resulting in uneven, frayed ends that look unprofessional and can lead to split ends. Professional shears typically cost between $20-50 for a decent starter pair, making them an affordable investment that pays for itself after just one or two home haircuts.
The blade length matters too – 5.5 to 6.5 inches works best for most home cutting projects. Shorter blades offer more control for detail work around the ears and neckline, while longer blades help create smoother lines when cutting larger sections. Some hairdressers recommend starting with a basic pair and upgrading once you become more comfortable with the technique.
Consider purchasing thinning shears as well, especially if you have thick hair. These specialized scissors have teeth on one or both blades that remove bulk without changing the overall length. They’re invaluable for creating texture and preventing that triangular, helmet-like shape that can occur with thick hair in shorter styles.
Additional tools you’ll need
Beyond scissors, several other tools will make your cutting experience more successful. A fine-tooth comb helps create precise partings and holds hair in place while cutting. A rattail comb, with its pointed end, excels at creating clean sections and detail work. Wide-tooth combs work better for detangling and checking overall shape.
Multiple mirrors prove essential for seeing all angles of your head. If you don’t have a three-way mirror, position a hand mirror to view the back and sides while facing your bathroom mirror. Some women find success using their phone’s camera in selfie mode for checking hard-to-see areas.
Here are additional helpful tools for your home salon setup:
Spray Bottle: Keeps hair damp throughout the cutting process for more control
Hair Clips: Section hair away cleanly while working on specific areas
Cape or Old Towel: Protects clothing and makes cleanup easier
Good Lighting: Natural light or bright LED bulbs help you see exactly what you’re cutting
Hair Dryer: Allows you to check your work as you go by drying and styling sections
Setting up your cutting station
Choose a well-lit area with easy-to-clean flooring – bathroom tiles or kitchen linoleum work better than carpet. Position yourself where you can easily see multiple angles in your mirrors without straining. Many women find standing gives better control than sitting, though a adjustable-height stool can help reduce fatigue during longer cutting sessions.
Lay out all tools within easy reach before starting. Having to search for clips or scissors mid-cut disrupts your flow and can lead to mistakes. Keep a towel handy for wiping your hands and tools, as damp hair can make everything slippery.
Preparing your hair properly
Start with freshly washed, conditioned hair for the most accurate cut. Product buildup or natural oils can weigh hair down, giving a false impression of length and texture. Skip heavy conditioners or masks that might make hair too slippery to control effectively. A lightweight conditioner provides just enough slip without compromising your grip.
Towel-dry hair until it’s damp but not dripping. Hair shrinks as it dries, particularly curly and wavy textures, so cutting soaking wet hair often results in a shorter final length than intended. Damp hair gives you better control while still allowing you to see the natural fall and movement patterns.
Comb through thoroughly to remove all tangles, paying special attention to the crown and nape areas where knots tend to hide. Any tangles will create uneven tension while cutting, leading to irregular lengths. Take time with this step – smooth, evenly distributed hair forms the foundation for an even cut.
For those with curly or wavy hair, consider your natural texture when preparing. Some prefer cutting hair in its natural state (dry) to see exactly how it will look styled. Others find damp hair easier to control. Experiment with both methods on small sections first to determine which gives you better results.
The temperature of your space matters too. Avoid cutting immediately after a hot shower when mirrors fog up and humidity affects hair behavior. Give your bathroom time to air out, ensuring clear visibility and normal hair texture throughout the cutting process.
Step-by-Step Cutting Technique
Sectioning your hair correctly
Creating clean sections forms the foundation of a successful long pixie cut. Begin by parting your hair exactly how you typically wear it – whether that’s a side part, middle part, or no defined part at all. This ensures your cut works with your natural styling preferences rather than against them.
Next, create a horseshoe section from temple to temple, going over the crown of your head. This separates the top portion that will remain longest from the sides and back that need graduating. Secure this top section with clips, twisting it up and away from the areas you’ll cut first. The cleaner your sections, the more professional your results will appear.
Divide the remaining hair into horizontal sections starting at the nape. Each section should be about an inch wide – thin enough to see what you’re doing but thick enough to work efficiently. Working in systematic sections prevents the common mistake of randomly snipping here and there, which creates an uneven, choppy appearance.
Starting with the back sections
The back of your head requires the most faith since you can’t see it directly, but following a methodical approach ensures even results. Take your bottom section at the nape and comb it straight down. Hold the hair between your fingers at about a 45-degree angle from your head, positioning your fingers at the length you want – typically around the middle of your neck for a long pixie.
Cut straight across using smooth, confident strokes rather than tiny snips. This creates your guide for all subsequent sections. Each new section should be pulled down to meet this guide, ensuring consistent length throughout the back. Remember that hair appears longer when wet, so err on the side of caution with your initial cut.
Working your way up the back of the head, gradually increase the elevation angle of each section. The bottom might be cut at 45 degrees, the middle at 90 degrees, and the top back sections at 135 degrees. This graduation creates the rounded shape characteristic of a well-executed pixie cut rather than a blunt, boxy appearance.
Pay special attention to the area where the back meets the sides. This transition zone often reveals cutting mistakes most obviously. Check your work frequently using your hand mirror, making sure both sides match in length and graduation. Small adjustments here make a significant difference in the overall polish of your cut.
Working on the sides
The sides require careful attention to create that flattering frame around your face. Starting behind your ear, take vertical sections about half an inch wide. Pull each section straight out from your head at a 90-degree angle and cut at a slight angle, shorter near the ear and gradually longer as you move toward your face.
Your guide here comes from connecting the back sections to what will eventually meet the top sections. Think of creating a smooth slope rather than distinct steps. Many women find success by cutting the sides slightly longer than intended initially, then refining the length once they see how everything connects.
The area around your ears demands extra precision. Carefully cut around the ear shape, leaving about a quarter-inch of hair visible below the ear for a softer look. Going too short here creates a masculine appearance, while leaving too much length looks unkempt. Take your time with small snips, checking both sides frequently for symmetry.
For the sections moving toward your face, consider your face shape. Longer pieces near the cheekbones flatter most face shapes, while shorter sides create a more dramatic, edgy look. The beauty of cutting your own hair is customizing these details to your preferences.
Creating the top layers
Now comes the fun part – creating movement and texture in the top sections. Release your horseshoe section and divide it into smaller workable portions. The key to beautiful layers lies in understanding elevation and angle. Higher elevation creates shorter layers and more volume, while lower elevation results in longer, heavier layers.
Take sections parallel to your parting and elevate them to about 90 degrees from your head. Cut at a slight angle, creating layers that are shorter in the back and gradually longer toward the front. This technique builds in natural movement and prevents the dreaded shelf effect where layers appear to sit on top of each other.
For added texture, try point cutting – holding scissors vertically and making small snips into the ends of the hair. This technique creates softer, more natural-looking layers compared to blunt horizontal cuts. Focus especially on the crown area where you want maximum lift and movement.
The front sections deserve special consideration as they frame your face most prominently. Many women prefer keeping these pieces slightly longer, perhaps reaching the cheekbones or even the chin. This length provides styling versatility – you can sweep them to the side, tuck behind ears, or style forward for different looks.
Blending everything together
The difference between a homemade-looking cut and a professional result lies in the blending. Walk around your entire head, lifting sections to check for any harsh lines or disconnected areas. Where you see distinct weight lines, use your scissors to soften the transition by taking small diagonal snips.
Cross-checking is a professional technique that ensures even results. Take sections in the opposite direction from how you cut them – if you cut horizontally, check vertically. Pull these checking sections straight up and look for any pieces that stick out beyond the rest. These longer pieces need trimming to match the surrounding hair.
Thinning shears come in handy during this stage, especially for removing bulk without sacrificing length. Focus on areas that feel heavy or appear triangular. Make gentle snips with thinning shears held at an angle, working from mid-shaft to ends. Never thin too close to the roots, as this creates frizzy regrowth.
The perimeter needs special attention for a polished finish. Run your fingers through the hair around your hairline, feeling for any uneven spots. Clean up the neckline using small snips, creating either a soft, natural finish or a more defined line depending on your preference. The sideburn area also benefits from careful detailing to ensure it blends seamlessly with the rest of the cut.
Common Mistakes and How to Fix Them
Even experienced DIY haircutters encounter challenges when creating a long pixie at home. Understanding these common pitfalls and their solutions helps you avoid frustration and achieve better results. Most mistakes are fixable with patience and the right approach, so don’t panic if something doesn’t look perfect on your first attempt.
Cutting too much at once
The excitement of transforming your look can lead to overzealous cutting, especially during that first snip. Women often underestimate how much shorter hair appears once it dries and styles. Wet hair hangs longer and straighter than dry hair, particularly for those with any natural wave or curl. This optical illusion causes many to cut off far more than intended.
The solution starts with cutting less than you think you need. You can always go shorter, but you can’t glue hair back on. Start by removing just an inch or two, then dry and style that section to see the true length. This approach takes more time but prevents that sinking feeling of realizing you’ve gone too short.
If you’ve already cut too short, focus on styling techniques that add visual length. Using a small round brush to direct hair forward rather than up creates the illusion of longer pieces. Products that add texture and piece-y definition also help, as they prevent hair from shrinking up as much as smooth styles do. Strategic use of bobby pins or small clips can temporarily hold shorter pieces in more flattering positions while they grow.
For extreme cases where the top is significantly shorter than desired, consider adjusting the sides and back to create better proportion. Sometimes shortening these areas helps balance the overall shape. Adding texture through razoring or point cutting can also help shorter pieces blend more naturally with surrounding hair.
Uneven lengths
Discovering one side is longer than the other ranks among the most common home haircutting issues. This usually stems from not maintaining consistent tension while cutting or failing to account for natural growth patterns. Your hair might grow faster on one side, or you may unconsciously hold sections differently with your dominant hand.
Start fixing unevenness by identifying exactly where the discrepancy occurs. Wet your hair and comb it straight down, using clips to mark the shortest point on the longer side. This becomes your new guide length. Work in very small sections, constantly comparing both sides as you trim the longer side to match.
Sometimes what appears uneven is actually a styling issue rather than a cutting problem. Natural cowlicks, growth patterns, or sleeping positions can make properly cut hair look lopsided. Before cutting more, try styling both sides identically, using a blow dryer to direct hair in the same pattern on each side. You might discover the lengths match perfectly once styled correctly.
Poor blending between sections
Visible lines between different sections create that obviously home-cut appearance everyone wants to avoid. These weight lines typically occur where the sides meet the back, or where shorter layers meet longer ones. The result looks choppy and disconnected rather than flowing seamlessly.
Begin fixing poor blending by identifying where the harsh lines appear. Hold sections of hair up to the light – you’ll see thick, blunt edges where blending is needed. Using your scissors at a 45-degree angle, make small snips into these heavy areas. Think of it as feathering the edges rather than cutting length.
The twist-and-cut method works wonders for softening harsh lines:
Take a Section: Grab a small portion where you see a weight line
Twist Gently: Turn the section until it forms a loose spiral
Snip Carefully: Make tiny cuts along the twisted section
Release and Check: Let go and see how it falls naturally
Repeat as Needed: Continue until the line disappears
Thinning shears also help immensely with blending, but use them sparingly. Over-thinning creates wispy, flyaway pieces that look frizzy rather than smooth. Make one or two passes with thinning shears, then check your work before continuing.
Quick fixes for minor errors
Small mistakes don’t always require major corrections. Learning quick fixes helps you address issues without dramatically altering your cut. For example, a piece that’s slightly too short can be camouflaged by cutting surrounding pieces to create a gradual transition rather than an obvious mistake.
Styling products become your best friends when dealing with minor imperfections. A strong-hold gel or pomade can tame pieces that stick up awkwardly. Texturizing spray adds grip to help shorter pieces blend with longer ones. Even strategic placement of hair accessories can disguise problem areas while you wait for growth.
If you notice a small section that’s significantly shorter than intended, try the graduation technique. Instead of matching everything to the shortest piece, create intentional layers that incorporate the mistake into the overall design. This approach often results in a more textured, modern look than your original plan.
Color can also help disguise cutting errors. Strategic highlights or lowlights create visual texture that draws attention away from uneven lengths. This doesn’t mean you need dramatic color changes – even subtle dimensional color helps choppy sections blend more naturally.
Remember that most people won’t notice small imperfections that seem glaring to you. We scrutinize our own appearance far more critically than others do. What feels like a disaster might actually look like an intentionally edgy, textured style to everyone else. Give yourself grace during the learning process and remember that hair grows approximately half an inch per month, so any mistakes are temporary.
Styling and Maintaining Your New Long Pixie
Once you’ve successfully cut your long pixie, mastering the styling techniques transforms a good haircut into a great one. The right approach to daily styling, combined with proper maintenance, keeps your DIY cut looking fresh and intentional rather than grown-out and neglected. This versatile length offers numerous styling possibilities that can take you from casual to formal with just a few product changes and technique adjustments.
Daily styling techniques
Your morning routine doesn’t need to be complicated to achieve polished results. Start with damp hair – either freshly washed or misted with water from a spray bottle. The key is having enough moisture to reactivate any product from the previous day while allowing you to reshape the hair’s direction. Apply a small amount of lightweight styling cream or mousse from roots to ends, focusing on areas that tend to misbehave.
The direction you dry your hair makes all the difference in creating volume and movement. For maximum lift at the crown, flip your head upside down while blow-drying, using your fingers to lift roots away from the scalp. Once the roots are mostly dry, flip back up and use a small round brush to smooth the ends while maintaining that root lift. Direct the airflow from roots to ends to seal the cuticle and create shine.
Creating different looks with the same cut keeps your style fresh and versatile. For a sleek, professional appearance, blow-dry hair smooth using a paddle brush, then finish with a tiny amount of smoothing serum. Want something edgier for evening? Scrunch in some texture paste while hair is damp, then either air-dry for natural texture or diffuse for more defined pieces.
Product recommendations
Finding the right products for your hair type and desired style prevents that heavy, greasy look that can plague shorter cuts. Fine hair benefits from volumizing mousses or root lift sprays that add body without weight. Apply these products to damp hair, concentrating on the roots and mid-lengths while avoiding the ends where product can accumulate and look stringy.
Women with thick hair need different products to manage volume and create definition. A smoothing cream or light gel helps control bulk while defining the cut’s shape. Texture paste or clay works wonderfully for piece-y, separated looks that show off your layers. Apply these products sparingly – start with a pea-sized amount and add more if needed.
Finishing products seal your style and add polish. A light-hold hairspray maintains your style without stiffness, while a shine spray adds healthy-looking gloss. For special occasions or days when you need extra hold, a medium-hold spray applied in light layers works better than one heavy application. Dry shampoo extends time between washes while adding texture and absorbing excess oil at the roots.
Trimming schedule
Maintaining your long pixie’s shape requires regular attention, but full cuts aren’t always necessary. Plan for minor maintenance every 2-3 weeks, focusing on areas that show growth most obviously. The neckline and around the ears typically need attention first, as even slight growth here can make the entire style look unkempt. These quick touch-ups take just minutes once you’re comfortable with your scissors.
More comprehensive trims every 4-6 weeks keep the overall shape intact. During these sessions, reassess the balance between all sections and adjust any areas that have grown out of proportion. The top typically grows more noticeably than the graduated underneath sections, so you might need to remove length here while simply cleaning up the perimeter elsewhere.
Seasonal adjustments help your cut work with changing weather and styling needs. Summer might call for shorter sides and back for coolness, while winter could benefit from slightly more length for warmth and versatility under hats. These minor modifications keep your basic cut fresh without requiring dramatic changes.
Growing out gracefully
Should you decide to grow out your long pixie, strategic trimming makes the process less awkward. The goal shifts from maintaining the pixie shape to creating intermediate styles that look intentional. First, let the back and sides catch up to the top length while keeping the neckline clean. This creates a short bob shape that looks purposeful rather than neglected.
During the growth process, regular micro-trims prevent mullet-like appearances where the back outgrows the sides disproportionately. Focus on maintaining balance between all sections even as the overall length increases. Styling becomes crucial during this phase – learning to work with in-between lengths helps you feel confident throughout the transition.
Consider these approaches for managing the growing-out phase:
Accessorize Strategically: Headbands, clips, and bobby pins control awkward lengths
Change Your Part: Switching from side to middle (or vice versa) creates new looks with the same length
Add Texture: Products that enhance natural texture disguise uneven growth patterns
Embrace Volume: Bigger styling can make shorter layers blend with longer pieces
Color Dimension: Highlights or lowlights add visual interest during boring growth stages
The journey from long pixie to bob typically takes 4-6 months, depending on your growth rate and desired final length. Patience during this phase pays off with healthy hair that grows evenly. Regular conditioning treatments and minimal heat styling support faster, healthier growth while preventing damage that could require cutting away progress.
Mastering Your Long Pixie Journey
Creating and maintaining a beautiful long pixie at home empowers you to take control of your style while saving significant money over time. The skills you’ve learned – from understanding proper sectioning to mastering blending techniques – will improve with each trim, building your confidence and expertise. Remember that professional stylists spent years perfecting their craft, so be patient with yourself as you develop these new abilities.
The freedom to adjust your cut exactly to your preferences, touch up growth immediately when needed, and experiment with different variations makes home cutting an invaluable skill. Your long pixie will evolve with you, whether you choose to maintain its current length, grow it into a longer style, or take it shorter for a more dramatic look. The techniques you’ve mastered apply to future cuts as well, giving you lifelong independence in managing your hair’s appearance.
Frequently Asked Questions
Q: Should I cut my long pixie wet or dry?
A: Damp hair works best for most people. Soaking wet hair appears longer than it actually is, while completely dry hair can be difficult to control. Lightly mist dry hair with water or cut it when it’s towel-dried after washing for the most accurate results.
Q: What’s the biggest mistake beginners make when cutting their own pixie?
A: Cutting too much length at once tops the list. Start conservatively, removing less hair than you think necessary. You can always cut more, but patience prevents that dreaded too-short result that takes months to grow out.
Q: How do I know if my scissors are sharp enough for cutting hair?
A: Test your scissors on a single wet tissue. Sharp hair scissors will slice through cleanly without dragging or tearing. If the tissue bunches up or tears raggedly, your scissors need sharpening or replacing.
Q: Can I fix an uneven cut without making everything shorter?
A: Yes, try styling techniques first. Sometimes what appears uneven is actually natural growth patterns or cowlicks. If truly uneven, use texturizing techniques to blend rather than matching everything to the shortest point.
Q: How often should I wash my long pixie?
A: Most women find washing every 2-3 days ideal. Short hair shows oil more quickly than longer styles, but overwashing can stimulate more oil production. Dry shampoo helps extend time between washes.
Q: What’s the best way to add volume to a flat long pixie?
A: Blow-dry with your head flipped upside down, use volumizing products at the roots, and consider adding subtle layers at the crown. Switching your part occasionally also creates natural lift in different areas.
Q: How long does it take to grow a long pixie into a bob?
A: Typically 4-6 months, assuming average hair growth of half an inch monthly. Regular trims to maintain shape during this process actually result in healthier, more even growth overall.
Q: Is a long pixie high-maintenance compared to longer hairstyles?
A: Daily styling is actually quicker – usually 5-10 minutes. However, you’ll need trims every 4-6 weeks to maintain the shape, compared to every 8-12 weeks for longer styles.