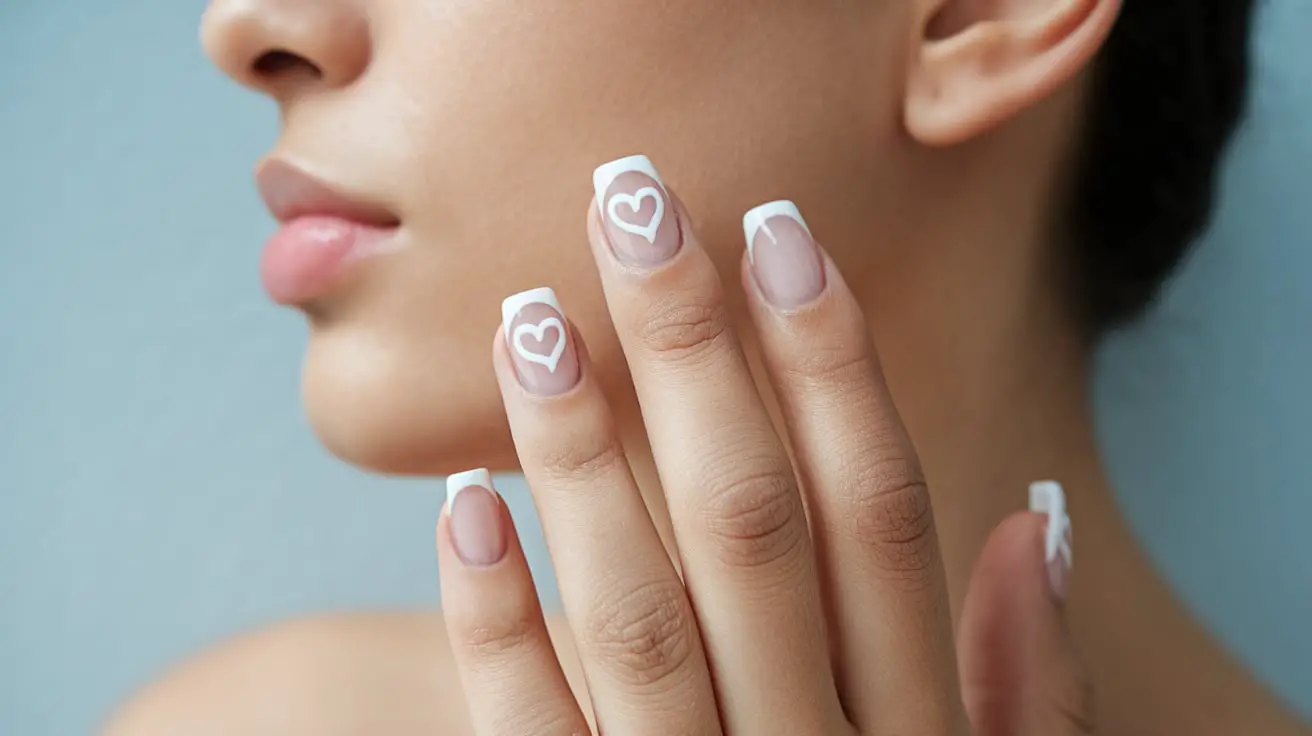
White French tip heart press on acrylic nails have become a go-to choice for women wanting professional-looking manicures without the salon appointment. These pre-designed nails feature the classic French manicure style with a playful twist – tiny hearts incorporated into the white tips, creating a romantic yet sophisticated look that works for both everyday wear and special occasions. The convenience of press-on nails combined with this trendy design makes them particularly appealing for those who want beautiful nails in minutes rather than hours.
The application process for these specialized press-ons differs slightly from standard designs due to the delicate heart details that need careful positioning. Unlike traditional French tips where precision matters mostly at the smile line, heart designs require extra attention to symmetry and placement across all ten nails. Getting the technique right means the difference between nails that look professionally done and ones that appear obviously artificial.
Throughout the following sections, you’ll discover everything from initial nail preparation to advanced customization techniques that professional nail technicians use. We’ll cover the essential tools you need, proper preparation methods, application secrets for bubble-free results, creative ways to personalize your heart designs, and maintenance tips that extend wear time significantly. Let’s transform your nails into the perfect canvas for this charming style.
What You Need Before Starting
Successfully applying white French tip heart press on acrylic nails starts with gathering the right supplies and understanding how each tool contributes to your final result. Many women rush through this preparation phase, only to find themselves struggling with application issues that proper planning would have prevented. Taking a few extra minutes to organize your workspace and select quality tools pays off in professional-looking results that last.
Essential tools and supplies
Your basic toolkit should include nail glue or adhesive tabs, a nail file, buffer block, cuticle pusher, rubbing alcohol or nail dehydrator, and cotton pads. Quality matters particularly with adhesives – cheaper options often fail within days, while professional-grade products keep nails secure for weeks.
Consider investing in a glass nail file rather than traditional emery boards. Glass files create smoother edges that won’t snag or peel, particularly important when working with the delicate edges of press-on nails.
A small bowl of warm water helps soften cuticles before pushing them back, making the process gentler on your nail beds. Some women prefer cuticle oil for this step, though water works just as effectively for most people.
Preparing your workspace
Set up your application area near good lighting – natural daylight works best, though a bright desk lamp serves as an excellent alternative. Poor lighting often leads to misaligned nails or missed air bubbles that become visible later. Lay out a clean towel to protect your surface and prevent small items from rolling away.
Choosing the right nail sizes
Press-on nail sets typically include multiple sizes, and finding your perfect match for each finger prevents lifting and ensures comfort during wear. Start by laying out all sizes and comparing them to your natural nails. The press-on should cover your nail from sidewall to sidewall without overlapping onto skin.
When stuck between two sizes, always choose the slightly smaller option. Nails that are too large will lift at the edges and catch on clothing or hair. You can file down a slightly small nail to fit perfectly, but oversized ones can’t be fixed.
Take time to number or mark which size fits each finger – this saves confusion during application when you’re working quickly with drying adhesive.
Understanding nail adhesive options
The adhesive you choose dramatically affects both application ease and wear duration. Here are your main options:
Nail Glue: Provides the strongest, longest-lasting bond but requires precision during application
Adhesive Tabs: Allow repositioning and easier removal but typically last only 3-5 days
Gel Adhesive: Offers a middle ground with decent hold and slightly easier removal than traditional glue
Combination Method: Using tabs as a base layer with glue on top gives both security and easier future removal
Each method has its place depending on your needs. Special events might call for the security of glue, while testing a new style might warrant temporary tabs. Understanding these differences helps you make informed choices based on your specific situation.
Your preparation extends beyond just gathering supplies. Remove any existing polish completely, as residue interferes with adhesion. Even clear base coats must go – press-ons need direct contact with your natural nail for proper bonding.
Check that your chosen press-on set includes enough sizes for comfortable fits on all fingers. Some sets skimp on popular sizes, leaving you with poor options for thumbs or pinkies. Having a backup set or additional sizes prevents application day disappointments.
Temperature matters more than most people realize. Cold adhesives become thick and difficult to work with, while overly warm products might set too quickly for proper positioning. Room temperature storage ensures consistent application results.
Creating a clean environment reduces contamination risks that weaken adhesive bonds. Dust, oils, and debris interfere with proper adhesion, leading to premature lifting. A quick wipe-down of your workspace with rubbing alcohol eliminates these invisible bond-breakers.
Preparing Your Natural Nails
The foundation you create on your natural nails determines how well your white French tip heart press-ons will adhere and how long they’ll last. Proper preparation takes about 15-20 minutes but makes the difference between nails that pop off after two days versus ones that stay beautiful for two weeks or longer.
Removing old polish and oils
Start with completely bare nails, even if you think they look clean. Invisible residues from previous manicures create barriers between your nail and the press-on adhesive. Use acetone-based remover rather than gentler formulas – you need the stronger solvent to eliminate every trace of old products.
After removing visible polish, go over each nail again with fresh remover on a clean cotton pad. This second pass catches any remaining oils or residue your eyes can’t see.
Your natural nails constantly produce oils that, while healthy for nail flexibility, prevent press-ons from sticking properly. These oils regenerate quickly, which explains why some applications fail despite seemingly perfect preparation.
Trimming and shaping natural nails
Short natural nails provide the best foundation for press-on application. Trim your nails close to your fingertips, leaving just a small white edge. Long natural nails underneath press-ons create uncomfortable pressure points and increase the chance of breakage.
File your natural nails into a shape that roughly matches your chosen press-ons. Square naturals under oval press-ons create visible bumps and edges. This shaping doesn’t need perfection since the press-ons will cover everything, but basic coordination helps.
Pay special attention to any split or peeling areas on your natural nails. These weak spots need filing down completely, as they’ll cause your press-ons to lift prematurely. A few extra seconds smoothing problem areas prevents frustration later.
Use gentle, single-direction strokes when filing. Sawing back and forth creates microscopic tears in your nail plate that weaken the structure. These tears might seem insignificant, but they provide entry points for moisture that loosens adhesive bonds.
Pushing back cuticles properly
Well-groomed cuticles create more nail surface for adhesion while giving your manicure a professional appearance. Soak your fingertips in warm water for three to five minutes to soften the cuticle tissue. This soaking makes pushing painless and reduces the risk of tearing delicate skin.
Use an orange stick or rubber-tipped cuticle pusher with gentle pressure. The goal isn’t to remove cuticles entirely but to reveal the full nail plate. Aggressive pushing causes inflammation that actually makes cuticles grow back thicker.
Work slowly around each nail’s perimeter, paying attention to the corners where cuticle tissue often hides. These hidden bits create gaps under press-ons where moisture collects, eventually breaking down your adhesive.
Dry your nails thoroughly after cuticle work. Any remaining moisture trapped under press-ons becomes a breeding ground for bacteria and significantly weakens adhesive bonds. Pat with a clean towel, then let nails air dry for several minutes.
Buffing the nail surface
Creating slight texture on your nail plate helps adhesives grip better, similar to sanding wood before painting. Use a fine-grit buffer with light pressure – you’re not trying to thin your nails, just remove the ultra-smooth top layer.
Cleaning and dehydrating nails
The final preparation step removes any debris from filing and eliminates moisture from your nail plate. Rubbing alcohol on a lint-free pad works perfectly for this dual purpose. Wipe each nail thoroughly, including the free edge and sidewalls where oils collect.
Some women prefer specialized nail dehydrators or primers designed for artificial nail application. These products work well but aren’t absolutely necessary if you’re thorough with rubbing alcohol.
Let your nails dry completely before moving to application. This usually takes about sixty seconds, though humid environments might require extra time. Nails should look slightly matte rather than shiny when properly dehydrated.
Watch for your natural oils returning during this waiting period. If you touch your face or hair, those oils transfer back to your nails. Keep your hands still and away from other surfaces while the dehydrator evaporates.
Consider doing a final wipe with fresh alcohol immediately before applying each press-on. This belt-and-suspenders approach ensures maximum adhesion, especially important for special occasions when you can’t risk a nail mishap.
Skip any moisturizing products during this preparation phase. Hand creams, cuticle oils, and lotions all interfere with adhesion. Save these treatments for after your press-ons are fully set and you’re doing maintenance care.
Application Techniques for Perfect Results
Mastering the actual application of white French tip heart press-on nails requires patience and attention to detail that goes beyond simply sticking them on. The heart designs on these particular press-ons need precise alignment to look intentional rather than haphazard, and small technique adjustments make significant differences in your final results.
Selecting the correct size for each nail
Begin with your dominant hand while you have maximum control and steadiest movements. Many women find starting with their non-dominant hand leads to better results on the second hand once they’ve practiced the motions. Lay out your selected sizes in order, perhaps on a piece of tape labeled with L1-L5 and R1-R5, preventing mix-ups during application.
The white tip with hearts should sit naturally where your nail bed meets the free edge. If a press-on extends too far down toward your cuticle, the proportions look off and the design appears stretched. Test-fit without adhesive first, checking that each heart element aligns pleasingly with your nail shape.
Some fingers might need slight size adjustments from what initially seemed correct. Your middle finger and thumb often require the most careful sizing, as these nails endure more pressure during daily activities. A properly sized nail should leave a tiny gap at the cuticle area – about the width of a business card.
Applying adhesive correctly
Adhesive application technique varies based on your chosen method. For nail glue, place a small drop at the center of the press-on, then use the tip of the glue bottle to spread it slightly. Avoid getting glue near the edges initially – it will spread naturally when you press down. Too much glue causes overflow onto your skin, creating messy edges and potential irritation.
The amount of glue needed surprises many first-time users. A tiny drop, about half the size of a pinhead, suffices for most nails. Thumbs might need slightly more due to their larger surface area, but resist the urge to flood the nail with adhesive.
When using adhesive tabs, press them firmly onto the press-on first, not your natural nail. This approach gives you better control over placement and prevents tabs from shifting during application. Remove the backing paper only when you’re ready to apply that specific nail.
Pressing and holding techniques
Position the press-on at a 45-degree angle, placing the edge near your cuticle first, then slowly lower the rest of the nail onto your natural nail. This rolling motion pushes out air and excess adhesive toward the free edge rather than trapping it underneath.
Once positioned, apply firm, steady pressure for at least thirty seconds. Count slowly – most people underestimate time when focused on holding still. The initial bond forms quickly, but full strength develops over several minutes.
Press from the center outward, using your thumb on top and index finger supporting from underneath. This technique ensures even pressure distribution and helps the press-on conform to your natural nail’s slight curve.
For nails with the heart design, pay extra attention to pressing along the white tip area. These design elements can create tiny gaps if not properly adhered, leading to catching and eventual lifting.
Avoiding air bubbles
Air bubbles remain visible through the white French tip portion of these nails, creating unsightly imperfections in your manicure. Prevention works better than trying to fix bubbles after application. Here’s how to maintain bubble-free results:
Warm your press-ons: Cold acrylic doesn’t flex well, making bubbles more likely
Use adequate adhesive: Too little creates dry spots where air gets trapped
Apply in good lighting: Shadows hide forming bubbles until it’s too late
Work systematically: Rush leads to trapped air and misalignment
If you notice a bubble forming during application, immediately lift the nail and reapply. Once adhesive begins setting, bubbles become permanent. Small bubbles near edges might disappear with firm pressure, but central bubbles require starting over.
Ensuring proper alignment
The heart details on these specific press-ons need visual coordination across all ten nails. Before final application, arrange your nails to check that heart positions create a pleasing overall pattern. Some sets feature varying heart placements, while others maintain consistency – know which you’re working with.
Consider the visual flow from thumb to pinky. Hearts that gradually shift position can look intentional and artistic, while random placement might appear careless. Take photos of your preferred arrangement before applying, giving you a reference guide during the actual process.
Use your cuticle line as a guide for straight application. Crooked nails become increasingly obvious over time, especially with geometric designs. A slightly angled nail might look acceptable initially but will bother you more each day you wear it.
Check alignment from multiple angles before the adhesive fully sets. What looks straight from above might appear tilted from the side. These first few seconds offer your only opportunity for adjustments, so take advantage of this window.
The precision required for these heart-adorned nails might feel overwhelming initially, but each nail you apply builds your confidence and skill. By the time you reach your tenth nail, the process feels more natural and controlled. Many women find their second application attempt produces dramatically better results simply from understanding the process better.
Customizing and Finishing Your Heart Design
After successfully applying your white French tip heart press-on nails, the customization and finishing phase transforms them from obviously artificial to uniquely yours. This stage allows creative expression while ensuring your manicure withstands daily wear.
Adding extra heart details
While your press-ons already feature heart designs in the French tips, additional embellishments can personalize the look further. Small rhinestones placed strategically around existing hearts create subtle sparkle without overwhelming the design. Choose clear or white stones to maintain the classic French aesthetic, or add pale pink for a romantic touch.
Nail art pens in white or silver let you draw tiny heart outlines on the nude portion of the nail. These delicate additions should complement, not compete with, the existing tip design. Practice on paper first to perfect your heart-drawing technique – confident strokes look more professional than hesitant lines.
For special occasions, consider metallic accents using chrome powder or foil. Apply these sparingly along the smile line where the white tip meets the nail bed. This creates dimension and catches light beautifully in photographs.
Some women enjoy adding their initials or meaningful dates in tiny script near the cuticle area. Use a fine-tipped nail art brush with polish slightly darker than your nail bed for subtle personalization that doesn’t distract from the main heart design.
Sealing the edges
Edge sealing prevents water and debris from working under your press-ons, significantly extending wear time. Run a small bead of clear nail glue along the seam where the press-on meets your natural nail. Use a toothpick to spread this thin layer evenly, creating an invisible barrier against lifting.
Focus particularly on the free edge and sidewalls – these areas experience the most stress during daily activities. The heart designs near the tips make these nails slightly thicker than standard press-ons, requiring extra attention to edge security.
Filing for perfect fit
Even well-sized press-ons benefit from custom filing to match your exact nail shape. File in one direction from the outside edge toward the center, using gentle pressure to avoid cracking the acrylic material.
The sides often need the most adjustment, especially where the press-on might extend slightly beyond your natural nail width. Creating a seamless transition here prevents snagging and improves comfort significantly.
Length adjustments should preserve the heart design proportions. If shortening the nails, file evenly across all ten to maintain visual consistency. The white tips with hearts look best when they occupy about one-third of the total nail length.
Shape refinement comes next. Whether you prefer squared, rounded, or almond-shaped tips, ensure all ten nails match. Inconsistent shaping draws attention to the artificial nature of press-ons. Hold your hands at arm’s length periodically to check for uniformity.
Your file choice matters here. Glass or crystal files work best on acrylic material, creating smooth edges without the harsh scratching of traditional emery boards. The investment in a quality file pays off through multiple manicures.
Creating smooth transitions
The junction between press-on and natural nail should feel imperceptible to touch. Use a buffer block to gently blend this transition area, working with minimal pressure to avoid thinning the press-on or damaging your natural nail underneath.
Start with the coarsest side of your buffer block for initial smoothing, then progress through finer grits for a polished finish. This gradual approach prevents over-filing that could weaken the press-on structure.
Pay attention to the cuticle area where gaps sometimes remain despite careful application. A tiny amount of clear builder gel or thick top coat can fill these spaces, though application requires steady hands and practice.
Adding top coat for longevity
A quality top coat serves multiple purposes on your customized press-ons. It seals any art additions, adds shine, and provides an extra protective layer against chips and scratches. The heart designs particularly benefit from top coat protection, as the raised elements can catch and chip without this barrier.
Apply top coat in thin layers rather than one thick coating. Start at the cuticle and sweep toward the free edge in three strokes – center, then each side. This technique prevents pooling and ensures even coverage.
Wrap the top coat around the free edge by running your brush along the nail tip. This “capping” technique prevents chips from starting at the nail edge where wear typically begins.
Quick-dry top coats work well for convenience, but traditional formulas often provide superior durability. If time allows, use a standard top coat and plan a few minutes of careful drying time.
Reapply top coat every three to four days to maintain protection and shine. This refresh also helps blend any minor lifting that might have started at edges, buying you extra wear time from your manicure.
UV or LED-cured gel top coats offer maximum durability if you have access to a curing lamp. These create an incredibly hard surface that resists virtually all chipping and maintains high shine for weeks. Apply thin coats and cure according to manufacturer instructions for best results.
Making Your Press Ons Last Longer
The longevity of your white French tip heart press-on nails depends largely on how you treat them after application. With proper care and smart daily habits, these nails can maintain their beauty for two to three weeks, making them a practical alternative to salon manicures.
Daily care tips
Your morning routine should include a quick nail check, looking for any signs of lifting or damage that need immediate attention. Catching problems early prevents complete nail loss and maintains your manicure’s polished appearance. Run your fingers along the edges to feel for gaps that might not be visible yet.
Water exposure remains the primary enemy of press-on longevity. While you can’t avoid water entirely, minimizing prolonged exposure makes a substantial difference.
What to avoid
Hot water weakens adhesive bonds faster than any other daily activity. When washing dishes, taking long baths, or cleaning, the combination of heat and moisture creates perfect conditions for press-on failure. Wear rubber gloves for household chores, choosing ones with cotton lining for comfort during extended wear.
Opening cans, particularly soda cans with pull tabs, puts tremendous pressure on your nail tips exactly where the heart designs sit. Use the side of a spoon or a dedicated tool instead. This simple change prevents the frustration of losing a nail to a beverage can.
Picking at labels, stickers, or tape with your nails gradually loosens the edges. These repetitive motions create micro-lifts that worsen over time. Keep scissors or a letter opener handy for tasks that tempt you to use nails as tools.
Hair products deserve special consideration. Shampoo and conditioner contain ingredients designed to break down oils and buildup – exactly what holds your press-ons in place. Apply products with your fingertips rather than nails, and rinse thoroughly to remove residue.
Protecting during activities
Before exercising, consider how your workout might impact your nails. Weight lifting, rock climbing, and rowing place direct pressure on nail tips. Modify your grip slightly or wear workout gloves to distribute pressure away from your press-ons.
Typing technique matters more with longer press-ons. Use finger pads rather than nail tips when possible, and adjust your keyboard angle if needed. Some women find that a slight downward keyboard tilt reduces nail contact during typing.
Gardening enthusiasts should always wear gloves, as soil contains moisture and microorganisms that attack adhesive bonds. Even quick tasks like deadheading flowers can loosen press-ons if done barehanded.
Swimming pools and hot tubs present special challenges. Chlorine and extreme temperatures combine to create harsh conditions for any artificial nails. Limit exposure when possible, and always dry thoroughly afterward.
During sleep, your nails face unique stresses from unconscious movements. Consider wearing loose cotton gloves for the first few nights after application while adhesive reaches full strength. This prevents accidental catches on bedding that could pop off a nail.
Touch-up techniques
Small lifts at edges don’t necessarily mean complete reapplication. Keep nail glue handy for quick repairs that extend your manicure’s life significantly:
Clean the area: Remove any debris with rubbing alcohol on a cotton swab
Apply minimal glue: Use just enough to fill the gap without overflow
Press firmly: Hold for thirty seconds to ensure proper bonding
Seal if needed: Add top coat over the repaired area once dry
File rough edges: Smooth any areas that might catch after repair
Regular top coat reapplication every few days refreshes shine while adding protective layers. Focus on high-wear areas like tips and edges where the heart designs need extra protection.
When to remove and reapply
Even with excellent care, press-ons eventually need replacement. Watch for these signs that removal time has arrived:
Lifting affects more than half your nails despite repair attempts. Multiple problem nails indicate adhesive breakdown requiring fresh application. Fighting to maintain a failing manicure often causes natural nail damage.
Visible growth at the cuticle area exceeds three millimeters. At this point, the proportions look unbalanced, and the heart designs appear too far from your nail base. The aesthetic compromise isn’t worth pushing wear time further.
Any signs of infection or irritation demand immediate removal. Green discoloration, persistent redness, or unusual odor suggests bacterial growth requiring attention. Your nail health always takes priority over manicure longevity.
The press-ons show structural damage like cracks or deep scratches. Damaged nails can break unexpectedly, potentially taking natural nail layers with them. Replace compromised nails promptly to prevent painful accidents.
Natural nail damage becomes visible through the press-on. If you notice white spots, peeling, or unusual texture changes in your natural nails, remove press-ons to assess and treat the condition.
Plan replacement around your schedule. If you have important events coming up, don’t push worn press-ons to their absolute limit. Fresh application two days before ensures your nails look their best when it matters most.
Mastering Your Heart-Adorned Manicure
White French tip heart press-on acrylic nails offer the perfect combination of classic elegance and playful romance, transforming your hands into polished accessories that complement any outfit or occasion. The techniques you’ve learned here – from meticulous preparation through creative customization – put professional-quality results within reach of anyone willing to invest a little time and attention to detail. Your newfound knowledge about proper sizing, application methods, and maintenance strategies means you’ll never have to sacrifice beautiful nails due to time constraints or budget limitations again.
The journey from bare nails to a stunning heart-adorned manicure might seem complex initially, but each application builds your confidence and refines your technique. Those small details that felt overwhelming at first – perfect alignment, bubble-free application, seamless edges – become second nature with practice, allowing you to achieve salon-quality results in the comfort of your own home. Whether you’re preparing for a special event or simply wanting to feel polished every day, these skills serve you well beyond just this specific nail style, opening doors to endless nail art possibilities.
Frequently Asked Questions
Q: How long do white French tip heart press-on nails typically last?
A: With proper application and care, these press-ons can last 10-14 days using nail glue, or 3-5 days with adhesive tabs. Factors like your daily activities, water exposure, and maintenance routine significantly impact longevity.
Q: Can I reuse my press-on nails after removing them?
A: Yes, if you remove them carefully using acetone or oil to dissolve the adhesive. Clean off all glue residue, sanitize with rubbing alcohol, and store them properly for future use.
Q: Will press-on nails damage my natural nails?
A: When applied and removed correctly, press-ons cause minimal damage. Problems usually arise from forceful removal or wearing them continuously without breaks to let natural nails breathe.
Q: How do I remove press-ons without damaging the heart design?
A: Soak your nails in warm water with oil for 10-15 minutes, then gently wiggle each press-on loose. Never force or pull them off, as this can damage both the press-on design and your natural nails.
Q: Can I shower immediately after applying press-on nails?
A: Wait at least 2-3 hours before prolonged water exposure to allow adhesive to fully cure. For best results, apply press-ons in the evening and avoid water until the next morning.
Q: What’s the best way to fix a press-on that keeps lifting at the edges?
A: Clean the lifted area with rubbing alcohol, apply a tiny amount of nail glue, press firmly for 30 seconds, then seal with top coat once dry.
Q: Can I cut or file the heart designs if my nails are too long?
A: Yes, but file carefully from the sides toward the center to avoid cracking. Try to maintain the proportion of white tip to nail bed for the most flattering look.
Q: Why do my press-ons pop off within a day or two?
A: Common causes include inadequate nail preparation, oil residue, using too little adhesive, or exposure to water too soon after application. Review your preparation process and ensure nails are completely clean and dry before applying.