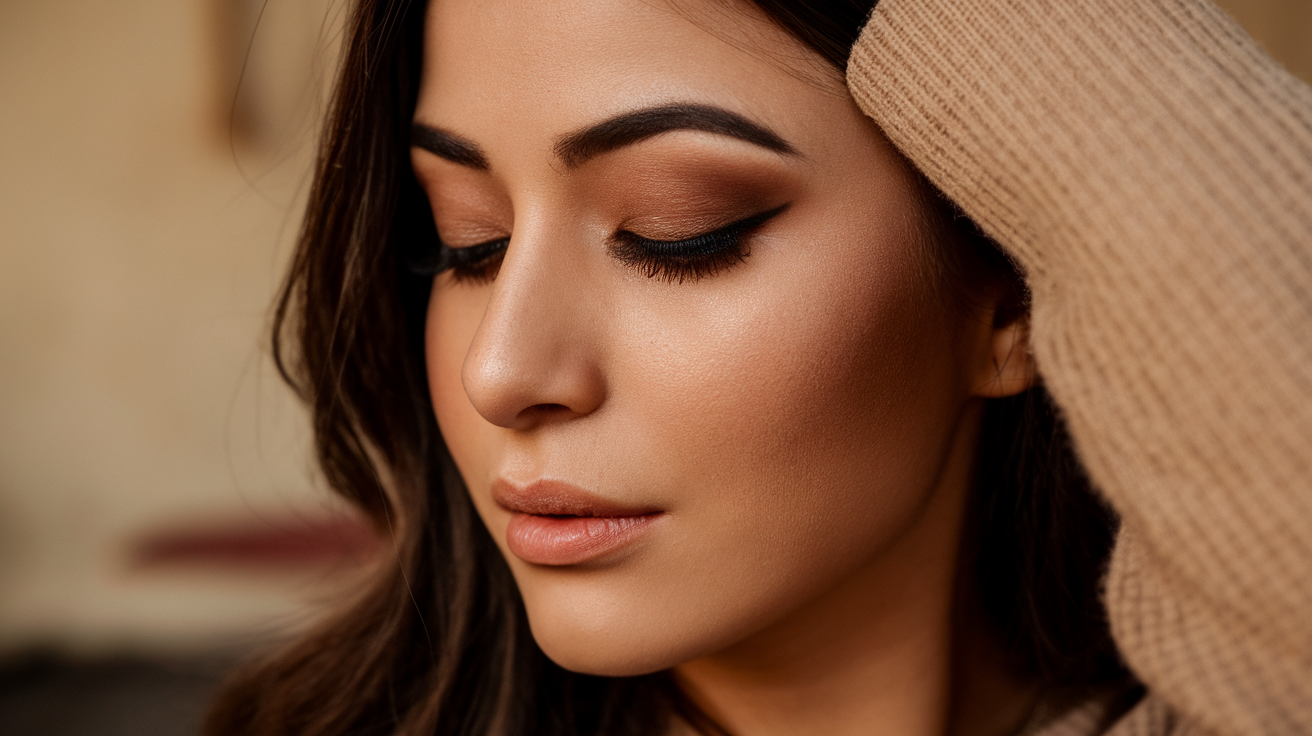
Hooded eyes have their own distinct beauty, characterized by a fold of skin that partially or completely covers the mobile eyelid when your eyes are open. This eye shape appears in women of all ages and ethnicities, creating a naturally mysterious and sophisticated look. While some women develop hooded eyes with age, many are born with this eye shape, which includes celebrities like Blake Lively, Jennifer Lawrence, and Taylor Swift who showcase stunning makeup looks daily.
The unique structure of hooded eyes can make traditional makeup application techniques less effective. Standard eyeshadow placement often disappears into the fold, carefully crafted wings can transfer onto the upper lid, and that perfect smoky eye you spent twenty minutes creating might only be visible when you blink. These challenges lead many women to feel frustrated with eye makeup, wondering if they’ll ever achieve the dramatic looks they see in tutorials designed for different eye shapes.
The good news is that with the right techniques, products, and application methods specifically designed for hooded eyes, you can create absolutely gorgeous eye makeup looks that enhance your natural features. In the following sections, we’ll talk about proven strategies that work with your eye shape rather than against it, from product selection to application techniques that makeup artists use on hooded-eyed clients every day. Get ready to transform your eye makeup routine and discover how beautiful hooded eyes can truly be.
Understanding Your Eye Shape and Working With It
The journey to flawless eye makeup starts with recognizing and understanding your specific eye characteristics. Many women spend years struggling with makeup application simply because they haven’t identified their eye shape correctly or understood how to work with their natural features.
How to identify hooded eyes
Looking straight into a mirror with a relaxed expression gives you the clearest view of your eye shape. If you notice that your upper eyelid seems to disappear when your eyes are open, or if the skin from your brow bone extends down to meet your lash line, you likely have hooded eyes. The key identifier is minimal visible lid space when your eyes are open naturally. Some women might see a tiny sliver of lid, while others see none at all.
Different types of hooded eyes
Not all hooded eyes are identical, and recognizing your specific variation helps you customize techniques more effectively. Some women have partially hooded eyes where a small amount of lid remains visible, while others have fully hooded eyes with no visible lid space. The hood might be more prominent on one eye than the other, creating asymmetry that requires different approaches for each eye. Additionally, the angle and depth of the hood varies significantly between individuals.
Age-related hooding develops gradually as skin loses elasticity, while genetic hooding appears from birth or develops during puberty. Understanding which type you have influences product choices, particularly regarding primer strength and setting powder needs. Women with oily skin might experience more pronounced hooding throughout the day as natural oils break down makeup.
Why standard makeup techniques don’t always work
Traditional makeup tutorials often instruct placing transition shades in the visible crease, but hooded eyes frequently lack this visible crease when open. The fold of skin creates a different canvas entirely, one where conventional color placement can result in muddy, transferred, or completely hidden artistry. Cut crease techniques that look stunning on other eye shapes can appear heavy or age hooded eyes unnecessarily.
The typical advice to place dark colors in the outer V can make hooded eyes appear smaller and more closed off. Similarly, thick eyeliner across the entire lid consumes precious visible space, making eyes look even more hooded. These standard approaches fail because they don’t account for how the hood changes the visible area and light reflection on the eye.
Customizing techniques for your specific shape
Successful makeup application begins with accepting your eye shape and learning techniques that enhance rather than hide it. Instead of fighting against the hood, work with it by adjusting placement, color intensity, and product selection. This might mean applying eyeshadow higher than feels natural or using your finger to feel where colors should go rather than relying solely on visual cues.
Consider your other facial features too. Women with prominent cheekbones might balance hooded eyes differently than those with softer features. The distance between your eyes, your brow bone prominence, and even your face shape all influence which techniques will be most flattering. Experimentation becomes key – what works beautifully on one woman with hooded eyes might need adjustment for another.
Creating a personalized approach means paying attention to how your specific eyes behave throughout the day. Do your hoods become more pronounced when you’re tired? Does one eye have more hooding than the other? These observations guide you toward techniques that address your individual needs rather than following generic advice.
Essential Products and Tools for Hooded Eyes
The right products can make the difference between makeup that disappears into your crease and looks that last all day. Investing in specific formulas and tools designed to work with hooded eyes eliminates frustration and creates a solid foundation for any eye look.
Must-have eye primers and their importance
Eye primer becomes absolutely non-negotiable for hooded eyes. The constant contact between the lid and the overhanging skin creates friction that breaks down even the most long-wearing formulas. A quality primer creates a barrier that prevents oils from breaking through while providing grip for shadows to adhere properly.
Look for primers with a slightly tacky finish rather than those that dry completely smooth. This texture helps shadows stick better and prevents the creasing that plague hooded eyes. Some women find success with eyeshadow primers specifically formulated for oily lids, even if they don’t have particularly oily skin, because these formulas offer superior staying power.
Choosing the right eyeshadow formulas
Powder eyeshadows work best for hooded eyes, particularly those with a drier, more pigmented formula that sets well. Cream shadows, while beautiful, tend to crease and transfer more readily when skin touches skin throughout the day. If you love cream formulas, use them sparingly as a base and set immediately with powder.
Avoid shadows with excessive shimmer or glitter for the mobile lid area. These textures emphasize texture and can transfer dramatically onto the hood. Instead, reserve shimmers for the inner corner, brow bone, or center of the lid where they’re less likely to migrate. Matte and satin finishes in the crease area create depth without drawing attention to the hood itself.
The quality of your shadows matters significantly. Shadows that blend easily require less manipulation, reducing the likelihood of disturbing your primer base. Well-pigmented formulas mean you need less product, which translates to less weight on the lid and reduced creasing potential.
Brush selection for precision application
Smaller, more precise brushes give you better control when working with limited lid space. Large, fluffy brushes that work beautifully on other eye shapes can deposit color where you don’t want it, creating muddy results. A small, flat shader brush becomes essential for precise color placement on the visible lid area.
Invest in quality pencil brushes for detailed work along the lash line and in the outer corner. These allow you to create definition without taking up valuable lid real estate. A small, firm blending brush helps you work shadow into and slightly above the natural crease without over-blending and losing definition.
Here’s what should be in your hooded eye brush collection:
- Flat shader brush: For precise application on the mobile lid
- Pencil brush: For detailed lash line work and outer V definition
- Small blending brush: For controlled blending in the crease area
- Angled brush: For tightlining and precise liner application
- Fan brush: For cleaning up fallout without disturbing eye makeup
Setting products that prevent transfer
Setting spray and powder designed specifically for eyes help lock makeup in place. Unlike face setting sprays, eye-specific formulas account for the unique challenges of the eye area, including watering, blinking, and skin-to-skin contact. Apply these products in thin layers rather than one heavy application.
Translucent setting powder applied with a small brush over cream products or particularly transfer-prone areas creates an additional barrier. Some makeup artists recommend a light dusting of setting powder over primer before shadow application for maximum longevity. This technique, while adding an extra step, significantly reduces creasing and fading.
Waterproof options that last
Waterproof formulas aren’t just for swimming or emotional events – they’re everyday essentials for hooded eyes. The constant friction and natural oils that break down regular formulas have less effect on waterproof options. This applies to everything from primers to liners to mascaras.
When selecting waterproof products, look for those labeled as “budge-proof” or “transfer-resistant” rather than just water-resistant. These formulas specifically address the rubbing and friction that hooded eyes experience. Keep a good eye makeup remover on hand, as these long-wearing formulas require proper removal to maintain healthy skin and lashes.
Shadow Placement Techniques That Open the Eyes
Traditional eyeshadow placement rules need complete reimagining for hooded eyes. The techniques that create beautiful looks on other eye shapes can actually emphasize hooding and make eyes appear smaller. Learning where to place color for maximum impact transforms your entire approach to eye makeup.
The key principle involves working with the space you see when your eyes are open, not what appears when they’re closed. This fundamental shift in thinking changes everything about shadow application. Many women make the mistake of creating beautiful looks with their eyes closed, only to have everything disappear when they open them.
Where to place transition colors
Transition shades need to sit higher on hooded eyes than traditional placement suggests. With your eyes open, look straight ahead in the mirror and use a clean brush to mark where you want the color to be visible. This spot typically falls above the natural crease, sometimes significantly so. It might feel strange at first, placing color so high, but this adjustment ensures your hard work remains visible.
The windshield wiper motion everyone talks about still applies, but the placement shifts upward. Start your transition shade where you’ve marked and blend upward toward the brow bone, not down into the mobile lid. This upward motion lifts the eye visually and prevents color from disappearing into the fold.
Creating the illusion of more lid space
Strategic color placement can make your visible lid area appear larger. Light, bright shades on the mobile lid reflect light and push that area forward visually. Avoid dark colors on the lid itself unless you’re creating a specific dramatic look, as darkness recedes and makes small spaces appear even smaller.
A technique many makeup artists use involves applying a light, shimmery shade just above the pupil when looking straight ahead. This creates a spotlight effect that draws attention to the center of the eye, making the entire area appear more open. The shimmer should be subtle – think satin rather than glitter – to avoid emphasizing texture.
Gradient techniques work beautifully on hooded eyes when applied correctly. Start with the lightest shade on the inner third of the lid, gradually deepening the color as you move outward. This horizontal gradient creates width and openness that vertical gradients can’t achieve on hooded eyes.
Working with the crease that isn’t visible
Your actual crease might be completely hidden, but you can create the illusion of one. Using a small brush, apply your crease color where you want the definition to appear with your eyes open. This faux crease sits above your natural one, visible when your eyes are open and looking straight ahead.
Building intensity gradually prevents harsh lines that look unnatural. Start with a light wash of color and build slowly, checking your progress with eyes open between each addition. The goal is soft definition that enhances your eye shape without creating obvious demarcation lines.
Some women find success with the “batwing” technique, where shadow placement follows the natural curve of the hood when the eye is open. This creates a lifted effect that works with your anatomy rather than against it. The shape might look unusual with eyes closed, but appears balanced and flattering when open.
Highlight placement for lifting effects
Strategic highlighting lifts hooded eyes dramatically. The traditional brow bone highlight works, but placement is crucial. Apply highlighter just below the brow hairs rather than on the entire brow bone, as too much shimmer in this area can emphasize the hood.
Inner corner highlighting opens the eyes significantly. Extend this highlight slightly onto the inner portion of the upper and lower lids, creating a subtle spotlight effect. Choose highlighters with fine mill shimmers rather than chunky glitters, as these blend seamlessly without emphasizing texture.
A lesser-known technique involves placing a tiny dot of highlighter at the center of the mobile lid, right above the pupil. This creates dimension and the illusion of more lid space. The key is using minimal product – you want a subtle glow, not an obvious spot of shimmer.
Consider highlighting the inner third of the lower lash line with a light, shimmery shade. This unexpected placement brightens the entire eye area and creates the illusion of larger, more awake-looking eyes. Match this shade to your inner corner highlight for cohesion.
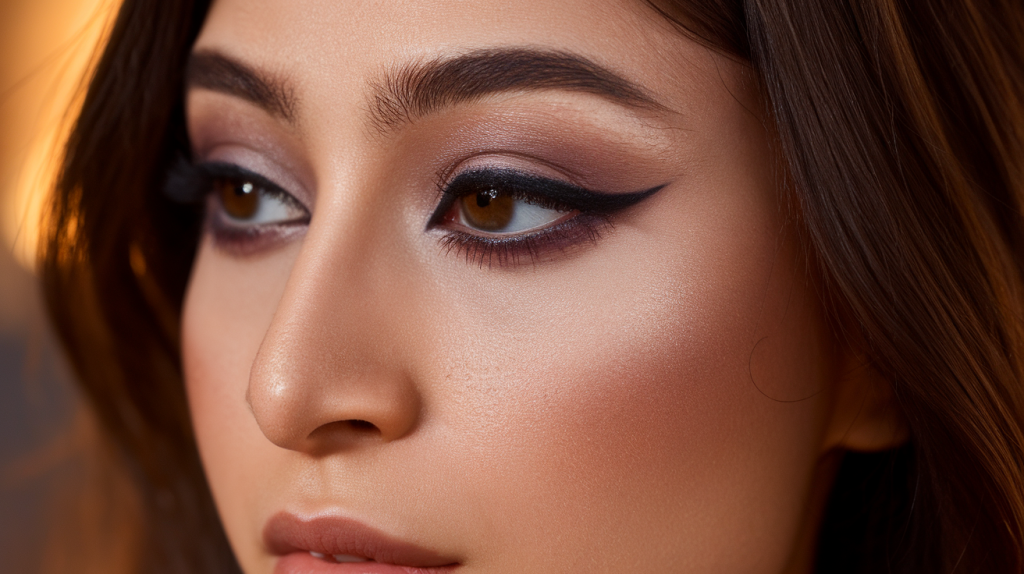
Eyeliner Strategies for Maximum Impact
Eyeliner application for hooded eyes requires a complete rethinking of traditional techniques. The goal shifts from creating thick, dramatic lines to strategic placement that defines without overwhelming your limited lid space. These specialized approaches ensure your liner enhances rather than hides your eyes.
Tightlining techniques
Tightlining becomes the hooded eye’s best friend, creating definition without sacrificing precious lid space. This technique involves applying liner between the lashes at the root, making lashes appear thicker and eyes more defined without any visible liner on the lid itself. Use a waterproof pencil or gel liner with a thin brush for precision.
Start by gently lifting your lid to expose the lash roots. Work in small sections, wiggling the product between each lash. This meticulous approach takes time but creates incredible definition that makes eyes pop without any visible liner. The effect looks natural yet polished, perfect for everyday wear.
For the lower lash line, tightlining just the outer two-thirds prevents the closing-in effect that full lower liner can create. This partial application maintains openness while still providing definition. Smudge slightly with a small brush for a softer effect that doesn’t look harsh.
Wing adjustments for hooded eyes
Creating wings on hooded eyes requires strategic planning. The traditional upward flick often gets lost in the fold or creates unusual shapes when the eye is open. Instead, keep wings shorter and more horizontal, following the natural curve of your lower lash line rather than aiming dramatically upward.
Start your wing with eyes open, marking where you want it to end. This ensures the wing remains visible and doesn’t create strange angles when your eye is open. The thickness should be minimal – think of it as an extension of your lash line rather than a dramatic statement. You can always build thickness if desired, but starting thin gives you more control.
Some women find success with the “bat wing” liner technique, where the liner follows the hood’s natural fold when the eye is open. This creates an unusual shape with eyes closed but appears as a perfect wing when open. Practice this technique when you have time to experiment, as it requires understanding your specific eye shape.
Thickness variations that work
Thin liner generally works better for hooded eyes, preserving lid space while still providing definition. Start with the thinnest line possible along the lash line, building only if necessary. The inner corner should have the thinnest application, gradually increasing slightly as you move outward.
Consider varying thickness strategically rather than maintaining one width throughout. A slightly thicker outer third creates the illusion of larger eyes without overwhelming the lid. This graduated approach adds dimension while maintaining the open appearance you want.
Skip thick liner on the mobile lid entirely. If you crave more drama, achieve it through eyeshadow depth or lash volume rather than liner thickness. This approach maintains the openness while still creating impact.
Color choices beyond basic black
While black liner creates definition, it can sometimes make hooded eyes appear smaller. Deep brown offers softer definition that opens the eyes, particularly for daytime looks. This shade works especially well for fair complexions or when you want a more natural appearance.
Colored liners in deep jewel tones add interest without the harshness of black. Navy, deep purple, or forest green provide definition while adding a subtle pop of color. These shades are particularly flattering when matched to your eye color – purple enhances green eyes, while bronze beautifies blue eyes.
For the lower lash line, consider lighter colors than you use on top. A medium brown or even a shimmer shade opens the eyes while still providing definition. This contrast between upper and lower creates dimension that makes eyes appear larger.
Preventing transfer and smudging
Transfer remains the biggest challenge for hooded eyes and liner. Set your liner immediately with a matching eyeshadow to lock it in place. Use a small, firm brush to press shadow directly over the liner, creating a barrier against transfer.
Waterproof formulas are essential, but application technique matters just as much. Allow each section to dry completely before moving to the next, and avoid looking down immediately after application. Some women find success with using a small fan or simply waving their hand to speed drying.
Consider using a liner sealant product designed specifically for preventing transfer. These clear formulas go over your finished liner, creating a protective barrier. While adding another step, they significantly extend wear time and prevent the dreaded transfer marks on the upper lid.
Lash Techniques to Lift and Define
Beautiful lashes can transform hooded eyes, creating lift and openness that no amount of shadow work can achieve. The right techniques make your lashes work harder, compensating for limited lid visibility while creating stunning definition.
Understanding how lashes interact with hooded eyes helps you maximize their potential. The right curl, product application, and lash style can literally lift the hood, creating more visible lid space while making eyes appear larger and more awake. These techniques go beyond basic mascara application to create truly transformative results.
Curling methods for lasting lift
Lash curling becomes essential for hooded eyes, but technique matters more than the tool itself. Start curling at the very base of your lashes, holding for a full ten seconds. Move the curler to the middle of your lashes and squeeze again, then finish with a gentle squeeze at the tips. This three-step process creates a gradual curve rather than a harsh bend.
Heat your lash curler slightly with a hair dryer for five seconds before using. Test the temperature on your hand first – it should feel warm, not hot. This gentle heat helps set the curl more effectively, particularly important for straight or stubborn lashes that tend to droop onto hooded lids.
For lasting results, curl before and after mascara application. The initial curl creates the shape, while the post-mascara curl locks it in place. Use a clean spoolie between coats to separate lashes and maintain the curl. This prevents clumping while ensuring each lash contributes to the lifted effect.
Waterproof mascara formulas hold curl better than regular ones. Even if you switch to regular mascara for easier removal, consider using waterproof just on the tips to maintain lift throughout the day. This hybrid approach gives you the best of both worlds.
Mascara application tricks
The way you apply mascara can dramatically impact how open your eyes appear. Focus most product on the roots, wiggling the wand back and forth to deposit color at the base. This creates the illusion of liner without taking up lid space while making lashes appear thicker from the root.
Apply mascara in thin coats, allowing each to dry before adding the next. Heavy, wet coats weigh down lashes, causing them to drop onto the hood. Three thin coats create more volume than one thick coat while maintaining lift. Pay special attention to the outer corner lashes, emphasizing them to create a subtle cat-eye effect.
For lower lashes, use a smaller wand or the tip of your regular wand. Apply product only to the outer two-thirds of lower lashes to maintain openness. Too much product on inner lower lashes can create a closing-in effect that makes hooded eyes appear smaller.
False lash selection and placement
False lashes can be game-changing for hooded eyes when chosen correctly. Avoid heavy, uniform strips that add weight and cause drooping. Instead, look for wispy styles with varying lengths that create natural-looking volume without overwhelming your eye shape.
Individual lashes or accent clusters work particularly well, allowing you to customize placement. Focus additional length and volume on the outer corners to create a lifting effect. The center of the lash line should have moderate length to avoid hitting the hood when you blink.
When applying strip lashes, trim them to fit your eye precisely. The band should end just before your inner corner to prevent irritation and maintain comfort with hooded lids. Use a thin line of lash glue and wait until tacky before application to prevent sliding and ensure precise placement.
Consider demi-lashes that cover only the outer two-thirds of your lash line. These provide drama where you want it most while maintaining a natural inner corner. This style opens the eyes and creates the illusion of an almond shape, particularly flattering for hooded eyes.
Brow grooming to complement eye makeup
Well-groomed brows create a frame that enhances eye makeup on hooded lids. The shape and position of your brows directly impacts how much lid space appears visible. A slightly higher arch can create the illusion of more space between the brow and lash line.
Avoid over-plucking the tail of your brow, as this can emphasize drooping. Instead, maintain a gentle arch that lifts the eye area. If your brows naturally grow close to your eyes, consider professional shaping to create more visible lid space. Even a few strategically removed hairs can make a significant difference.
Brow products should enhance without adding weight. Use hair-like strokes with a pencil or pen rather than heavy powder application. Focus on defining the arch and tail to create lift. A clear or tinted brow gel sets hairs in an upward direction, contributing to the overall lifted appearance.
The color of your brow products matters too. Going too dark can create a heavy appearance that emphasizes hooding. Choose a shade that matches your brow hairs or goes one shade lighter for a softer, more lifting effect. This subtle difference brightens the entire eye area.
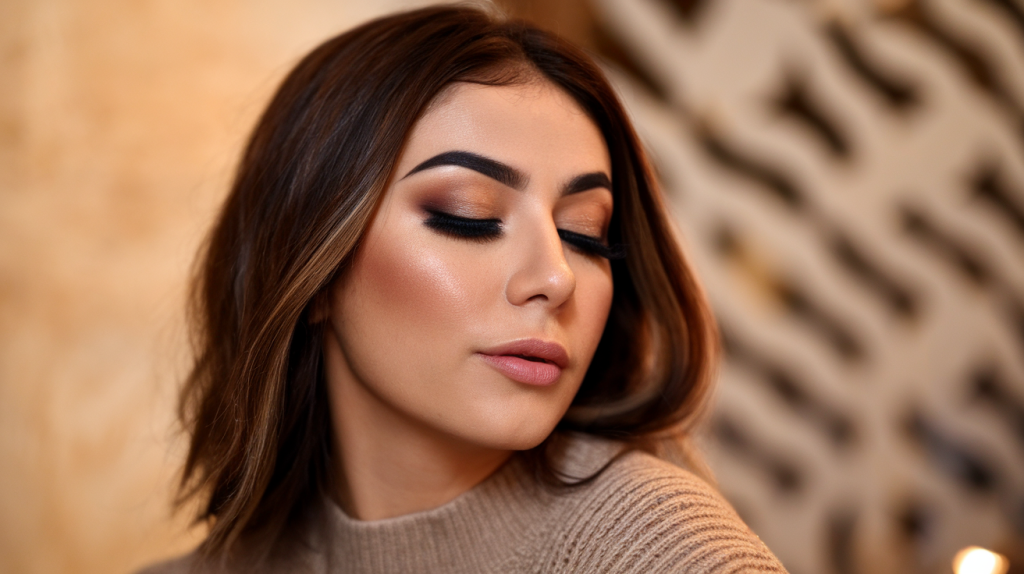
Creating the Perfect Everyday Look That Lasts
Putting all these techniques together creates stunning eye makeup that works with your hooded eyes throughout the day. The perfect everyday look balances enhancement with wearability, ensuring you feel confident from morning coffee through evening plans. Remember that practice makes perfect – the more you work with these techniques, the more natural they become.
The beauty of hooded eyes lies in their versatility once you master the right techniques. You’re not limited to one look or style. These methods simply provide the foundation for any creative expression you choose. Whether you prefer natural enhancement or dramatic evening looks, these strategies ensure your makeup stays beautiful and visible all day long.
Frequently Asked Questions
Q: Can I wear glitter eyeshadow if I have hooded eyes?
A: Yes, but placement is key. Apply glitter to the center of your mobile lid or inner corner rather than all over. Set with a fixing spray to prevent transfer, and choose finer glitters over chunky ones.
Q: Why does my eyeshadow always end up on my brow bone?
A: This happens due to transfer from your mobile lid to the hood. Use a strong eye primer, set cream products with powder, and ensure each layer is completely dry before opening your eyes fully.
Q: Should I avoid dark eyeshadows completely?
A: Not at all! Dark shadows work beautifully on hooded eyes when placed strategically. Use them in the outer V and along the upper lash line, but keep the mobile lid lighter to maintain openness.
Q: How can I make my wings symmetrical when one eye is more hooded?
A: Create wings with your eyes open, marking where you want them to end. The shape might look different on each eye when closed, but they’ll appear balanced when your eyes are open.
Q: What’s the best way to remove waterproof eye makeup?
A: Use an oil-based remover specifically designed for waterproof formulas. Soak a cotton pad and hold it on your closed eye for 30 seconds before gently wiping away. This prevents tugging on delicate skin.
Q: Can I wear cut crease looks with hooded eyes?
A: Traditional cut creases don’t work well, but you can create a modified version. Place the “cut” higher than your natural crease and keep the contrast subtle rather than stark.
Q: How do I keep my mascara from smudging on my upper lid?
A: Use waterproof mascara, especially on upper lashes. Let it dry completely before opening your eyes fully, and set with a light dusting of translucent powder on the hood area.
Q: Is it worth getting my brows professionally shaped for hooded eyes?
A: Professional shaping can make a significant difference by creating more visible lid space. A skilled technician can adjust your arch height and clean up areas that maximize your eye area.