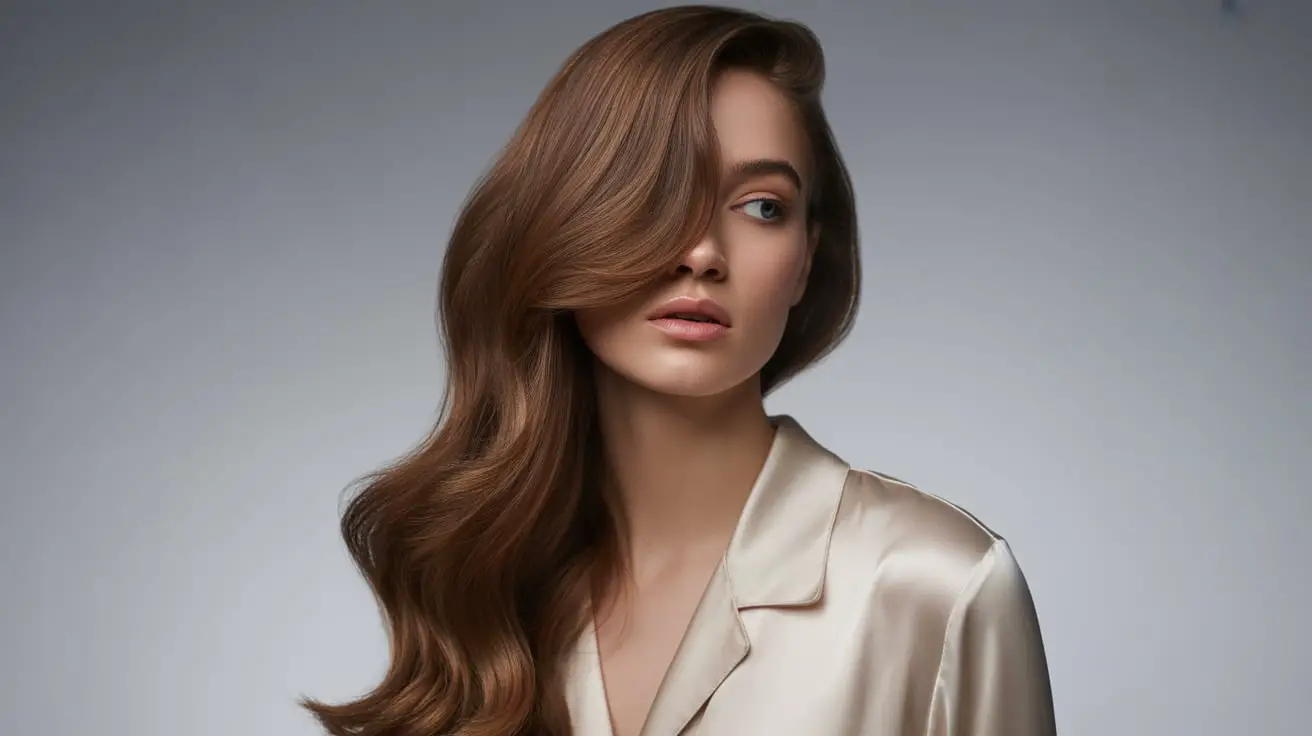
Chestnut brown hair color sits at that sweet spot between blonde and brunette, offering warmth without the commitment of going completely dark. This versatile shade brings together rich chocolate undertones with subtle caramel highlights, creating a multidimensional look that catches light beautifully in any setting. Whether you’re considering your first major color change or simply ready to refresh your current brunette, this particular hue offers something special that works across seasons and skin tones.
The beauty of this color lies in its adaptability – it can lean warmer with golden undertones or cooler with ash notes, making it customizable to your specific complexion and personal style. Professional colorists often recommend it as a gateway shade for blondes wanting to go darker or brunettes seeking more warmth and dimension. The color photographs exceptionally well, appearing rich and glossy whether you’re under fluorescent office lights or natural sunlight, which explains why it’s become such a social media favorite.
From subtle single-process applications to complex balayage techniques, the possibilities with this shade seem endless. Each variation offers its own personality while maintaining that signature richness that makes the color so appealing. Let’s walk through everything you need to know about achieving and maintaining your perfect version of this trending hair color.
- What Makes Chestnut Brown So Irresistible This Year
- Which Chestnut Brown Variations Work for Your Skin Tone
- How to Get the Perfect Chestnut Brown at Home
- What Styling Techniques Make Chestnut Brown Pop
- How to Maintain Your Chestnut Brown Between Salon Visits
- Your Perfect Shade Awaits
- Frequently Asked Questions
What Makes Chestnut Brown So Irresistible This Year
The current obsession with chestnut brown stems from its ability to look expensive and polished without requiring constant salon visits. Unlike platinum blonde or vivid fashion colors that demand frequent touch-ups, this shade naturally fades into beautiful variations of itself, maintaining its appeal even as roots grow in. The color strikes a perfect balance that feels both trendy and timeless, working equally well in professional settings and casual weekend looks.
The perfect balance between warm and cool tones
Finding a hair color that doesn’t clash with your wardrobe or makeup choices can feel impossible, but chestnut brown solves this dilemma elegantly. The shade contains enough warmth to prevent that flat, ashy appearance that can wash out certain skin tones, while maintaining sufficient coolness to avoid looking brassy or orange. This balanced nature means you won’t need to completely overhaul your makeup routine or clothing colors after dyeing.
The complexity within the shade creates natural-looking variation that mimics how hair appears in sunlight. Rather than a single flat color, you’ll notice subtle shifts between deeper espresso notes and lighter hazelnut highlights throughout your strands.
How it complements different skin tones
Universally flattering hair colors are rare, but chestnut brown manages to enhance nearly every complexion. Women with olive skin find that it brings out golden undertones without competing with their natural warmth. Those with pink or ruddy complexions discover that the shade helps neutralize redness while adding depth around the face.
Fair-skinned women benefit from the way this color creates contrast without appearing harsh or aging. The shade provides definition that pure blonde sometimes lacks while avoiding the severity that black hair can create against pale skin. Darker complexions look stunning with deeper variations that add richness and shine, creating that coveted glossy finish that reflects light beautifully.
Natural-looking dimension and depth
Single-process color often falls flat, lacking the movement and life of virgin hair. Chestnut brown, however, naturally creates an illusion of dimension even when applied uniformly. The interplay of red, gold, and brown pigments within the formula catches light differently across various angles, preventing that telltale “box dye” appearance.
This inherent depth becomes even more pronounced with professional techniques. Stylists can paint in lighter pieces around the face, add babylights throughout for sparkle, or create subtle ombré effects that transition into lighter ends. Each technique enhances the multidimensional quality already present in the base color.
Why colorists recommend this shade
Hair professionals consistently suggest chestnut brown to clients for several practical reasons beyond its aesthetic appeal. The shade covers gray effectively without looking harsh or unnatural, making it ideal for women beginning to see silver strands.
The color also causes less damage than dramatic lightening processes. Going from dark blonde or light brown to this shade typically requires minimal processing, preserving hair integrity. Even those starting from black or very dark brown can achieve it without extensive bleaching.
Colorists appreciate how forgiving the shade is during application. Small mistakes or uneven sections blend more easily than with extreme colors, resulting in fewer correction appointments.
Maintenance and longevity benefits
Your color investment stretches further with chestnut brown compared to high-maintenance shades. Root growth blends more seamlessly, especially if you choose a shade close to your natural color. This means you can extend time between salon visits from the typical 4-6 weeks to 8-10 weeks or even longer.
The shade resists common color problems like brassiness and fading better than lighter colors. While blonde hair might turn yellow or orange between appointments, this color simply softens into equally attractive variations. You might notice it becoming slightly lighter or developing more golden tones, but these changes typically enhance rather than detract from the overall look. Swimming pools, sun exposure, and heat styling affect it less dramatically than more delicate colors.
Which Chestnut Brown Variations Work for Your Skin Tone
Not all chestnut browns are created equal. The shade encompasses a surprisingly wide spectrum, from light milk chocolate tones to deep espresso-adjacent hues. Understanding which variation complements your complexion ensures you’ll love your results rather than feeling like something’s slightly off. The key lies in identifying your skin’s undertones and selecting a version that harmonizes with them rather than competing.
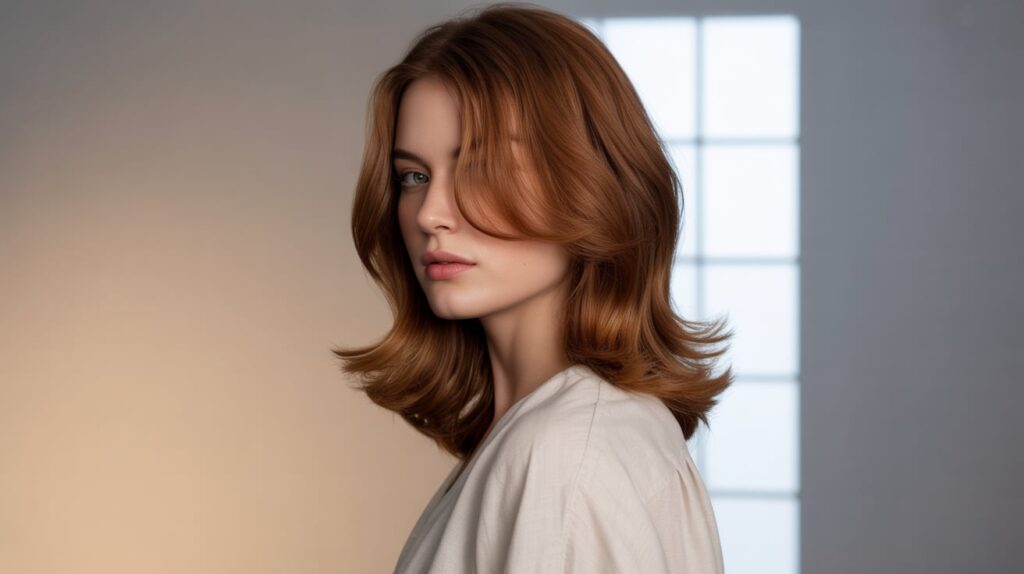
Golden chestnut for warm undertones
Women who look best in gold jewelry and peachy blush typically have warm undertones that pair beautifully with golden chestnut variations. This version incorporates honey and caramel notes that echo the natural warmth in your skin. The result feels cohesive and sun-kissed, as if you’ve spent weeks on a Mediterranean vacation.
Look for formulas described as “warm brown” or containing words like honey, caramel, or golden in their names. These shades contain more yellow and orange pigments that prevent the color from appearing flat or muddy against warm skin.
During application, your colorist might add face-framing highlights in an even warmer tone to brighten your complexion further. This technique creates a lifting effect that many women find instantly rejuvenating. The golden tones reflect light upward, minimizing shadows and creating a youthful glow.
Ash chestnut for cool undertones
If silver jewelry suits you better than gold and you gravitate toward pink or berry lip colors, ash chestnut will likely become your signature shade. This cooler variation eliminates any hint of red or orange, instead incorporating subtle violet and blue undertones that neutralize unwanted warmth.
The sophistication of ash tones creates an expensive-looking finish that photographs beautifully. Fashion photographers often request this specific variation because it maintains its true color under various lighting conditions without pulling brassy or orange. Cool-toned women find this shade makes their skin appear clearer and more porcelain-like.
When requesting this variation at the salon, specify that you want all warmth eliminated. Some stylists add a purple toner after the initial color to ensure no golden tones develop as the color oxidizes. This extra step makes a significant difference in achieving that perfect cool-toned result.
Between salon visits, purple shampoo helps maintain the ash quality. Use it once weekly to prevent any warmth from creeping in, especially if your water contains minerals that can alter your color.
Neutral chestnut for balanced complexions
Some women don’t fall clearly into warm or cool categories, finding that both gold and silver jewelry work equally well. These balanced complexions look stunning in neutral chestnut, which contains equal amounts of warm and cool pigments.
This variation offers maximum versatility in terms of makeup and wardrobe choices. You can wear coral lipstick one day and burgundy the next without your hair color clashing. The balanced tone acts as a perfect canvas for experimenting with different looks.
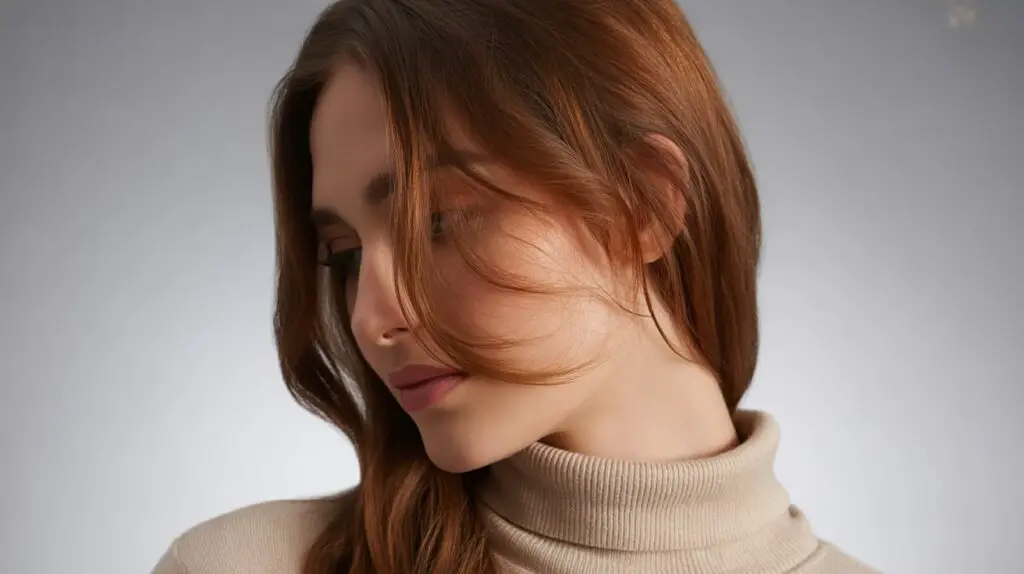
Deep chestnut for darker skin tones
Rich, deep chestnut creates gorgeous contrast and dimension on darker skin while maintaining a natural appearance. This variation leans toward espresso but retains enough brown to distinguish it from pure black. The richness adds incredible shine that makes hair look thick and healthy.
Consider incorporating subtle highlights just one or two shades lighter than your base to add movement. These don’t need to be dramatic – even minimal variation creates visual interest. Caramel or toffee ribbons woven throughout prevent the color from appearing too uniform or heavy.
Women with darker skin often find that deep chestnut makes their features pop more than lighter shades would. The color creates beautiful contrast with the whites of eyes and teeth, producing a brightening effect. Many notice their skin appears more luminous with this rich backdrop.
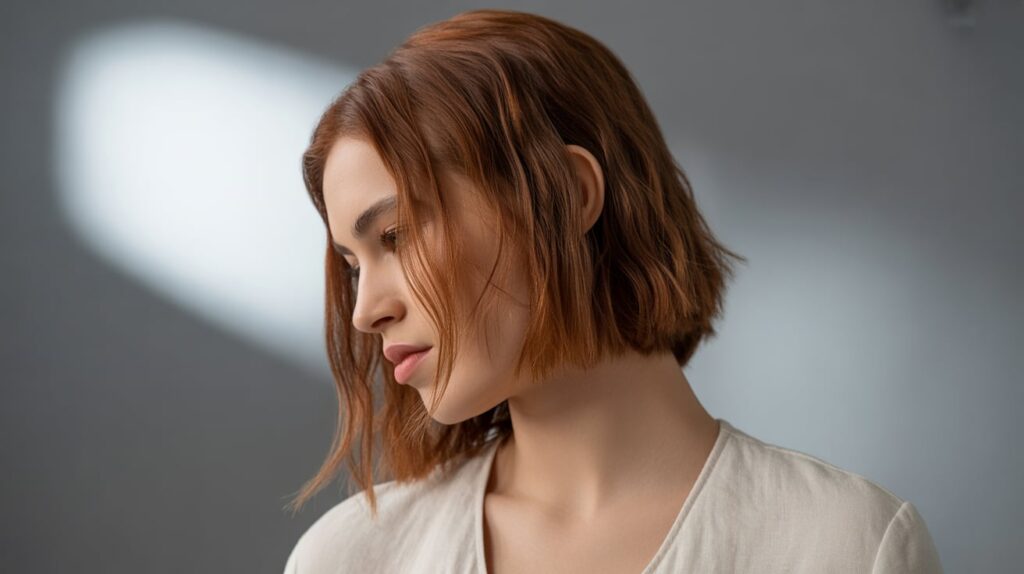
Light chestnut for fair complexions
Fair-skinned women sometimes worry that brown hair will wash them out, but light chestnut provides the perfect solution. This variation hovers between dark blonde and light brown, offering more depth than blonde while avoiding the potential harshness of darker browns.
The shade works particularly well for women transitioning from blonde who aren’t ready for a dramatic change. It adds richness and dimension while maintaining some of the lightness they’re accustomed to. Natural blondes going darker for the first time often find this shade less shocking than deeper browns.
Here are key considerations when choosing light chestnut for fair skin:
- Undertone Matching: Select warm-leaning versions if you have peachy skin, cool-leaning for pink undertones
- Highlight Placement: Strategic lighter pieces around the face prevent the color from overwhelming delicate features
- Glossing Treatments: Regular glosses enhance shine and prevent the color from appearing dull
- Gradual Transition: Consider starting lighter and gradually deepening over multiple appointments
Your stylist might suggest a technique called “reverse balayage” where darker pieces are painted in while maintaining lighter sections. This creates depth without committing to all-over color, perfect for those nervous about going too dark too quickly.
How to Get the Perfect Chestnut Brown at Home
Achieving salon-quality chestnut brown from a box requires more preparation and technique than simply following the basic instructions. While professional coloring always yields superior results, budget constraints or scheduling difficulties sometimes make at-home coloring necessary. Success depends on choosing the right product and applying it strategically to avoid common mistakes like uneven coverage or unexpected tones.
Choosing the right shade from the box
Box dye names rarely match their actual results, making shade selection trickier than it should be. That “medium chestnut brown” might turn out surprisingly dark, while “golden chestnut” could appear almost auburn. The model’s photo on the box provides limited guidance since results vary dramatically based on your starting color and hair condition.
Read the side panel that shows expected results based on different starting shades. These charts prove more reliable than front packaging. If your current color falls between two categories, expect results closer to the darker prediction. Hair typically absorbs color more readily than anticipated, especially if it’s porous from previous chemical processing.
Consider purchasing two boxes if your hair extends past shoulder length. Running out mid-application guarantees uneven results. Better to have extra than attempt stretching a single box too thin. Many stores accept returns of unopened boxes, so the additional purchase doesn’t necessarily mean wasted money.
Pre-coloring preparation steps
The condition of your hair before coloring determines how well it accepts and holds the new shade. Clarifying shampoo used 24-48 hours before coloring removes product buildup that might prevent even absorption. Skip conditioner after this wash – you want your cuticles slightly open to accept color.
Perform a strand test even if you’ve used the brand before. Cut a small section from an inconspicuous area, apply the color according to directions, and evaluate the result. This reveals how your specific hair reacts to the formula, potentially saving you from whole-head disasters. Pay attention to both the color result and how your hair feels afterward. Excessive dryness or brittleness indicates the formula might be too harsh for your hair type.
Protect your skin, clothing, and surroundings before beginning. Petroleum jelly along your hairline, ears, and neck prevents stubborn staining. Old towels, a button-front shirt you don’t mind ruining, and newspapers or plastic sheets on the floor eliminate worry about drips and splashes.
Application techniques for even coverage
Sectioning your hair properly makes the difference between professional-looking results and obvious DIY color. Divide hair into four quadrants – part down the middle from forehead to nape, then ear to ear across the crown. Clip each section separately.
Start application at the back sections where hair tends to be most resistant. These areas need maximum processing time. Work in small subsections no wider than an inch, applying color from roots to ends with a tinting brush rather than the bottle applicator. Brushes provide better control and more even distribution.
Roots process faster due to scalp heat, so apply there last if you’re covering your entire head. For root touch-ups only, focus exclusively on regrowth to avoid creating bands of different tones. Overlapping onto previously colored hair creates darker sections that look unnatural.
After initial application, go back through each section adding more product where needed. Hair absorbs color quickly in the first few minutes, and sparse areas become apparent. Don’t assume one pass provides sufficient coverage.
Processing time considerations
Resist the temptation to leave color on longer than recommended, thinking it will create richer results. Over-processing leads to damage and potentially darker color than intended. Set a timer immediately after finishing application.
Check your color development at the minimum recommended time. Wipe a small section clean with a damp paper towel to see the true color. If it needs more time, reapply color to that spot and continue processing. Gray hair often requires the full processing time, while previously colored hair might develop faster.
Room temperature affects processing speed. Cold rooms slow chemical reactions, potentially requiring a few extra minutes. Warm environments speed things up. If your bathroom tends toward either extreme, adjust timing accordingly. Never use heat from a blow dryer unless specifically instructed – this can create uneven results and damage.
Aftercare for lasting color
The first 48 hours after coloring determine how long your new shade lasts. Wait at least two days before shampooing to allow the cuticle to fully close and lock in pigment. When you do wash, use cool water – hot water opens cuticles and releases color molecules.
Invest in color-safe products even if you typically use drugstore basics. Sulfate-free formulas prevent premature fading while maintaining moisture that colored hair desperately needs. The extra cost pays for itself through extended color life.
Weekly deep conditioning treatments repair damage from the coloring process while keeping your shade vibrant. Look for masks specifically formulated for color-treated hair. These contain ingredients that smooth the cuticle and enhance shine. Apply from mid-length to ends, avoiding roots that can become greasy with heavy treatments.
Your styling routine might need adjustment to preserve your investment. Heat protection spray becomes non-negotiable before any hot tool use. Lower temperatures achieve the same styles while minimizing color fade and damage. Consider air-drying more often or using heated tools just for special occasions.
What Styling Techniques Make Chestnut Brown Pop
The richness of chestnut brown deserves styling techniques that showcase its multidimensional nature. Certain methods reveal hidden tones and create movement that makes the color appear even more expensive. Whether you prefer sleek and polished or textured and casual, specific approaches maximize the impact of your new shade. The right styling can make the difference between hair that looks nice and hair that stops people in their tracks.
Glossing treatments for shine
Nothing showcases the depth of chestnut brown quite like mirror-like shine. Glossing treatments, whether professional or at-home, deposit a clear or tinted topcoat that smooths the cuticle and amplifies light reflection. The effect makes your color appear fresher and more dimensional, similar to the difference between matte and glossy nail polish.
Professional glosses last 4-6 weeks and can subtly adjust tone while adding shine. Your stylist might recommend a clear gloss for pure shine or a tinted version to enhance specific undertones in your color. Some women schedule gloss appointments between full color services to maintain that just-left-the-salon look.
At-home glossing masks offer temporary but impressive results. These typically last 1-2 weeks but cost a fraction of salon treatments. Apply them after shampooing, leave on for the specified time, and rinse thoroughly.
The immediate transformation after glossing can be dramatic. Dull, tired-looking color suddenly appears rich and healthy. Light bounces off each strand differently, creating movement and dimension even in simple styles.
Wave and curl patterns that enhance dimension
Curved styles naturally create shadows and highlights that make monochromatic color appear more complex. Beach waves, in particular, show off the various tones within chestnut brown beautifully. The bends catch light at different angles, revealing golden glints or deeper chocolate notes you might not notice in straight styles.
Creating waves starts with proper prep. Texturizing spray applied to damp hair provides grip and hold without weighing down the movement. Section hair horizontally and wrap pieces around a large barrel curling iron, leaving ends out for a modern finish.
For a lived-in wave pattern, alternate curl directions and vary the size of sections. This randomness appears more natural than uniform curls all going the same way. After curling, let hair cool completely before gently separating waves with your fingers.
Braiding damp hair before bed creates heat-free waves that last surprisingly well. French or Dutch braids produce tighter patterns near the roots, while simple three-strand braids create looser waves. The overnight method proves gentler on color-treated hair while still delivering texture that highlights your color’s complexity.
Straight styles that showcase richness
While waves create dimension through shadow play, poker-straight styles reveal color richness through pure shine and uniformity. The key lies in achieving smoothness without flatness – you want sleek strands that still move naturally.
Start with a smoothing shampoo and conditioner designed for straight styles. These formulas typically contain ingredients that align the hair shaft and reduce frizz. After towel-drying, apply a lightweight serum from mid-length to ends. Too much product near roots creates greasiness that dulls your color’s impact.
Blow-dry using a paddle brush, directing air flow down the shaft from roots to ends. This technique smooths cuticles for maximum light reflection. Professional stylists use the cool shot button at the end of each section to set the style and boost shine.
Flat iron work should be minimal on color-treated hair, but when necessary, keep the temperature below 350°F. Higher heat strips color molecules and creates damage that makes hair appear dull. Pass through each section just once – multiple passes increase damage without improving results.
The finished straight style should move when you walk, not sit stiffly like a helmet. This movement catches light continuously, showing off the expensive-looking finish that makes chestnut brown so appealing.
Braiding techniques for depth display
Braids naturally separate and recombine sections of hair, creating patterns that reveal color variation beautifully. Even solid color appears more interesting when woven into intricate designs. The interplay of overlapping sections produces a visual richness that makes your shade look professionally highlighted.
Consider these braiding styles that particularly flatter brown hair:
- Fishtail Braids: The thin sections create intricate patterns that showcase subtle color differences
- Dutch Braids: The raised nature of these braids creates shadows underneath that add dimension
- Waterfall Braids: Dropping sections throughout reveals different tones as strands cascade down
- Crown Braids: Wrapping around the head displays color from multiple angles simultaneously
Preparation makes braiding easier and longer-lasting. Day-old hair provides better grip than freshly washed strands. Dry shampoo at roots adds texture that helps braids hold their shape. A light mist of hairspray on each section before braiding prevents flyaways without creating stiffness.
Updos that highlight multidimensional tones
Strategic updos reveal color complexity by exposing different sections simultaneously. A simple topknot shows off darker underneath sections while highlighting lighter pieces on top. The contrast creates visual interest that wouldn’t be apparent with hair down.
Low chignons with face-framing pieces pulled out combine elegance with dimension. The twisted sections in the bun catch light differently than the looser pieces around your face. This variation prevents the style from appearing too uniform or helmet-like.
Messy buns work particularly well with chestnut brown because the intentional imperfection reveals multiple tones. Pull the style apart slightly after securing to create gaps where light penetrates. These openings showcase interior color that typically stays hidden.
Half-up styles offer the best of both worlds – the polished look of an updo with the movement of loose hair. The contrast between secured and flowing sections naturally displays your color’s range. Try twisting side sections back and securing with bobby pins that match your shade for an effortless look that still appears intentional.
How to Maintain Your Chestnut Brown Between Salon Visits
The journey doesn’t end once you achieve your perfect shade of chestnut brown. Maintaining that fresh-from-the-salon richness requires consistent care and smart product choices. Without proper maintenance, even the most beautiful color job fades into something muddy and lifeless within weeks. A solid routine extends the time between expensive salon visits while keeping your color vibrant and dimensional.
Color-safe shampoo selection
Your shampoo choice impacts color longevity more than any other product in your routine. Traditional shampoos containing sulfates strip color molecules along with dirt and oil, causing rapid fading. Color-safe formulas use gentler cleansing agents that preserve pigment while still removing buildup.
Reading ingredient lists helps identify truly color-safe options versus marketing claims. Avoid sodium lauryl sulfate and sodium laureth sulfate – these harsh detergents fade color fastest. Look instead for cocamidopropyl betaine or sodium cocoyl isethionate, gentler alternatives that clean without stripping.
Purple shampoos aren’t just for blondes. Using one weekly prevents brassiness in cooler-toned chestnut variations. The violet pigments neutralize unwanted orange or yellow tones that develop over time. Start with once-weekly use and adjust based on how your color responds.
Weekly conditioning treatments
Colored hair needs more moisture than virgin strands because the coloring process raises cuticles and creates porosity. Weekly deep conditioning fills these gaps, smoothing the hair shaft and locking in color molecules. Well-moisturized hair also reflects more light, making your shade appear richer and more dimensional.
Protein treatments alternated with moisture masks create the ideal balance. Protein fills structural gaps in damaged hair, while moisture prevents brittleness. Using only one type leads to problems – too much protein causes breakage, excessive moisture creates limpness.
Application technique matters as much as product selection. After shampooing, squeeze out excess water before applying your treatment. Water-logged hair can’t absorb conditioning ingredients effectively. Focus on mid-lengths and ends where damage concentrates, avoiding roots that rarely need deep conditioning.
Heat amplifies treatment penetration. Covering hair with a shower cap and wrapping a warm towel on top opens cuticles for deeper absorption. Even 10 minutes with heat equals 30 minutes without, making treatments more efficient for busy schedules.
Heat protection essentials
Every heat styling session potentially strips color and damages hair structure. Protection sprays create a barrier between styling tools and your strands, minimizing both color fade and structural damage. Think of them as sunscreen for your hair – invisible protection that prevents long-term damage.
Different heat protectants work better for various styling methods. Lightweight sprays suit fine hair and quick touch-ups. Cream formulas provide heavier protection for thick hair or extensive styling sessions. Serums offer the most intensive protection but can weigh down finer textures.
Application timing and technique affect protection levels. Most products work best on damp hair before blow-drying, creating a protective layer as hair dries. For dry styling with flat irons or curling tools, apply protectant to small sections immediately before heat contact.
Temperature matters more than you might think. Each 25-degree increase dramatically affects color molecules. Keep flat irons and curling irons below 350°F for color-treated hair. Yes, styling takes slightly longer at lower temperatures, but your color remains vibrant weeks longer.
Root touch-up strategies
Visible roots can make even expensive color look cheap and poorly maintained. Between full color appointments, several strategies disguise growth while protecting your hair from excessive processing.
Root concealer sprays provide instant coverage that shampoos out. These work best for special events or important meetings when you need quick fixes. Match the shade slightly lighter than your colored hair – exact matches often appear too dark at the scalp.
Powder formulas last longer than sprays and look more natural. Applied with a small brush, they cling to hair without the helmet-like effect some sprays create. Setting them with hairspray extends wear time through multiple days.
Strategic styling minimizes root visibility without any products. Deep side parts reveal less growth than center parts. Slightly tousled styles at the crown disguise the line between natural and colored hair. Headbands, scarves, and creative braiding also camouflage growth while adding style interest.
Professional treatments worth investing in
While at-home care maintains your color, certain professional treatments dramatically extend its life and improve appearance between full color services. These investments often cost less than frequent color appointments while delivering impressive results.
Glossing treatments every 4-6 weeks refresh color without the commitment or damage of full processing. Your stylist can adjust the formula to correct any unwanted tones developing in your shade. Clear glosses simply add shine, while tinted versions subtly shift color.
Olaplex or similar bond-building treatments repair structural damage that causes color to fade quickly. Damaged hair can’t hold pigment effectively, so repairing bonds helps color last longer. Many salons add these treatments to color services, but standalone appointments provide intensive repair.
Professional deep conditioning treatments penetrate more effectively than at-home versions. Salon-strength formulas combined with processing techniques like steam or heat caps deliver results lasting several weeks. The immediate improvement in shine and manageability makes your color look freshly done.
Toning services adjust color between full applications. If your chestnut develops unwanted warmth or coolness, a professional toner corrects it without processing your entire head. This proves especially useful for maintaining ash tones that tend to fade quickly.
Your Perfect Shade Awaits
After exploring all these variations and techniques, you might feel ready to take the plunge into chestnut brown territory. The shade offers something unique – sophistication without stuffiness, warmth without brassiness, and depth without heaviness. Most women find that once they discover their perfect version of this color, it becomes their signature look for years to come.
The versatility and low maintenance of chestnut brown make it particularly appealing for busy women who want gorgeous hair without constant salon visits. Whether you choose professional color or brave the at-home route, proper preparation and aftercare ensure beautiful results that last. Your new shade will photograph beautifully, complement your wardrobe, and give you that confidence boost that comes from having genuinely great hair.
Frequently Asked Questions
Q: How long does chestnut brown hair color typically last?
A: With proper care and color-safe products, chestnut brown typically maintains its vibrancy for 6-8 weeks. The shade tends to fade gracefully into lighter variations rather than turning brassy or dull.
Q: Can I achieve chestnut brown if I have previously bleached hair?
A: Yes, but previously bleached hair requires careful color filling first. Your stylist will need to add back warm pigments before applying the final chestnut shade to prevent it from turning green or muddy.
Q: Will chestnut brown cover my gray hair completely?
A: Chestnut brown provides excellent gray coverage, especially in professional formulas. Resistant grays might require pre-softening or longer processing times, but the shade effectively camouflages silver strands.
Q: What’s the difference between chestnut brown and chocolate brown?
A: Chestnut brown contains more red undertones and appears lighter than chocolate brown. Chocolate brown leans cooler and darker, while chestnut has warmth and dimension that creates a more multifaceted appearance.
Q: How often should I wash chestnut brown hair to maintain the color?
A: Washing 2-3 times per week maximizes color longevity. Use dry shampoo between washes to maintain freshness without stripping color through excessive washing.
Q: Can I go from black hair to chestnut brown without bleaching?
A: Achieving true chestnut brown from black requires some lightening, though not necessarily bleaching. Color removers or high-lift color might achieve the desired result with less damage than traditional bleach.
Q: Does chestnut brown hair color require special makeup changes?
A: Most women find chestnut brown works with their existing makeup. You might want to adjust brow products to match better, and some find that warmer lip colors complement the hair shade beautifully.
Q: What happens if I don’t like how chestnut brown looks on me?
A: The shade can be adjusted relatively easily. Going darker requires simple application of a deeper brown, while lightening might need professional help but remains less damaging than initial lightening from dark hair.