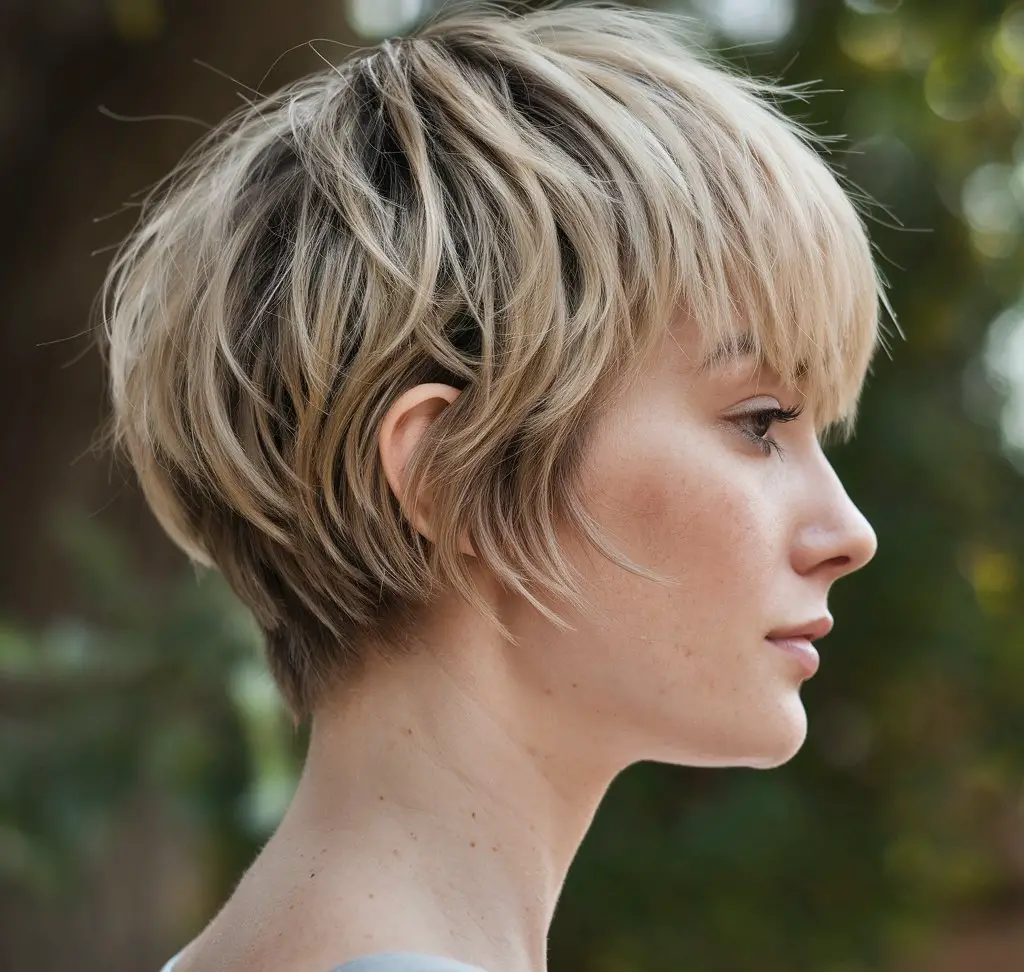
The short shaggy bob has become one of the most requested haircuts in salons across the country. This versatile style combines the classic bob structure with textured, choppy layers that create movement and dimension. Unlike traditional bobs that feature clean, precise lines, this cut offers a more relaxed and effortless appearance that works beautifully for various hair types and face shapes.
What sets this particular haircut apart is its ability to add volume and texture without requiring extensive daily styling. The strategic layering creates natural movement that looks fresh whether you air-dry your hair or style it with minimal effort. Women with fine hair find it adds fullness, while those with thicker hair appreciate how the layers reduce bulk and create a more manageable shape.
In the following sections, you’ll discover everything needed to successfully cut this trendy style at home. From understanding the key differences between this and other bob variations to mastering the texturizing techniques that give it its signature look, we’ll cover the complete process step by step. Let’s explore how to achieve this flattering and modern haircut that continues to dominate hair trends this year.
What Makes a Short Shaggy Bob Different From Other Bob Cuts?
A short shaggy bob stands apart from traditional bob haircuts through its distinctive approach to layering and texture. Rather than the uniform length and sharp edges found in classic bobs, this style features multiple layers cut at varying lengths throughout the hair. These layers start shorter at the crown and gradually increase in length, creating natural volume and movement that gives the cut its characteristic tousled appearance.
The signature layers and texture
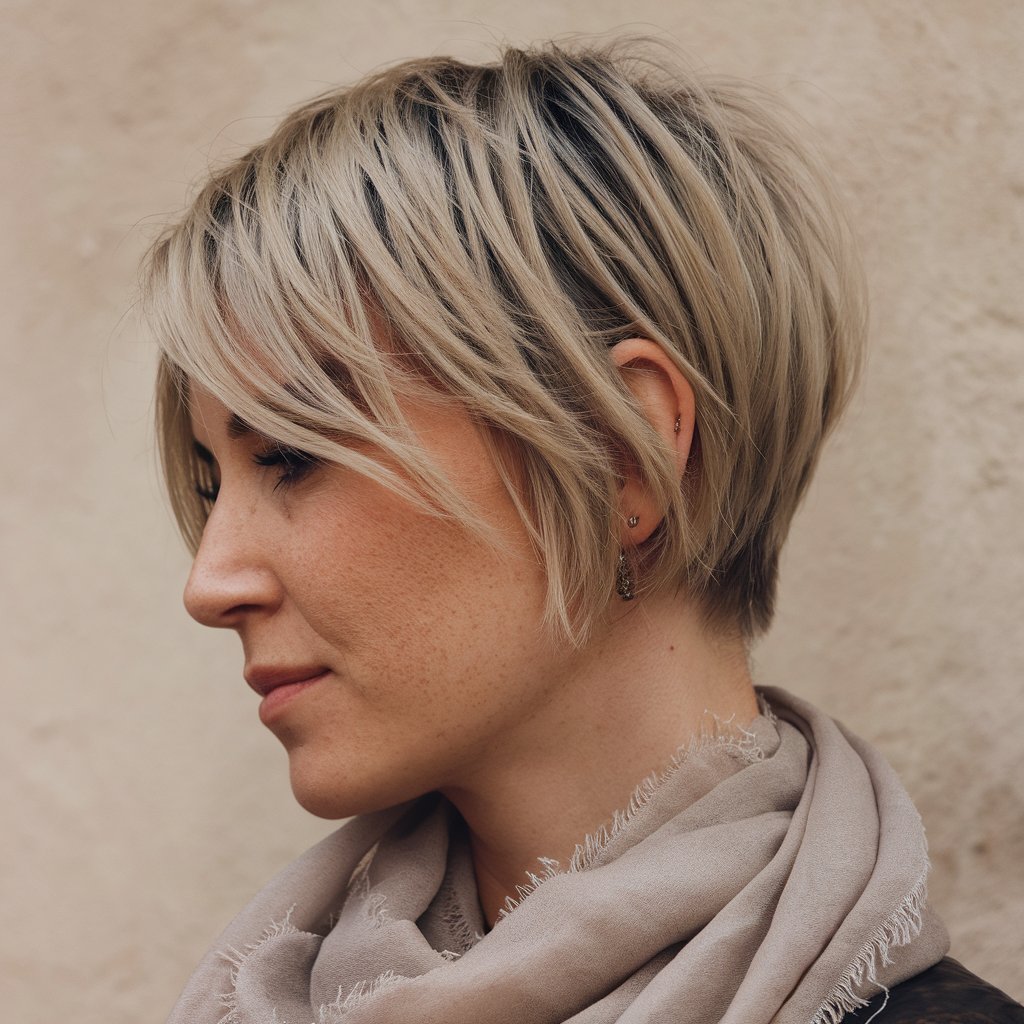
The layering technique used in this haircut creates a deliberately undone texture that looks effortlessly stylish. Each layer is cut at different angles to prevent the hair from lying flat against the head. This approach produces a piece-y, separated effect that adds visual interest and dimension. The layers typically begin around the cheekbones and continue throughout the length, with shorter pieces framing the face and longer sections providing weight at the bottom.
Length variations and where it hits
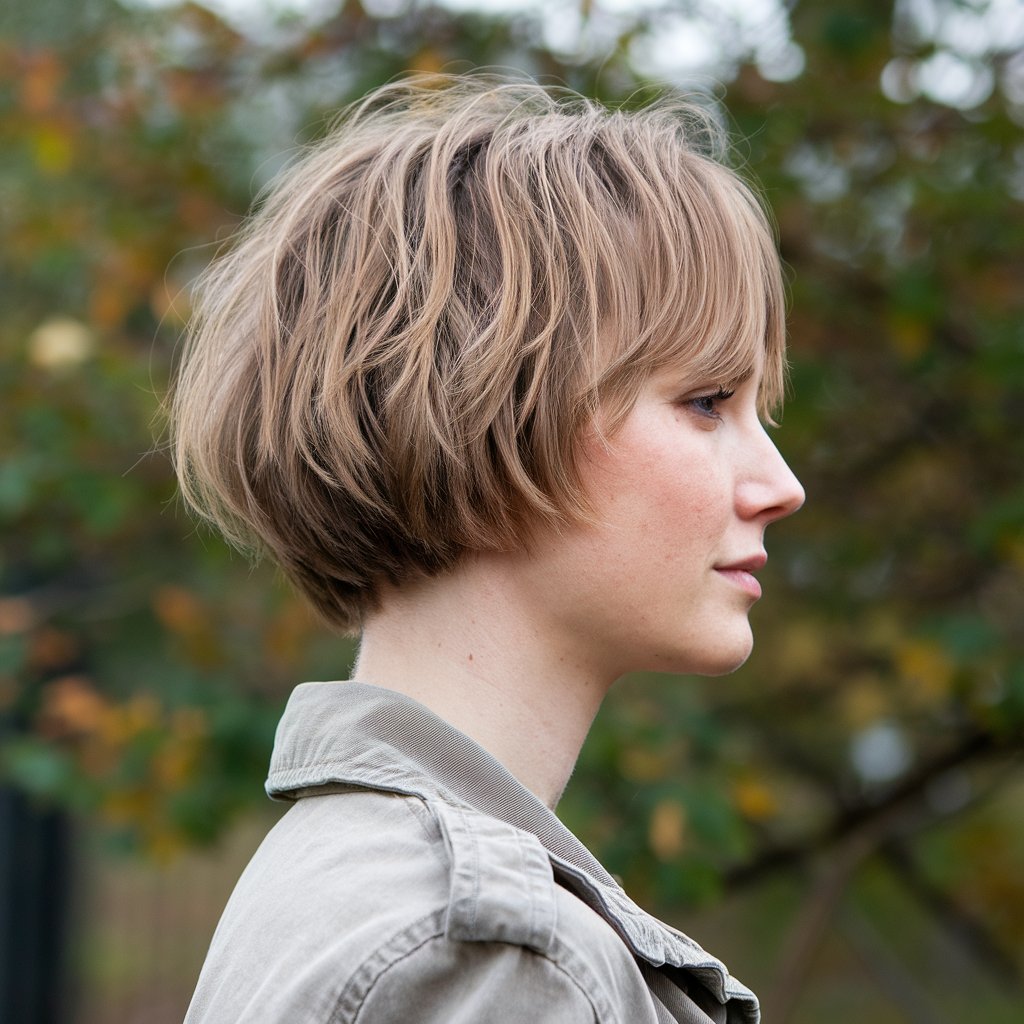
Most short shaggy bobs fall somewhere between the chin and shoulders, though the exact length depends on personal preference and face shape. The front sections often hit just below the jawline, while the back can range from nape-length to collar-bone length. This graduation in length creates a subtle angle that’s less severe than an A-line bob but more dynamic than a one-length cut. The varying lengths also allow for more styling versatility.
Movement and volume characteristics
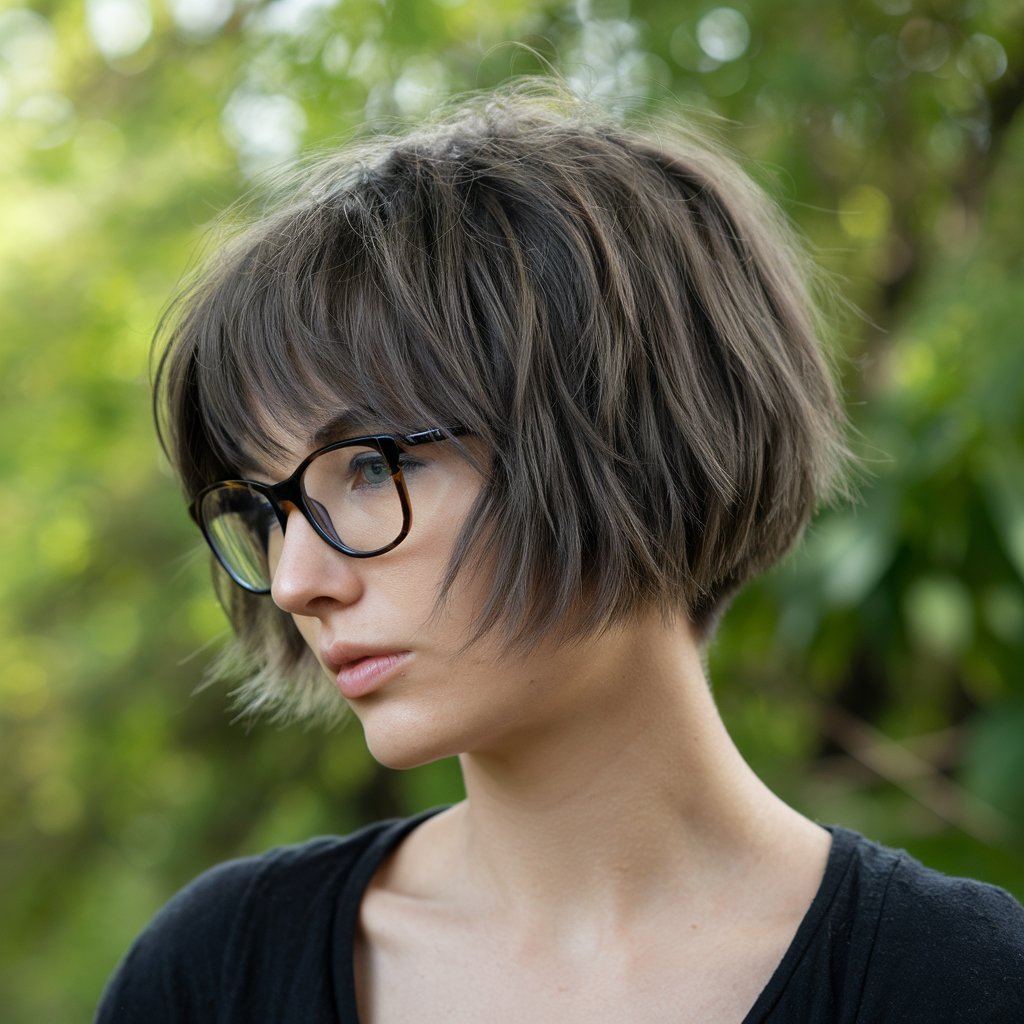
The way hair moves is perhaps the most defining characteristic of this cut. Unlike sleek, polished bobs that require blow-drying and flat-ironing to look their best, this style thrives on natural texture and movement. The layers work together to create lift at the roots and separation throughout the lengths. This built-in movement means the hair looks good whether it’s styled with products or simply allowed to air-dry naturally.
Face-framing qualities
One of the most flattering aspects of this haircut is how it frames the face. The shorter layers around the face create soft, wispy pieces that highlight your best features while softening angular jawlines or adding definition to rounder face shapes. These face-framing layers can be customized to work with any face shape, making the style universally flattering. The texture also prevents the hair from looking too heavy or severe around the face.
Maintenance requirements
While this cut appears effortlessly undone, it does require regular maintenance to keep its shape. The layers need trimming every 6-8 weeks to prevent them from growing out unevenly. However, the textured nature of the cut means it grows out more gracefully than precision bobs, giving you a bit more flexibility between salon visits. Daily styling is minimal – most women find they can enhance the natural texture with a bit of texturizing spray or sea salt spray and go.
The beauty of this particular style lies in its versatility and forgiveness. Small imperfections in cutting actually add to its charm, making it an ideal choice for those attempting to cut their own hair or for stylists still perfecting their technique.
Essential Tools You’ll Need Before Starting
Having the right tools makes the difference between a professional-looking haircut and one that appears amateurish. Before attempting to cut a short shaggy bob, gathering quality equipment will set you up for success. While you don’t need every tool a professional salon uses, certain items are absolutely essential for achieving the textured, layered look that defines this style.
Professional hair cutting scissors
Regular household scissors will damage hair by crushing and tearing rather than cleanly cutting. Professional hair cutting scissors, also called shears, feature sharp blades specifically designed to slice through hair smoothly. Look for scissors between 5.5 and 6.5 inches long, which provide good control for most cutting techniques. The investment in quality shears pays off through cleaner cuts that reduce split ends and create smoother layers.
Quality shears should feel comfortable in your hand with a balanced weight distribution. Stainless steel or Japanese steel options offer durability and maintain their sharpness longer. If purchasing professional shears seems expensive, consider that one good pair will last years with proper care, making them worthwhile for anyone planning to cut hair regularly.
Texturizing shears
These specialized scissors feature one regular blade and one blade with teeth, creating a tool that removes bulk and adds texture without changing the overall length dramatically. For a shaggy bob, texturizing shears are crucial for creating the piece-y, separated texture that defines the style. They thin out thick sections and soften blunt edges, transforming a basic bob into the coveted shaggy version.
When selecting texturizing shears, consider the number of teeth – fewer teeth remove more hair with each cut, while more teeth create subtler texture. For beginners, shears with 25-30 teeth offer good control and versatility. Practice using them on small sections first to understand how much hair they remove.
Clips and sectioning tools
Proper sectioning is fundamental to achieving an even, balanced haircut. You’ll need several clips to separate hair into manageable sections while cutting:
Duckbill clips: These flat, long clips hold sections securely without creating dents
Butterfly clips: Ideal for holding larger sections of hair up and out of the way
Sectioning clips: Smaller clips perfect for precise partings and detailed work
Tail comb: Essential for creating clean parts and sections
Having enough clips prevents the frustration of hair falling into your work area. Professional stylists typically use 6-10 clips during a haircut, so stock up accordingly.
Spray bottle and combs
A spray bottle filled with water keeps hair at the optimal dampness for cutting. Look for bottles with fine mist settings that distribute water evenly without soaking the hair. Some stylists prefer bottles with continuous spray triggers that reduce hand fatigue during longer cutting sessions.
Combs serve multiple purposes during haircutting. A wide-tooth comb detangles without pulling, while a fine-tooth comb creates precise sections and checks for evenness. A cutting comb with both wide and fine teeth offers versatility in one tool. The long, thin handle of a tail comb helps create straight parts and lift sections for cutting.
Mirror setup
Proper visibility from multiple angles prevents surprises once the haircut is complete. Ideally, position yourself between two mirrors – one in front and one behind – allowing you to see all angles of the head while cutting. A hand mirror also helps check side views and hard-to-see areas.
Good lighting is equally important. Natural light or bright white LED lights reveal the true texture and any uneven spots. Avoid yellow-tinted lighting that can distort how the hair looks. If cutting your own hair, consider investing in a three-way mirror that provides multiple viewing angles simultaneously.
Additional helpful tools include a cape or old towel to protect clothing, hair clips for marking guide points, and a ruler or measuring tape for checking lengths. While not absolutely necessary, these extras make the cutting process more comfortable and precise.
Is It Better to Cut a Shaggy Bob Wet or Dry?

The question of whether to cut hair wet or dry sparks debate among stylists, particularly for textured cuts like shaggy bobs. Each method offers distinct advantages, and understanding these differences helps you achieve better results. The choice often depends on your hair type, experience level, and the specific look you want to achieve.
Benefits of cutting dry hair
Cutting hair in its dry state shows exactly how it will look once styled, eliminating guesswork about shrinkage and natural movement patterns. This approach works exceptionally well for shaggy bobs because you can see how each layer falls and interacts with the others in real-time. Dry cutting allows for immediate adjustments to create the perfect amount of texture and movement.
For curly or wavy hair, dry cutting is often the preferred method. Each curl pattern behaves differently, and cutting them dry respects their natural formation. You can work with the hair’s natural texture rather than against it, creating layers that enhance rather than disrupt the curl pattern. This technique also prevents the common mistake of cutting curly hair too short, as you see the true length throughout the process.
When wet cutting works better
Wet cutting provides more control and precision, especially for those new to haircutting. The hair lies flatter and sections more easily, making it simpler to create even lengths and systematic layers. Water acts as a temporary straightening agent, allowing you to see the hair’s length without texture interfering. This method works particularly well for creating the initial shape and structure of the bob.
Fine or straight hair often benefits from wet cutting because it shows length discrepancies more clearly. The weight of water pulls the hair down, revealing any uneven sections that might hide when the hair is dry and has more volume. Wet hair also stays in place better during cutting, reducing the chance of accidentally cutting sections you’ve already completed.
How hair type affects your choice
Your natural hair texture plays a significant role in determining the best cutting method. Thick, coarse hair may be easier to manage when wet, as water temporarily reduces volume and makes sectioning simpler. However, the final check and texturizing should happen on dry hair to ensure the layers create the desired movement.
Fine hair: Often benefits from wet cutting for the initial shape, then dry cutting for final texturizing
Wavy hair: May need a combination approach – wet for length, dry for perfecting the layers
Curly hair: Almost always better cut dry to respect natural curl patterns
Straight hair: Can be successfully cut either wet or dry, depending on preference
Professional recommendations
Many experienced stylists use a combination approach for shaggy bobs. They might establish the basic shape and length on wet hair, then dry the hair and refine the layers and texture. This hybrid method combines the precision of wet cutting with the accuracy of dry cutting, resulting in a more polished final look.
The initial cut often happens on damp (not soaking wet) hair. This provides some control while still allowing you to see how the hair naturally wants to move. After rough-drying or air-drying, the stylist returns to add texture, adjust layers, and perfect the shape. This two-step process takes more time but produces superior results.
Common mistakes to avoid
One frequent error is cutting wet hair without accounting for shrinkage. Hair typically appears 10-30% longer when wet, depending on its texture. Failing to compensate for this can result in a much shorter final length than intended. Always cut conservatively when working with wet hair, leaving extra length that can be adjusted once dry.
Another mistake involves using the wrong tension while cutting. Pulling hair too taut while cutting, whether wet or dry, creates uneven lengths once the hair relaxes. This is particularly problematic with textured cuts that rely on natural movement. Maintain minimal tension and let the hair fall naturally while cutting.
Temperature also affects cutting accuracy. Very cold or hot environments can change how hair behaves, making it seem straighter or curlier than normal. Work in a comfortable room temperature for the most predictable results. Additionally, avoid cutting hair that’s been heavily styled with products, as this masks the hair’s true texture and movement.
How to Section and Cut the Basic Shape
Creating the foundation of a short shaggy bob requires methodical sectioning and careful attention to establishing the right lengths. This initial shaping phase determines the overall silhouette and sets the stage for adding texture later. Taking time to section properly and cut systematically results in a more balanced, professional-looking finished style.
Creating your guide length
Start by determining where you want the longest point of your bob to fall. This guide length becomes your reference point for all subsequent cutting. Most shaggy bobs work best with the back length hitting between the nape and shoulders. Comb a small section at the center back straight down and cut it to your desired length. This creates your stationary guide that won’t move as you work through other sections.
Make this initial cut slightly longer than your final goal, as you can always remove more length later. Cut straight across with minimal tension to establish a solid baseline. This guide section should be about one inch wide – enough to see clearly but not so wide that it becomes difficult to use as a reference point. Remember that wet hair will shrink once dry, so factor this into your initial length decision.
Working with horizontal sections
After establishing your guide, begin creating horizontal sections across the back of the head. Start at the nape and work your way up in sections approximately half an inch thick. Clip the upper hair securely out of the way to prevent it from falling into your work area. Each new section should be combed down to meet your guide length, creating a consistent perimeter.
Use your fingers or a comb to hold each section at a 0-degree angle (straight down) initially. This creates a solid, one-length base that you’ll later transform into layers. As you move up the head, you might notice the sections becoming slightly shorter due to the head’s natural curve. This is normal and actually helps create the graduated effect typical of bob haircuts.
For the sides, continue your horizontal sections from the back, wrapping them around to the front. This maintains consistency in your perimeter line:
Section thickness: Keep consistent at 1/2 inch for control
Combing direction: Always comb straight down for the perimeter
Checking method: Pull sections from both sides together to ensure evenness
Tension level: Minimal to prevent cutting shorter than intended
Building the perimeter
The perimeter forms the outer edge of your haircut and needs special attention for a polished look. After cutting your basic horizontal sections, go back and refine this edge. Check that both sides match by pulling sections from each side together at the center. Any discrepancies become immediately visible with this technique.
For a classic shaggy bob shape, the front typically sits slightly longer than the back, creating a subtle forward angle. Achieve this by cutting your perimeter line at a slight diagonal from back to front. The angle shouldn’t be dramatic – just enough to create interest and frame the face flatteringly. Stand back frequently to assess the overall shape and make small adjustments as needed.
Establishing the weight line
The weight line in a bob refers to where the hair appears thickest and creates a visual “shelf.” For shaggy bobs, this line sits somewhere between the occipital bone (the rounded part at the back of your head) and the nape. Establishing this properly creates the foundation for your layers and prevents the dreaded triangle shape that can occur with poorly cut bobs.
To find and enhance your weight line, take diagonal sections from the round of the head down to your perimeter. Hold these sections at a 45-degree angle from the head and cut to create graduation. This technique removes weight from underneath while maintaining length on top, creating the stacked effect that gives bobs their shape. Work systematically from one side to the other, using consistent angles for even results.
Checking for balance
Before moving on to texturizing, thoroughly check your basic shape for balance and symmetry. Use multiple checking methods to ensure accuracy. First, comb all hair straight down and visually assess the perimeter from the front, sides, and back. Look for any obvious differences in length or density between sides.
Next, use the cross-checking technique: take sections from different areas and bring them together to compare lengths. Pull hair from both sides of the head to the center back, the center front, and various points in between. This reveals any uneven sections that might not be visible when the hair is in its natural fall.
Finally, have the person shake their head gently and see how the hair settles naturally. This movement test shows how the cut will look in real life and highlights any areas that need adjustment. Make small corrections as needed, but avoid the temptation to keep cutting – sometimes perceived unevenness is actually due to natural growth patterns or cowlicks rather than cutting errors.
How to Add Texture and Movement
The transformation from a basic bob to a shaggy bob happens during the texturizing phase. This crucial step creates the piece-y, lived-in texture that defines the style. Adding movement through various cutting techniques brings life to the haircut and prevents it from looking heavy or helmet-like. The key lies in knowing where and how much texture to add without compromising the overall shape.
Point cutting techniques
Point cutting involves holding your scissors vertically and making small snips into the ends of the hair. This technique creates a softer, more natural-looking edge compared to blunt cutting. For a shaggy bob, point cutting serves multiple purposes: it removes weight, adds movement, and creates the separated, piece-y texture characteristic of the style.
Start with vertical sections about one inch wide. Hold each section between your fingers and angle your scissors upward at approximately 45 degrees. Make small, deliberate cuts into the last inch or two of the hair length. The depth and angle of your cuts determine how much texture you create – deeper cuts produce more dramatic texture, while shallow cuts offer subtle softening.
Work systematically through the entire haircut, paying special attention to areas that tend to look heavy or blunt. The perimeter especially benefits from point cutting, as it prevents the harsh line that can make bobs look dated or severe. Vary your cutting angle slightly as you work to create a more natural, random texture pattern.
Using texturizing shears properly
Texturizing shears remove bulk and create movement without significantly altering length. For shaggy bobs, these tools are invaluable for achieving that effortlessly tousled look. The key to successful texturizing lies in understanding how much hair your shears remove and working with restraint – you can always remove more, but you can’t put hair back.
Begin texturizing at least two inches from the scalp to avoid creating short pieces that stick up. Work through vertical sections, closing the shears once or twice per section depending on hair thickness. For maximum movement and texture, try these approaches:
Slide cutting: Close shears partially and slide them down the hair shaft
Spot texturizing: Make single cuts at various points along the section
Twist cutting: Twist small sections before texturizing for random texture
Surface texturizing: Work on top of sections to create wispy pieces
Pay attention to how different areas of the head require different amounts of texturizing. The crown often needs more texture to create lift, while the nape might need less to maintain the shape. Areas around the ears frequently benefit from extra texturizing to prevent the hair from looking bulky or poufy.
Creating piece-y layers
The signature piece-y texture of a shaggy bob comes from strategic layering combined with texturizing techniques. Unlike uniform layers that create a smooth, blended look, piece-y layers maintain some disconnection between sections. This creates visual interest and movement throughout the cut.
To achieve this effect, take diagonal sections through the interior of the haircut. Elevate each section to 90 degrees from the head and cut at an angle, creating layers that don’t perfectly blend with the sections below. This technique, called disconnected layering, produces the chunky, textured appearance that makes shaggy bobs so appealing.
Focus on creating shorter layers through the crown and top sections while maintaining more length through the bottom. This distribution creates natural volume at the roots and prevents the triangular shape that can plague poorly layered bobs. The layers should enhance the hair’s natural movement patterns rather than fighting against them.
Softening harsh lines
Even with careful cutting, some areas might still appear too blunt or heavy. Softening these harsh lines is essential for achieving the relaxed, effortless aesthetic of a shaggy bob. This refinement phase makes the difference between a haircut that looks professionally done and one that appears amateur.
Use a combination of techniques to soften any remaining harsh lines. Slide cutting works well for blending layers that appear too disconnected. Hold sections at various angles and gently slide your scissors down the length, removing small amounts of hair to create seamless transitions. This technique requires a light touch – too much pressure will remove too much hair.
For the face-framing sections, create soft, wispy pieces by point cutting at a severe angle. These delicate pieces around the face prevent the haircut from looking too heavy or severe while highlighting facial features beautifully. Consider the natural way hair falls around the face and work with this movement rather than against it.
Final shaping touches
The last phase of texturizing involves stepping back and assessing the overall shape and movement. Look for any areas that appear too heavy, too thin, or disconnected from the rest of the cut. This is your opportunity to perfect the silhouette and ensure the haircut moves beautifully from every angle.
Dry the hair completely if you’ve been working on damp hair, then reassess. Hair often behaves differently once fully dry, revealing areas that need additional attention. Make small adjustments using your texturizing shears or point cutting technique, but resist the urge to over-cut. The beauty of a shaggy bob lies in its imperfect perfection.
Finally, style the hair using minimal products to see how it naturally wants to fall. This reveals the true personality of the cut and shows whether any final adjustments are needed. A well-executed shaggy bob should look good with minimal styling, air-drying to reveal natural texture and movement that appears effortlessly chic.
Your Perfect Shaggy Bob Awaits
Mastering the art of cutting a short shaggy bob opens up a world of styling possibilities that suit nearly every hair type and face shape. This versatile haircut combines the sophistication of a classic bob with modern texture and movement, creating a look that feels both polished and effortlessly undone. By following the techniques outlined throughout this guide – from understanding what sets this style apart to perfecting those final texturizing touches – you now have the knowledge to create this coveted look.
The journey from basic bob to perfectly tousled shaggy style relies on patience, the right tools, and understanding your hair’s unique characteristics. Whether you choose to cut wet, dry, or use a combination approach, the key lies in working methodically through each phase while maintaining sight of the overall vision. With practice, the techniques of sectioning, establishing guide lengths, and adding texture become second nature, allowing you to customize the cut to flatter individual features and preferences. Your new shaggy bob awaits – grab those shears and start creating your signature textured style.
Frequently Asked Questions
Q: How often should I trim my short shaggy bob to maintain its shape?
A: Plan to trim your shaggy bob every 6-8 weeks to maintain its shape and texture. The layered nature of this cut means it grows out more gracefully than blunt bobs, but regular maintenance keeps the style looking fresh and prevents the layers from becoming too heavy or losing their movement.
Q: Can I cut a shaggy bob on very fine hair without making it look thinner?
A: Yes, fine hair actually benefits from the layering technique used in shaggy bobs. The key is using minimal tension while cutting and avoiding over-texturizing. Focus on creating movement through strategic layers rather than thinning, and concentrate texturizing efforts on the mid-lengths and ends rather than near the roots.
Q: What’s the biggest mistake people make when cutting their own shaggy bob?
A: The most common mistake is cutting too much too quickly, especially when adding layers and texture. Start conservatively with longer lengths and gradually work shorter. You can always remove more hair, but you can’t add it back. Also, many people pull the hair too taut while cutting, which results in uneven lengths once the hair relaxes.
Q: Should I use regular scissors if I don’t have professional hair shears?
A: Never use regular scissors on hair as they crush and damage the hair shaft, leading to split ends and frizz. Invest in at least one pair of basic hair cutting shears – even inexpensive hair scissors will give you better results than household scissors. The clean cut is essential for healthy-looking hair.
Q: How do I know if I’m sectioning the hair correctly for an even cut?
A: Proper sections should be thin enough to see through (about 1/2 inch thick) and consistent in size throughout the haircut. Use clips to secure all hair except the section you’re working on. If you can’t see your guide (previously cut hair) through the new section, it’s too thick. Take time to create clean, horizontal partings for the most even results.
Q: What’s the difference between point cutting and using texturizing shears?
A: Point cutting involves holding scissors vertically and cutting into the ends of hair to create texture and remove weight while maintaining length. Texturizing shears have one regular blade and one with teeth, removing bulk from within sections. Both techniques add movement, but point cutting affects only the ends while texturizing shears work throughout the length.
Q: Can I achieve a shaggy bob look if I have naturally curly hair?
A: Absolutely! Curly hair looks fantastic in a shaggy bob, but the cutting technique differs slightly. Always cut curly hair dry to see how each curl naturally falls. Focus on creating shape rather than perfect symmetry, and work with your curl pattern instead of against it. The natural texture of curly hair enhances the piece-y, tousled aesthetic of this style.
Q: How do I fix one side that turned out shorter than the other?
A: First, determine if the difference is due to natural growth patterns or actual cutting error. If it’s a cutting issue, resist the urge to keep trimming the longer side to match. Instead, style the hair and see how noticeable the difference is when dry. Often, slight length variations aren’t visible once the hair is styled. If adjustment is necessary, trim conservatively and check frequently.