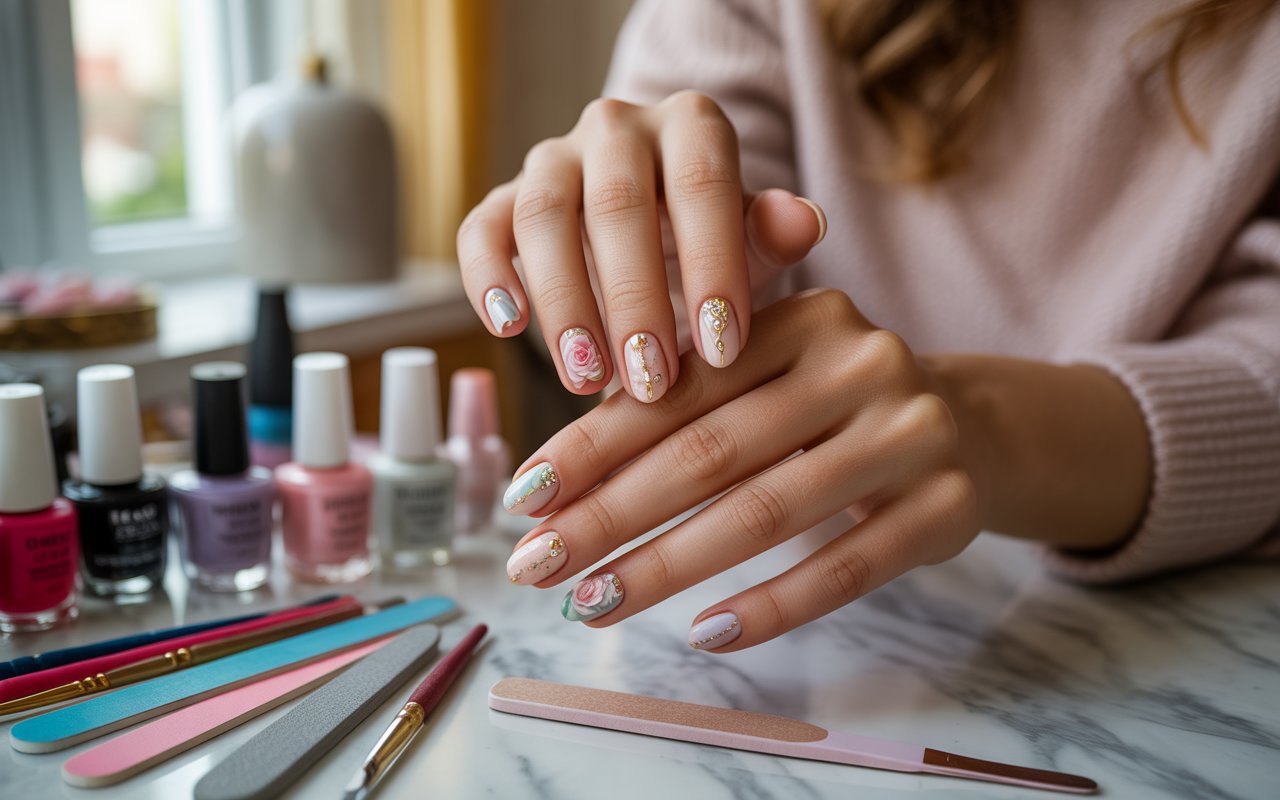
Painting your nails at home can feel like a treat without spending salon money. You have complete control over colors, designs, and timing. Many women skip professional manicures because they’re expensive or time-consuming. But creating beautiful nail art in your own space is simpler than you might think.
The right technique makes all the difference. Some designs need special tools while others work with items already in your bathroom drawer. From gradients to geometric patterns, there’s a style for every skill level. Women who learn these methods save money and develop a creative hobby. You can experiment with trends without committing to a full salon visit.
We’ll walk through ten popular techniques that transform plain nails into eye-catching statements. Each method comes with clear steps and helpful tips. You’ll discover which designs suit beginners and which ones challenge your artistic side. At the end, you’ll have enough knowledge to start your at-home nail art journey with confidence.
Ombre Gradient Nails
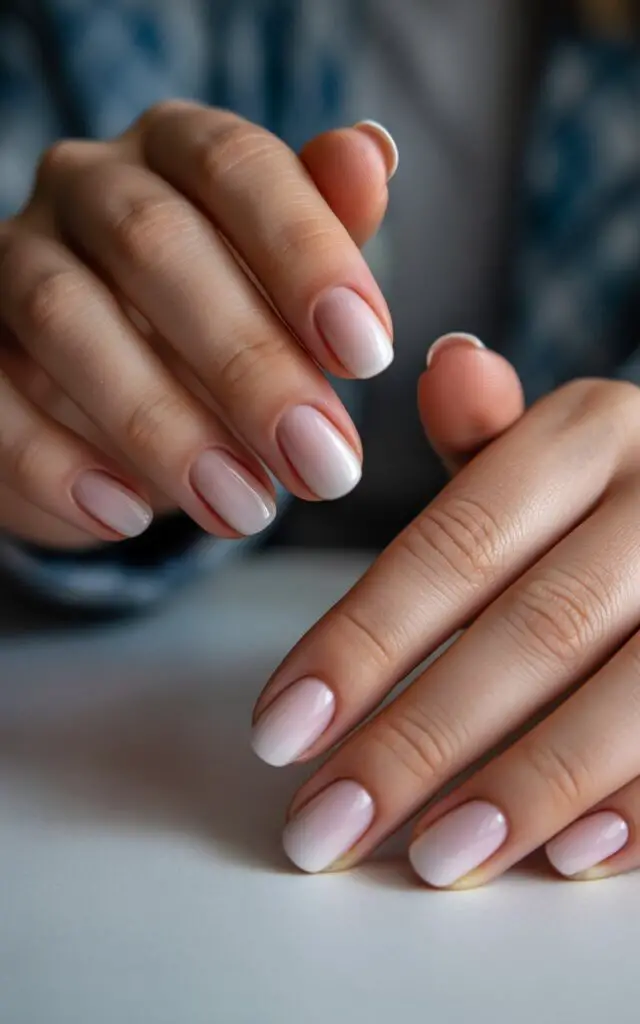
Creating a smooth color transition on your nails gives you that professional salon finish. This technique works with any color palette you choose. Start by applying a base coat to protect your natural nails. Pick two complementary polish colors for the best results.
Choosing Your Colors
The color combination determines how your gradient appears. Lighter shades blend more easily than dark ones. Many women start with pink fading to white or purple transitioning to blue. You can also try seasonal combinations like orange to yellow for summer vibes.
Application Method
Paint your base color on the entire nail first. Let it dry completely before moving forward. Apply both gradient colors onto a makeup sponge in vertical stripes. Dab this sponge onto your nail with a bouncing motion. The colors will blend naturally where they meet. Repeat this process two or three times for intensity.
Cleanup and Finishing
The sponge method creates mess around your nails. Apply petroleum jelly or tape around your nail beds before starting. This protective barrier makes cleanup much easier. Wipe away excess polish with a cotton swab dipped in remover. Seal everything with a clear top coat.
Different nail lengths showcase this design differently:
Short Nails: Keep gradients simple with two colors for best visibility.
Medium Nails: Add a third transitional shade for depth.
Long Nails: Experiment with multiple color bands for dramatic effects.
Practice makes this technique faster each time. Your first attempt might look slightly messy but improves quickly.
Modern French Manicure
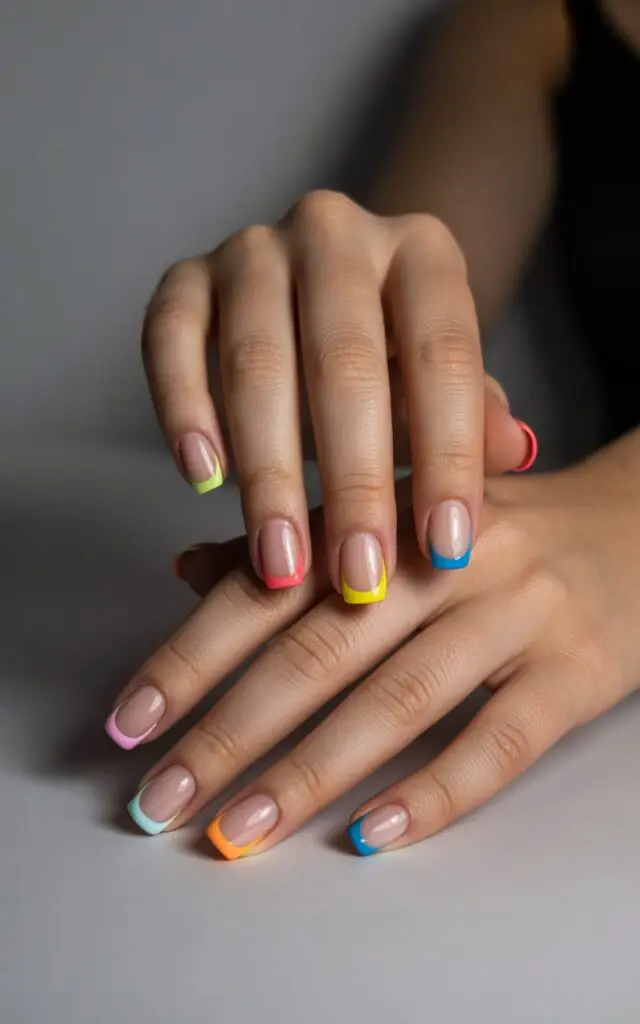
The classic French tip has evolved beyond white and pink combinations. Women now add color, change tip shapes, and play with proportions. This timeless design adapts to current trends while maintaining its sophisticated appeal.
Start with clean, shaped nails. Apply your chosen base color and let it dry completely. Traditional versions use sheer pink or nude shades. Modern interpretations work with any base from bold red to black.
Creating the Tips
Thin tips look more contemporary than thick ones. Use striping tape as a guide for clean lines. Place the tape in an arc across your nail where you want the tip to start. Paint above the tape with your tip color. Remove the tape immediately while polish is still wet. This prevents pulling and creates crisp edges.
Color Variations
Switch white tips for pastels, metallics, or neon shades. Try different base colors too. Dark bases with light tips create striking contrast. Matching your tips to your outfit adds a coordinated touch. Some women paint each nail a different tip color for variety.
Advanced Techniques
V-shaped tips replace the traditional curve for an edgy look. Diagonal tips angle from one corner to another. Thin line tips feature just a sliver of color at the edge. Reverse versions flip the design with color at the base instead.
Top coat application matters here. One thick layer can blur your careful lines. Apply two thin coats instead for clarity and shine. Your modern French manicure stays fresh for up to a week with proper care. Avoid using your nails as tools to prevent chipping.
Polka Dot Design
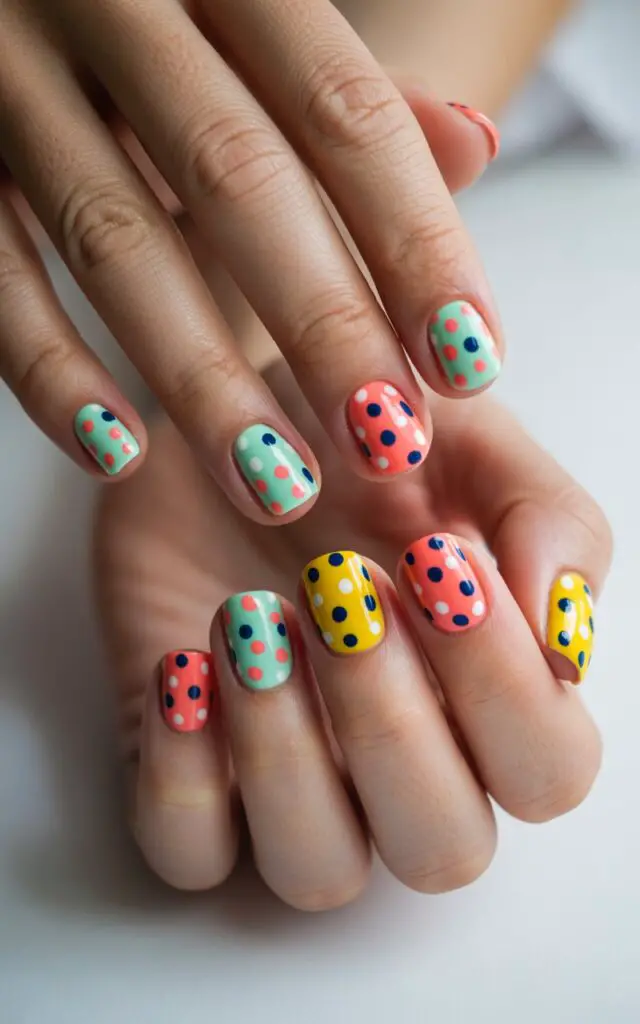
Dots transform plain nails into playful designs without requiring artistic skills. This beginner-friendly technique uses simple tools and minimal effort. You probably already own everything needed to create perfect circles.
Apply your base color first. Let it dry thoroughly before adding dots. Rushing this step causes smudging and ruins your design. Pick a contrasting dot color that stands out against your base.
Tool Options
A dotting tool creates consistent circles effortlessly. No dotting tool? Bobby pins work perfectly as substitutes. Dip the round end in polish and press onto your nail. Toothpicks make tiny dots for detailed work. Even pen tips can serve as makeshift dotting tools.
Pattern Ideas
Random placement gives a casual, scattered look. Evenly spaced dots create geometric precision. Line up dots in rows for a polka dot fabric effect. Cluster dots together in one corner for asymmetry. Size variation adds visual interest. Make some dots large and others small. Alternate colors between dots for extra dimension.
Layering Colors
Wait for each layer to dry before adding another. You can stack different colored dots on top of each other. This creates flower shapes or targets. Three graduated sizes make simple flower designs. Put a yellow dot in the center of white petals for daisies.
The beauty of this design lies in its flexibility. Mess up a dot? Simply wipe it away before it dries and try again. Cover your entire nail with dots or add just a few accent dots on one nail. Your design choices depend on your mood and time available.
Marble Effect Nails
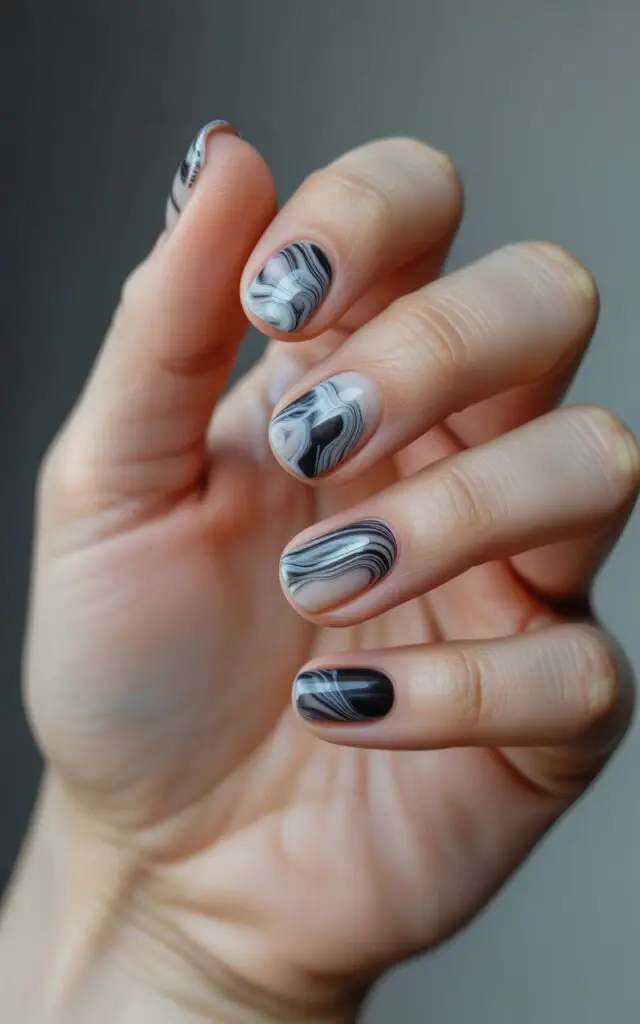
Swirled patterns mimic natural stone textures on your nails. This technique creates art that looks complex but uses basic supplies. Each nail becomes different because marble patterns never repeat exactly.
Fill a small cup with room temperature water. Cold water makes polish sink too fast. Drop one polish color into the water center. It will spread into a circle. Add a second color drop in the middle of the first circle. Keep alternating colors and dropping them in the center. You’ll see concentric circles forming on the water surface.
Creating the Pattern
Use a toothpick to drag through the circles. Pull from the center outward like spokes on a wheel. Swirl in different directions for varied effects. Work quickly because polish starts hardening on water after a minute. The pattern you create on the water transfers to your nail.
Dipping Your Nail
Cover skin around your nail with tape or petroleum jelly first. Lower your nail parallel to the water surface. Dip it into your pattern slowly. The design wraps around your nail as it touches the water. Use a toothpick to gather excess polish floating on the water before lifting your finger out. This prevents unwanted polish from sticking to your skin.
Color Combinations
Blues and whites create ocean effects. Pinks and purples give galaxy vibes. Black and white produces classic marble. Try metallics mixed with regular polish for shimmer. Three colors add complexity but take practice.
Each nail will look slightly different. That’s part of this technique’s charm. Clean up messy edges with remover and a small brush. Seal your marble masterpiece with top coat to prevent chipping. Water temperature affects how polish spreads, so experiment to find what works best.
Chrome Metallic Finish
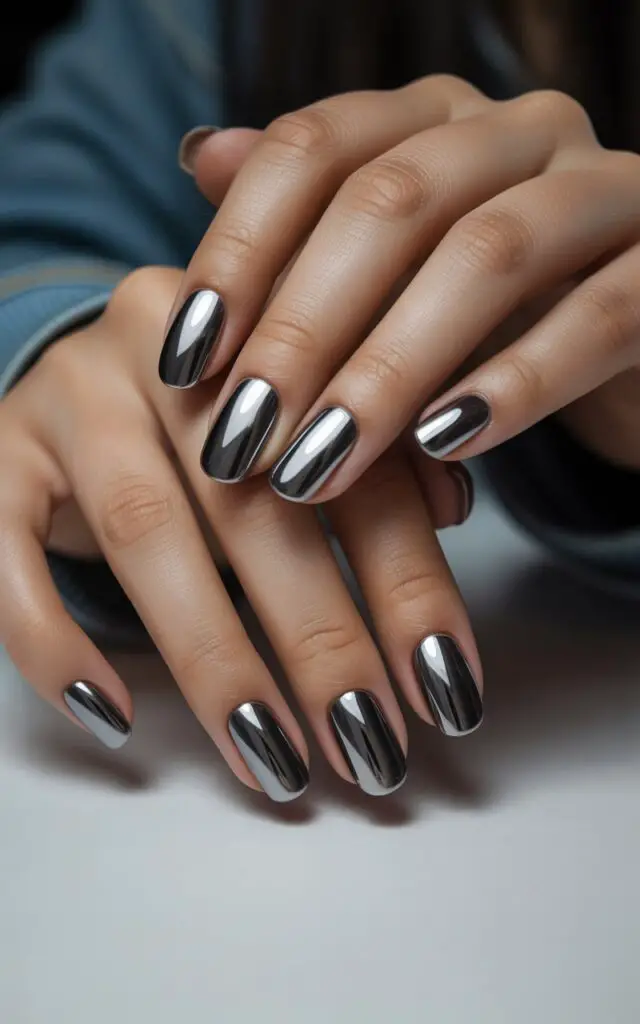
Mirror-like shine catches light and turns heads. Chrome nails reflect surfaces like actual metal. This trendy finish works over any base color you choose. The application process differs from regular polish but produces stunning results.
Preparation Steps
Start with gel polish if you have a UV lamp. Regular polish works too but doesn’t shine as intensely. Apply your base color in thin, even coats. Make sure coverage is completely opaque. Cure gel polish or let regular polish dry fully. Any tackiness prevents chrome powder from adhering properly.
Apply a no-wipe gel top coat or sticky base layer. This creates the surface for powder to stick. Don’t cure this layer yet if using gel. The stickiness is what makes chrome powder bond.
Powder Application
Chrome powder comes in various metallic shades. Use an eyeshadow applicator or silicone tool. Rub the powder onto your nail using gentle circular motions. The powder needs friction to bond and shine. Keep buffing until you see that mirror finish appear. Brush away excess powder with a soft brush.
Here’s what different base colors create:
Black Base: Deepest, most dramatic chrome reflection.
White Base: Brightest, true metallic appearance.
Color Bases: Tinted metallics with base color showing through.
Seal chrome nails carefully. Use a gel top coat and cure it if you applied gel base. Regular top coat works but might dull the shine slightly. Apply gently without brushing too much. Heavy brushing can disturb the powder. Your chrome finish lasts several days with minimal chipping.
Aura Nail Art
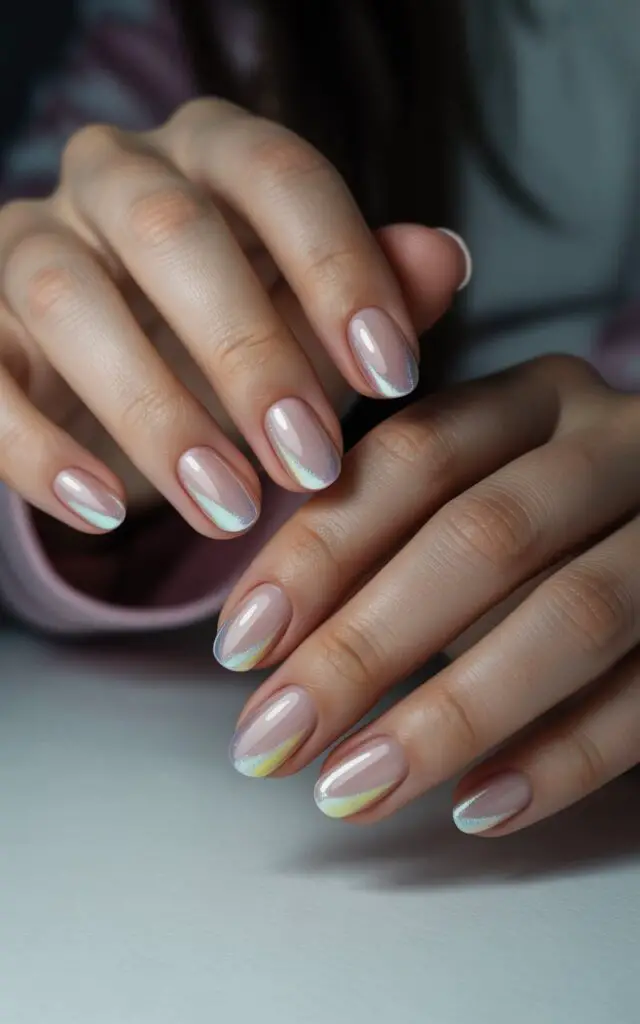
Soft color halos create a dreamy cloud effect on your nails. This technique gained massive popularity through social media. The gradient starts from your nail center and fades outward. Colors blend seamlessly without harsh lines.
Paint your base color first. Most women choose white, nude, or pastel shades. Let this base dry completely. Pick a contrasting color for your aura center. Bright colors create bold looks while pastels stay soft.
Creating the Aura
Cut a makeup sponge into a small wedge. Apply your aura color directly onto the sponge. Dab this loaded sponge onto your nail center repeatedly. The color deposits heaviest in the middle. Each dab spreads color slightly further. The natural sponge texture creates that hazy, blended effect. Rotate the sponge between dabs for varied patterns.
Multiple Auras
Layer different colors for depth. Apply pink first, then dab orange on top. The colors mix where they overlap. Try three colors radiating from the center. Keep each layer light for transparent effects. Heavy application creates solid color instead of auras. Build gradually with multiple light dabs.
Cleanup Process
Protect your skin before starting. Apply tape around each nail or use a peel-off base coat on your skin. The sponging technique spreads polish everywhere. Cleanup takes time without protection. Use a small brush dipped in polish remover for precise cleaning. Cotton swabs work for larger areas. Seal your aura nails with glossy top coat. This intensifies colors and adds dimension. The design looks three-dimensional under light. Your finished nails appear to glow from within.
Negative Space Design
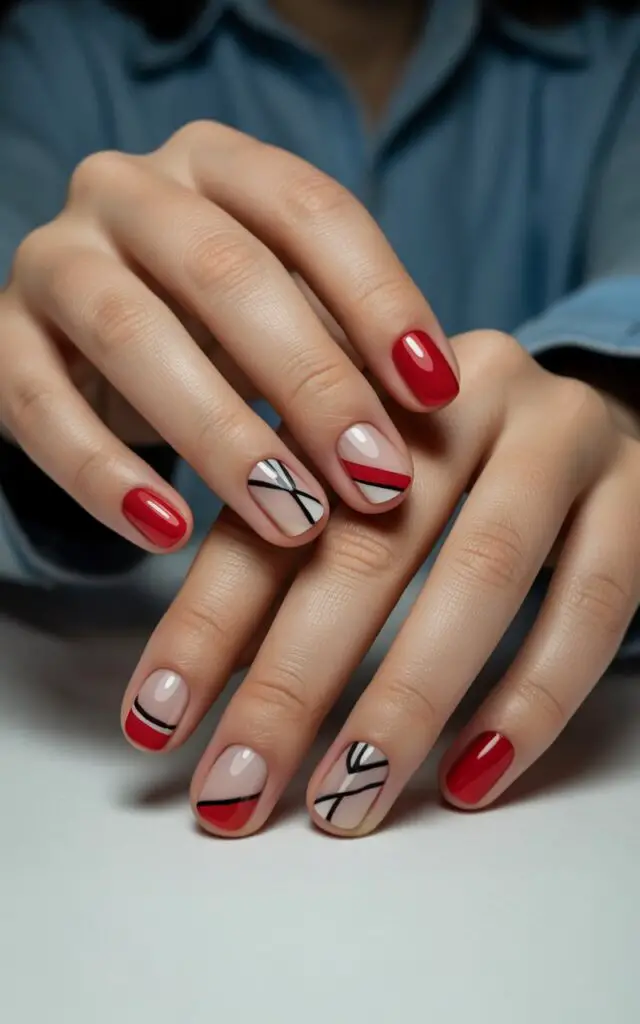
Bare nail sections become part of your design rather than something to cover. This minimalist approach creates modern, artistic looks. Your natural nail color acts as another design element. The contrast between polished and bare areas makes striking patterns.
Design Planning
Decide which areas stay bare before painting. Simple designs work best for beginners. Try painting just the tips or leaving half-moon shapes at the base. Geometric shapes like triangles or rectangles add interest. Striping tape helps create clean divisions between polished and bare sections.
Apply tape in your chosen pattern. Press edges down firmly to prevent polish bleeding underneath. Paint over the tape with your selected color. Remove tape while polish is still slightly wet. This prevents peeling up dried polish with the tape.
Pattern Ideas
Diagonal lines across each nail create dynamic movement. Cutout circles scattered randomly look playful. Bare strips running vertically make nails appear longer. Try leaving just your nail center bare with colored sides. Frame your bare nail with thin colored lines. The options are limited only by your imagination.
Color Choices
Bold colors show strong contrast against bare nails. Nudes create softer, understated looks. Metallics add glamour while maintaining simplicity. Black creates graphic, high-contrast designs. Some women use different colors on each nail while keeping the same bare pattern.
Natural nail care becomes important with this style. Your bare nail is visible, so keep it neat and healthy. File nails smoothly and push back cuticles. Apply nail strengthener to bare sections before taping. Top coat goes over everything, including bare areas. This creates a uniform shine across your entire nail. The design stays sharp for over a week with careful application.
Floral Patterns
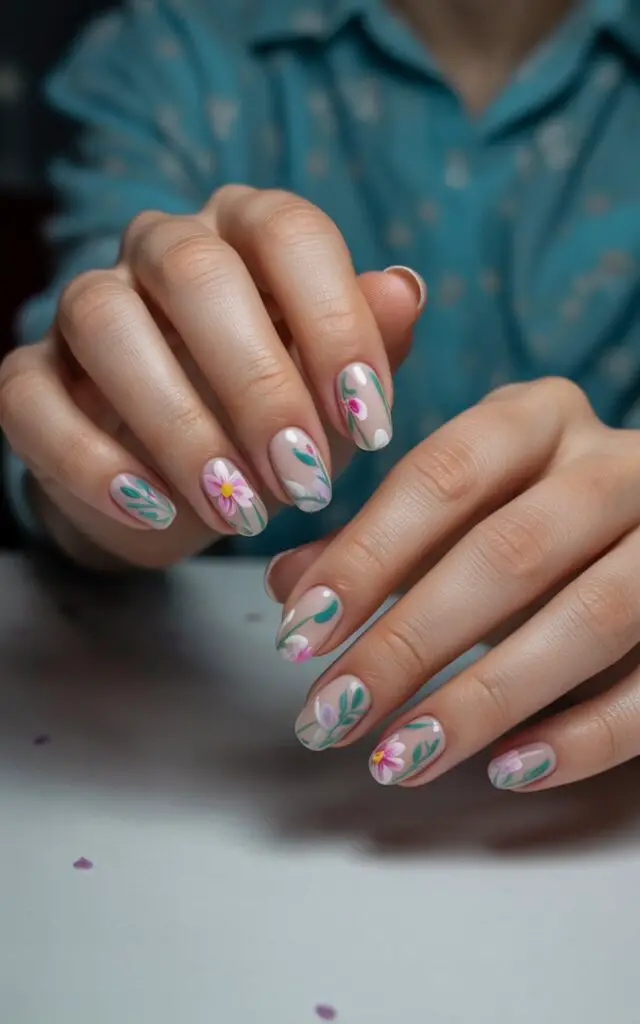
Hand-painted flowers bring garden beauty to your fingertips. This artistic technique ranges from simple daisies to complex roses. Women love florals because they suit any season or occasion. You don’t need perfect painting skills to create pretty petals.
Apply a colored base coat and let it dry. Most floral designs pop against light backgrounds. White, nude, or pastel bases work wonderfully. Have your flower colors ready before starting. Small nail art brushes help with detail work.
Simple Flower Technique
Dot five small circles in a flower shape using a dotting tool. These become your petals. Add a contrasting center dot where petals meet. This basic method creates cute daisies or abstract blooms. Make flowers different sizes across your nails. Cluster small flowers together or showcase one large bloom.
Painting Petals
Use a thin brush for more detailed flowers. Paint small curved strokes outward from a center point. These strokes form individual petals. Three to five petals make simple flowers. Overlap petals for dimension. Add a second layer of petals in a different color for depth. Tiny leaves complete the look. Paint two small strokes in green beside your flowers.
Advanced Details
Add shading to petals with a slightly darker color. Paint one edge of each petal for definition. White highlights make flowers look dewy. Tiny dots in flower centers mimic pollen. Vine designs connect flowers across multiple nails. Paint thin green curves flowing between blooms.
Match flower colors to seasons for timely designs. Reds and pinks work for spring. Bright yellows and oranges suit summer. Deep purples and oranges fit fall. Whites and blues feel wintry. Seal completed floral art with top coat carefully. Avoid heavy brushing that smears delicate details.
Striped Nail Design
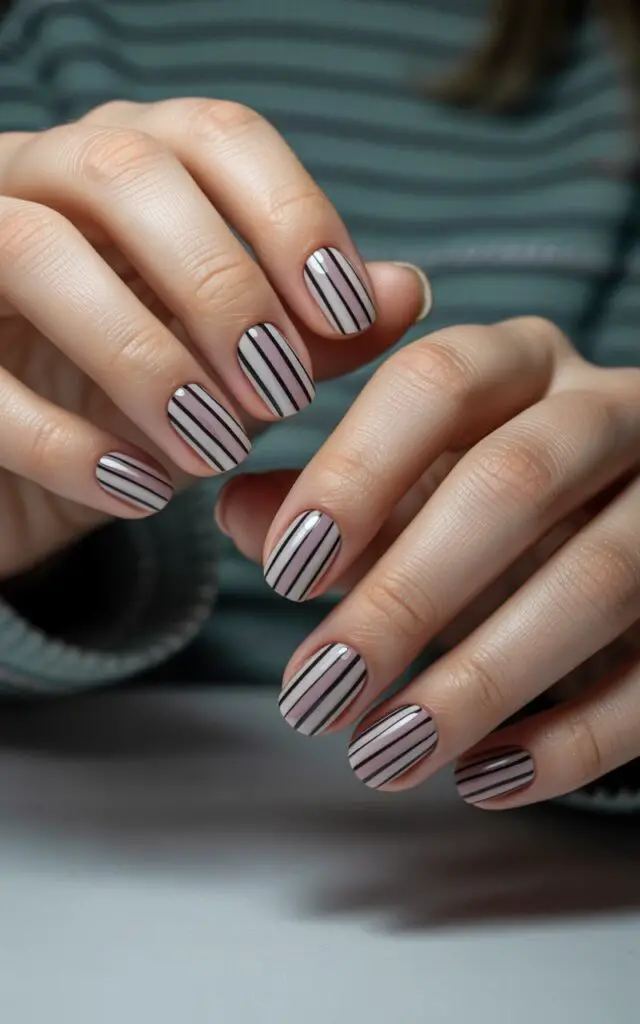
Clean lines create sophisticated patterns with minimal effort. Stripes work vertically, horizontally, or diagonally across nails. This geometric approach suits professional settings and casual wear equally well. The technique is beginner-friendly yet looks polished.
Using Striping Tape
This thin adhesive tape creates perfect straight lines. Apply your base color first and let it dry completely. Place tape strips across your nail in your desired pattern. Press firmly so polish can’t seep under edges. Paint over the tape with a contrasting color. Remove tape immediately while polish remains wet. This reveals clean stripes underneath.
Metallic striping tape offers another option. Apply it directly onto dried polish without painting over it. The tape itself becomes your stripe. This method requires less precision and dries instantly. Simply press tape onto your nail and seal with top coat.
Freehand Striping
Thin brushes paint straight lines without tape. Steady your painting hand against your other hand for control. Start from the nail base and pull the brush toward the tip in one smooth motion. Wipe excess polish off your brush before each stroke. Too much polish creates thick, uneven lines.
Pattern Variations
Here are popular stripe arrangements:
Vertical Stripes: Make nails appear longer and slimmer.
Horizontal Stripes: Add width, perfect for wider nails.
Diagonal Stripes: Create movement and visual interest.
Mixed Directions: Combine different stripe angles on each nail.
Alternate stripe colors for rainbow effects. Keep stripes thin for elegance or go bold with thick bands. Space stripes evenly or vary distances between them. Try one accent nail with stripes while others stay solid. Color blocking with stripes creates modern geometric art. Seal your design with top coat to prevent lifting at the edges. Sharp lines stay crisp for days with proper sealing.
Abstract Swirl Art
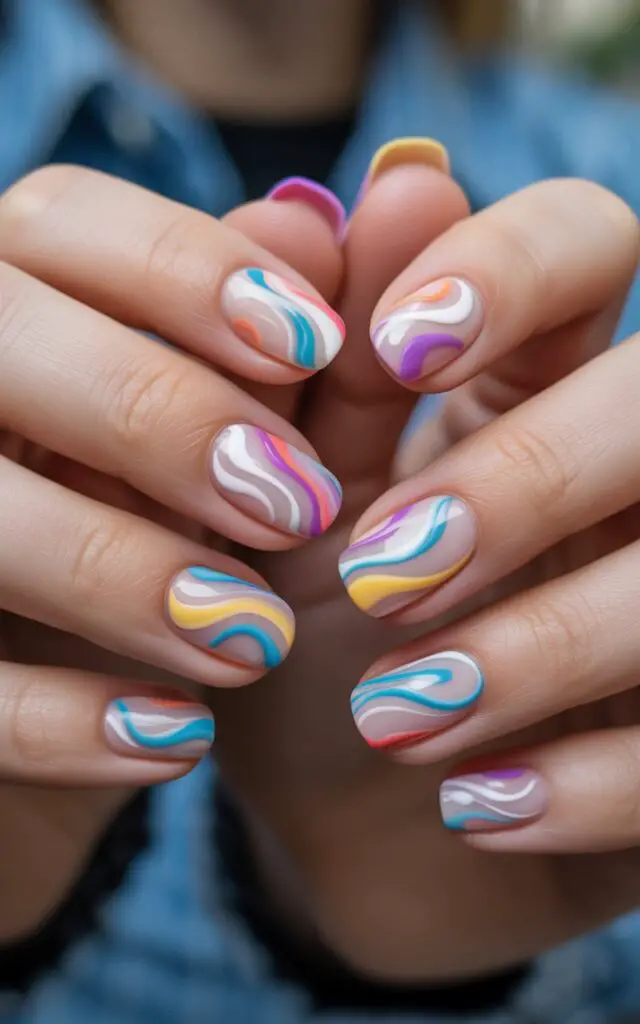
Free-flowing curves create one-of-a-kind designs on every nail. This technique embraces imperfection and spontaneity. No two nails look identical, making your manicure truly custom. Abstract art works for women who want something different from traditional patterns.
Start with a white or light-colored base. This makes swirl colors stand out vividly. Let your base dry fully before adding swirls. Choose two or three colors that complement each other. Too many colors create muddy results.
Creating Swirls
Drop polish directly onto your nail in random spots. Use different colors in various locations. While polish is still wet, drag a toothpick through the colors. Swirl in circular motions or pull in long curves. Let colors blend naturally where they meet. Work quickly before polish starts drying. Dried polish won’t swirl smoothly.
Alternatively, drop colors onto your nail in sequence. Use a thin brush to swirl through all colors at once. Create figure-eight patterns or spiral designs. Pull colors from edges toward the center. The unpredictable results make this method exciting.
Color Combinations
Warm tones like red, orange, and yellow create fiery swirls. Cool blues, purples, and greens give ocean vibes. Black and white produce graphic contrast. Add metallic gold or silver for shimmer. Pastel swirls look soft and romantic. Match colors to your outfit or mood.
Finishing Touches
Let swirls dry completely before top coat. Wet swirls smear under brush strokes. Apply top coat in gentle strokes without heavy pressure. This preserves your swirl patterns. The glossy finish enhances color vibrancy. Your abstract nails become conversation starters. Each design is artwork you created yourself. Change up your swirl patterns every manicure for fresh looks each time.
Your Home Nail Studio Awaits
Mastering these techniques transforms your nails into personal canvases. You’ve learned methods ranging from simple dots to complex marble effects. Each style offers room for creativity and personalization. The supplies needed for most designs cost less than a single salon visit.
Practice builds confidence with any new skill. Your first attempts might not match salon perfection, and that’s completely fine. Every woman who masters nail art started as a beginner. The joy comes from creating something beautiful with your own hands. Set aside time for yourself, put on music you love, and experiment with colors that make you happy. Your nails become an extension of your personality and style choices.
Frequently Asked Questions
Q: How long should I wait between coats of polish?
A: Wait about two minutes between regular polish coats. Thin layers dry faster than thick ones. Touch the edge of your nail gently to test dryness. If it feels tacky, give it more time. Rushing between coats causes smudging and bubbles.
Q: Can I do nail art with regular polish or do I need gel?
A: Regular polish works perfectly for all these techniques. Gel polish lasts longer but requires a UV lamp. Most beginners start with regular polish because it’s more forgiving. You can remove mistakes easily and don’t need special equipment.
Q: How do I make my nail art last longer?
A: Apply a good base coat before polish and top coat after. Reapply top coat every two days to refresh shine and seal edges. Avoid hot water for the first hour after painting. Wear gloves when cleaning or washing dishes. These steps can make your manicure last up to ten days.
Q: What’s the easiest nail art technique for complete beginners?
A: Polka dots are the most beginner-friendly design. You only need a dotting tool or bobby pin. The technique is simple and mistakes are easily fixable. Success comes quickly, which builds confidence for trying more complex designs.
Q: Do I need expensive tools to create nail art at home?
A: No. Household items work well as substitutes for professional tools. Bobby pins, toothpicks, tape, and makeup sponges create beautiful designs. A basic nail art kit costs under $15 and includes essential tools. Invest in quality polish and top coat instead of fancy tools.
Q: How can I clean up polish on my skin without ruining my design?
A: Dip a small brush or cotton swab in polish remover. Carefully wipe around your nail edges. Work slowly to avoid touching your nail design. Apply petroleum jelly or tape around nails before painting for easier cleanup. Peel-off base coat on skin works wonderfully too.
Q: Why does my polish chip so quickly?
A: Several factors cause chipping. Oily nails prevent polish adhesion. Wipe nails with rubbing alcohol before painting. Skipping base coat allows staining and reduces staying power. Thick polish layers chip faster than thin ones. Seal your nail tips by running polish across the edge. This prevents tip wear.
Q: Can I mix different nail art techniques on one hand?
A: Absolutely! Many women create accent nails by mixing techniques. Try stripes on some nails and dots on others. Keep colors coordinated across different designs. This creates cohesive looks despite varied patterns. Mixing techniques shows creativity and prevents boring uniformity.