The fishtail braid stands out as one of those hairstyles that looks incredibly intricate but actually requires just a simple technique once you understand the basics. Many women admire this style from afar, assuming it demands professional skills or hours of practice to achieve. The truth is, with the right guidance and a bit of patience, anyone can create this elegant braid that works beautifully for both casual days and special occasions.
Unlike traditional three-strand braids, the fishtail uses just two sections of hair, weaving small pieces from one side to the other to create its distinctive pattern. This technique produces a braid that appears more detailed and sophisticated than its simpler cousins, making it a favorite choice for women who want to elevate their everyday hairstyle. The versatility of this braid means you can wear it sleek and polished for work or loose and romantic for weekend brunches.
In the following sections, you’ll discover everything needed to master this coveted hairstyle, from the essential tools and preparation steps to troubleshooting common challenges. Whether your hair is thick or thin, straight or wavy, these techniques will help you create beautiful fishtail braids that stay put all day. Ready to transform your hair routine? Let’s start with the basics you’ll need to succeed.
What You Need to Get Started
Creating a flawless fishtail braid starts long before your fingers begin weaving. The right preparation and tools make the difference between a braid that falls apart within hours and one that looks fresh from morning to night. Understanding what you need beforehand saves frustration and helps you achieve professional-looking results every time you style your hair.
Hair Length Requirements
Your hair needs to reach at least shoulder length for a basic fishtail braid to work properly. Shorter lengths simply don’t provide enough material to create the overlapping pattern that defines this style. Medium to long hair offers the most flexibility, allowing you to experiment with different variations and placements. If your hair sits just at shoulder length, consider starting the braid higher on your head to maximize the braided portion.
Essential Tools and Products
The beauty of fishtail braiding lies in its minimal tool requirements. You’ll need a good quality brush or wide-tooth comb to remove tangles before starting. Clear elastic bands work better than thick hair ties, as they secure the braid without adding bulk at the bottom. A rattail comb helps create clean sections, though your fingers work just fine once you gain confidence.
Hair products can transform your braiding experience. A lightweight texturizing spray adds grip to slippery hair, preventing pieces from sliding out as you work. For those with fine or silky hair, dry shampoo applied at the roots provides the texture needed for the braid to hold. A small amount of smoothing serum tames flyaways without weighing down your style.
Preparing Your Hair
Preparation determines how easily your braid comes together and how long it lasts. Start with completely dry hair, as wet strands stretch and can lead to an uneven or loose braid once dried. Brush through your hair thoroughly, removing every tangle from roots to ends. This step prevents snags that could disrupt your braiding rhythm.
The debate between freshly washed versus day-old hair has a clear winner for braiding. Hair washed the previous day offers better texture and hold than squeaky-clean strands. If you must braid freshly washed hair, add texture with products rather than fighting against naturally slippery strands. A light mist of hairspray before beginning provides extra insurance against pieces escaping during the day.
Best Hair Textures for Fishtail Braids
While fishtail braids work on various hair types, certain textures naturally lend themselves to this style. Wavy hair provides built-in texture that helps the braid hold without much product assistance. The natural bends in wavy hair create visual interest and help disguise any minor imperfections in your technique.
Straight hair benefits from added texture through products or heat styling before braiding:
- Light crimping: Creates invisible texture throughout the hair
- Sea salt spray: Adds grit without visible product buildup
- Braiding spray: Specifically formulated to help braids grip and hold
- Dry texture powder: Provides volume and hold at the roots
Curly and coily hair types can absolutely rock fishtail braids, though the technique might need slight adjustments. These textures often hold braids exceptionally well without additional products. The key lies in thoroughly detangling first and possibly stretching the hair slightly to see the braid pattern clearly. Some women with very curly hair prefer to blow-dry their hair smooth first, while others love how their natural texture creates a unique, fuller-looking fishtail.
Very thick hair might require sectioning off some layers before beginning, creating a more manageable amount to work with. Thin hair benefits from teasing at the crown and gentle tugging at the braid edges once complete, creating the illusion of fuller, more voluminous style. No matter your hair type, the right preparation sets you up for braiding success.
Step-by-Step Fishtail Braid Tutorial
Now comes the moment to put preparation into practice. Creating your first fishtail braid might feel awkward initially, but muscle memory develops quickly with practice. This technique differs from traditional braiding, yet once you understand the rhythm, your fingers will move automatically through the pattern.
Starting Position and Sectioning
Position matters more than most people realize when beginning a fishtail braid. Gather all your hair into a low ponytail position at the nape of your neck, securing it temporarily with an elastic you’ll remove later. This starting point creates the classic fishtail look and provides the easiest angle for beginners to see their work.
Divide your ponytail into two equal sections, holding one in each hand. These two sections remain your only working pieces throughout the entire braid, unlike traditional braiding that uses three. Keep your grip firm but not tight – tension should come from the weight of the hair rather than squeezing with your fingers.
The Basic Fishtail Technique
The fundamental movement of fishtail braiding involves taking small pieces from the outside of one section and crossing them over to join the opposite section. Start by separating a thin strand from the outer edge of your right section. The smaller the strand, the more intricate your finished braid appears. This piece crosses over the right section and joins the left section completely.
Next, take a similarly sized piece from the outer edge of the left section. Cross it over to join the right section. This back-and-forth pattern continues down the length of your hair. The key lies in maintaining consistent strand sizes – varying thickness creates an uneven, messy appearance unless that’s your intended style.
Your hands work in a specific rhythm: take from the outside, cross over, join the opposite side, switch hands, repeat. This motion becomes second nature surprisingly quickly. Focus on keeping the two main sections separated while you work, as allowing them to blend together ruins the distinctive fishtail pattern.
Maintaining Even Tension
Consistent tension throughout your braid prevents loose spots and ensures longevity. The trick involves pulling gently outward on both sections after adding each new piece. This slight tug keeps everything snug without creating painful tightness against your scalp.
Watch for these signs that your tension needs adjustment: sections becoming noticeably different sizes, the braid twisting instead of lying flat, or pieces popping out as you work lower. Address tension issues immediately rather than hoping to fix them later. Once a loose spot develops, it affects the entire braid below that point.
Many women find their dominant hand naturally creates more tension than their non-dominant side. Compensate by consciously matching the pressure between both hands. If you notice one side looking tighter, pause and gently adjust before continuing. This attention to detail separates amateur attempts from professional-looking results.
Finishing Touches
As you approach the end of your hair, the sections become thinner and harder to manage. Stop braiding when roughly two inches of hair remain, leaving enough length to secure with your elastic. Remove the temporary elastic from the top if you used one, allowing the braid to flow naturally from your scalp.
The traditional fishtail often looks better slightly loosened, creating a romantic, effortless appearance. Starting at the bottom, gently tug on the outer edges of your braid, working upward in small increments. This “pancaking” technique adds width and dimension without compromising the braid’s structure. Pull evenly on both sides to maintain symmetry.
A light mist of flexible-hold hairspray sets your style without stiffness. Focus on any baby hairs or flyaways around your face and the nape of your neck. For extra security, especially if you have slippery hair, run a tiny amount of clear brow gel or hair gel along any pieces that tend to escape.
Small adjustments make significant differences in the final appearance. Tuck any visible elastics under the braid by wrapping a small piece of hair around the band and securing with a bobby pin. Smooth any bumps by gently massaging the braid between your palms. These finishing touches transform a basic braid into a polished hairstyle worthy of compliments all day long.
Common Mistakes and How to Fix Them
Every woman learning the fishtail braid encounters similar challenges initially. Rather than feeling frustrated when these issues arise, recognize them as normal parts of the learning process. Understanding what goes wrong helps you correct problems quickly and avoid them in future attempts.
Uneven Sections
The most frequent mistake involves creating sections of drastically different sizes as you braid. This imbalance shows up as a lopsided braid that curves to one side or appears thicker in certain areas. The problem usually starts when you take larger pieces from one side without realizing it, gradually shifting all the hair in one direction.
Fix uneven sections by stopping as soon as you notice the issue. Gently loosen the last few crosses you made, redistributing the hair more evenly between your two main sections. Pay attention to the thickness of pieces you select – they should match in size even if your sections have become unequal. Visual markers help here. Try to grab pieces roughly the width of your pinky finger until you develop an instinct for consistent sizing.
Prevention works better than correction for this issue. Before starting each new cross, glance at both sections in your hands. They should appear similar in volume. If one looks notably smaller, take a slightly thinner piece from the fuller side until balance returns. Some women find it helpful to work in front of a mirror initially, though this can feel awkward until you adjust to the reversed image.
Loose or Falling Apart Braids
Nothing frustrates quite like spending time on a braid only to have it unravel within hours. This problem stems from insufficient tension during braiding or inadequate preparation of the hair itself. Silky, freshly washed hair proves especially prone to this issue, as the smooth cuticles provide no grip between sections.
When your braid starts loosening, first check your technique. Each piece you cross over should be pulled taut before grabbing the next section. Think of it as a gentle, consistent pressure rather than yanking. The braid should feel secure but not tight against your scalp. If you can easily slide your finger under the braid at any point, you need more tension.
Product application solves most loose braid problems. Work a texturizing product through your hair before beginning, focusing on the mid-lengths where most of the braiding occurs. For emergency fixes on completed braids, try this: spray a bit of hairspray on your fingertips and carefully run them along any loosening sections. The tackiness helps pieces stick together without visible product buildup.
Bumpy or Messy Appearance
While some women love an intentionally messy fishtail, unwanted bumps and irregularities can make your braid look amateurish. These typically result from rushing the process or not maintaining consistent hand positions as you work down the braid. Bumps often appear where you’ve switched your grip or taken a break mid-braid.
Smooth out minor bumps by gently massaging the braid between your palms, using a rolling motion similar to making a clay snake. This technique redistributes the hair within the braid without completely loosening your work. For more stubborn bumps, use the pointed end of a rattail comb to carefully adjust individual pieces, tucking strays back into the pattern.
Creating a smooth braid from the start requires methodical movements. Keep your hands at the same distance from the braid as you work downward, avoiding the temptation to hold closer as the sections get smaller. Maintain the same angle throughout – if you start holding the sections straight out from your head, continue that angle rather than dropping your hands as you tire.
Taking Too Long to Complete
Speed comes with practice, but many beginners find themselves spending 20-30 minutes on a single braid. This extended time often leads to hand fatigue, increasing mistakes in the lower portions. The main culprit? Taking pieces that are too small or stopping to fix every tiny imperfection along the way.
Build speed through deliberate practice sessions when you’re not rushing to leave the house. Set a timer and challenge yourself to complete a braid within that timeframe, even if it’s not perfect. Focus on maintaining rhythm rather than creating magazine-worthy results initially. Your hands need to learn the motion pattern before you can execute it quickly and neatly.
Here are techniques that naturally increase your braiding speed:
- Larger sections initially: Start with slightly bigger pieces until the motion feels natural
- Consistent rhythm: Count “one-two, one-two” as you alternate sides
- Strategic positioning: Tilt your head slightly forward to reduce arm fatigue
- Planned breaks: For very long hair, pause at the halfway point to shake out your hands
Most women find their speed doubles within a week of daily practice. What once took half an hour becomes a five-minute styling option. The key lies in accepting imperfect practice braids as stepping stones to quicker, neater results. Your muscle memory develops whether the braid looks perfect or not, so prioritize repetition over perfection during your learning phase.
Styling Variations and Tips
Once you’ve mastered the basic fishtail technique, a world of styling possibilities opens up. These variations use the same fundamental weaving pattern but create entirely different looks suitable for various occasions and personal styles. Experimenting with placement, texture, and accessories transforms your simple braid into a signature style.
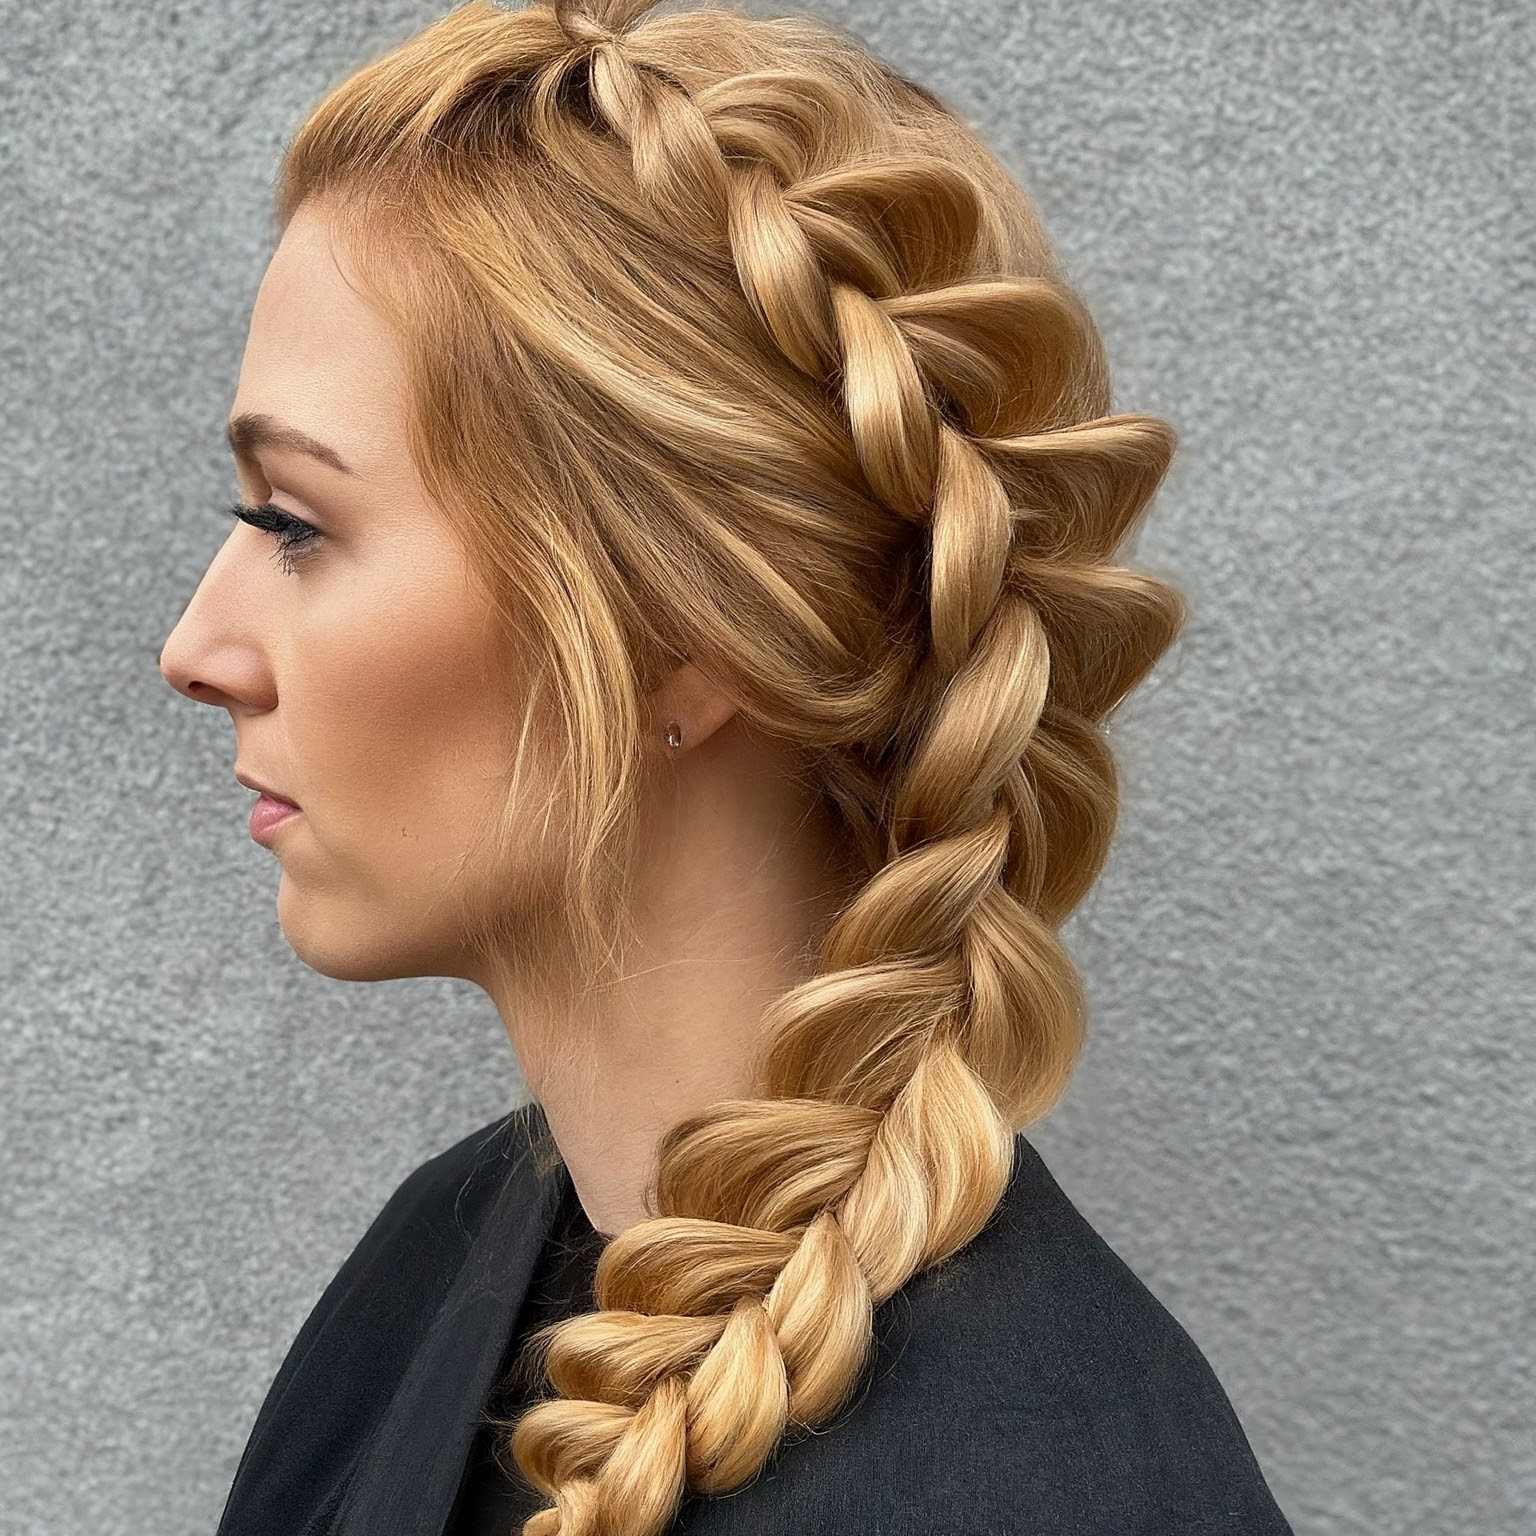
Side Fishtail Braid
The side fishtail adds romantic asymmetry to your look while offering practical benefits. This variation works especially well for women who struggle to see behind their heads or find back braiding uncomfortable. Start by bringing all your hair over one shoulder, securing it temporarily with an elastic about two inches from your ear.
Creating a side fishtail requires minor technique adjustments. Your arms work at different angles, with one reaching across your body more than the other. This positioning can feel strange initially but becomes comfortable with practice. The key lies in maintaining consistent tension despite the asymmetrical arm positions.
Side fishtails naturally create a softer, more relaxed appearance than center-back versions. The braid drapes beautifully over your shoulder, making it perfect for special occasions or when you want your hairstyle visible in photos. This placement also allows you to monitor your progress easily without mirrors or awkward neck positions.
Messy Fishtail for Casual Looks
The intentionally undone fishtail braid has become incredibly popular for its effortless appearance. This style starts with the standard technique but incorporates strategic messiness for a lived-in look. Begin by creating texture throughout your hair with sea salt spray or dry shampoo, scrunching to enhance natural movement.
As you braid, vary your section sizes slightly and avoid pulling too tightly. The goal is controlled chaos rather than true messiness. Once you’ve secured the end, the real transformation begins. Starting from the bottom, gently pull apart sections of the braid, focusing on making some areas fuller than others. This creates an organic, imperfect shape that looks naturally tousled.
Pull out face-framing pieces before or after braiding for added softness. These wisps should look accidental rather than carefully placed. A curling iron can add movement to these pieces if your hair is very straight. The final result should suggest you’ve had the braid in all day, even when freshly done.
Adding Accessories
Accessories elevate simple fishtail braids into special-occasion styles without requiring advanced techniques. The braid’s texture provides perfect anchor points for various decorative elements. Small flowers tucked into the braid create a bohemian vibe perfect for outdoor events or festivals.
Metallic hair rings threaded onto small sections before braiding add subtle shine throughout the style. These work especially well for evening events when you want understated glamour. Position them randomly rather than in perfect patterns for a more modern, effortless look. Similarly, small pearls or beads can be incorporated for vintage-inspired styles.
Ribbon weaving creates dramatic transformation with minimal effort. Choose a ribbon slightly longer than your hair and incorporate it as a third element from the beginning. The ribbon weaves through naturally as you work, creating a colorful accent that makes even simple braids look special. Velvet ribbons suit fall and winter styles, while silk or satin options work beautifully for summer events.
Making It Last All Day
Long-lasting fishtail braids require strategic planning from start to finish. Beyond initial preparation, several techniques ensure your style survives whatever your day brings. The first secret involves braiding slightly damp hair that’s been treated with a holding product. As the hair dries completely within the braid, it sets in that shape more permanently.
Consider your daily activities when deciding how tightly to braid. Workouts, outdoor activities, or windy conditions demand firmer braids with extra security. For these situations, create a tighter initial braid and skip the pancaking step. Use bobby pins to anchor any sections that typically loosen first, usually around your ears or nape.
Product layering provides insurance against humidity and movement. Start with texturizing spray, add a light hold gel to pieces as you braid, and finish with hairspray. This combination addresses different challenges: texture for grip, gel for control, and hairspray for overall hold. Focus extra product on your ends, where braids typically begin unraveling first.
Strategic touch-ups throughout the day maintain your style’s appearance without complete re-braiding. Carry a travel-size hairspray and a few bobby pins for quick fixes. If pieces escape, twist them slightly before pinning back into the braid – this disguises them better than simply tucking straight pieces. A tiny amount of hand lotion smoothed over flyaways works in pinch when you’re without hair products.
Perfecting Your Fishtail Technique
Mastery of any hairstyling technique comes through consistent practice and understanding how to adapt methods to your unique hair characteristics. The journey from creating your first somewhat-messy fishtail to producing salon-worthy braids follows a predictable path that every skilled braider has traveled.
Practice Recommendations
Dedicated practice sessions yield faster improvement than occasional attempts when you’re already running late. Set aside 10-15 minutes each evening for braiding practice, treating it like any other skill you’re developing. This timing works well because you can leave the braid in overnight, giving your hair pretty waves the next morning as a bonus.
Track your progress by taking photos of each practice braid. This visual record shows improvement that might otherwise go unnoticed. Small advances in consistency, speed, or neatness become obvious when you compare braids from different weeks. Many women find this documentation motivating during the learning phase when progress feels slow.
Creating practice goals keeps sessions focused and productive. Rather than simply braiding repeatedly, target specific improvements:
- Week one: Focus solely on maintaining consistent section sizes
- Week two: Work on increasing speed while maintaining quality
- Week three: Perfect your tension throughout the entire length
- Week four: Master finishing touches and pancaking techniques
Practicing on others accelerates your learning curve. Braiding someone else’s hair provides a completely different perspective and helps you understand the technique from new angles. Friends or family members with different hair textures offer valuable experience in adapting your technique. Plus, braiding while relaxed and chatting removes the pressure of perfection.
Working with Different Hair Types
Fine hair presents unique challenges that require specific adaptations. The key lies in creating volume and grip before beginning. Backcomb gently at the crown and through the lengths where the braid will sit. This teasing provides structure that helps the braid maintain its shape. Use lightweight products that won’t weigh down delicate strands.
Thick hair demands patience and sometimes creative sectioning. Consider creating two thinner fishtail braids instead of one massive one, then wrapping them together for an intricate look. Alternatively, section off the top layers, braid the underneath portion, then incorporate the top layers gradually as you work down. This prevents the overwhelming bulk that makes thick-hair braids challenging.
Different hair textures shine with adapted techniques. Straight hair benefits from overnight braiding on slightly damp hair for lasting results. Wavy hair often looks best with minimal product and gentle handling to preserve natural texture. Very curly or coily hair might need light straightening or stretching first, though many women love how their natural texture creates uniquely beautiful fishtail patterns.
Quick Fishtail for Busy Mornings
Reality means most hairstyling happens during rushed morning routines. Developing a streamlined fishtail technique ensures this style remains accessible even on hectic days. The abbreviated version focuses on essentials while skipping time-consuming perfection attempts.
Start with hair prepped the night before. Apply texturizing product to dry hair before bed, then sleep with hair in a loose bun. This creates perfect braiding texture by morning without additional styling time. Keep your braiding supplies in one designated spot – elastic bands, brush, and hairspray together eliminate hunting for tools.
The rapid fishtail uses slightly larger sections than the traditional version. Instead of tiny pieces, grab sections about thumb-width. This adjustment cuts braiding time in half while still creating an attractive pattern. Work standing rather than sitting, as this position naturally encourages faster movements and better arm positioning.
Professional Finishing Tips
Small details separate amateur attempts from professional-looking results. These finishing techniques require minimal extra time but dramatically improve your braid’s appearance. Start by addressing the elastic band – professionals never leave these visible. Wrap a small section of hair around the band, securing underneath with a bobby pin that matches your hair color.
The area where your braid begins often needs special attention. Smooth any bumps or irregularities by gently tugging individual strands to even out tension. A toothbrush sprayed with hairspray works perfectly for taming baby hairs without creating helmet-like stiffness. Work in small sections for natural-looking control.
Creating dimension through strategic product placement elevates basic braids. Apply a tiny amount of shine serum to the raised portions of your pancaked braid, avoiding the recessed areas. This creates subtle light play that makes the braid appear more complex and professionally styled. Similarly, a light dusting of dry shampoo on the raised sections adds texture contrast.
Consider your overall hairstyle when finishing. Fishtail braids often look best with slightly undone elements elsewhere – perfectly smooth hair everywhere except the braid can appear disconnected. Allow some natural texture around your face, or create soft waves in any loose pieces. This cohesion makes the braid appear intentional rather than added as an afterthought.
Final Thoughts on Mastering Fishtail Braids
The journey from fumbling with your first fishtail attempt to confidently creating this elegant style mirrors learning any worthwhile skill. Each practice session builds muscle memory, making movements that once required intense concentration flow naturally from your fingers. What seems impossible during your first attempts becomes a quick styling option you can complete while mentally planning your day.
Your personal braiding style will develop through experimentation with the techniques shared here. Some women discover they prefer ultra-neat, tight braids for professional settings, while others fall in love with the romantic looseness of messy fishtails. The beauty lies in having these options available once you’ve mastered the fundamental technique. The versatility of this single braiding method means you’ll never run out of ways to style your hair, whether you’re heading to the office, a wedding, or simply running errands on the weekend.
Frequently Asked Questions
Q: Can I create a fishtail braid on myself if I have layered hair?
A: Yes, layered hair works well for fishtail braids. Shorter layers might pop out initially, but you can use a bit of gel or hairspray to secure them. Many women with layers actually prefer the textured, piece-y look this creates.
Q: How long should my hair be to attempt a fishtail braid?
A: Your hair should reach at least your shoulders for a basic fishtail braid. Anything shorter won’t provide enough length to create the characteristic pattern and secure the end properly.
Q: Is it better to fishtail braid clean or dirty hair?
A: Day-old hair typically works better than freshly washed hair. The natural oils and texture provide better grip, helping the braid hold its shape throughout the day.
Q: Why does my fishtail braid always look loose and fall apart?
A: This usually results from insufficient tension while braiding or working with hair that’s too clean and slippery. Try adding texturizing spray before braiding and maintaining consistent, gentle tension as you work.
Q: How can I make my thin hair look fuller in a fishtail braid?
A: Gently tease your hair before braiding and use dry shampoo for added texture. After completing the braid, carefully pull apart the edges (pancaking) to create width and the illusion of thicker hair.
Q: Should I use rubber bands or regular hair ties for fishtail braids?
A: Clear elastic bands work best for fishtail braids. They’re less bulky than regular hair ties and can be easily hidden by wrapping a small piece of hair around them.
Q: How do I prevent my arms from getting tired while braiding?
A: Keep your elbows close to your body and take breaks if needed. Practicing regularly builds endurance. For very long hair, sit down and rest your elbows on a table while braiding.
Q: Can I sleep in a fishtail braid?
A: Absolutely! Sleeping in a loose fishtail braid protects your hair from tangling and creates pretty waves when you take it out in the morning. Just braid loosely to avoid tension on your scalp.
Q: What’s the difference between a fishtail and regular braid in terms of difficulty?
A: Fishtail braids use only two sections instead of three, making the concept simpler. However, the technique requires more repetitive motions. Most people find fishtails easier once they understand the pattern.