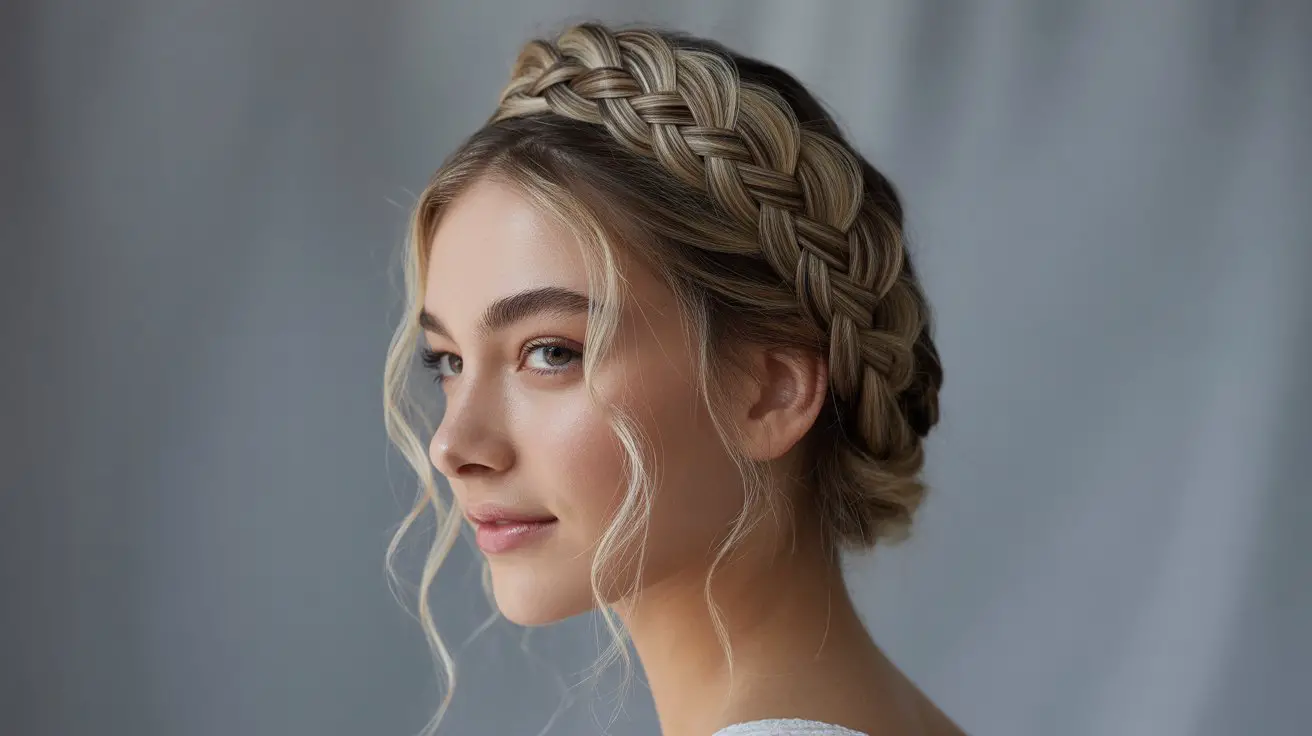
Crown braids have become one of the most sought-after hairstyles for women looking for something both elegant and practical. This romantic style wraps around your head like a delicate halo, creating an instantly polished look that works equally well for casual brunches or formal events. The best part is that what once seemed like a complicated salon-only style can actually be mastered at home in just minutes.
Many women assume creating this regal hairstyle requires professional skills or hours of practice. The truth is that with the right technique and a few simple tricks, you can achieve a beautiful crown braid faster than you might think. Modern braiding methods have simplified the process significantly, making it accessible to anyone willing to spend a few minutes learning the basics.
Ready to discover how you can create this stunning look in just five minutes? The following sections will walk you through everything from choosing the right materials to mastering the exact steps that will have you wearing this gorgeous style with confidence. Whether you’re getting ready for work or preparing for a special occasion, this quick crown braid technique will soon become your go-to hairstyle.
- What Materials You'll Need for a Quick Crown Braid
- How to Prepare Your Hair Before Starting
- Is It Better to Start Your Crown Braid Wet or Dry?
- What Are the Essential Steps for a 5-Minute Crown Braid?
- How to Make Your Crown Braid Last All Day
- Crown Braids: Your New 5-Minute Style Solution
- Frequently Asked Questions
What Materials You’ll Need for a Quick Crown Braid
Creating a crown braid in record time starts with having the right tools within reach. Scrambling to find bobby pins or the perfect hair tie while you’re mid-braid only adds unnecessary minutes to your routine. Setting up your workspace with everything you need makes the entire process flow smoothly from start to finish.
Hair Ties and Bobby Pins
The foundation of any successful crown braid lies in quality securing tools. Small, clear elastic bands work better than thick hair ties for this style since they disappear into the braid without creating bulky knots. Keep at least three elastics handy – one for the initial ponytail if needed, one for securing the braid end, and a spare just in case.
Bobby pins deserve special attention when selecting your materials. Standard pins often slip out of fine hair or fail to grip thick strands properly. Look for pins with a wavy design or rubberized coating for superior hold. You’ll typically need between 8-12 pins depending on your hair length and thickness. Having extras prevents mid-styling panic when you realize you’re running short.
Texturizing Products
Slippery, freshly washed hair poses the biggest challenge for quick crown braiding. The right texturizing product transforms smooth strands into workable material that holds its shape. Dry shampoo works wonderfully even on clean hair, adding grip without weighing down your style.
Sea salt sprays offer another excellent option for creating texture. These products add subtle roughness to each strand while maintaining movement and flexibility. For women with naturally textured or curly hair, a lightweight mousse might provide better control without disrupting your natural pattern.
Comb or Brush
Your choice of detangling tool significantly impacts both speed and final results. A wide-tooth comb works best for most hair types, gently separating strands without creating static or frizz. The wider spacing allows you to work through knots quickly without damaging your hair.
Paddle brushes suit those with straighter, finer hair textures. The flat surface smooths while detangling, creating a sleeker base for your braid. Avoid round brushes for this particular style – they’re designed for creating volume during blow-drying rather than preparing hair for braiding.
Some women find that finger-combing works perfectly for their hair type. This method gives you ultimate control over how much natural texture remains while ensuring no painful pulling during the detangling process.
Optional Accessories
While not essential for the basic crown braid, certain accessories can elevate your finished look or solve specific challenges. Decorative pins featuring pearls, flowers, or metallic details transform a simple braid into special-occasion worthy style. Position these strategically to hide any less-than-perfect sections.
A hand mirror proves invaluable for checking the back of your head during styling. Those tricky sections behind your ears and at the nape often need adjustment, and a second mirror prevents the frustration of discovering loose pieces after you’ve finished.
Hair clips – the kind used in salons for sectioning – speed up the braiding process considerably. They hold completed sections out of your way, preventing tangling and allowing you to focus on one area at a time. Three or four medium-sized clips should suffice for most crown braid styles.
How to Prepare Your Hair Before Starting
The difference between a crown braid that takes five minutes versus fifteen often comes down to preparation. Starting with properly prepped hair eliminates time-consuming struggles with tangling, slipping sections, or strands that won’t cooperate. A few strategic steps before you begin braiding set the stage for quick, beautiful results.
Clean vs Day-Old Hair
Contrary to what many assume, freshly washed hair actually works against you when attempting a quick crown braid. The squeaky-clean texture lacks the natural oils and grit that help strands grip each other during braiding. Most professional stylists recommend working with hair that’s been washed 24-48 hours prior.
Second-day hair provides the perfect balance of cleanliness and workability. Your scalp’s natural oils have had time to distribute slightly down the hair shaft, creating ideal texture for braiding. The strands hold together better, sections stay separated more easily, and the finished braid maintains its shape longer.
For those who must start with clean hair due to timing or personal preference, don’t worry. You can recreate that lived-in texture using products. The key is adding grip without making your hair feel dirty or weighed down. This is where those texturizing products mentioned earlier become essential tools in your arsenal.
Adding Texture
Proper texture application can cut your braiding time in half. Start by shaking your chosen product well if it’s a spray. Hold the bottle 8-10 inches from your head and mist lightly throughout, focusing on the mid-lengths and ends rather than roots. Over-applying at the scalp can make your crown braid look greasy rather than polished.
Work the product through with your fingers, scrunching gently to activate any natural wave or curl pattern. This technique ensures even distribution while avoiding the flat, producty look that comes from brushing immediately after application. Give the product 30 seconds to absorb before moving to the next step.
Detangling Properly
Nothing slows down braiding quite like encountering unexpected knots mid-process. Thorough detangling beforehand prevents those frustrating stops and starts. Begin at the ends of your hair, working your way up gradually to the roots. This bottom-up approach prevents pushing tangles together into larger, more difficult knots.
Divide your hair into sections mentally as you detangle. Pay special attention to the hair around your ears and at the nape of your neck – these areas tend to tangle more due to friction from clothing and movement. Spending an extra few seconds on these trouble spots now saves significant time during the actual braiding.
For women with very thick hair, consider detangling in quadrants. Part your hair down the middle from forehead to nape, then again from ear to ear. Work through each section completely before moving to the next. This methodical approach ensures no tangles hide in the under-layers.
Creating the Right Base
The final preparation step involves setting up your hair’s overall shape and direction. For crown braids, you want hair that’s been encouraged to move away from your face naturally. Flip your head upside down and shake your roots gently. This action lifts hair away from the scalp and creates natural volume that makes braiding easier.
As you flip back upright, use your fingers to direct hair into a rough horseshoe shape around your head. Don’t worry about perfection – you’re simply training the strands to follow the path they’ll take in the finished braid. This preliminary shaping means less fighting with stubborn sections during the actual braiding process.
Some hair types benefit from a light misting of flexible-hold hairspray at this stage. Choose one that doesn’t dry too stiff or sticky. The goal is adding just enough hold to maintain that lifted, shaped base without creating crunchiness that makes braiding difficult. Apply from underneath, lifting sections as you spray for even coverage.
Your hair should now feel slightly textured but still soft, completely tangle-free, and ready to hold its shape. With proper preparation complete, those five minutes you’ll spend actually creating your crown braid will fly by smoothly.
Is It Better to Start Your Crown Braid Wet or Dry?
This common question deserves careful consideration since your choice directly impacts both styling time and final results. While wet-styling works beautifully for certain braid types, crown braids specifically require a different approach for that promised five-minute completion time. Understanding why helps you make the best choice for your hair type and schedule.
Benefits of Dry Hair
Dry hair offers significant advantages for speed-focused crown braiding. The most obvious benefit is elimination of drying time – you can wear your finished style immediately without waiting for moisture to evaporate. This factor alone makes dry styling essential for anyone trying to achieve a five-minute crown braid.
Dry strands also provide better grip and control during the braiding process. Each section maintains its shape without the weight of water pulling it down or causing slippage. You can see exactly how the finished braid will look as you work, making adjustments instantly rather than guessing how it might appear once dried.
The texture of dry hair allows for easier manipulation and sectioning. Your fingers glide through without the resistance that wet hair creates. Pins and elastics grip more securely in dry hair too, reducing the likelihood of your crown braid loosening throughout the day.
Working with dry hair gives you immediate visual feedback about tension and placement. Too-tight sections show instantly as puckering or scalp visibility. Loose areas reveal themselves before you’ve progressed too far. This real-time information lets you perfect your technique quickly without redoing entire sections.
When Damp Hair Works
Slightly damp hair does have its place in crown braid styling, though not for five-minute applications. Women with extremely curly or coily textures sometimes find that hair with 10-20% moisture content behaves more cooperatively than completely dry strands. The key word here is “slightly” – soaking wet hair will never produce quick results.
For those dealing with excessive frizz or flyaways, barely damp hair can help smooth the overall texture. Think of it as the moisture level your hair has 30 minutes after towel-drying, not fresh from the shower. This minimal dampness can help control unruly pieces without adding significant styling time.
Product Application Timing
Strategic product use on dry hair mimics some benefits of damp styling without the drawbacks. Water-based styling creams or leave-in conditioners applied sparingly to dry hair can provide just enough slip for smooth braiding. The trick lies in using minimal amounts – you want to enhance manageability without recreating the heaviness of wet hair.
Apply products to your palms first, rubbing them together to distribute evenly, then smooth over the hair surface. This method prevents over-application in any one area. Focus on the lengths rather than roots to maintain volume at the crown where your braid will sit.
Consider these product application tips for optimal results:
Light Misting: Use a spray bottle filled with water and a drop of conditioner for targeted moisture without soaking
Section by Section: Apply products only to areas giving you trouble rather than all over
Heat Activation: Warm products between palms activate ingredients for better spread
Less is More: Start with tiny amounts since adding more is easier than removing excess
Speed Considerations
The mathematics of wet versus dry styling clearly favor dry hair for five-minute crown braids. Wet hair requires approximately 20-30 minutes of air drying or 5-10 minutes of blow drying before it reaches a workable state for crown braiding. Add the actual braiding time, and you’re looking at a 30-minute minimum commitment.
Dry styling eliminates all waiting time. You move directly from preparation to braiding to finished style. This efficiency makes crown braids accessible for busy mornings or last-minute plans. The ability to create a polished look quickly transforms this style from special-occasion-only to everyday-appropriate.
Temperature plays an unexpected role in the wet versus dry decision. Cold weather makes wet styling particularly impractical – nobody wants to leave home with damp hair in winter. Hot, humid conditions cause wet hair to dry unevenly, creating frizz and ruining the smooth finish crown braids require. Dry styling works consistently regardless of weather conditions.
The verdict for five-minute crown braids is clear: dry hair wins for speed, control, and consistent results. Save wet styling for lazy weekend experiments when time isn’t a factor. For that quick morning transformation or pre-event styling session, trust dry hair to deliver the efficiency you need.
What Are the Essential Steps for a 5-Minute Crown Braid?
Mastering the five-minute crown braid comes down to following a streamlined sequence of movements. Each step builds upon the previous one, creating momentum that carries you quickly through to the finished style. Practice this exact routine a few times, and muscle memory will soon have you braiding without conscious thought.
Section Division Technique
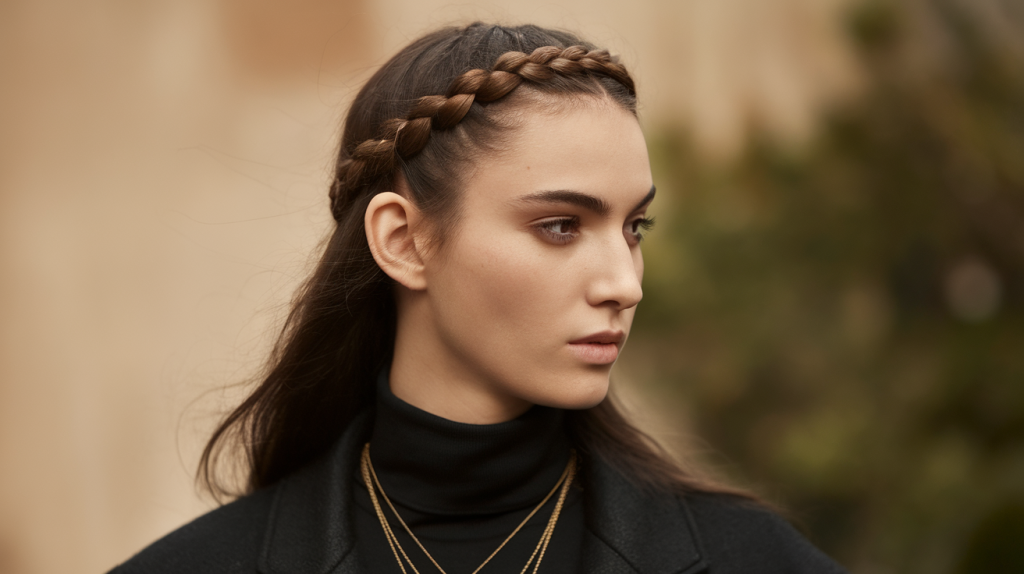
The foundation of your speedy crown braid lies in smart sectioning. Rather than attempting to work with all your hair at once, create a workable pathway that guides your braid naturally around your head. Start by making a deep side part on your preferred side – this creates an elegant asymmetrical look while providing a natural starting point.
Use your comb to create a curved section from your part to behind your opposite ear. This horseshoe-shaped section should include hair from about two inches back from your hairline. Secure the remaining hair at your crown with a clip to keep it completely out of your way. This clear working space prevents tangling and speeds up the braiding process significantly.
The width of your section determines the final braid thickness. For a delicate, romantic look, keep sections around one inch wide. A bolder crown braid requires sections closer to two inches. Consistency matters more than exact measurements – varying widths create an uneven appearance that’s difficult to correct quickly.
Starting Point Selection
Your braid’s starting location impacts both ease of creation and final appearance. Beginning directly above one ear offers the most control and visibility. You can see what you’re doing in the mirror while your arms remain in a comfortable position. This placement also creates a lovely asymmetrical crown that flatters most face shapes.
Position yourself sideways to your mirror with your starting ear closest to the reflection. This angle provides the best view of your work while keeping both hands free for braiding. Natural light from a window helps you see texture and any loose pieces that need attention.
Braiding Method
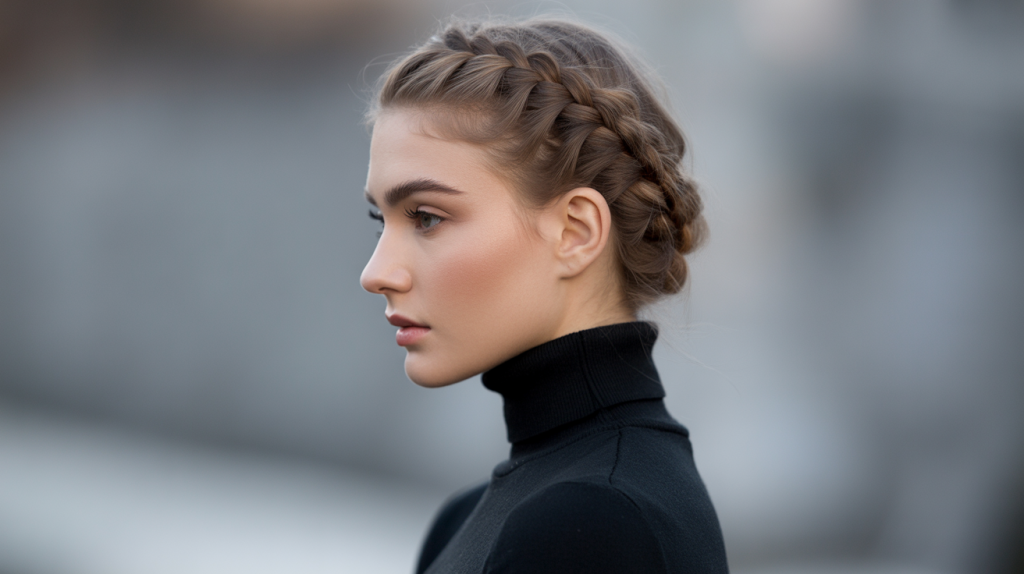
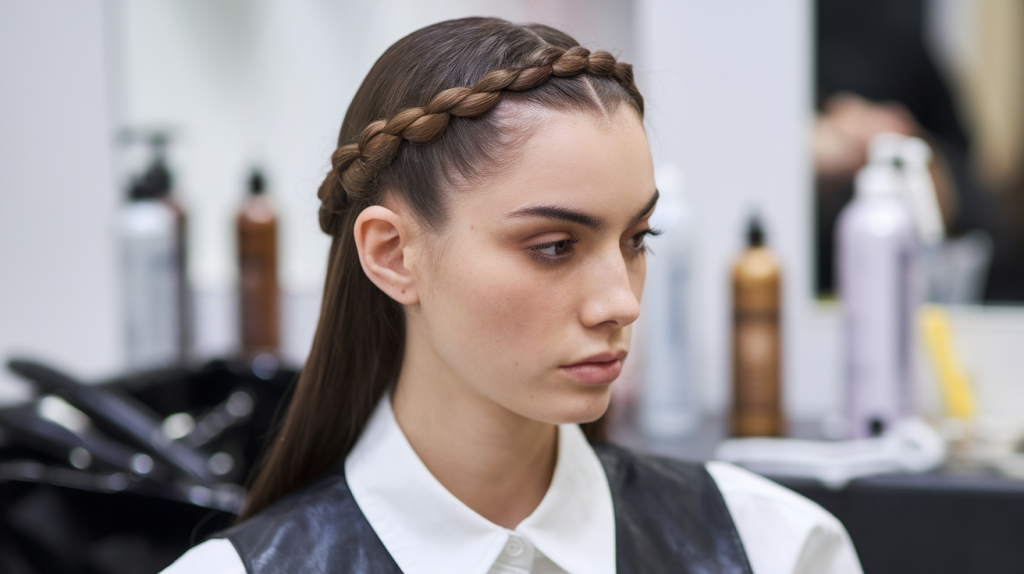
The Dutch braid technique works best for crown braids that need to stay close to the head. Unlike French braiding which sits on top of the hair, Dutch braiding creates a raised braid that stands out beautifully. Think of it as French braiding in reverse – crossing strands under rather than over.
Begin with three small sections at your starting point. Cross the outer sections under the middle one, adding small amounts of hair to each outer section as you progress. Keep sections roughly equal in size for the most polished appearance. Your hands should maintain steady rhythm: under, add hair, under, add hair.
Tension control determines whether your five-minute goal stays realistic. Pull firmly enough to keep the braid secure but not so tight that you create discomfort or visible scalp pulling. The sweet spot feels snug without pain. Consistent tension throughout creates a uniform braid that requires minimal adjustment.
Continue braiding along your hairline, following the curve of your head. As you round the back, you’ll need to adjust your arm position. Drop your elbows and work with your hands higher to maintain control. This is where that preliminary practice pays off – awkward positions become second nature with repetition.
Securing Techniques
Once you’ve braided around to your starting point, you’ll have a tail of loose hair to manage. How you handle this endpiece can make or break your five-minute timeline. The quickest option involves continuing your Dutch braid down the remaining length, then tucking and pinning the tail under the crown portion.
Secure the braid end with a clear elastic before tucking. This prevents unraveling while you position the tail. Lift a section of the crown braid near your starting point and tuck the tail underneath. Use bobby pins inserted at an angle to anchor both the tail and the lifted section back down.
Speed-pinning technique matters here. Rather than inserting pins straight in, angle them against the direction of the braid. This creates better hold with fewer pins needed. Three to four strategically placed pins should suffice for most hair types.
Finishing Touches
The final minute of your five-minute crown braid should focus on perfecting the overall look. Gently tug at the outer edges of your braid to create fullness – this technique, called pancaking, transforms a tight braid into a romantic, voluminous style. Work systematically around your head, pulling small sections evenly.
Check for any gaps where scalp shows through, especially at the back where sections can separate during braiding. A quick smoothing motion with your palm usually resolves minor issues. For stubborn gaps, steal a small piece of hair from the unbraided section and pin it strategically over the opening.
Address flyaways with the lightest touch of hairspray on your hands, then smooth over problem areas. Avoid spraying directly onto the braid initially – this can create stiff, unnatural texture. Save direct spray application for the very end if needed for extended wear.
A final mirror check from multiple angles ensures professional-looking results. Turn your head slowly, checking that the braid maintains consistent height and fullness throughout. With practice, this entire sequence truly does fit within a five-minute window, giving you a sophisticated style that looks like it took much longer to create.
How to Make Your Crown Braid Last All Day
Creating a stunning crown braid in five minutes means nothing if it falls apart by lunchtime. The longevity of your style depends on specific techniques applied during and after the braiding process. These professional secrets ensure your crown braid looks as fresh at day’s end as it did when you first stepped out the door.
Bobby Pin Placement
Strategic pin placement makes the difference between a braid that shifts and slides versus one that stays perfectly positioned. The biggest mistake women make is using pins only where they see looseness. Professional stylists know that preventive pinning works better than reactive fixing.
Start by identifying your braid’s natural stress points. These occur where the braid curves sharply, such as behind the ears and at the nape. Place pins at these locations even if the braid feels secure. Insert each pin through the braid and into the hair beneath, creating an anchor that prevents movement throughout the day.
The angle of insertion matters tremendously for hold quality. Push the pin in one direction, then flip it back the opposite way before the final push. This locking technique grips more hair and creates superior stability compared to straight insertion. You’ll use fewer pins overall while achieving better security.
Hidden pinning maintains the braid’s elegant appearance while providing necessary support. Slide pins under the raised portion of your Dutch braid where they disappear completely. Choose pins that match your hair color precisely – even a slight mismatch shows against the textured braid surface.
For areas requiring extra security, try the crossing technique. Insert two pins in an X formation, with each pin entering from opposite sides. This method works particularly well at the starting and ending points of your crown braid where the most stress occurs during daily movement.
Hair Spray Techniques
Proper spray application enhances longevity without creating that dreaded helmet-hair effect. The timing and method of hairspray use determine whether you achieve flexible hold or stiff, unnatural results. Understanding these nuances lets you customize hold level based on your day’s activities.
Initial spray should happen before any pancaking or adjusting. Hold the can 10-12 inches away and mist lightly over the completed braid. This base layer locks in the structure before you manipulate sections for fullness. Allow 10 seconds for the spray to set partially before touching the braid.
Working spray provides targeted hold during finishing touches. Spray a small amount onto your fingertips, then smooth over specific areas needing control. This technique tames flyaways without oversaturating the overall style. Focus on the hairline and any naturally unruly sections.
Final spray application seals everything in place. Use a sweeping motion that covers the entire crown braid evenly. For all-day events or humid conditions, apply two light coats rather than one heavy application. The layering approach provides better hold without stiffness.
Choose your hairspray formula based on your hair type and planned activities:
Fine Hair: Volumizing formulas that won’t weigh down delicate strands
Thick Hair: Strong-hold options that can control substantial weight
Humid Weather: Anti-humidity formulas that resist moisture absorption
Active Days: Flexible-hold sprays that move naturally with you
Special Events: Maximum-hold for photo-worthy perfection all night
Touch-Up Tips
Even perfectly executed crown braids may need minor adjustments throughout the day. Knowing quick fixes prevents panic when you notice loosening sections. Keep a small emergency kit in your bag containing two bobby pins, a travel-size hairspray, and a clear elastic.
Bathroom touch-ups take less than 30 seconds when you know where to look. Check behind your ears first – this area loosens fastest due to jaw movement and head turning. A quick pin reinforcement usually solves any issues. The nape area deserves attention next, especially if you wear scarves or high collars that create friction.
Reviving flattened sections requires minimal effort. Gently massage the scalp beneath the braid with your fingertips to restore volume. Pull lightly on braid edges if pancaking has compressed from wearing hats or lying against headrests. These simple actions restore the original fullness quickly.
For unexpected weather changes, adapt your maintenance routine. Wind requires extra pins at strategic points to prevent the entire braid from shifting. Rain or humidity calls for hands smoothed with anti-frizz serum rather than adding more spray which can create buildup.
Common Mistakes to Avoid
Several frequent errors sabotage crown braid longevity before you even leave home. Over-braiding ranks as the top mistake – pulling too tightly causes discomfort and inevitable loosening as your scalp rebels against the tension. Aim for secure but comfortable from the start.
Using too much product creates its own problems. Excessive texturizing spray or hairspray builds up, making hair feel dirty and look dull by afternoon. The weight of product buildup can actually cause drooping rather than providing support. Start with minimal amounts and add only as needed.
Skipping the clear elastic at your braid’s end invites unraveling. Some women rely solely on bobby pins to secure the tail, but movement throughout the day works pins loose. That tiny elastic provides insurance against complete style failure even if pins shift.
Ignoring your hair’s natural characteristics leads to unrealistic expectations. Fine, slippery hair needs different treatment than coarse, textured strands. Work with your hair’s personality rather than against it. This might mean accepting a slightly looser style that lasts rather than forcing an ultra-tight braid that fails.
Creating identical tension throughout the braid proves challenging but necessary. Inconsistent tightness creates weak points where loosening begins. Practice maintaining steady pressure as you work around your head. Your hands should feel the same resistance with each section added.
Poor pin quality undermines otherwise perfect technique. Old pins with worn coating or bent shapes don’t grip properly. Invest in fresh bobby pins regularly and discard any that show wear. The minimal cost provides significant return in styling security and saved time on touch-ups.
Crown Braids: Your New 5-Minute Style Solution
Mastering the five-minute crown braid opens up a world of polished styling options for busy women. This versatile technique works equally well for rushing to morning meetings or preparing for evening events. The combination of proper preparation, efficient technique, and smart securing methods transforms what once seemed like a complex style into an achievable daily option.
The journey from crown braid novice to quick-styling expert simply requires practice and the right approach. Each attempt builds muscle memory and familiarity with your hair’s unique characteristics. Soon, your hands will move through the steps automatically while you plan your day or chat with family. This beautiful style proves that sophisticated doesn’t have to mean time-consuming – sometimes the most elegant looks come together in just minutes.
Frequently Asked Questions
Q: Can I create a crown braid with shoulder-length hair?
A: Yes, shoulder-length hair works well for crown braids. You might have a shorter tail to tuck under at the end, but the style remains completely achievable. Use slightly smaller sections to ensure you have enough length to complete the circle around your head.
Q: What if my layers are too short to stay in the braid?
A: Short layers require extra attention but don’t prevent crown braiding. Use a bit more texturizing product on those pieces and pin them strategically as you work. Small clear elastics can also help secure rebellious layers within the braid structure.
Q: Should I attempt this style with very thick hair?
A: Thick hair actually creates gorgeous, full crown braids. The key is working with smaller sections than you might initially think necessary. This keeps the braid manageable and prevents it from becoming too heavy to stay in place throughout the day.
Q: How do I prevent headaches from tight braiding?
A: Proper tension is crucial for comfort. The braid should feel secure but never painful. If you experience discomfort while braiding, stop and loosen that section immediately. A correctly executed crown braid should feel nearly weightless on your head.
Q: Can crown braids work for formal events?
A: Absolutely! Crown braids suit everything from weddings to galas. Add decorative pins, small flowers, or a delicate hair vine to elevate the basic style. The five-minute version provides an excellent base for additional embellishments when time allows.
Q: What’s the best way to sleep without ruining my crown braid?
A: If you need your crown braid to last overnight, wrap a silk scarf loosely around your hairline before bed. This reduces friction and prevents frizzing. Some loosening is normal, but the basic structure should remain intact for easy morning touch-ups.
Q: How often should I wash my hair if I wear crown braids regularly?
A: Regular crown braid wearers often find that washing every 3-4 days works perfectly. This schedule maintains the ideal texture for braiding while keeping hair healthy. Use dry shampoo between washes to refresh your roots without losing that perfect braiding texture.
Q: Will this style damage my hair over time?
A: Crown braids are generally gentle on hair when done correctly. Avoid pulling too tightly and give your hair regular breaks between styles. Using quality bobby pins and removing them carefully prevents breakage from repeated styling.