Latte brunette has become one of the most requested hair colors in salons across the country. This warm, creamy brown shade mimics the rich tones of a perfectly crafted latte, blending caramel highlights with deeper brown depths. The color flatters multiple skin tones and requires less maintenance than dramatic color changes, making it practical for busy women.
Getting this particular shade right takes more than picking a box color from the drugstore shelf. The depth, warmth, and dimension that define salon-quality results require specific techniques and products. Your natural base color, hair health, and even previous color treatments all affect how this shade develops on your strands.
Let’s share here exactly what makes this color special, how to prepare your hair properly, which techniques create authentic results, and how to maintain that fresh-from-the-salon look at home. You’ll learn which products protect your investment and keep the color looking vibrant between appointments.
What Is Latte Brunette Hair Color?
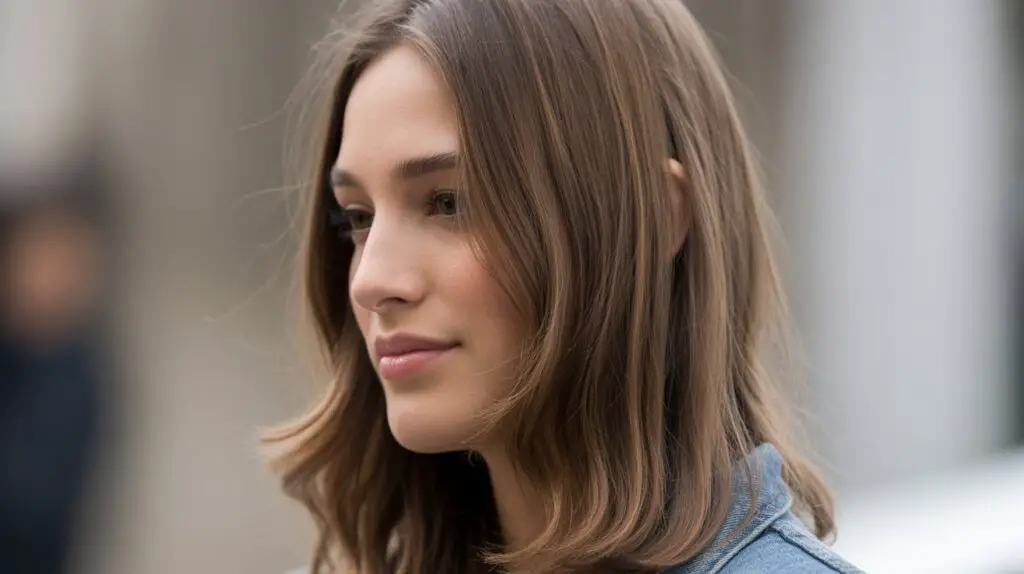
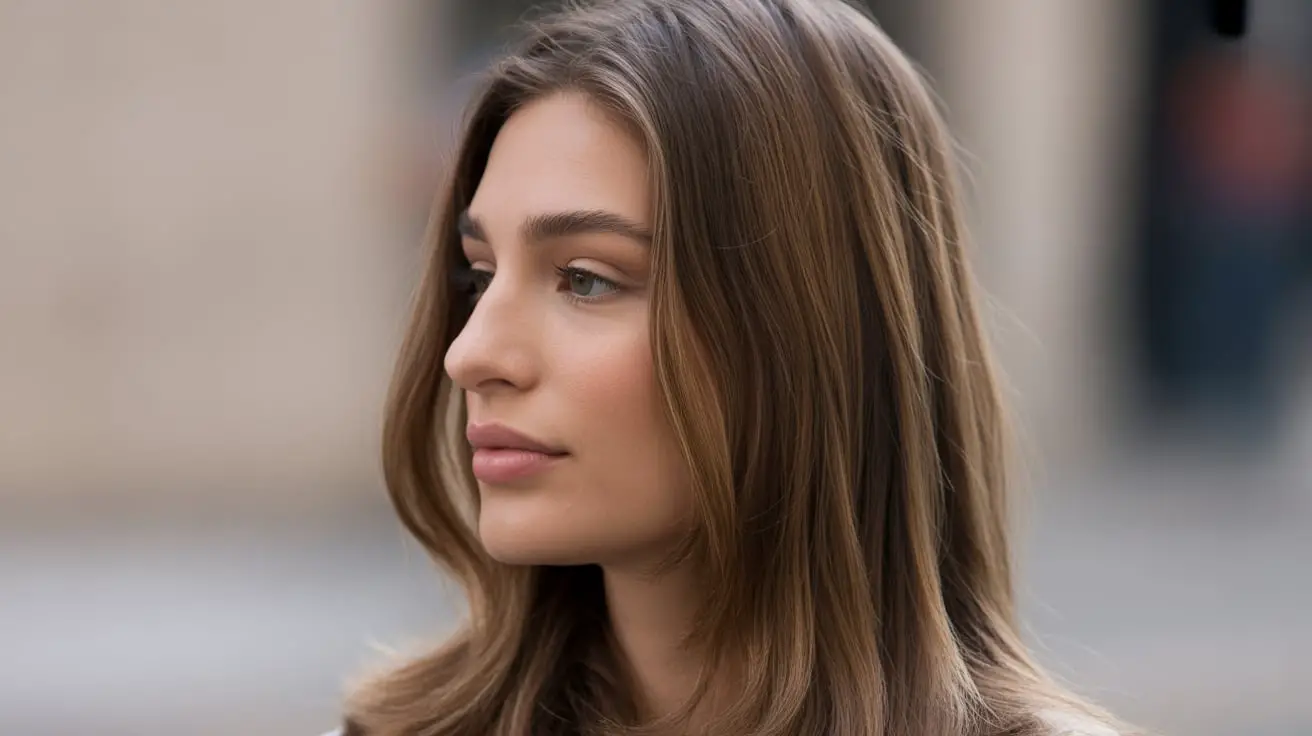
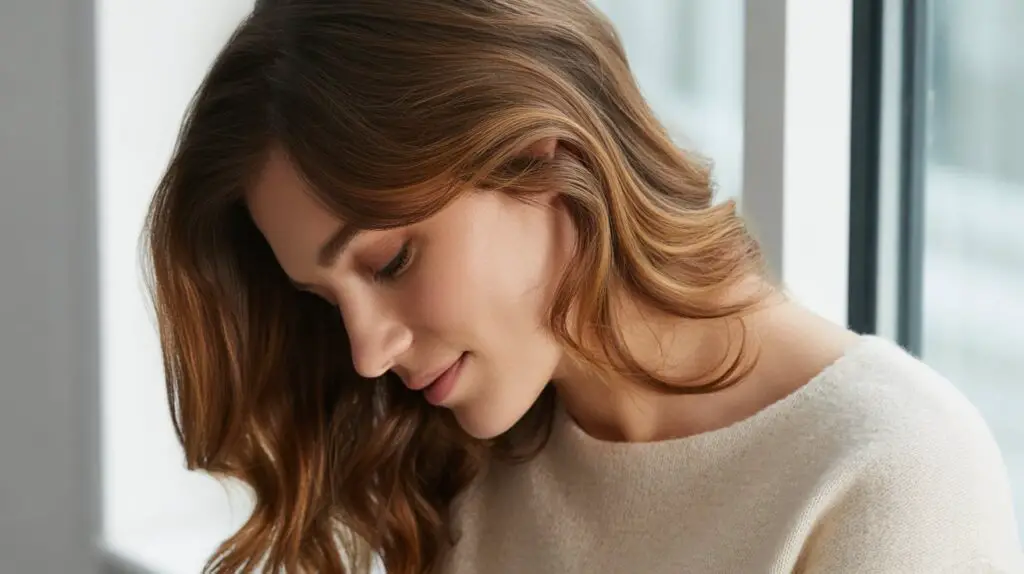
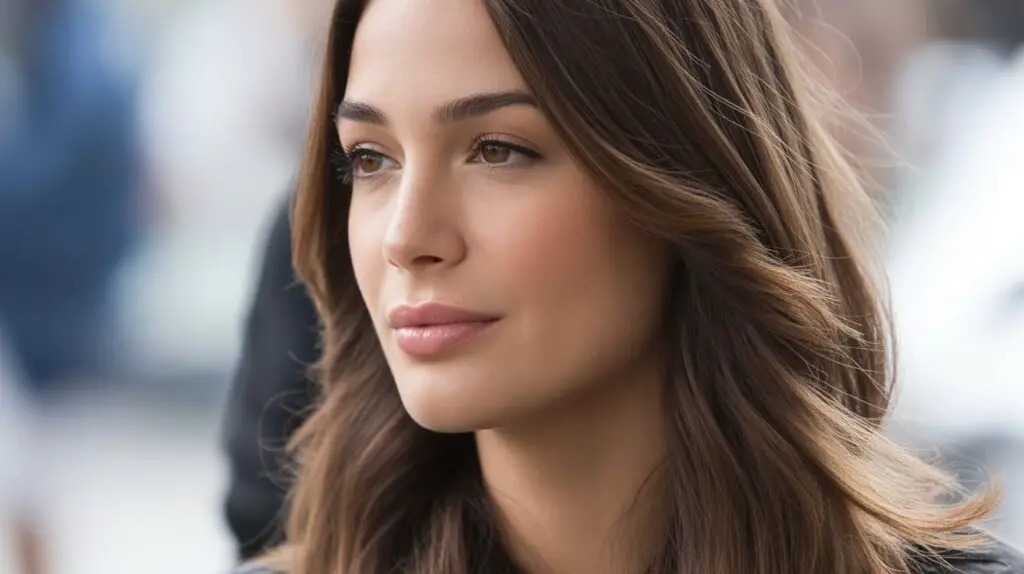
This trendy shade takes inspiration from the layered appearance of a café latte. The color combines warm brown tones with hints of caramel and honey, creating a multi-dimensional look that catches light beautifully. Unlike flat, single-process brown, this shade has depth and movement that makes hair look fuller and healthier.
The color composition and undertones
The base of latte brunette sits in the medium to dark brown family, typically ranging from level 4 to level 6 on the hair color scale. The magic happens in the undertones, which lean distinctly warm. Golden, caramel, and toffee notes create that signature creamy appearance. Some variations include subtle red undertones, while others stay firmly in the golden brown territory.
Think of your hair as a canvas where different shades blend together. The darkest sections might be a rich chocolate brown, while lighter pieces pull more golden or honey-toned. This variation creates dimension that makes the color look natural rather than flat or artificial.
How it differs from chocolate and espresso brown
Chocolate brown tends to be cooler and more neutral, while espresso brown leans almost black with minimal warmth. Latte brunette sits firmly on the warm side of the spectrum. The color also requires more dimension than these single-tone shades. Where chocolate brown might be one consistent color throughout, this shade needs lighter and darker sections to achieve that creamy, multi-toned effect.
The warmth level makes the biggest difference. Cool browns can wash out certain skin tones, but the golden undertones in this shade bring warmth to your complexion.
Which skin tones suit this shade best
Women with warm or neutral undertones typically see the most flattering results. If gold jewelry looks better on you than silver, or if your veins appear more greenish than blue, you likely have warm undertones that will work beautifully with this color. The golden tones in the hair complement similar tones in your skin, creating a harmonious look.
Fair skin with peachy or golden undertones glows next to these warm browns. Medium skin tones gain radiance from the caramel highlights. Deeper skin tones look stunning with richer versions of the shade that include more chocolate depth alongside the golden pieces.
The warmth level explained
Hair color warmth gets measured on a scale from cool to warm. This particular shade sits on the warm end, but not at the extreme. It’s warmer than ash brown but not as intensely golden as honey blonde. The goal is achieving a comfortable, wearable warmth that enhances rather than overpowers.
The warmth in this color comes from the presence of gold and yellow pigments. These pigments catch and reflect light differently than cool pigments, which is why the color appears to glow. Too much warmth can look brassy or orange, while too little makes the color appear dull. Skilled colorists balance these tones carefully.
Your natural hair color affects how much warmth shows through. Darker natural hair needs more lifting to reveal golden tones, while lighter natural hair takes warm pigments more easily. Previous color treatments also impact results. Hair that’s been heavily highlighted or bleached absorbs warm tones differently than virgin hair.
Color oxidation changes warmth over time too. Fresh color often appears slightly darker and less warm immediately after application. As you wash your hair over the following weeks, the color settles and the warm tones become more visible. This is normal and expected.
How Do You Prepare Your Hair for Coloring?
Starting with healthy, properly prepped hair makes all the difference in achieving salon-quality results. Color takes more evenly on hair that’s in good condition, and the final shade looks more vibrant and lasts longer. Preparation isn’t glamorous, but it’s the foundation for beautiful color.
Assessing your current hair color and condition
Look at your hair honestly before making any color decisions. Is it damaged from previous bleaching or chemical treatments? Does it feel dry and brittle, or is it relatively healthy? The condition of your strands determines how they’ll accept new color and how much prep work you need.
Check your current color level too. Are you starting from dark brown, light brown, or previously colored hair? If you’ve had highlights or balayage before, note where those lighter sections sit. This information helps your colorist plan the right approach.
Pre-color treatments to improve results
Protein treatments strengthen hair structure before the chemical process of coloring. Apply a protein mask one week before your color appointment. This reinforces the hair shaft and helps it withstand the coloring process without excessive damage. Your hair will also hold onto the new color better.
Deep conditioning treatments matter just as much as protein. Use a moisturizing hair mask twice in the two weeks leading up to your appointment. Well-hydrated hair accepts color more evenly and looks shinier after processing. Skip the deep conditioner the day before your appointment though – you want some texture on your strands for the color to grip properly.
Clarifying treatments remove product buildup that can interfere with color penetration. Use a clarifying shampoo three days before your appointment to strip away styling products, hard water minerals, and excess oils. Clean hair gives colorists a clear canvas to work with.
Timing your color appointment correctly
Schedule your appointment at least six weeks after any previous major color service. This gives your hair time to recover and settle. Rushing into another color treatment too soon increases damage risk and can cause unpredictable results.
Consider your monthly cycle when booking. Some women notice their scalp feels more sensitive during certain times of the month. If you know your scalp tends to be touchy at specific times, avoid scheduling color services then.
Plan for at least three hours in the salon for this type of multi-dimensional color. Complex coloring takes time, and rushing the process leads to disappointing results. Clear your schedule so your colorist can work without pressure.
Products to avoid before coloring
Stop using purple or blue-toned shampoos at least two weeks before your appointment. These products deposit cool pigments that can interfere with warm color development. You want neutral hair going into the coloring process.
Skip heavy oils and leave-in conditioners for a few days before your appointment. These products coat the hair shaft and can prevent color from penetrating properly. Wash your hair the night before your appointment with just shampoo and skip the conditioner.
Don’t try to color-correct at home right before your salon appointment. Box color or color-depositing products can create a complicated situation for your colorist to work around. If you’re unhappy with your current color, let the professional handle the correction from the start.
Building a healthy hair foundation
Start taking hair-healthy vitamins at least a month before your color appointment. Biotin, vitamin E, and omega-3 supplements support hair health from the inside out. Healthier hair handles chemical processing better and looks more vibrant after coloring.
Reduce heat styling in the weeks leading up to your appointment. Give your hair a break from flat irons and curling wands. Let it air-dry when possible. This reduces existing damage and creates a stronger foundation for color.
Get a trim before your color appointment, not after. Removing damaged ends first means the color goes onto healthier hair. Your colorist will do a final trim after coloring to perfect the shape, but starting with fresher ends improves the overall result.
What Techniques Create the Perfect Latte Brunette?
Creating authentic salon-quality results requires specific coloring techniques that build dimension and depth. The goal isn’t simply dying your hair one shade of brown. Multiple techniques work together to achieve that signature multi-toned appearance.
Base color application methods
Your colorist starts by establishing the foundational color that determines your overall tone. For darker natural hair, this might involve lifting the base slightly to allow warm tones to show through. Starting natural bases that are already medium brown might need minimal lightening or just a toner to shift the undertone.
The base color typically gets applied to your mid-lengths and ends first, then pulled through the roots toward the end of processing. This prevents over-processing at the roots where heat from your scalp speeds up color development. Even application matters – your colorist sections your hair carefully to make certain every strand gets covered.
Processing time for the base varies depending on your starting color and desired end result. Darker bases need longer to lift, while lighter bases might only need toning. Your colorist monitors the color development and may check test strands to confirm the tone is developing correctly.
Balayage versus highlights for dimension
Balayage creates the soft, blended dimension that defines this color. Your colorist hand-paints lightener onto selected sections, concentrating more lightness around your face and through the top layers where light naturally hits hair. The technique creates a gradual, natural-looking gradient from darker roots to lighter ends.
Traditional highlights create more defined contrast. Fine woven sections get saturated with lightener, creating distinct streaks of lighter color throughout. This technique works well if you want more obvious dimension or if your hair is naturally very dark and needs significant lightening to achieve the golden tones.
Many colorists combine both techniques. They might use balayage for face-framing pieces and the top layers, then add a few traditional highlights underneath for extra dimension. The combination creates depth that looks natural but still has plenty of visual interest.
Lowlights for depth and richness
While highlights add brightness, lowlights prevent the color from looking too light or washed out. Your colorist weaves in slightly darker sections throughout your hair, typically using a rich chocolate or deeper brown tone. These darker pieces create shadows that make the lighter sections appear even brighter by contrast.
Lowlights are especially important if your natural hair is lighter than your target color. Without them, the color can look flat or one-dimensional. The darker sections also help the color look more natural by mimicking how hair naturally has variation in tone.
The placement of lowlights matters as much as the color. Your colorist focuses them underneath and in the interior of your hair, where shadows naturally fall. This creates depth without hiding the beautiful lighter pieces on top.
Toning for the right warmth
After lightening, your hair needs toning to achieve the perfect warmth level. Toner neutralizes unwanted undertones and adds the specific warm pigments that define this color. Your colorist mixes a custom toner that considers your base color, how much your hair lifted, and your natural undertones.
The toner might be applied all over or just to the lightened sections, depending on your hair’s needs. Processing time usually runs between 5 to 20 minutes. Your colorist watches carefully because toner works quickly and even a few extra minutes can shift the final color.
Here’s what toners accomplish in creating this shade:
Neutralizes Brassiness: Removes unwanted orange or yellow tones that appear after lightening.
Adds Golden Warmth: Deposits the caramel and honey tones that make the color look creamy rather than flat.
Blends the Transition: Softens any harsh lines between different color sections for a seamless finish.
Enhances Shine: Closes the hair cuticle after the chemical process, improving light reflection.
How Do You Maintain Latte Brunette at Home?
Professional color deserves professional aftercare. The work your colorist does in the salon only stays beautiful with proper home maintenance. Your daily habits directly impact how long your color looks fresh and vibrant.
Color-safe washing routines
Wait at least 48 hours after your salon visit before washing your hair. The color needs this time to fully set into your hair shaft. Washing too soon can cause the color to rinse away before it’s properly locked in. Your hair might feel slightly coated from processing products, but resist the urge to wash immediately.
Wash your hair less frequently than you might be used to. Each wash strips a bit of color from your strands. If you currently wash daily, try cutting back to every other day or every third day. Dry shampoo becomes your friend for refreshing hair between washes.
Use lukewarm water rather than hot when you do wash. Hot water opens the hair cuticle, allowing color molecules to escape. Cooler water keeps the cuticle sealed, trapping color inside. The final rinse should be the coolest you can tolerate – this adds extra shine too.
Limit your washing time. You don’t need to scrub for five minutes. Work the shampoo through your roots where oil accumulates, then let the suds rinse through your lengths. Over-washing strips color and natural oils your hair needs for protection.
Heat protection and styling considerations
Never apply heat tools to your hair without protection first. Heat opens the hair cuticle and can fade color quickly. Spray a heat protectant throughout your hair before blow-drying, and use a serum or cream before flat ironing or curling. The protective barrier reduces color loss and prevents damage.
Lower your heat tool temperatures. You don’t need the highest setting to style effectively. Most hair types style beautifully at 300-350°F. Higher temperatures fade color faster and cause unnecessary damage. Adjust your tools to the lowest effective temperature.
Limit your heat styling frequency. Air-dry when possible, or use heatless styling methods. Give your hair breaks from thermal tools whenever you can. This preserves both your color and your hair’s health.
Glossing treatments between salon visits
At-home glosses refresh your color without the commitment of permanent dye. These semi-permanent treatments deposit color onto your hair surface, boosting vibrancy and adding shine. Use them every four to six weeks to maintain richness between salon appointments.
Pick a gloss that matches your color family. Look for terms like “warm brown,” “caramel,” or “golden brunette” on the package. Avoid anything labeled “ash” or “cool,” which will counteract your warm tones.
Apply gloss to damp hair and process according to package directions, usually 20-30 minutes. The color won’t lighten your hair or change it dramatically – it simply refreshes the tones that are already there. Some women do this in the shower as part of their regular routine.
Sun protection for color longevity
UV rays fade hair color just like they fade fabric. The sun’s rays break down color molecules, leaving your hair looking dull and brassy. This happens faster with warm colors because the golden pigments are particularly susceptible to sun damage.
Wear hats when you’re outside for extended periods. Physical barriers provide the best protection. Wide-brimmed hats shade your hair and face, protecting both your color and your skin.
Use UV protection products formulated for hair. Leave-in conditioners with SPF, protective oils, and anti-fade serums create a shield against sun damage. Apply these before beach days, pool time, or any extended outdoor activities.
Chlorine and salt water accelerate fading too. Wet your hair with fresh water before swimming so it absorbs less pool or ocean water. Apply a protective treatment beforehand. Rinse thoroughly after swimming and use a clarifying shampoo weekly if you swim regularly.
Touch-up timing and root management
Plan salon touch-ups every 8-12 weeks for optimal results. The timing depends on how fast your hair grows and how much your natural color contrasts with your colored hair. Women with darker natural roots might need more frequent appointments than those with lighter starting colors.
Between appointments, use root touch-up products for temporary coverage. Root concealers, sprays, and powders mask regrowth for a few days until your next wash. These products work well for special events when your roots are showing but you’re not quite ready for a full appointment.
Consider root smudging at your next salon visit. This technique blends your natural root color slightly into your colored hair, creating a softer, more gradual transition. The result grows out more gracefully and looks intentional rather than neglected.
What Products Keep This Color Looking Fresh?
The products you choose directly affect how long your color stays vibrant. Investing in the right formulas protects your salon investment and keeps your hair looking freshly colored between appointments. Your bathroom shelf should be filled with color-safe options.
Shampoos and conditioners for brunettes
Color-safe shampoos use gentler cleansing agents that don’t strip color from your hair. Look for sulfate-free formulas specifically designed for color-treated hair. These cleanse your scalp and strands without the harsh detergents found in regular shampoos.
Formulas designed for brunettes often contain subtle color deposits that refresh your shade while cleaning. These aren’t strong enough to actually color your hair, but they maintain vibrancy by replacing tiny amounts of pigment that wash away naturally.
Your conditioner matters just as much as your shampoo. Color-protecting conditioners contain ingredients that seal the hair cuticle, locking color molecules inside. They also provide essential hydration that color-treated hair needs. Never skip conditioner – dry hair fades faster and looks dull.
Purple versus blue shampoo for brown hair
Most people associate purple shampoo with blonde hair, but it can benefit brunettes too. Purple neutralizes unwanted yellow tones that can make warm brown look brassy over time. However, use it sparingly – too much purple can make warm brown look dull or muddy.
Blue shampoo targets orange tones, which can be more relevant for this particular shade. If your color starts pulling too orange or coppery, blue shampoo helps neutralize that warmth back to a more balanced golden tone. Use it once a week or every other week as needed.
Don’t use color-correcting shampoos every time you wash. Alternate them with your regular color-safe shampoo. Overusing purple or blue shampoos can over-correct your color, leaving it looking flat or too cool. Pay attention to how your hair responds and adjust frequency accordingly.
At-home glosses and glazes
Glosses add shine and deposit subtle color to refresh your hair between salon visits. Clear glosses boost shine without affecting your color tone. Tinted glosses add warmth and richness while making your hair gleam.
Apply gloss to clean, damp hair. Section your hair and work the product through from roots to ends, making certain every strand gets coated. Let it process for the recommended time – usually 20 minutes – then rinse thoroughly with cool water.
Some glosses are designed to be mixed with conditioner for a more subtle effect. This diluted approach works well for maintaining color rather than intensifying it. Experiment to find the ratio that gives you the results you want.
Hair masks for color-treated hair
Color processing changes your hair’s structure, making it more porous and prone to dryness. Weekly hair masks replenish moisture and proteins that coloring depletes. Healthy hair holds color better and looks more vibrant.
Choose masks formulated specifically for color-treated hair. These contain ingredients that both nourish your strands and protect your color. Look for products with keratin, argan oil, or shea butter on the ingredient list.
Apply your mask to clean, damp hair. Focus on your mid-lengths and ends where hair is oldest and needs the most care. Leave it on for at least 5-10 minutes, though overnight treatments provide even deeper conditioning. Heat helps the product penetrate, so wrap your hair in a warm towel or use a heat cap during processing.
Frequency depends on your hair’s condition. Very dry or damaged hair benefits from twice-weekly masking. Healthier hair does well with once-weekly treatments. Pay attention to how your hair feels and adjust your schedule accordingly.
Getting That Salon-Fresh Look That Lasts
Achieving this beautiful, multi-dimensional color is only half the journey. The real success shows in how well you maintain it over time. Your daily habits, the products you choose, and how you protect your hair all contribute to keeping that rich, creamy tone looking freshly done. Small changes in your routine create significant differences in color longevity.
This shade works hard to flatter your features and complement your skin tone. Treating it with care means you’ll enjoy the color longer and need fewer touch-ups. Your hair will look healthier, feel softer, and continue catching light beautifully for months after leaving the salon. The investment in professional color deserves the commitment to professional-level maintenance at home.
Frequently Asked Questions
Q: How long does latte brunette hair color typically last?
A: With proper care, this color lasts 8-12 weeks before needing a refresh. The balayage or highlight components can grow out gracefully for several months. Regular glossing treatments extend vibrancy between full color appointments.
Q: Can you achieve latte brunette on dark hair without bleaching?
A: Very dark hair requires some lightening to show the warm, golden tones that define this shade. Your colorist might use a high-lift color rather than traditional bleach for a gentler process. Without lightening, the warmth won’t show through darker bases.
Q: Does this color work on gray hair?
A: Yes, this shade covers gray effectively. The multi-dimensional approach with highlights and lowlights actually helps blend gray regrowth better than solid color. Your colorist can adjust the technique to provide the coverage you need while maintaining dimension.
Q: How much damage should I expect from getting this color?
A: Damage depends on your starting color and hair condition. Lightening always affects hair structure, but proper preparation and aftercare minimize damage. Starting with healthy hair and using bond-building treatments during coloring helps protect your strands.
Q: Will latte brunette fade to an unflattering color?
A: With color-safe products and proper maintenance, this shade fades to a lighter, softer version of itself rather than turning brassy or orange. Using blue or purple shampoo occasionally helps control warmth as it fades.
Q: Can you go from blonde to latte brunette easily?
A: Going darker is generally easier than going lighter. Your colorist will need to fill your hair with warm undertones before applying the brown to prevent the color from looking flat or ashy. The process typically requires one appointment.
Q: How much should professional latte brunette color cost?
A: Expect to pay $150-400 depending on your location, salon reputation, and how much work your hair requires. Major cities and high-end salons charge more. Complex color corrections or very long hair increase the price.
Q: Is box dye capable of creating this color at home?
A: Box dye can’t replicate the multi-dimensional effect that defines this color. The dimension comes from strategic placement of different tones, which requires professional technique. At-home color results in flat, single-tone brown rather than the creamy, layered effect.
Q: How soon can you swim after getting this color?
A: Wait at least one week before swimming. Chlorine and salt water strip color quickly when it’s newly applied. After the first week, always wet your hair with fresh water first and apply protective products before swimming.
Q: Does this color require a different haircut or style?
A: Any haircut works with this color, but layers showcase the dimension beautifully. The varying tones show best when your hair has movement. Blunt cuts can look equally stunning but display the color differently.