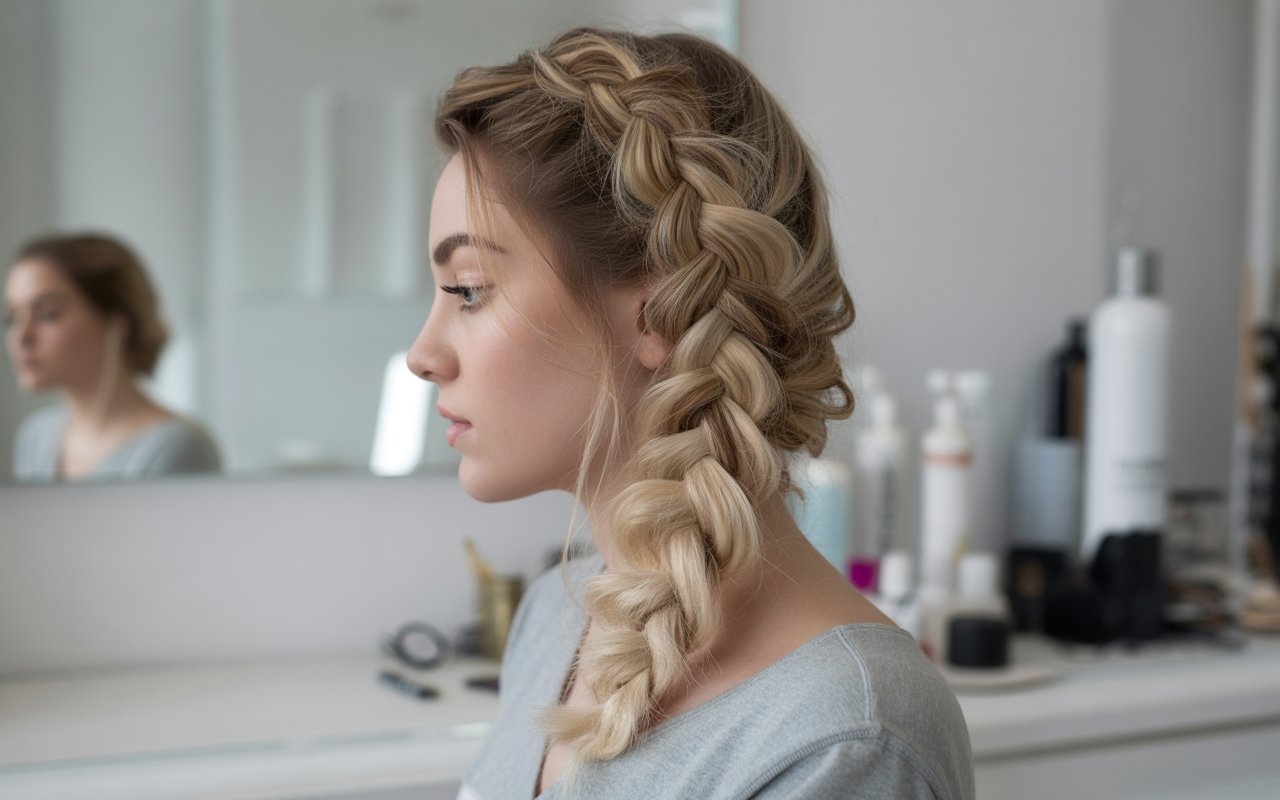
The pull-through braid has become one of the most requested hairstyles in salons across the country, and for good reason. This stunning style creates the illusion of an intricate, voluminous braid without requiring advanced braiding skills. Unlike traditional braids that rely on weaving three sections of hair together, the pull-through technique uses a series of ponytails pulled through each other to create a beautifully textured look that appears far more complicated than it actually is.
Women of all hair types and lengths have discovered that this versatile style works for everything from casual weekend outings to formal events. The technique offers incredible volume even for those with fine or thin hair, making it a game-changer for anyone who has struggled with flat, lifeless braids in the past. Whether your hair is straight, wavy, or curly, the pull-through method adapts beautifully to different textures while maintaining its distinctive dimensional appearance.
In the following sections, we’ll walk through everything you need to master this gorgeous hairstyle at home. From gathering the right tools to perfecting each step of the process, you’ll discover how simple it can be to create a braid that looks like you spent hours at the salon. Let’s get started on your journey to pull-through braid perfection!
What You’ll Need for Your Pull-Through Braid

Creating a flawless pull-through braid starts with having the right tools at your fingertips. While you won’t need any fancy equipment, gathering these essentials before you begin will make the entire process smoother and help you achieve professional-looking results.
Essential hair tools
The foundation of any successful pull-through braid lies in quality elastics. Clear or color-matched small elastic bands work best since they’ll be visible throughout the style. You’ll need quite a few – typically between 6 to 12 depending on your hair length – so stock up before starting. Many women find that silicone elastics provide the best grip without snagging or breaking hair strands.
A rattail comb becomes your best friend during this process. The pointed end helps create clean sections and assists in pulling hair through each loop. If you don’t have one, a regular comb with a pointed handle works just as well. You’ll also want a good brush for smoothing sections and a couple of hair clips to hold pieces out of the way while you work.
Hair type considerations
Your natural hair texture plays a significant role in how you’ll approach the style. Fine hair often benefits from texturizing products before starting, while thick hair might need smoothing serums to keep everything manageable. The beauty of this technique is its adaptability – it works wonderfully on hair as short as shoulder length and creates stunning results on longer lengths.
Those with straight hair might find their loops slip more easily, requiring extra product for grip. Wavy and curly textures often hold the style naturally but may need more careful sectioning to maintain evenness. Consider your hair’s unique characteristics when preparing for the best outcome.
Preparation products
The right products make all the difference between a braid that lasts all day and one that falls apart by lunchtime. A lightweight mousse or texturizing spray applied to damp hair before blow-drying creates the perfect foundation. These products add grip without weighing hair down, helping each section maintain its shape throughout the day.
For extra hold and smoothness, keep a light-hold hairspray nearby to tame flyaways as you work. Some women also find that a small amount of hair oil on the ends prevents tangling and adds shine to the finished look. Remember, less is more – too much product can make sections difficult to separate and manipulate.
Optional accessories
While the basic pull-through braid stands beautifully on its own, accessories can elevate the style for special occasions. Small decorative pins, fresh flowers, or delicate hair vines woven through the loops create romantic variations perfect for weddings or date nights. Ribbons threaded through the braid add a playful touch for more casual settings.
Consider keeping bobby pins that match your hair color on hand for securing any loose pieces or adjusting the final look. A hand mirror helps check the back of your work, especially when you’re first learning the technique. These extras aren’t essential but can enhance both the process and the final result.
How to Prepare Your Hair Before Starting

Proper preparation sets the stage for a pull-through braid that looks polished and stays intact throughout your day. Taking time with these preliminary steps might seem unnecessary, but they make the actual braiding process significantly easier and ensure better results. The key lies in creating the ideal canvas – hair that’s clean, manageable, and ready to hold its shape.
Washing and conditioning tips
Start with freshly washed hair using a volumizing shampoo that won’t weigh down your strands. Focus the shampoo primarily on your scalp and roots, allowing the suds to cleanse the lengths as you rinse. This approach prevents over-stripping natural oils from your ends while ensuring your roots are thoroughly clean.
Conditioning requires a different strategy for this style. Apply conditioner only from mid-length to ends, avoiding the roots entirely. This technique maintains volume at the crown while keeping the rest of your hair smooth and manageable. Rinse with cool water to seal the hair cuticle, which helps reduce frizz and adds shine to your finished braid.
Detangling techniques
Never attempt any braided style on tangled hair – it’s a recipe for frustration and potential damage. After washing, gently squeeze excess water from your hair using a microfiber towel or old t-shirt. These materials are gentler than regular towels and help prevent frizz formation.
Starting from the ends and working your way up, use a wide-tooth comb or detangling brush to remove any knots. Work in small sections, holding the hair above where you’re combing to minimize pulling on the roots. If you encounter stubborn tangles, apply a leave-in conditioner or detangling spray to help the comb glide through more easily. This methodical approach ensures every strand is smooth and ready for styling.
Adding texture for better hold
Second-day hair often works better for braided styles, but freshly washed hair can work wonderfully with the right texture-building techniques. After detangling, apply a golf-ball-sized amount of mousse throughout damp hair, focusing on the mid-lengths where you’ll be creating the loops.
Blow-dry your hair using a round brush to create subtle volume and movement. If your hair is particularly silky or slippery, try these texture-boosting methods:
Dry shampoo application: Spray along your part and throughout lengths for instant grip
Texturizing spray: Mist lightly while scrunching sections to create piece-y texture
Backcombing: Gently tease small sections at the roots for extra volume
Crimping tool: Create subtle waves at the roots for enhanced texture
Sea salt spray: Apply to damp hair before drying for beachy texture
Sectioning strategies
The secret to even, professional-looking loops starts with thoughtful sectioning. Begin by deciding where you want your braid to sit – centered down the back, over one shoulder, or positioned to the side. Use the pointed end of your rattail comb to create a clean part from your forehead to the nape of your neck.
For a standard pull-through braid, you’ll create horizontal sections across the back of your head. Each section should be approximately 2-3 inches wide, depending on your hair thickness and desired final look. Thicker sections create chunkier, more dramatic loops, while thinner sections result in a more delicate appearance. Consistency is crucial – try to keep each section roughly the same size for the most polished result.
As you section, temporarily secure the hair you’re not working with using clips or elastics. This prevents accidentally grabbing extra hair and keeps your sections clean and defined. Take your time with this step, as proper sectioning makes the actual braiding process much smoother.
Step-by-Step Guide to Creating the Perfect Pull-Through Braid
Now comes the exciting part – actually creating your pull-through braid! This technique might feel awkward at first, but once you understand the basic motion, muscle memory takes over. The process involves creating a series of ponytails and pulling them through each other to create the signature looped effect. With practice, you’ll complete the entire style in under 10 minutes.
Starting your first section
Begin at the crown of your head by gathering a section of hair roughly 2-3 inches wide. Secure this top section with a clear elastic, positioning it where you want the braid to start. This first ponytail sets the foundation for your entire braid, so take time to ensure it’s centered and at the right height.
Create your second section directly below the first, gathering hair of equal width. Before securing with an elastic, here’s where the magic happens. Split your first ponytail in half, creating two equal sections. Bring these halves down and around the sides of your second section, then clip them temporarily out of the way. Now secure the second section with an elastic, positioned about 2 inches below the first.
Creating the pull-through effect
Release those clipped sections from the first ponytail and bring them back together below the second ponytail. This creates your first “loop” – you’ll see how the second section appears to push through the first, creating dimension and the illusion of an intricate braid.
Continue this pattern down your head. Gather a third section of hair, split the combined pieces from your first ponytail in half again, bring them around the third section, and secure. The key is maintaining consistent tension and keeping your sections even. Each new ponytail should incorporate fresh hair from the sides of your head, similar to a French braid technique.
Maintaining even tension
The difference between a mediocre and stunning pull-through braid often comes down to tension control. Too loose, and your loops won’t hold their shape. Too tight, and the style looks strained and unnatural. Finding that sweet spot takes practice, but these guidelines help achieve the perfect balance.
As you work, gently tug on the edges of each loop after creating it. This technique, called “pancaking,” adds volume and creates that coveted full, dimensional look. Start with subtle pulls – you can always add more volume later, but you can’t undo overly stretched loops. Work your way down systematically, ensuring each loop receives equal attention.
Pay special attention to the hair at your temples and nape. These areas tend to loosen first, so incorporate them firmly into your sections without creating uncomfortable pulling. If you feel any pain or excessive tension, you’re pulling too tightly. The style should feel secure but comfortable.
Remember to check your work in a mirror periodically, especially the back sections you can’t see directly. Small adjustments as you go prevent major fixes later and ensure your braid looks polished from every angle.
Securing each loop properly
The longevity of your pull-through braid depends largely on how well you secure each section. Those small elastic bands bear all the weight and movement throughout your day, so proper placement and technique matter immensely.
When positioning each elastic, place it close enough to the previous section to create defined loops but with enough space for the pull-through effect to show. Generally, 1.5 to 2 inches between elastics works well, though you might adjust based on your hair length and desired look. Wrap each elastic at least three times for security, being careful not to catch and break hair strands in the process.
As you near the end of your braid, you’ll run out of fresh hair to incorporate. Simply continue the pull-through pattern with the remaining length, creating loops until you reach your ends. Secure the final elastic tightly and consider wrapping a small piece of hair around it for a polished finish. A light mist of hairspray sets everything in place without creating stiffness or an unnatural appearance.
Common Mistakes and How to Fix Them
Even experienced braiders encounter challenges with the pull-through technique. Understanding these common pitfalls and their solutions helps you troubleshoot issues quickly, saving frustration and achieving better results. Most problems stem from rushing the process or skipping crucial preparation steps.
Uneven sections
Nothing ruins the polished look of a pull-through braid faster than obviously uneven sections. This issue usually appears as loops of drastically different sizes or a braid that curves to one side instead of hanging straight. Sometimes you don’t notice the problem until you’re halfway through, making it tempting to just continue and hope for the best.
The fix starts with prevention. Before beginning, use your comb to create guide points down the back of your head where each section will be. Think of it like measuring before cutting – these reference points ensure consistency. If you notice unevenness mid-braid, it’s worth stopping to readjust. Release the last few elastics and re-section more carefully. Yes, it takes extra time, but the improved final result justifies the effort.
For sections that appear uneven after completion, strategic pancaking often saves the day. Gently pull on smaller loops to match larger ones, working slowly to avoid overdoing it. Sometimes adding a decorative element like a ribbon woven through can disguise minor inconsistencies while adding intentional interest.
Loose loops falling out
Few things feel more defeating than watching your carefully crafted loops slip and sag throughout the day. This common issue plagues those with silky, fine, or freshly washed hair that lacks natural grip. You might notice it first at the crown, where gravity and movement create the most stress on the style.
Addressing this requires a two-pronged approach: better prep and stronger hold. If your loops consistently fall, your hair likely needs more texture before starting. Next time, try braiding on second or third-day hair, or amp up your texturizing products. Dry shampoo applied liberally before beginning adds tremendous grip without visible residue.
For an in-progress fix, hairspray becomes your rescue tool. Spray each section lightly before pulling through, allowing the product to add tackiness that helps loops maintain their shape. Bobby pins strategically placed and hidden within loops can also provide extra security at problem areas. Just ensure they match your hair color for the most seamless look.
Braid looking too tight or sparse
Sometimes your pull-through braid resembles a thin rope rather than the full, romantic style you envisioned. This typically happens when sections are too small or pancaking is too conservative. Conversely, an overly tight appearance makes the style look severe rather than soft and feminine.
The solution lies in finding balance during the creation process. If your braid looks sparse, incorporate slightly more hair into each section as you work down. For existing sparse braids, aggressive pancaking transforms the look dramatically. Start at the top and work down, pulling loops both wider and slightly upward to create volume and movement.
Tight braids often result from anxiety about loops falling out, leading to overcompensation with tension. If you’ve created an uncomfortably tight style, gentle massage at the scalp can provide relief while slightly loosening the overall effect. Run your fingers carefully through the edges of each loop, encouraging natural movement without completely undoing your work.
Hair slipping from elastics
Clear elastics provide discrete hold, but they sometimes struggle with heavier hair sections or active lifestyles. You might find sections sliding down within their elastics, creating gaps and ruining the seamless flow of your braid. This issue intensifies with thick, heavy hair or during humid weather.
Selecting the right elastics makes a significant difference. Invest in quality silicone bands rather than cheap alternatives that stretch out quickly. For extra security, try the double-elastic method: use two elastics per section, positioned slightly apart. This distributes weight more evenly and provides backup if one fails.
When slippage occurs mid-day, quick fixes can salvage the style without starting over. Carry extra elastics and simply add another below any that have loosened. A tiny spritz of hairspray directly on the elastic area adds grip. For persistent problem spots, a carefully placed bobby pin through the elastic and into the loop above creates invisible reinforcement.
Styling Variations and Creative Ideas
Once you’ve mastered the basic pull-through braid, a world of creative possibilities opens up. This versatile technique adapts beautifully to different positions, combinations, and embellishments. Experimenting with variations keeps the style fresh and allows you to customize the look for any occasion or mood.
Side pull-through braid
The side-swept version adds romantic asymmetry perfect for special events or when you want your braid visible from the front. Start by creating a deep side part and sweeping all hair over one shoulder. This positioning changes the sectioning strategy slightly – instead of working straight down the back, you’ll curve around following the natural fall of hair over your shoulder.
Begin your first ponytail just behind your ear on the heavier side of the part. Work diagonally down and forward, keeping the braid positioned where you want it to fall. The challenge lies in preventing the braid from sliding toward the back throughout the day. Combat this by incorporating hair from further back on your head into early sections, creating an anchor effect. A few hidden bobby pins securing the braid to hair behind your ear provide extra insurance.
This variation particularly flatters round and square face shapes by creating vertical lines and showing off your neck and shoulders. For evening events, try starting with loose curls before braiding – the texture peeks through the loops creating gorgeous dimension.
Double pull-through braids
Why stop at one when two braids create such stunning symmetry? Double pull-through braids, sometimes called pigtail variations, offer a playful yet sophisticated option. The technique remains identical, but planning and sectioning require extra attention to ensure both sides match.
Part your hair cleanly down the center from forehead to nape. Work on one side completely before starting the other, using clips to keep the waiting section entirely out of the way. The trickiest part involves creating equal first sections – use a comb to measure and ensure both start at the same height and incorporate the same amount of hair.
These twin braids look adorable worn straight down the back or brought forward over each shoulder. For music festivals or casual weekends, try pancaking them dramatically for an extra-voluminous boho vibe. Professional settings call for subtler shaping and perhaps wrapping the ends under and securing for a more polished appearance.
Adding accessories
Accessories transform basic pull-through braids into special-occasion worthy styles. The open structure of the loops provides perfect anchor points for various decorative elements. Fresh flowers woven through create garden-party perfection, while metallic hair rings add edgy glamour.
Ribbon presents endless possibilities. Thread a thin ribbon through all loops before pancaking, allowing ends to trail romantically. Or wrap ribbon around each elastic for a color pop that coordinates with your outfit. Velvet ribbons create luxe winter looks, while gossamer organza suits spring celebrations. Here are some favorite accessory ideas:
Pearl pins: Tuck small pearl bobby pins into loops for bridal elegance
Hair rings: Thread decorative rings onto sections before creating loops
Silk scarves: Incorporate narrow scarves as you braid for bohemian flair
Fairy lights: Battery-powered strands create magical evening looks
Fresh flowers: Tuck small blooms into loops just before events
Mixing with other braid styles
Advanced braiders love combining techniques for unique hybrid styles. Try creating a Dutch braid for the first few sections before transitioning into the pull-through technique. This combination adds interesting texture variation and extra security at the crown where hair tends to loosen first.
Another stunning option involves creating a pull-through braid alongside a simple three-strand braid. Work them separately down the back of your head, then wrap one around the base of the other for an intricate bun effect. Or let them hang together for contrasting textures that catch the eye.
The pull-through technique also works beautifully as an accent within updos. Create a small pull-through braid with face-framing pieces, then pin it back into a messy bun or formal chignon. This adds detail and interest without requiring full-head braiding skills. Experiment with placement – a pull-through crown braid or halo effect makes a statement while keeping hair off your face.
Mastering Your Pull-Through Braid
Creating the perfect pull-through braid no longer needs to feel intimidating or out of reach. With the right tools, proper preparation, and patient practice, this stunning hairstyle becomes an achievable addition to your styling repertoire. The technique’s forgiving nature means that even imperfect attempts often result in beautifully textured looks that appear far more complex than the simple process requires.
Your journey to pull-through braid mastery starts with that first attempt. Don’t expect perfection immediately – even professional stylists needed practice to achieve smooth, even loops. Each time you create the style, your hands develop muscle memory and your eyes better judge proportions. Soon, what once took 30 minutes of careful concentration becomes a quick 10-minute morning routine. Keep experimenting with variations, textures, and accessories to make this versatile technique truly your own.
Frequently Asked Questions
Q: How long does my hair need to be to create a pull-through braid?
A: Your hair should be at least shoulder-length to create a basic pull-through braid. Shorter hair can work, but you’ll have fewer loops and might need to adjust the technique slightly. Hair that reaches mid-back creates the most dramatic results with multiple loops.
Q: Can I sleep in a pull-through braid?
A: Yes, though the style might loosen overnight. For sleeping, create a looser version and wrap it in a silk scarf or use a silk pillowcase to minimize friction. Many women find the waves created after removing the braid in the morning are worth any minor messiness.
Q: Why do my loops keep sliding down even with hairspray?
A: This usually indicates your hair needs more texture before starting. Try using dry shampoo throughout your lengths, not just at the roots. Also, ensure you’re wrapping elastics tightly enough – they should grip firmly without causing discomfort.
Q: How many elastics do I need for medium-length hair?
A: Most women with shoulder to mid-back length hair need between 8-12 elastics. Always have extras on hand, as clear elastics can break during the process. Buying them in bulk saves money since you’ll use quite a few for each style.
Q: Can I create a pull-through braid on curly hair?
A: Absolutely! Curly hair often holds this style better than straight hair due to its natural texture. You might want to lightly stretch your curls first with a blow dryer for more defined loops, or leave them natural for a romantic, textured finish.
Q: How do I prevent the elastics from showing?
A: Choose elastics that match your hair color as closely as possible. After completing the braid, wrap a small piece of hair around each elastic and secure with a bobby pin. This technique completely hides the elastics for a seamless look.
Q: What’s the difference between a pull-through braid and a bubble braid?
A: While similar, pull-through braids involve actually pulling sections through each other, creating an interwoven effect. Bubble braids simply feature ponytails spaced apart with “bubbles” created by pancaking between elastics. Pull-through braids appear more intricate and braid-like.
Q: My pull-through braid looks messy – is that normal?
A: Some messiness often enhances the style’s romantic appeal! However, if it’s messier than desired, focus on creating cleaner sections and maintaining consistent tension. Using a smoothing serum before starting helps create a more polished finish while still maintaining necessary texture.