The classic punk-inspired hairstyle has transformed into something women across the globe are wearing with confidence. This braided variation offers a protective style that keeps your hair healthy while giving you an edgy, fashionable appearance. You can wear it to work, special events, or casual outings. The versatility makes it a practical choice for busy women who want to look polished without spending hours on daily styling.
Many women find that this style works well for all hair types and textures. You can create the look with your natural hair or add extensions for extra length and volume. The braiding technique protects your strands from daily manipulation and environmental damage. Plus, it can last for several weeks with proper care, making it a low-maintenance option that saves time and effort in your morning routine.
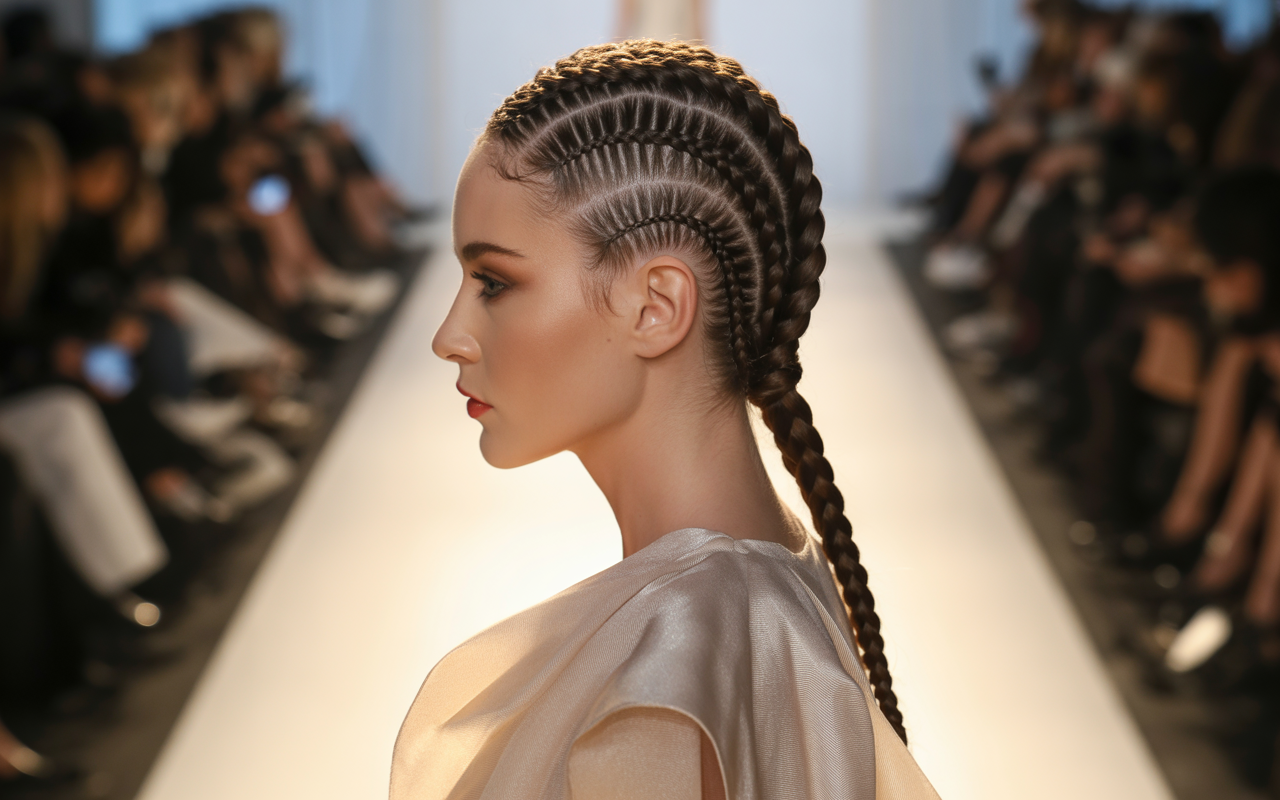
The look involves creating braids on the sides of your head while leaving the center section raised and prominent. This creates a striking silhouette that draws attention upward and frames your face beautifully. Below are ten different ways to style this braid, each offering its own personality and flair. Whether you prefer something sleek and polished or loose and romantic, you’ll find a variation that matches your personal style and fits your lifestyle perfectly.
Classic Cornrow Mohawk

This traditional version features tight rows of braids running from the front of your hairline to the back of your head. The sides are braided flat against your scalp, creating a clean contrast with the raised center section. You’ll notice how the braids on each side angle toward the middle, forming a distinctive pathway that guides the eye upward.
Creating the Base Structure
The technique starts with sectioning your hair into three parts. The middle section stays loose while you work on the sides first. Each cornrow needs to be tight enough to stay secure but not so tight that it causes discomfort or tension on your scalp. A skilled braider can complete this style in about two to three hours, depending on your hair length and thickness.
Styling the Center
Once the side braids are complete, you have options for the middle section. You can braid it into one thick plait, create multiple smaller braids, or leave it loose for a softer appearance. Some women prefer to gather the center into a high ponytail, while others let it flow down naturally. The choice depends on your face shape and the occasion you’re styling for.
Maintenance Tips
This style requires minimal daily upkeep. Wrap your hair in a silk or satin scarf at night to prevent frizz and maintain the neat appearance of your rows. Apply a light oil to your scalp every few days to keep it moisturized and comfortable. Here are some care basics:
Nighttime Protection: Sleep with a silk bonnet or pillowcase to reduce friction and preserve the braids.
Scalp Health: Use a nozzle applicator bottle to apply oil directly to your scalp between the rows.
Edge Control: Apply a small amount of gel to your hairline in the morning if needed to keep edges smooth.
This version works particularly well for women with active lifestyles. The tight braiding keeps everything in place during workouts, swimming, or other physical activities. You won’t need to worry about your hair shifting or becoming messy throughout the day. The clean lines create a polished look that transitions easily from gym wear to evening attire, making it one of the most practical options available.
French Braid Mohawk

The French braiding technique adds a softer, more romantic element to this edgy style. Unlike cornrows that lie flat, French braids have a raised, woven appearance that creates dimension and texture. This variation appeals to women who want the bold silhouette without the severity of traditional cornrows.
Understanding French Braid Technique
French braiding involves picking up new sections of hair as you work your way down from the crown. Each stitch incorporates hair from the sides, creating a rope-like effect that sits on top of your head rather than flush against your scalp. The technique requires practice but becomes easier with repetition.
You can create one large French braid down the center or make two parallel braids that run side by side. Both options look beautiful and offer different visual effects. A single braid appears bolder and more dramatic, while double braids give a playful, youthful vibe that many women prefer for casual settings.
Side Styling Options
The sections on either side of your center braid can be handled in several ways. Some women choose to leave them smooth and slicked back with gel or pomade. Others add thin accent braids for additional detail. You might also twist these sections loosely before pinning them back, creating extra texture that complements the main braid.
Hair Length Considerations
This style works best with medium to long hair. If your hair is shoulder-length or longer, you’ll have enough length to create a substantial braid that makes an impact. Shorter hair can still work, but you may need to adjust your expectations about how far down your back the braid will extend.
Color and Highlights
Adding color to this style can enhance its visual appeal significantly. Consider highlights or lowlights in the center section to make the braiding pattern more visible. Warm tones like caramel or honey blonde create a sun-kissed effect, while cooler shades like platinum or ash brown offer a more modern, editorial appearance.
The finished look feels feminine and approachable while still maintaining that edgy quality. It photographs beautifully and looks intentional from every angle. Women often choose this version for weddings, date nights, or other special occasions where they want to look put-together but not overly formal or severe.
Faux Hawk with Twists

Twisting instead of braiding creates an entirely different texture and appearance. This method works exceptionally well for natural hair textures that thrive with twist-out styles. The twisted version offers more volume and a looser, more organic feel compared to sleek braided options.
Starting with Twists
Begin by dividing your hair into the familiar three-section pattern. The side sections get flat-twisted against your scalp, similar to how you would create cornrows but using a two-strand twist technique instead. These twists should be relatively small and tight to create clean parts and a secure hold.
The center section remains loose initially. Once the sides are complete, you can two-strand twist the middle section or leave it natural. Many women prefer to create several medium-sized twists in the center for uniformity and structure.
Creating Height and Volume
The beauty of this twisted variation lies in its natural volume. Unlike braids that compress hair, twists allow your strands to maintain their body and fullness. You can gently pull apart the twists in the center section to create even more width and height, amplifying the statement-making quality of the style.
Texture Enhancement
Apply a twisting cream or butter to damp hair before creating your twists. This helps define each section and reduces frizz. Products with natural oils and butters work particularly well for maintaining moisture and shine throughout the wear time of this style.
Versatility Factor
One major advantage of using twists is the ability to unravel them later for a different look. After wearing the twisted hawk for several days, you can take down the center twists to reveal beautiful, defined curls. This gives you two styles in one, maximizing the value of your initial styling session.
Best Hair Types
This technique suits naturally curly, coily, or kinky hair textures particularly well. The twists blend seamlessly with your natural texture, creating a cohesive appearance. Women with straight or wavy hair can still create this look but may need to use more product to achieve the same level of definition and hold.
The twisted version feels less formal than braided styles, making it perfect for everyday wear. It has a relaxed, bohemian quality that pairs well with casual clothing and laid-back settings. You’ll feel comfortable wearing this style to brunch with friends or running weekend errands.
Ponytail Mohawk Braid

Combining a ponytail with the distinctive silhouette creates a practical yet stylish option. This version keeps all your hair off your neck and shoulders, making it ideal for hot weather or physical activity. The ponytail adds length and movement that many women find flattering.
Construction Method
Start by creating your side cornrows or flat twists as usual. The center section gets gathered and secured with an elastic band at whatever height you prefer. Most women position the ponytail at the crown or slightly lower for optimal comfort and appearance.
Once the ponytail is secured, you can braid the length in one thick plait or leave it loose and curly. Some women prefer to wrap a small section of hair around the elastic to hide it and create a more polished finish.
Length Options
Your ponytail can extend down your back for a dramatic, flowing effect. Alternatively, a shorter ponytail that just reaches your shoulders creates a cute, bouncy look. The length you choose affects the overall vibe—longer feels more elegant and formal, while shorter appears more playful and casual.
Adding Extensions
If your natural hair doesn’t provide enough length or thickness for the ponytail you envision, extensions solve this problem easily. Match the texture and color of extensions to your natural hair for a seamless blend. Synthetic hair works well and costs less, while human hair offers more styling versatility.
Movement and Swing
One of the most appealing aspects of this version is how the ponytail swings and moves when you walk or turn your head. This dynamic quality adds life and energy to the style. It catches light differently than an updo or down style, creating visual interest from every angle.
Practical Benefits
This style keeps your hair completely out of the way during activities like exercising, cooking, or working. You won’t have hair falling in your face or getting caught on things. The secure ponytail means you can go about your day without thinking about your hair or needing to adjust it constantly.
The combination of edgy side details with a classic ponytail creates an interesting contrast. It shows you can appreciate both bold and traditional elements, mixing them together in a way that feels fresh and current. This balance makes the style appropriate for a wide range of settings and occasions.
Curly Mohawk with Side Braids

Showcasing your natural curls while adding structure through side braids creates a stunning contrast of textures. This variation celebrates the beauty of curly hair while giving it a defined shape and purpose. The curls provide softness that balances the geometric precision of the braided sides.
Working with Natural Curls
Start with freshly washed and conditioned hair. Apply a curl-defining cream or gel to enhance your natural curl pattern. The center section should be full of bouncy, well-defined spirals before you begin working on the sides.
Side Braid Placement
Create cornrows or flat twists on both sides of your head, angling them toward the center as you work back. These braids should be tight and neat, providing a sharp contrast to the loose, voluminous curls in the middle. The number of braids on each side can vary from two to five, depending on your preference and hair density.
Curl Maintenance
To keep the center curls looking their best, refresh them daily with a water-based spray. Scrunch the curls gently to reactivate the product and restore definition. At night, pineapple your curls by gathering them loosely at the top of your head with a satin scrunchie.
Volume Control
If your curls tend to be extremely voluminous, you can control the width by lightly smoothing the sides with gel or cream. This keeps the silhouette from becoming too wide while still allowing the curls to maintain their natural shape and bounce.
Color Possibilities
Curly hair shows off color beautifully. Consider adding highlights throughout the curls to create dimension and depth. The way light hits curls is already dynamic, and strategic color placement enhances this natural quality even further.
Face-Framing Elements
Leave a few curls loose around your hairline and temples. These face-framing pieces soften the overall look and prevent it from appearing too severe or stark. They also help flatter various face shapes by providing subtle coverage where needed.
Best Curl Types
This style works beautifully on all curl patterns, from loose waves to tight coils. The key is working with your natural texture rather than fighting it. Women with type 3 and 4 curls often find this style particularly flattering because it gives their curls a intentional structure while still letting them shine.
The finished result feels joyful and celebratory. It honors the natural beauty of textured hair while adding a modern, styled element. Women who wear this version often report receiving compliments and feeling confident throughout their day.
Ghana Braids Mohawk

Ghana braids, also called invisible cornrows or banana braids, create thick, rope-like rows that make a bold statement. Using this technique for your hawk results in a high-impact style that commands attention. The braids appear fuller and more prominent than traditional cornrows.
Understanding Ghana Braid Technique
This method involves adding small amounts of braiding hair as you work along each row. The additions create thickness that increases as you move from the front of your head toward the back. Each braid appears to grow larger and more substantial, creating a dramatic, sculptural effect.
The technique requires skill and patience. Finding an experienced braider who specializes in Ghana braids helps achieve the best results. The braids should be neat, even, and uniform in size for optimal visual impact.
Pattern Variations
You can create straight-back Ghana braids on the sides, or angle them in curved patterns for added artistry. Some women prefer geometric designs with sharp angles and clean lines. Others opt for softer, more organic curves that flow naturally across the scalp.
Center Section Handling
The middle portion can feature one thick Ghana braid running down the center, or you might choose to leave this section unbraided for contrast. Another option involves creating smaller Ghana braids in the center that differ in size from the side braids, adding visual variety.
Duration and Longevity
This style typically lasts four to six weeks with proper care. The added hair and tight braiding technique provide excellent hold and durability. You’ll get good value from the time investment since the style maintains its appearance for an extended period.
Styling the Added Hair
The hair extensions used in Ghana braids come in various colors and lengths. You can match your natural color for a seamless look, or experiment with bold hues like burgundy, honey blonde, or even vibrant fashion colors. The extensions also allow you to achieve length and fullness beyond what your natural hair provides.
Scalp Care Requirements
Because Ghana braids use extensions and can feel heavy initially, proper scalp care becomes important. Apply oil to your scalp regularly to prevent dryness and itching. If you experience excessive tension or discomfort, speak up—your braider can adjust the tightness to make the style more comfortable.
This powerful variation makes a serious style statement. It works well for women who want their hair to be a focal point of their appearance. The bold, graphic quality translates beautifully in photographs and looks striking in person.
Stitch Braids Mohawk

The stitch braiding technique creates a distinctive pattern that resembles sewing stitches running along each braid. This detail-oriented method produces crisp, clean lines that look incredibly polished and intentional. The precision required makes this style particularly special and eye-catching.
What Makes Stitch Braids Different
Regular cornrows have a continuous, smooth appearance. Stitch braids, in contrast, feature a visible pattern where the braider intentionally creates horizontal lines that cross each braid at regular intervals. This technique requires pulling small sections of hair horizontally before continuing with the vertical braiding motion.
Creating the Pattern
A skilled braider uses a rattail comb to create perfectly spaced horizontal sections as they work down each row. The consistency of the stitching determines how polished the final result appears. Even spacing and uniform stitch size across all braids create the most professional appearance.
Side Design Options
You can have the stitched pattern on every braid for maximum impact, or limit it to just a few accent braids for a more subtle detail. Some women choose to have stitch braids only on the outer edges where they’re most visible, leaving the braids closer to the center as regular cornrows.
Time Commitment
Stitch braids take longer to create than standard cornrows because of the additional detailing work. Expect to spend at least an hour longer in the chair. The extra time investment pays off in the form of a highly distinctive, professional-looking result that showcases real artistry.
Maintenance Simplicity
Despite their intricate appearance, stitch braids don’t require any special maintenance beyond what you’d do for regular cornrows. Wrap your hair at night, apply oil to your scalp as needed, and keep your edges neat with a small amount of gel.
Photography Appeal
The defined pattern of stitch braids shows up beautifully in photographs. The details remain visible from various angles and distances, making this style particularly popular for special events, professional photos, or any occasion where you’ll be photographed extensively.
Trending Status
This style has gained significant popularity on social media platforms. Many women seek out braiders specifically for their stitch braid expertise. If you want a current, on-trend variation that shows you’re aware of the latest techniques, this option delivers.
The technical precision of stitch braids demonstrates a level of care and attention that people notice and appreciate. It signals that you value quality and are willing to invest time and resources in your appearance. The style feels modern, fresh, and expertly executed.
Boho Mohawk with Accessories
")
Adding decorative elements transforms a simple braided style into something truly special. The bohemian approach incorporates beads, cuffs, rings, and other ornaments that personalize your look. This version allows for maximum creativity and self-expression through your choice of accessories.
Selecting Accessories
Gold and silver metal cuffs slide onto individual braids, adding shine and visual interest. Beads come in countless colors, sizes, and materials—wood, glass, plastic, or gemstone. You can choose accessories that match your outfit, reflect your personality, or simply appeal to your aesthetic preferences.
Placement Strategy
Strategic placement creates the most impact. Concentrate accessories near your hairline where they’re most visible, or scatter them throughout for an all-over embellished effect. Some women prefer to accent only the center section, leaving the sides plain for contrast.
Clustered accessories create focal points that draw the eye, while evenly distributed pieces provide consistent decoration throughout. Experiment with different arrangements to find what appeals to you most.
Bead Threading Technique
Most beads designed for hair have large holes that accommodate braids easily. Simply slide them onto a braid and position them where you want them. For tighter security, you can add a small elastic band above and below each bead to prevent sliding.
Color Coordination
Match accessories to your outfit for special events, or choose neutral tones that work with everything in your wardrobe. Some women build a collection of hair jewelry in various colors, swapping pieces out to coordinate with different looks throughout the style’s wear time.
Cultural Significance
Hair beads and ornaments hold cultural significance in many African and African diaspora communities. Wearing them connects you to these traditions while expressing your individual style. Respect and appreciation for this cultural heritage adds depth and meaning to your aesthetic choices.
Weight Considerations
Be mindful of adding too many heavy accessories, which can strain your scalp and cause discomfort. Lightweight options provide decoration without the drawback of excess weight. You can achieve a fully adorned look using primarily plastic or wood beads rather than heavier metal pieces.
The bohemian approach celebrates creativity, individuality, and personal expression. It allows you to continually refresh your look by changing accessories without redoing your braids. This flexibility extends the value and enjoyment you get from the style.
Updo Mohawk Braid

Pinning the braids up creates an elegant variation suitable for formal occasions. This sophisticated version maintains the distinctive silhouette while adding height and polish. It works beautifully for weddings, galas, or professional events where you want to look refined and put-together.
Bun Variations
The center braids can be wrapped into a high bun positioned at the crown, creating maximum height and drama. Alternatively, a low bun at the nape of your neck provides elegant sophistication with a more understated profile. Mid-height buns offer a balanced option that works well for most face shapes and occasions.
Roll and Tuck Method
Instead of a circular bun, you might roll the braids into a cylindrical shape and tuck the ends under, securing them with bobby pins. This creates a sleek, linear element that differs from the roundness of a traditional bun.
Pin Placement
Use bobby pins that match your hair color for invisible hold. Place them strategically to secure the updo without creating visible gaps or loose sections. High-quality pins with grippy coating stay in place better than cheap ones, so invest in good supplies.
Adding Flourishes
Once the basic updo is secure, you can add decorative pins, flowers, or other embellishments. Jeweled bobby pins provide sparkle for evening events. Fresh or silk flowers create a romantic, garden-party aesthetic. The possibilities for customization are extensive.
Face-Framing Details
Leave a few small sections loose around your face to soften the overall look. These wisps prevent the style from appearing too severe and help flatter various face shapes by providing gentle framing.
Hairspray Application
A light mist of strong-hold hairspray helps control flyaways and keeps everything looking polished throughout your event. Apply from a distance to avoid wet spots or product buildup.
Longevity Through the Day
Check your updo periodically and add pins if anything feels loose. Carrying a few extra bobby pins in your bag allows for quick touch-ups if needed. Most well-executed updos stay secure for eight to twelve hours without requiring major adjustments.
The refined nature of an updo version makes it appropriate for situations where you want to appear professional and polished. It shows you can take a trendy, edgy base style and elevate it for formal contexts, demonstrating style versatility and sophistication.
Box Braids Mohawk

If you already wear box braids, you can create this look by simply styling them differently. Gather your existing braids into the characteristic silhouette without creating new braids specifically for the style. This approach offers convenience and versatility for women who keep box braids as a regular protective style.
Gathering the Braids
Part your box braids down the center, separating the sides from the middle section. Use large elastic bands or clips to hold the side sections flat against your head. The center braids remain loose and free, creating the raised middle portion.
Securing the Sides
Bobby pins help keep the side sections smooth and flat. Insert them at an angle, pushing them against your scalp for maximum hold. Use enough pins to create security without making your scalp sore or uncomfortable.
Center Styling Options
Leave the center braids flowing loose for a dramatic, flowing effect. Alternatively, gather them into a high ponytail, create multiple buns, or weave them into one large braid. The flexibility allows you to change your look frequently without redoing your base braids.
Accessorizing Box Braids
Add cuffs, beads, or wraps to individual braids for personalization. You can concentrate these on the center section to draw attention there, or distribute them throughout for consistent decoration.
Refresh and Repeat
Because you’re just styling existing braids rather than creating new ones, you can wear this look for a day or two, then take it down and return to wearing your box braids loose. This versatility maximizes the value you get from your protective style installation.
Length Considerations
Longer box braids create more dramatic results because they provide more length and volume to work with. Shorter braids work too, but the overall effect will be more compact and less flowing. Both lengths have appeal depending on your preferences and lifestyle.
Texture Mixing
Some women wear straight box braids while others prefer curly ends. Both textures work beautifully for this styling approach. Curly ends add extra volume and texture to the center section, while straight braids create sleek, clean lines.
This method appeals to women who value flexibility and want multiple styling options from a single braiding session. You can alternate between wearing your box braids down, in a ponytail, in this hawk configuration, or in other updos throughout the weeks you wear them.
Side-Swept Mohawk Braid

Creating an asymmetrical version adds an unexpected twist to the traditional centered approach. This variation features the raised section positioned off to one side rather than running straight down the middle. The asymmetry creates visual interest and offers a fresh take on the classic format.
Asymmetrical Sectioning
Instead of parting your hair straight down the center, create a deep side part. One side of your head will have significantly more hair than the other. This uneven distribution forms the basis of the asymmetrical look.
Braid Placement
The braids on the smaller side lie very flat and close to your head, following the natural curve of your skull. The larger side features the raised braided section that creates the signature silhouette. This off-center placement draws the eye across your face at an angle rather than straight back.
Face Framing Benefits
The asymmetrical approach provides extra coverage on one side of your face while leaving the other more exposed. This can be particularly flattering for women who prefer not to have both sides of their face equally visible. It also accommodates those who favor one side in photographs.
Styling the Larger Side
The raised section can feature one large braid, multiple smaller braids, twists, or even loose curls. The styling options remain similar to other variations, but the off-center placement creates a completely different overall aesthetic.
Fashion-Forward Appeal
Asymmetry feels modern and fashion-forward. It signals awareness of current style trends and a willingness to try something slightly unconventional. Women who wear asymmetrical versions often report feeling more fashion-confident and stylish.
Photogenic Angles
This variation photographs beautifully because it creates interesting lines from every angle. Profile shots look particularly striking because the full asymmetry is visible, creating a distinctive silhouette that stands out.
Versatility in Positioning
You can change which side features the raised section each time you style this way, giving you two distinct looks from the same general approach. Alternating sides also distributes tension differently, which can benefit your scalp health over time.
The unexpected nature of this variation makes it memorable and distinctive. It shows creativity and a willingness to personalize traditional styles to suit your individual preferences rather than simply following standard templates.
Bringing It All Together
You now have ten distinct options for creating a beautiful braided style that suits your personality, hair type, and lifestyle. Each variation offers different benefits depending on your needs. Some prioritize ease and speed, while others focus on visual impact or formal elegance. Consider which aspects matter most to you—maintenance level, occasion appropriateness, time investment, or personal comfort—when choosing which version to try first.
Don’t hesitate to mix elements from different variations to create something truly yours. You might combine the stitch braid technique with boho accessories, or create an asymmetrical version with a ponytail. The possibilities extend far beyond these ten basic templates. Work with a skilled braider who understands your vision and can help you achieve the specific look you want. Your hair becomes a canvas for creative expression, and these styles provide the foundation for countless personalized variations.
Frequently Asked Questions
Q: How long does it take to create a mohawk braid?
A: The time varies depending on which variation you choose. Simple versions with basic cornrows take about two to three hours. More complex options with Ghana braids, stitch patterns, or extensive accessorizing can require four to six hours. The braider’s skill level and your hair’s length and thickness also affect timing.
Q: Can I create this style on my own without professional help?
A: Some variations are easier to self-install than others. Simple side cornrows with a loose center section can be done at home with practice. More intricate options like stitch braids or perfectly aligned Ghana braids typically require professional expertise. Start with easier versions if you’re learning, then progress to more complex styles as your skills improve.
Q: How long will the style last before needing to be redone?
A: Most braided versions last two to four weeks with proper care. Styles using extensions generally last longer than those created with only your natural hair. Your hair’s growth rate and how well you maintain the style also affect longevity. Following a good nighttime routine with a silk scarf significantly extends wear time.
Q: Will this hairstyle work with my hair texture?
A: These styles work across all hair textures from straight to coily. The specific technique and products used may vary based on your texture, but the basic concept adapts well. Straight or wavy hair often requires more product for hold, while curly and coily textures naturally grip and hold braids well.
Q: What products do I need to maintain the style?
A: You’ll need a lightweight oil for scalp application, a silk or satin scarf for sleeping, and possibly edge control gel for your hairline. Some women also use a spray bottle with water and leave-in conditioner for refreshing. Keep your product list simple—you don’t need many items for effective maintenance.
Q: Can I exercise and swim with this hairstyle?
A: Yes, the braided structure holds up well during exercise. Wrap your hair afterward to manage any sweat, and apply dry shampoo to your scalp if needed. Swimming is possible but requires extra care. Wear a swim cap to minimize water exposure, and rinse thoroughly with fresh water after swimming in chlorine or salt water.
Q: How do I prevent my edges from breaking?
A: Ask your braider not to braid too tightly at your hairline. The braids should feel secure but not painful or overly tense. Apply castor oil to your edges nightly to strengthen the hair. Avoid pulling or manipulating the front braids excessively. If you notice thinning, give your edges a break between braiding sessions.
Q: What face shapes does this style flatter?
A: The raised center creates vertical lines that elongate the face, making it particularly flattering for round or square face shapes. The style also works beautifully on oval and heart-shaped faces. The key is adjusting the width and placement to complement your specific features. A skilled braider can customize the proportions to suit you best.
Q: How much does professional installation typically cost?
A: Pricing varies widely based on your location, the braider’s experience level, and the complexity of the style. Simple versions might cost between $80 and $150. Intricate styles with extensions, detailed patterns, or extensive accessories can range from $200 to $400 or more. Research braiders in your area and ask about pricing during consultations.
Q: Can I add my own creative touches to these styles?
A: Absolutely! These ten variations provide templates, but you should feel free to personalize them. Adjust the width, change the center styling, mix techniques, add unique accessories, or try unexpected colors. Working collaboratively with your braider to create something customized makes the experience more enjoyable and results in a style that truly reflects your personality.