
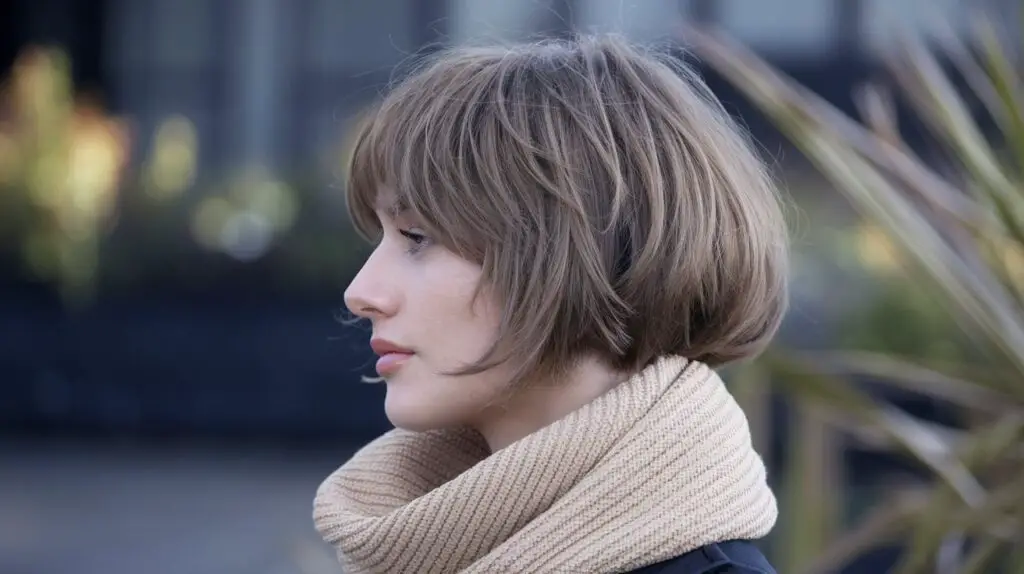
Cutting your own hair at home might sound intimidating, but with the right guidance and techniques, you can achieve a trendy shaggy bob without stepping foot in a salon. This versatile haircut combines the classic bob’s structure with textured, piece-y layers that create movement and a carefree vibe. The beauty of this style lies in its forgiving nature – the intentionally undone texture means you don’t need salon-level precision to get great results.
Many women discover that trimming their hair at home offers surprising benefits beyond just saving money. You control the timing, work at your own pace, and can make adjustments exactly how you want them. Plus, learning to maintain your hairstyle between salon visits gives you confidence and flexibility in your beauty routine. The shaggy bob particularly suits DIY cutting because its textured, layered nature works with slight imperfections rather than against them.
Ready to transform your hair with scissors in hand? The following sections will guide you through everything from gathering the right tools to mastering cutting techniques, fixing common mistakes, and styling your new look. You’ll learn professional tricks that make the process manageable, even if you’ve never cut hair before. Let’s get started on creating your perfect shaggy bob right from your bathroom.
What Tools You’ll Need for a Perfect Shaggy Bob Cut
Before you make that first snip, gathering the right tools sets you up for success. Professional hairstylists rely on specific equipment for good reason – quality tools make all the difference between a choppy disaster and a salon-worthy result. While you don’t need to invest in an entire professional kit, a few key items will transform your at-home haircut experience.
Essential cutting tools
Sharp haircutting scissors top the list of must-haves. Those kitchen shears or craft scissors won’t create clean cuts – they’ll leave your hair with split ends and uneven edges. Invest in scissors specifically designed for cutting hair, ideally between 5.5 and 6.5 inches long. These provide better control for the precise work ahead.
You’ll also need a fine-tooth comb for creating clean sections and a wide-tooth comb for detangling. A rattail comb proves particularly helpful for making precise parts and sections. Keep both combs within easy reach throughout the cutting process.
Hair clips become your third hand during cutting. Stock up on sectioning clips or even simple butterfly clips to hold hair out of the way as you work through different areas. The more organized your sections, the more even your final cut will be.
Styling products required
The right products help you see exactly what you’re cutting and achieve the signature texture of a shaggy bob. Start with a spray bottle filled with water to keep hair damp throughout the cutting process. Damp hair shows length more accurately than dry hair and stays in place better while cutting.
A texturizing spray or sea salt spray helps create the piece-y, separated look that defines this style. Apply it before cutting to see how your hair naturally wants to move and separate. This preview helps you cut with your hair’s natural patterns rather than against them.
Preparation materials
Set up your workspace with a hand mirror to check the back of your head alongside your main bathroom mirror. This two-mirror system lets you see all angles without straining or guessing. Natural light works best, so position yourself near a window if possible.
Lay out a towel or sheet on the floor to catch falling hair. This simple step saves major cleanup time later. Keep a small brush handy to sweep hair off your shoulders and neck as you work – loose hairs can obscure your view and make it harder to see your progress.
Safety equipment
While not strictly necessary, a cutting cape or old shirt you don’t mind getting hair on protects your clothes. More importantly, it helps you see the hair’s fall and length without fabric interfering. Choose something with a smooth neckline that won’t bunch up or distort how the hair lays.
Good lighting prevents eyestrain and cutting mistakes. If your bathroom lighting casts shadows, consider bringing in an extra lamp or ring light. Clear visibility of every section ensures even cutting and helps you spot any areas that need adjustment.
How Should You Prepare Your Hair Before Cutting?
Proper preparation makes the difference between a haircut you love and one you immediately regret. Taking time to set up your hair correctly provides a solid foundation for the entire cutting process. Think of this stage as creating your canvas – the better prepared your hair, the easier cutting becomes.
Starting with freshly washed hair gives you the cleanest slate to work with. Shampoo removes any product buildup, oils, or debris that might weigh down your hair or affect how it falls naturally. Skip heavy conditioners or masks that might make hair too slippery to handle effectively. A light conditioner on the ends provides just enough slip without compromising control.
Washing and drying techniques
After washing, towel dry your hair until it’s damp but not dripping. This moisture level offers the perfect balance – wet enough to show true length but not so wet that hair stretches or appears longer than it actually is. Pat rather than rub with the towel to prevent creating frizz or tangles that complicate cutting.
For the most accurate cut, let your hair air dry to about 80% dry if you have time. This shows your natural texture and wave pattern, essential information for creating a flattering shaggy bob. If you typically style with heat tools, you might blow dry to this same level of dampness using low heat and minimal product.
Sectioning your hair properly
Creating clean sections transforms a potentially chaotic process into manageable steps. Start by parting your hair exactly where you normally wear it. This ensures your cut works with your everyday style rather than fighting against it.
Next, divide hair into four main sections: two in front of the ears and two behind. Secure each section with clips, leaving just the bottom layer loose to begin cutting. Working in horizontal layers from bottom to top gives you maximum control and prevents accidentally cutting too much from any area.
The typical sectioning pattern for a bob includes:
- Nape Section: The lowest portion at the back of your neck
- Occipital Bone: The curved area at the back of your head
- Crown Sections: The top portions that add volume
- Side Sections: Frame your face and connect front to back
- Fringe Area: If you have bangs or face-framing pieces
Creating the right texture
Before cutting, evaluate your hair’s natural texture and density. Thick hair might need more layers to prevent a triangular shape, while fine hair benefits from fewer, strategically placed layers that maintain fullness. Run your fingers through damp hair to see how it naturally falls and separates.
Apply a small amount of texturizing product to help visualize the final look. This shows you where hair naturally wants to separate and chunk together, guiding your cutting decisions. Remember that wet hair appears longer than dry, so always cut conservatively at first.
Setting up your workspace
Position yourself in front of a large mirror with good lighting from multiple angles. Natural light from a window provides the most accurate color and texture visibility. Set your tools on a clean surface within easy reach – fumbling for scissors mid-cut leads to mistakes.
Check your posture before beginning. Stand straight with shoulders relaxed and level. Hunching or tilting affects how hair falls and can result in an uneven cut. Take breaks to stretch if needed rather than pushing through when your posture starts to slip. Your body position directly impacts the haircut’s outcome.
What Are the Step-by-Step Cutting Techniques?
Now comes the moment of truth – actually cutting your hair. The shaggy bob’s forgiving nature makes it an ideal choice for home cutting, but following proper techniques ensures professional-looking results. Take your time with each step, remembering you can always cut more but can’t glue hair back on.
Creating the base length
Start with the back section at your nape. Comb a thin horizontal section straight down and decide on your desired length. For a classic shaggy bob, aim for somewhere between chin and shoulder length. Hold the hair between your index and middle fingers, sliding down to where you want to cut.
Cut straight across using smooth, confident snips rather than tiny nervous cuts. This creates a cleaner edge and prevents the jagged, choppy look of hesitant cutting. After cutting the first section, use it as your guide for the remaining back sections. Pull down each new section along with a piece of the already-cut hair to match lengths.
Work your way up the back of your head in horizontal sections about half an inch thick. Keep checking that both sides remain even by pulling sections from each side together at the center back. This comparison method catches any length differences early before they become major issues.
Adding layers for movement
Once your base length is established, layers create that signature shaggy movement. Starting at the crown, take vertical sections about an inch wide. Hold each section straight up from the head at a 90-degree angle and cut at a slight angle rather than straight across. This technique, called point cutting, creates softer edges and natural movement.
For the sides, pull sections forward at a 45-degree angle and cut upward into the hair. This creates graduated layers that blend seamlessly from back to front. The key is making small cuts and checking frequently – you’re removing weight and adding texture, not dramatically changing length.
Focus on creating layers that enhance your face shape. Round faces benefit from layers starting below the chin, while longer faces look great with layers beginning around the cheekbones. Always cut less than you think you need initially – you can add more layers after seeing how your hair falls naturally.
Texturizing for that shaggy look
The difference between a regular bob and a shaggy bob lies in the texture. After establishing your layers, go back through with texturizing techniques. Hold sections vertically and make small snips into the ends at various angles. This breaks up blunt edges and creates the piece-y separation characteristic of this style.
For thicker hair, you might use thinning shears sparingly on the mid-lengths to remove bulk without losing length. Make gentle snips about 2-3 inches from the ends, closing the shears only partially with each cut. This technique works especially well around the crown where thickness can create unwanted volume.
Twist small sections and carefully snip into them at different points. This creates varied lengths within each section, contributing to the overall textured appearance. Pay special attention to the pieces around your face – these frame your features and often need the most texturizing to achieve that effortlessly undone look.
Framing your face shape
The front sections require extra attention since they’re most visible and impact how the style flatters your features. Determine where you want the shortest pieces to fall – typically somewhere between the cheekbone and chin. Pull these sections forward and cut at a slight angle, shorter in front and gradually longer toward the ears.
Create soft face-framing by point cutting into these sections while holding them at various angles. This prevents harsh lines and allows hair to curve naturally around your face. If you wear your hair tucked behind your ears often, cut these sections slightly longer to accommodate that styling preference.
Consider your face shape when determining the angle and length of face-framing pieces:
- Oval Faces: Can handle any length or angle
- Round Faces: Benefit from longer pieces that start below the chin
- Square Faces: Soft, wispy pieces around the jaw work well
- Heart-shaped Faces: Fuller pieces around the chin create balance
Remember to check both sides frequently for symmetry. Small differences become very noticeable in the front sections, so take extra time ensuring both sides match. Step back from the mirror periodically to get a full view rather than focusing too closely on one area.
How to Fix Common Cutting Mistakes
Even professional stylists make occasional mistakes, so don’t panic if something doesn’t look quite right. Most cutting errors in a shaggy bob can be fixed or disguised thanks to the style’s textured, imperfect nature. The key lies in identifying the issue and knowing which technique will solve it without making things worse.
Uneven lengths
Discovering one side is longer than the other ranks as the most common home cutting mistake. Before attempting to fix it, determine where the discrepancy occurred. Wet your hair completely and comb it straight down. Use a ruler or measuring tape to check lengths at multiple points – sometimes what appears uneven when styled actually measures the same length.
If you confirm uneven lengths, resist the urge to immediately start cutting. Instead, section your hair again exactly as you did initially. Take a small section from the shorter side and match it with the corresponding section on the longer side. Trim only the excess from the longer side, working in small increments.
Sometimes apparent unevenness comes from natural growth patterns or cowlicks rather than cutting errors. In these cases, styling techniques work better than more cutting. Use a flat iron to smooth rebellious sections or add extra texture to disguise length differences. The shaggy bob’s tousled nature makes these styling fixes particularly effective.
Too many layers
Overzealous layering can leave you with a cut that looks more mullet than modern shaggy bob. While you can’t add hair back, you can minimize the contrast between lengths. Start by identifying the shortest layers and determining if the overall shape still works. Sometimes the issue is styling rather than the cut itself.
To fix excessive layering, focus on blending rather than removing more hair. Take diagonal sections between the short and long pieces. Hold them at a 45-degree angle and make tiny snips to create intermediate lengths. This gradual transition softens harsh layer lines without sacrificing more length.
Styling products become your best friend when dealing with too many layers:
- Smoothing Cream: Weighs down shorter pieces that stick up
- Texture Paste: Helps blend different lengths together
- Flexible Hold Spray: Keeps layers in place without stiffness
Wrong angle cuts
Cutting at incorrect angles can create unflattering shapes or pieces that won’t lay properly. This often happens when trying to create face-framing layers without maintaining consistent angles throughout the cut. The fix requires patience and a careful eye rather than dramatic corrections.
First, identify which sections have problematic angles. Wet these areas and comb them into their natural fall position. Look for pieces that flip out unnaturally or create gaps in the overall shape. These indicate where angles need adjustment.
To correct angle issues, work with small subsections of the problem area. Hold each piece at the angle you want it to lay when dry, then trim minimally to encourage that direction. Point cutting works particularly well here, as it creates softer edges that blend more easily with surrounding hair.
Blending issues
Poor blending between sections creates visible lines or steps in your haircut. This often occurs where the sides meet the back or where layers transition. The shaggy bob should flow seamlessly despite its textured appearance, so harsh lines need softening.
Address blending problems by taking diagonal sections across the problem areas. These connecting sections should incorporate hair from both the shorter and longer areas. Hold them at various angles while point cutting to create a gradual transition. Think of it as building a bridge between the two lengths.
For stubborn blending issues, try the twist-and-cut method. Take small sections that span the problem area, twist them gently, then make small snips along the twist. This creates varied lengths that naturally blend together when the hair is released. Check your progress frequently, as this technique can remove length quickly if overdone.
Styling Your New Shaggy Bob
The perfect shaggy bob comes to life through styling. This cut’s beauty lies in its versatility – you can achieve different looks from polished to perfectly messy with just a few product swaps and technique changes. Understanding how to style your new cut ensures you’ll love it every day, not just immediately after cutting.
Daily styling routine
Your morning routine should enhance the cut’s natural texture without requiring hours of effort. Start with damp hair and apply a volumizing mousse or texture spray from roots to ends. This provides the foundation for that signature shaggy movement. Scrunch the product through your hair rather than combing it, which encourages natural wave patterns.
For air drying, twist small sections while damp and release them once mostly dry. This creates natural texture and separation without heat damage. If time permits, diffuse on low heat while scrunching sections upward. The diffuser attachment preserves texture while speeding drying time and adding volume at the roots.
On second or third-day hair, refresh your style with dry texturizing spray. Spray it at the roots for volume, then work through the mid-lengths and ends with your fingers. This revives texture and absorbs any excess oil without the need for complete rewashing and restyling.
Product application tips
Less is more when it comes to product in a shaggy bob. Start with a dime-sized amount of your chosen styling product and add more only if needed. Too much product weighs down the hair and eliminates the light, airy texture that makes this style special.
Apply products in sections for even distribution. Divide hair into four parts and work product through each one separately. This prevents over-application in easily accessible areas while ensuring harder-to-reach sections get adequate coverage. Focus extra attention on the crown area where volume matters most.
Different hair types need adjusted product strategies:
- Fine Hair: Lightweight mousse or texture spray only
- Thick Hair: Smoothing cream plus texture spray
- Wavy Hair: Curl-enhancing cream to define natural patterns
- Straight Hair: Volumizing products plus texturizing spray
Heat styling methods
While the shaggy bob looks great air-dried, heat styling creates polished variations for special occasions. Use a flat iron to smooth face-framing pieces while maintaining texture through the rest. This combination of smooth and textured elements modernizes the look.
Create bendable texture with a flat iron by clamping small sections and rotating the iron as you pull through. Alternate the direction of each bend – some toward your face, others away. This creates natural-looking movement that enhances the cut’s shaggy nature without appearing overly styled.
A small round brush and blow dryer add volume and shape when you want a more refined look. Focus on lifting roots while directing the ends under slightly. This technique works particularly well for growing out a shaggy bob, as it creates a more structured shape while maintaining movement.
Maintaining the shaggy texture
Between cuts, maintain your bob’s shape and texture with regular trimming of just the very ends. Every 2-3 weeks, dust the ends by twisting small sections and carefully trimming any pieces that stick out. This prevents split ends from traveling up the hair shaft while preserving the overall shape.
Sleeping on a silk or satin pillowcase reduces friction that can create frizz and flatten texture. If you prefer cotton pillowcases, try loosely braiding sections before bed or using a silk hair wrap. These simple steps mean waking up with texture intact rather than having to completely restyle.
Weekly deep conditioning treatments keep hair healthy and manageable, essential for maintaining the shaggy bob’s textured appearance. Focus conditioner on the mid-lengths and ends rather than roots to avoid weighing down the style. Healthy hair holds texture better and requires less product for styling, creating that effortless shaggy look naturally.
Your Shaggy Bob Journey Starts Now
Taking scissors to your own hair requires courage, but you now have all the knowledge needed to create a stunning shaggy bob at home. From selecting the right tools to mastering professional cutting techniques, each step builds toward achieving that perfectly imperfect textured style. The forgiving nature of this cut means minor imperfections actually add to its charm rather than detracting from the overall look.
Your new skills extend beyond just this one haircut. Understanding how to section, cut, and texture hair opens up possibilities for maintaining your style between salon visits or making minor adjustments as your preferences change. Plus, the confidence gained from successfully cutting your own hair translates into other areas of self-care and personal style. Whether you’re motivated by convenience, creativity, or simple curiosity, mastering the at-home shaggy bob proves that professional-looking results don’t always require professional prices.
Frequently Asked Questions
Q: Can I cut a shaggy bob if I have curly hair?
A: Yes, curly hair works beautifully with a shaggy bob. Cut curly hair dry rather than wet to see exactly how each curl falls. Make cuts within individual curls rather than stretching them straight, and cut less than you think you need since curls spring up when released.
Q: How often should I trim my shaggy bob to maintain its shape?
A: Trim your shaggy bob every 6-8 weeks to maintain the shape and prevent split ends. You can extend this timeline by doing minor maintenance trims at home, focusing just on removing damaged ends every 2-3 weeks.
Q: What’s the difference between point cutting and blunt cutting?
A: Point cutting involves holding scissors vertically and making small snips into the hair ends at various angles, creating soft, textured edges. Blunt cutting means cutting straight across horizontally, creating a solid, even line. Shaggy bobs primarily use point cutting for texture.
Q: Should I cut my shaggy bob wet or dry?
A: Cut damp hair for the most accurate results. Completely wet hair stretches and appears longer than when dry, while totally dry hair can be harder to control and section evenly. Damp hair shows true length while remaining manageable.
Q: How do I know if a shaggy bob will suit my face shape?
A: Shaggy bobs flatter most face shapes due to their customizable nature. Adjust the length and layer placement to complement your features – longer layers for round faces, softer edges for square faces, and fuller sides for long faces.
Q: What if I accidentally cut one side too short?
A: Don’t panic or immediately try to match the other side. Style the shorter side with extra texture or tuck it behind your ear to disguise the difference. If very noticeable, gradually trim the longer side over several days to avoid overcutting.
Q: Can I create a shaggy bob from longer hair in one session?
A: Yes, but cut conservatively in stages. Remove length first to establish the basic bob shape, then add layers and texture. Taking breaks to assess the shape as you go prevents removing too much length at once.
Q: Which texturizing products work best for fine hair?
A: Fine hair benefits from volumizing mousse, dry texture spray, and sea salt spray. Avoid heavy creams or oils that weigh hair down. Apply products to damp hair and focus on roots for lift without sacrificing the ends’ movement.