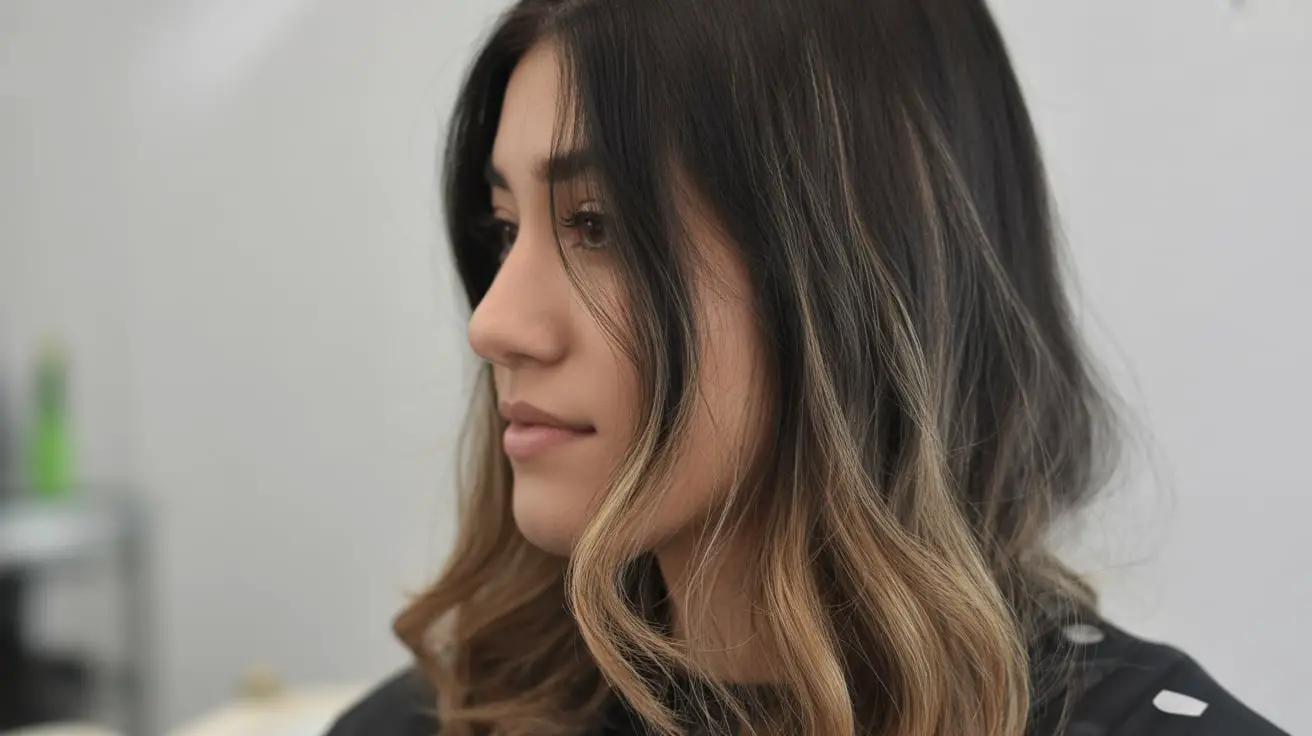
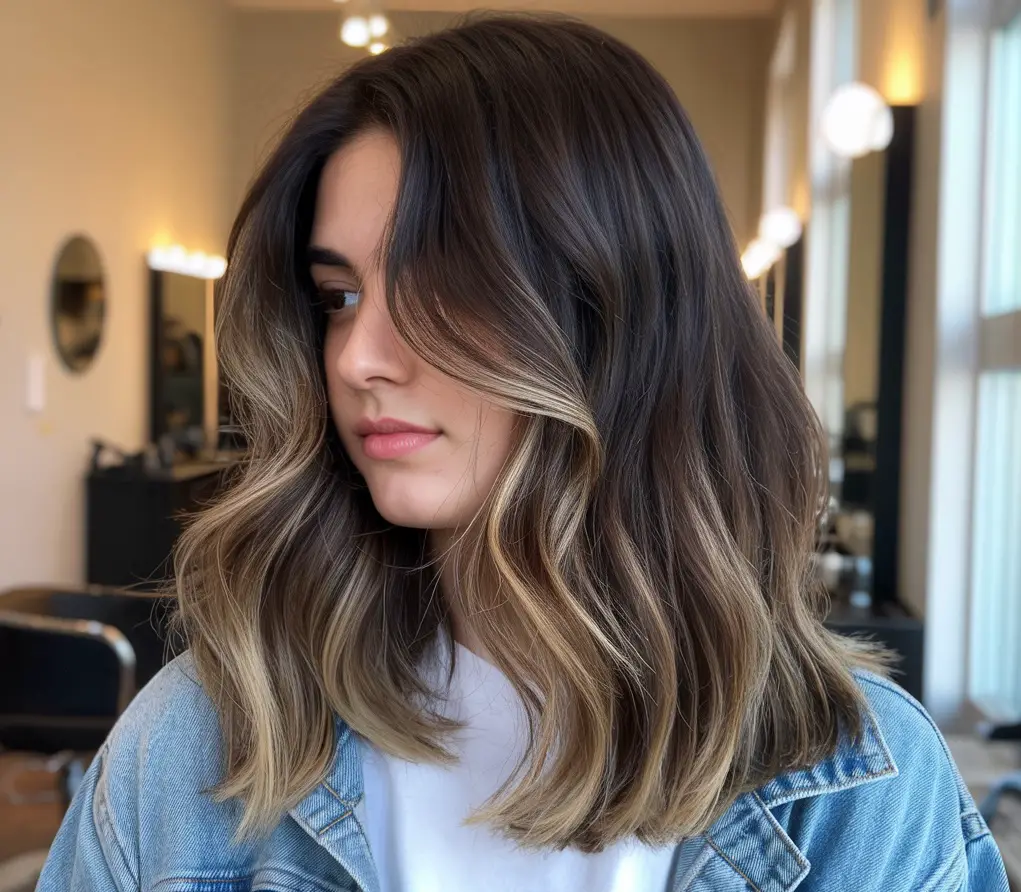
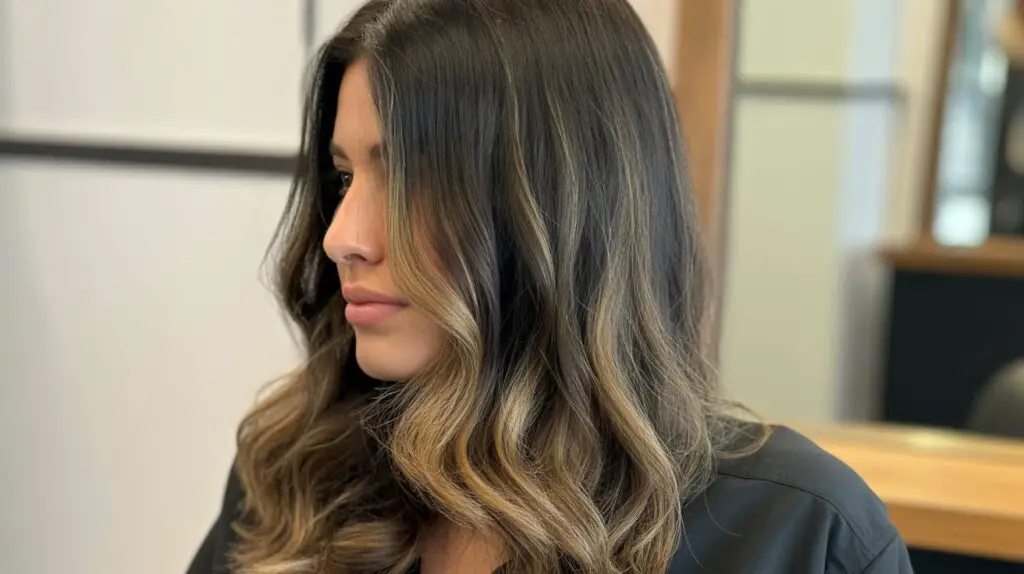
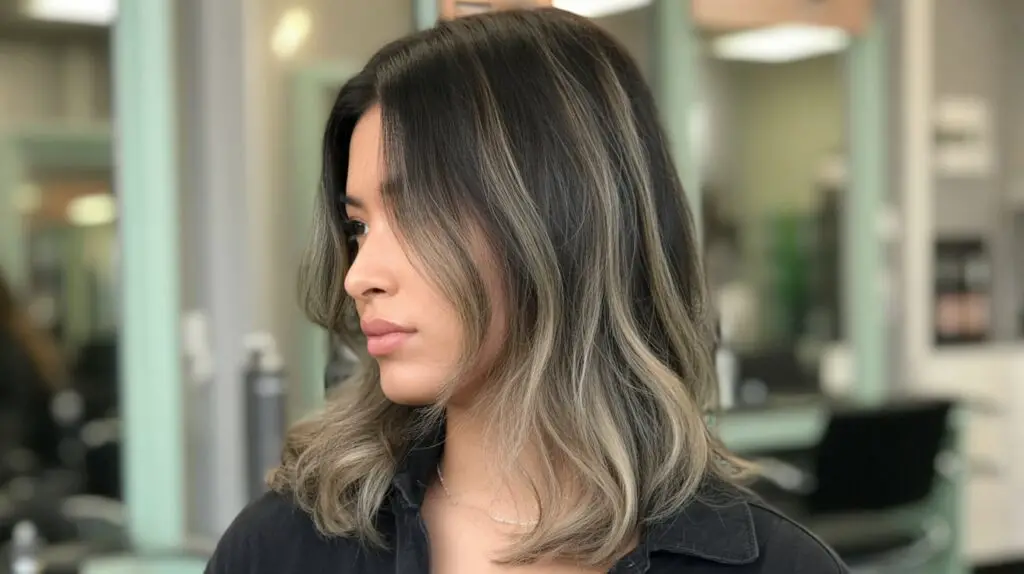
Creating beautiful balayage on dark hair requires a different approach than working with lighter bases. Dark hair presents unique opportunities for stunning contrast and dimension, but it also demands specific techniques to achieve that seamless, sun-kissed effect everyone desires. The rich depth of brunette shades provides the perfect canvas for balayage when you understand how to work with, rather than against, the natural pigments.
Many women with dark hair feel limited in their color options, believing dramatic bleaching is the only path to dimensional color. This couldn’t be further from the truth. Balayage technique specifically shines on dark hair because it creates gentle transitions that look naturally occurring. The hand-painted method allows for customized placement that enhances your features while maintaining the integrity of your dark base.
In the following sections, we’ll walk through everything you need to know about creating gorgeous balayage on dark hair. From understanding why dark hair behaves differently during lightening to mastering the painting techniques that deliver professional results, you’ll discover how to achieve that coveted lived-in color. Let’s transform your dark locks into a multidimensional masterpiece that turns heads.
What Makes Balayage Different on Dark Hair?
Dark hair contains more melanin molecules than lighter shades, which directly impacts how it responds to lightening products. These dense pigment molecules require more lifting power to break through, but they also create richer, more complex tones during the lightening process. Understanding this fundamental difference helps explain why techniques that work beautifully on blonde hair often fall flat on brunettes.
How dark hair absorbs and reflects light differently
The structure of dark hair actually absorbs more light than it reflects, which can make poorly executed highlights appear stripy or harsh. When balayage is properly applied, it works with this light absorption to create depth and movement. The hand-painted technique allows colorists to place lighter pieces strategically where light naturally hits, creating an illusion of brightness without overwhelming the natural base.
Dark strands also have a different porosity pattern than lighter hair. The cuticle layers tend to be more tightly sealed, making it harder for lightener to penetrate evenly. This characteristic means processing times need careful monitoring, and the application technique must account for potential hot spots or uneven lifting.
Why traditional highlighting fails on dark bases
Traditional foil highlights often create stark contrasts against dark hair that look unnatural and grow out harshly. The uniform application and complete saturation used in foiling can result in obvious lines of demarcation. Dark-haired women frequently end up with what colorists call “striped” or “chunky” results that lack the subtle graduation balayage provides.
The warmth that emerges during lightening also poses challenges with traditional techniques. Dark hair reveals orange and red undertones as it lifts, and without the gentle blending of balayage, these warm bands become glaringly obvious. Foils trap heat and can accelerate this warmth, while the open-air processing of balayage allows for more controlled lifting.
The role of undertones in dark hair
Every brunette has underlying warm tones that emerge during the lightening process. Asian hair often pulls orange, while Mediterranean and Latin hair tends toward red-orange. Understanding your specific undertones helps predict how your hair will lift and what toners you’ll need to achieve your desired result.
Cool-toned brunettes might see yellow-orange emerge first, while warm-toned brunettes often experience intense red-copper stages. These undertones aren’t flaws to fight against but rather natural stages in the lightening journey. Working with them, rather than trying to completely eliminate them, creates more natural-looking results.
Color theory for brunettes
The color wheel becomes your best friend when planning balayage on dark hair. Complementary colors neutralize each other, which explains why purple-based toners counteract yellow tones while blue-based formulas cancel orange. However, complete neutralization isn’t always the goal. Leaving subtle warmth creates dimension and prevents the flat, ashy appearance that can make dark hair look dull.
Consider these color relationships when planning your balayage:
- Level 1-3 hair: Expect strong red-orange undertones requiring blue-based toners
- Level 4-5 hair: Orange tones dominate, calling for blue-violet formulas
- Level 6-7 hair: Yellow-orange appears, best neutralized with violet tones
- Natural ash brunettes: Less warmth emerges but risk looking flat without some golden pieces
Processing time variations
Dark hair requires significantly longer processing times than lighter bases, sometimes up to 45 minutes or more depending on the desired lift. This extended timing demands different application strategies. Rather than applying all sections at once, staggered application ensures even results. The back sections, which process slower due to less body heat, might need application first.
Temperature plays a crucial role in processing dark hair. While heat accelerates lifting, it also increases the risk of damage and uneven results. Room temperature processing takes longer but provides more control and gentler results. Some stylists use climazon processors for the final 10 minutes to boost lifting without compromising hair integrity.
Which Products and Tools Do You Need?
Success with dark hair balayage starts with assembling the right arsenal of products and tools. Using professional-grade supplies makes the difference between beautiful, healthy-looking results and damaged, brassy disappointment. Each item serves a specific purpose in protecting hair integrity while achieving maximum lift and tone.
Essential lightening products for dark hair
The lightener you choose sets the foundation for your entire balayage service. Clay-based lighteners work exceptionally well for dark hair because they stay exactly where you place them without bleeding or expanding. This precision matters more on dark bases where any bleeding creates obvious spots or halos. Look for formulas containing bond-protecting ingredients that minimize damage during the longer processing times dark hair requires.
Your developer selection impacts both lifting power and hair health. While 40-volume developer lifts fastest, it also causes the most damage and can create uncontrollable warmth. Most professionals recommend 30-volume for dark hair balayage, providing substantial lift while maintaining some control over tone development. For extremely resistant hair or when seeking subtle results, 20-volume paired with longer processing creates gentler outcomes.
Pre-lightening treatments deserve consideration too. Clarifying treatments remove buildup that might interfere with even lifting. Some colorists apply coconut oil to the mid-lengths and ends before lightening, as it penetrates the hair shaft and provides protection without interfering with the lightening process at the roots.
Brushes and application tools
The right brush transforms your application technique and final results. Traditional tint brushes work poorly for balayage because they create harsh lines and don’t allow for the feathering effect that makes this technique special. Instead, invest in these specialized tools:
A wide paddle brush designed specifically for balayage creates soft, diffused placement. The bristles should be firm enough to hold product but flexible enough to create varying pressure. This variation in pressure creates the signature graduated effect, with heavier saturation toward the ends and lighter feathering near the roots.
Protective treatments and toners
Bond-building treatments have revolutionized what’s possible with dark hair lightening. Adding these treatments directly to your lightener helps maintain hair integrity during processing. Popular options include Olaplex, Brazilian Bond Builder, or Wellaplex. These products work by reconnecting disulfide bonds broken during the lightening process.
Toner selection requires careful consideration of your underlying pigment and desired end result. Demi-permanent toners provide the most natural results on balayaged dark hair because they add tone without further lightening. Keep multiple toner shades on hand, as different sections might require different formulas to achieve uniform results.
Sectioning clips and foils
Proper sectioning makes or breaks your balayage application. Duck bill clips work better than traditional clips because they create cleaner sections without leaving marks. You’ll need at least 12 clips to work efficiently through the entire head. Color-coding your clips helps track which sections you’ve completed and which still need attention.
While balayage traditionally processes in open air, strategic foil use helps achieve extra lift on resistant sections. Cotton strips or meche papers placed between sections prevent color transfer while allowing the hair to breathe. Some stylists use plastic wrap loosely placed over sections to trap gentle heat without the intense effect of traditional foils.
Developer strengths for different results
Understanding developer mathematics helps customize results for each client. Mixing different developer strengths creates intermediate options. For example, combining equal parts 20 and 30-volume creates an effective 25-volume developer. This flexibility allows you to adjust lifting power for different sections of the same head.
Here’s a practical breakdown of developer choices:
- 20-volume: Lifts 1-2 levels, ideal for subtle dimension
- 25-volume: Lifts 2-3 levels, perfect for medium contrast
- 30-volume: Lifts 3-4 levels, creates dramatic dimension
- 35-volume: Lifts 4-5 levels, use only on healthy, virgin hair
Remember that these lifting capabilities decrease on previously colored hair. Dark hair with existing color might only achieve half the expected lift, requiring adjusted expectations or multiple sessions.
How to Section Dark Hair for Balayage?
Strategic sectioning forms the foundation of natural-looking balayage on dark hair. Unlike traditional highlights that follow uniform patterns, balayage sectioning should mimic how the sun would naturally lighten hair. This organic approach requires understanding both hair growth patterns and how light interacts with different areas of the head.
Creating natural-looking patterns
Nature never lightens hair in perfect straight lines or uniform sections. Study how children’s hair lightens in summer – you’ll notice irregular patterns with concentration around the hairline, crown, and ends. Recreating this randomness while maintaining balance requires intentional “imperfection” in your sectioning.
Start by identifying the natural part and crown area. These landmarks guide your sectioning strategy. Working with the hair’s natural fall creates results that grow out beautifully. Force-creating parts or sections that fight against growth patterns leads to awkward regrowth and high-maintenance results.
Diagonal back sections create more movement than horizontal ones. Taking sections at a 45-degree angle allows color to blend seamlessly as hair moves. This technique works particularly well on dark hair because it prevents the harsh horizontal lines that can make grown-out balayage look striped.
Working with different hair textures
Curly and wavy dark hair requires completely different sectioning approaches than straight hair. The spring pattern in textured hair means color placement needs to account for how the hair will shrink and stack when dry. What looks like perfect placement on stretched, wet hair can become patchy when curls reform.
For tight curls, work with the hair in its natural state rather than stretching it straight. Paint the pieces that would naturally catch light when the curls are formed. This typically means focusing on the outer curve of each curl formation. The inside of the curl spiral remains darker, creating incredible dimension.
Straight dark hair shows every line and mistake, demanding meticulous sectioning. Create soft zigzag patterns rather than straight lines when taking sections. This irregularity helps blend the color naturally. Varying section thickness also contributes to a more organic result – some pieces should be whisper-thin while others are slightly thicker.
Placement for face-framing highlights
The sections around the face deserve special attention because they have the most impact on overall appearance. These money pieces should start subtly at eye level or below, never right at the root. Beginning application too high creates an unnatural grow-out line directly around the face where it’s most noticeable.
Consider face shape when planning front sections:
- Round faces: Keep lighter pieces below the cheekbones to create lengthening effect
- Square faces: Soft pieces starting at the temple area soften angular features
- Heart-shaped faces: Concentrate lightness from mid-cheek down to balance proportions
- Oval faces: Most flexible, can handle lightness starting anywhere from temple to jaw
Back section strategies
The back of the head presents unique challenges because you can’t see it directly while working. Creating a solid sectioning plan before starting prevents confusion midway through the service. Many colorists use a modified brick-lay pattern, staggering sections to avoid obvious horizontal lines.
Divide the back into quadrants using the occipital bone as your horizontal guide and the center back as your vertical line. This creates four manageable sections to work through systematically. Within each quadrant, take diagonal-back sections that follow the head’s curve. This approach ensures even coverage while maintaining the random appearance balayage requires.
Avoiding harsh lines
The biggest mistake in sectioning dark hair for balayage is creating patterns that are too perfect or predictable. Your sections should vary in width, with some as thin as ⅛ inch and others up to ½ inch. This variation creates the lived-in effect that makes balayage so appealing.
Feather your sections by gently teasing the hair at the point where you’ll begin color application. This creates a diffused edge rather than a harsh line. The teasing doesn’t need to be dramatic – just enough to create some irregularity in the hair’s lay. This technique proves especially important on dark hair where any sharp demarcation becomes glaringly obvious.
Between sections, leave irregular amounts of hair. Some dark pieces should be hair-thin ribbons while others are chunkier sections. This randomness mimics nature and ensures the grow-out phase looks intentional rather than neglected. Think of it as creating negative space that’s just as important as the painted sections.
What Are the Best Techniques for Dark Hair Balayage?
Mastering the actual painting technique separates average results from stunning transformations on dark hair. The way you apply lightener, control saturation, and blend sections determines whether you achieve that coveted seamless gradient or end up with spotty, uneven results. Dark hair demands more precision because mistakes show up more obviously than on lighter bases.
Painting methods for subtle gradients
The classic V-formation technique works beautifully on dark hair when executed properly. Start your brush strokes about 2-3 inches from the root, creating soft downward strokes that gradually increase in saturation. The key lies in varying your pressure – lighter at the starting point, gradually increasing as you move toward the ends. This creates the natural fade that makes balayage so distinctive.
Clay lightener responds best to a tapping motion rather than smooth strokes. After initial application, use your brush to tap and feather the product upward toward the root area. This creates micro-diffusion that eliminates harsh lines. The tapping motion also helps the product penetrate the cuticle more effectively on resistant dark hair.
For ultra-seamless blending, try the backcombing method. Lightly tease the section where you want the color to begin, then paint over the teased area. The irregular hair placement creates automatic diffusion. This technique works especially well on Asian hair types that tend to show every line and demarcation.
Cross-checking your application from multiple angles prevents missed spots or over-saturation. What looks perfect from one viewpoint might reveal patches from another. Walk around your sections, viewing them from the side and back. Dark hair’s light absorption means these different angles dramatically change how the color appears.
Saturation levels for lift
Dark hair requires strategic saturation to achieve desired lift without damage. The ends need complete saturation to achieve maximum lightness, while the mid-shaft benefits from medium saturation. This graduated approach creates the dimensional effect balayage is known for while preventing unnecessary damage to areas that don’t need extreme lifting.
Product quantity matters more on dark hair than lighter bases. Skimping on lightener leads to uneven results and potential spotting. Each section should have enough product to remain moist throughout processing. Dry patches stop lifting and create unsightly spots that are difficult to correct later.
Temperature affects saturation needs too. Warmer areas of the head (crown, nape) process faster and might need slightly less product. Cooler areas (sides, hairline) often require heavier saturation to achieve matching results. Understanding these thermal patterns helps you customize application for even results.
Blending at the roots
The transition zone where lightener meets natural hair determines whether your balayage looks professional or amateur. On dark hair, this area needs extra attention because any sharp line becomes immediately visible. Create a buffer zone by applying product very sparingly in a 1-inch section before your main application begins.
Feathering techniques vary based on hair texture. For fine dark hair, use horizontal brush strokes to diffuse the product. Coarse dark hair responds better to vertical tapping motions that help product penetrate the resistant cuticle. Either way, the goal remains the same – creating an imperceptible transition that looks like it occurred naturally.
Some stylists apply a barrier cream just above where they want color to stop. This invisible shield prevents lightener from creeping higher during processing. On dark hair that shows every imperfection, this extra insurance helps maintain clean sections while still achieving soft blending.
Creating dimension without brassiness
The biggest challenge with dark hair balayage is managing warmth during lifting. Rather than fighting the natural undertones, plan for them. Apply heavier product to sections you want coolest, as they’ll need to lift higher to push through warm phases. Sections where subtle warmth adds dimension can receive lighter application.
Consider these strategies for controlling brassiness:
- Strand test first: Always test on a hidden section to see how the hair lifts
- Monitor carefully: Check every 10 minutes to catch optimal timing
- Cool shot rinse: Use cool water to close cuticles and reduce warmth
- Double toning: Apply initial toner, then gloss for extra neutralization
Timing for optimal results
Dark hair’s extended processing time requires strategic planning. Rather than applying all sections simultaneously, work in phases. Apply to the sections needing most lift first (usually mid-lengths and ends), then move to areas requiring less dramatic change. This staggered timing ensures even results across all sections.
Visual checks tell you more than timing alone. Dark hair might need anywhere from 30-55 minutes to achieve desired lift. Look for the lightener to stop expanding and the color to stabilize. The pieces should look pale yellow to white when ready, never orange or gold. If warmth persists after maximum safe processing time, plan for heavy toning rather than over-processing.
Room temperature affects timing significantly. Cold rooms slow processing and might require gentle heat assistance. Warm environments accelerate lifting but increase brassiness risk. The ideal processing temperature sits around 72-75°F, providing steady, controlled lifting without unexpected surprises.
How to Maintain Balayage on Dark Hair?
Maintaining gorgeous balayage on dark hair requires a different approach than caring for traditional highlights. The investment you’ve made in achieving beautiful dimension deserves protection through proper home care and strategic salon visits. Dark hair with balayage can actually be lower maintenance than all-over color when you understand the unique needs of your new multidimensional shade.
Purple shampoo frequency
Purple shampoo serves as your first defense against brassiness, but dark hair balayage requires a lighter touch than fully blonde styles. Using purple shampoo too frequently can create an ashy, lifeless appearance that makes dark hair look dull. The goal is neutralizing unwanted warmth while preserving the dimension that makes balayage special.
Start with once-weekly purple shampoo sessions and adjust based on how your hair responds. Fine dark hair typically needs less frequent toning than coarse textures. If your lightened sections start looking silvery or your natural base appears flat, you’re overdoing it. The sweet spot maintains brightness in the painted sections while keeping your natural color rich and vibrant.
Water temperature during purple shampoo application makes a significant difference. Hot water opens the cuticle too much, allowing excessive pigment deposit. Lukewarm water provides just enough opening for the violet pigments to neutralize yellow tones without over-depositing. Leave the product on for 3-5 minutes initially, extending time only if needed.
Quality matters when selecting purple shampoo for dark hair balayage. Professional formulas contain balanced violet pigments that won’t stain or over-tone. Drugstore versions often use harsh purple dyes that can create uneven results, especially problematic when you’re trying to maintain subtle dimension rather than uniform tone.
Deep conditioning schedules
Lightened sections of your balayage need more intensive moisture than your virgin base. This creates a conditioning conundrum – how to adequately hydrate processed pieces without weighing down healthy roots. The solution lies in strategic application and choosing treatments designed for multi-textured hair.
Weekly deep conditioning treatments should focus on mid-lengths and ends where the lightener was concentrated. Apply treatment to damp (not soaking) hair for better penetration. Work the product through with your fingers, ensuring every lightened piece receives coverage. Your natural base needs just a light coating to prevent buildup.
Protein-moisture balance becomes crucial for balayaged dark hair. The lightened sections lost protein during processing and need regular replenishment. Alternate between moisture-rich treatments and light protein treatments. Too much protein makes hair brittle, while excess moisture causes limpness. Finding your perfect rotation might take experimentation.
Heat activation supercharges deep conditioning treatments. After application, cover hair with a processing cap and apply gentle heat for 15-20 minutes. This opens the cuticle for deeper penetration. The cooldown period matters too – let hair return to room temperature before rinsing to seal in benefits.
Touch-up timing
The beauty of well-executed balayage lies in its graceful grow-out. Unlike traditional highlights that demand 6-8 week touch-ups, dark hair balayage can go 3-4 months between appointments. This extended timeline makes it perfect for busy women who want beautiful hair without constant salon visits.
Your natural growth rate and contrast level determine optimal timing. Subtle balayage with minimal contrast might last 4-5 months before needing refresh. Dramatic differences between base and painted sections typically need attention around the 3-month mark. The face-framing pieces usually need refreshing before the overall color.
Root smudging or shadow rooting during touch-ups extends the time between appointments even further. This technique softly blends your natural growth with the lightened sections, creating an even more seamless transition. Many women find they can push appointments to 5-6 months with this approach.
Protecting color between appointments
Sun exposure poses the biggest threat to balayaged dark hair. UV rays fade toner quickly, bringing back the brassiness you worked to eliminate. They also degrade the hair structure, making lightened sections more porous and prone to damage. Wearing hats or using UV-protectant sprays preserves both color and condition.
Heat styling requires extra precaution on multi-tonal hair:
- Always use heat protectant: Apply to damp hair before blow-drying
- Lower temperatures: Lightened sections need less heat than virgin hair
- Section awareness: Focus heat on roots, use cooler settings on processed areas
- Air dry when possible: Preserve integrity by minimizing heat exposure
Swimming presents unique challenges for maintained balayage. Chlorine strips toner rapidly while salt water causes dryness and tangling. Wet hair thoroughly with clean water before swimming – saturated hair absorbs less pool or ocean water. Apply a leave-in conditioner for extra protection, focusing on lightened pieces.
Home care products
Building an effective home care routine starts with understanding ingredient labels. Sulfate-free shampoos preserve toner and natural oils. However, clarifying treatments every 2-3 weeks remove buildup that can dull your color. This balance keeps balayage looking fresh without stripping essential moisture.
Leave-in treatments bridge the gap between salon visits. Lightweight oils or serums applied to lightened sections add shine and manageability. Avoid heavy products that can weigh down fine hair or make dark bases appear greasy. The goal is enhancing light reflection on painted pieces while maintaining movement.
Color-depositing masks offer professional results at home. These treatments refresh tone between salon visits without the commitment of permanent color. Choose shades slightly lighter than your toner to avoid over-deposit. Application only to lightened sections prevents altering your natural base color.
Night treatments maximize repair time. Silk pillowcases reduce friction that causes frizz and breakage in processed sections. Weekly overnight masks penetrate deeply while you sleep. Some women find braiding damp hair with treatment creates beautiful waves while conditioning – multitasking at its finest.
Creating stunning balayage on dark hair
Creating stunning balayage on dark hair opens up a world of dimensional color that enhances your natural beauty without requiring dramatic changes. The techniques and knowledge you’ve gained empower you to achieve professional-looking results that complement your features while maintaining the health and integrity of your hair. Whether you’re attempting this at home or working with a stylist, understanding the unique requirements of dark hair ensures better outcomes.
Your newly balayaged hair tells a story of thoughtful color placement and careful technique. The seamless blend from dark roots to lighter ends creates movement and interest that flat color simply can’t match. With proper maintenance and care, your balayage will continue evolving beautifully, requiring only periodic touch-ups to maintain its multidimensional magic. Trust the process, protect your investment with quality products, and enjoy the confidence that comes with gorgeously painted hair.
Frequently Asked Questions
Q: Can you balayage black hair without bleach?
A: While traditional balayage requires lightener to create dimension, extremely dark hair can achieve subtle effects using high-lift color or specialized ammonia-free lighteners. These gentler options won’t achieve dramatic contrast but can create soft, caramel dimensions that enhance natural movement.
Q: How many sessions does dark hair need for blonde balayage?
A: Achieving blonde balayage on dark hair typically requires 2-3 sessions spaced 6-8 weeks apart. This gradual approach preserves hair integrity while safely lifting through multiple undertone stages. Attempting dramatic lightening in one session often results in severe damage and persistent brassiness.
Q: Will balayage damage my virgin dark hair?
A: Any lightening process causes some damage, but proper balayage technique minimizes impact by treating only selected sections rather than all-over application. Virgin dark hair actually responds better to lightening than previously processed hair, often achieving beautiful results with less damage when proper products and techniques are used.
Q: How do I fix orange balayage on dark hair?
A: Orange tones indicate insufficient lifting or premature toner fading. Professional toning with blue-based formulas neutralizes orange effectively. At home, blue-toning shampoos and masks can help, but severe brassiness usually requires salon correction to avoid over-processing.
Q: What’s the difference between balayage and highlights on dark hair?
A: Balayage creates softer, more natural-looking dimension through hand-painted application, while traditional highlights use foils for uniform lightening. On dark hair, balayage typically looks more sun-kissed and grows out more gracefully, while highlights create more dramatic, defined streaks of color.
Q: Can I do balayage on previously colored dark hair?
A: Previously colored dark hair can receive balayage, but results vary depending on existing color history. Hair with multiple processes or dark box dye might lift unevenly or struggle to achieve significant lightness. Professional consultation helps determine realistic expectations and whether color correction is needed first.
Q: How long does balayage take on dark hair?
A: Plan for 3-5 hours in the salon for initial balayage on dark hair. This includes consultation, application, processing time (45+ minutes for dark hair), toning, and styling. Complex corrections or multiple processes extend timing further.
Q: What face shapes look best with balayage on dark hair?
A: Balayage flatters every face shape when placement is customized appropriately. Strategic lightening can elongate round faces, soften square jaws, or balance heart-shaped faces. The key lies in working with an experienced colorist who understands how light placement affects facial proportions.