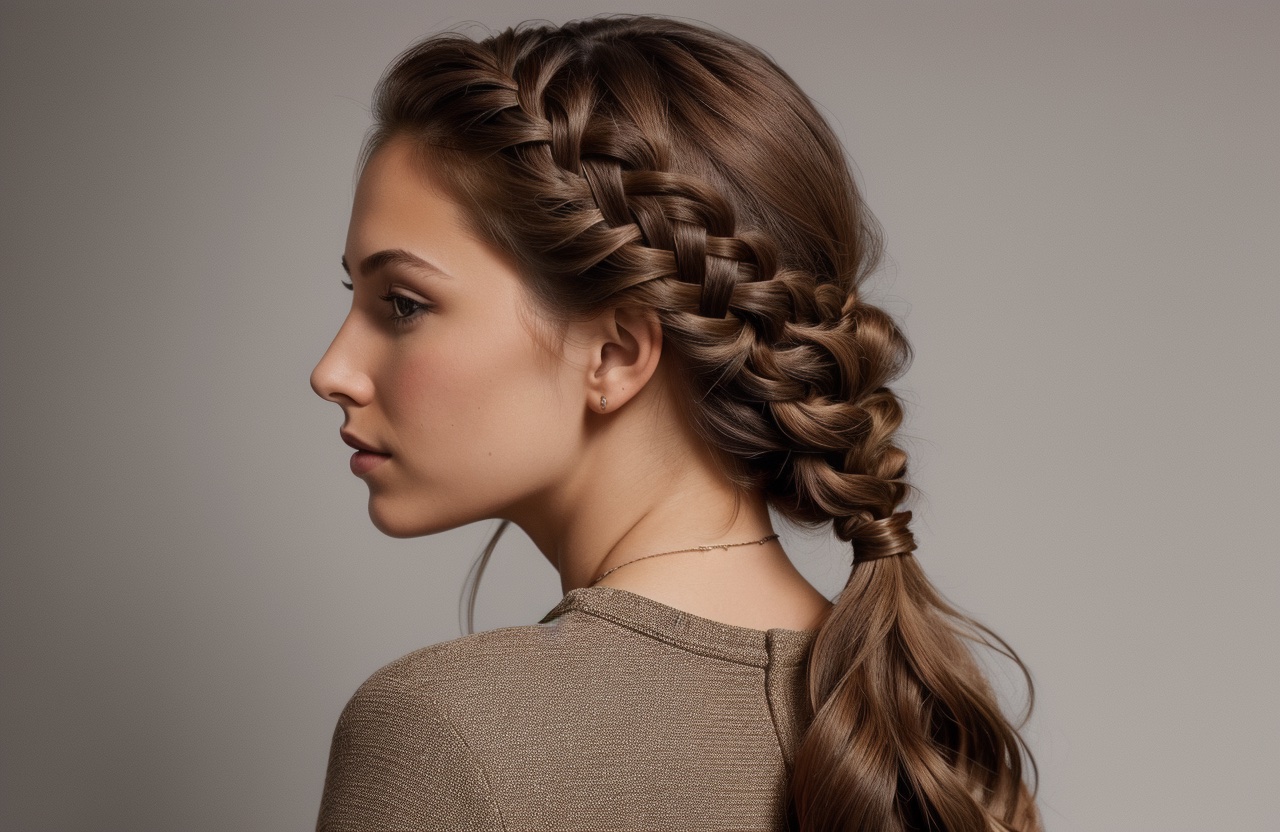
Four strand braids are a stylish and sophisticated hairstyle that can elevate your look. This braiding technique uses four sections of hair instead of the traditional three, creating a more intricate and eye-catching pattern. The result is a chic and polished appearance that’s perfect for various occasions, from casual outings to formal events.
Choosing a four strand braid offers several advantages. It provides a unique twist on the classic braid, allowing you to stand out with a hairstyle that’s both elegant and modern. This braid type also tends to hold better than its three-strand counterpart, making it an excellent choice for active women or those who want their style to last throughout the day. Additionally, the four strand braid can add volume and texture to your hair, giving the illusion of fuller, more luscious locks.
Mastering the four strand braid technique opens up a world of styling possibilities. Here’s essential tools, preparation tips, step-by-step instructions, troubleshooting advice, and exciting variations of this versatile hairstyle. Whether you’re a braiding novice or looking to expand your hair styling skills, this guide will help you create stunning four strand braids with confidence.
What tools do you need for a four strand braid?

Creating a stunning four strand braid starts with having the right tools at your fingertips. Let’s explore the essential items you’ll need to craft this chic hairstyle.
Hair brush or comb
A good quality brush or comb is crucial for preparing your hair. You’ll want to remove any tangles and smooth out your locks before starting the braiding process. A wide-toothed comb works well for detangling, while a boar bristle brush can help distribute natural oils and create a sleek finish.
Hair ties or elastics
Securing your braid is just as important as creating it. Choose hair ties or elastics that match your hair color for a seamless look. Opt for snag-free varieties to prevent damage to your strands. Keep a few extras on hand in case one breaks during the styling process.
What makes a good hair tie for braiding? Look for options that are:
- Strong enough to hold your braid in place
- Gentle on your hair to prevent breakage
- Easy to remove without causing tangles
Hair clips or sectioning tools
Dividing your hair into four equal sections is a key step in creating this braid. Hair clips or sectioning tools can help you keep each part separate and tidy as you work. Butterfly clips or alligator clips are popular choices for their firm grip and ease of use.
Optional: hair spray or styling products
While not strictly necessary, styling products can elevate your four strand braid. A light-hold hairspray can help tame flyaways and keep your braid looking polished throughout the day. For added texture and grip, consider using a small amount of mousse or texturizing spray before you start braiding.
Mirror setup for better visibility
Proper visibility is essential when creating a four strand braid, especially if you’re new to the technique. A handheld mirror can be incredibly helpful for checking the back of your head as you braid. If possible, set up two mirrors – one in front and one behind you – for a clear view of your entire head.
Have you considered the lighting in your styling area? Good lighting can make a significant difference in your ability to see what you’re doing. Natural light is ideal, but if that’s not available, a well-placed lamp can work wonders.
Remember, practice makes perfect when it comes to four strand braiding. Don’t get discouraged if your first attempts aren’t flawless. With time and patience, you’ll master this beautiful hairstyle.
By gathering these tools before you start, you’ll set yourself up for success. Each item plays a specific role in helping you create a polished, long-lasting four strand braid. As you become more comfortable with the technique, you may find yourself reaching for these tools instinctively, making the process smoother and more enjoyable.
How do you prepare your hair for a four strand braid?
Creating a four strand braid might seem tricky at first, but with practice, you’ll master this stylish hairstyle. Let’s break down the process into manageable steps.
Dividing hair into four equal sections
Begin by parting your hair down the middle, from forehead to nape. Then, split each half into two equal parts. You should now have four sections of hair. Use clips to keep them separate if needed. This initial division is crucial for achieving a balanced braid.
Understanding the over-under pattern
The key to a four strand braid lies in its weaving pattern. Think of your four sections as numbered 1 to 4, from left to right. The basic pattern goes like this:
- Move section 4 under section 3
- Move section 2 over section 3
- Move section 1 under section 2
This sequence creates the distinctive look of a four strand braid. It might feel awkward at first, but with repetition, it’ll become second nature.
Starting the braid at the crown
Why start at the crown? This placement allows for a neat, visible braid that cascades down your back. Gather your sectioned hair at the crown of your head. If you’re right-handed, hold sections 1 and 2 in your left hand, and 3 and 4 in your right. Lefties, reverse this.
Begin the over-under pattern described earlier. As you work, incorporate loose hair from each section into the braid. This technique, similar to a French braid, keeps your style sleek and prevents loose strands.
Maintaining tension while braiding
Consistent tension is vital for a polished look. How tight should you braid? Aim for firm but comfortable tension. Too loose, and your braid may unravel quickly. Too tight, and it might cause discomfort or headaches.
As you braid, keep your hands close to your head. This proximity helps maintain even tension throughout the style. If you notice the braid becoming looser as you move down, gently tug on the sections to tighten them before continuing.
Securing the end of the braid
Once you’ve braided all your hair, secure the end with an elastic band. Choose one that matches your hair color for a seamless look. If you want a fuller braid, gently tug at the edges to loosen it slightly. This technique, called “pancaking,” can make your braid appear thicker and more voluminous.
For a polished finish, smooth any flyaways with a small amount of hair oil or hairspray applied to your palms. Gently run your hands over the braid to tame any stray hairs.
Are you struggling to keep the braid neat at the end? Try this tip: before securing with an elastic, spray a small amount of hairspray on your fingers and smooth down the last few inches of hair. This extra step can help prevent flyaways and keep your braid looking fresh all day.
Remember, creating a perfect four strand braid takes practice. Don’t get discouraged if your first attempts aren’t flawless. Each time you try, you’ll improve your technique and speed. Soon, you’ll be able to create this eye-catching style with ease.
Experiment with different hair textures and tensions to find what works best for you. Some women prefer to braid slightly damp hair for better control, while others find dry, textured hair holds the style better. Try both methods to see which gives you the best results.
By mastering these basic steps, you’re well on your way to creating beautiful four strand braids. This versatile style can be dressed up or down, making it perfect for various occasions. Whether you’re heading to the office, going out with friends, or attending a special event, a four strand braid offers a sophisticated and stylish option.
What are the basic steps to create a four strand braid?
Even the most experienced braiders can encounter challenges when creating a four strand braid. Let’s explore some common issues and their solutions to help you achieve a flawless look.
Dealing with uneven sections
Uneven sections can lead to a lopsided braid. If you notice this problem, stop braiding and reassess your sections. Gently separate the hair and redistribute it evenly among the four strands. Use a fine-toothed comb to help you divide the hair accurately.
A helpful tip: Start with slightly damp hair. This can make it easier to create clean, even sections. If your hair is dry, consider using a spray bottle to lightly mist it before sectioning.
Fixing loose strands
Loose strands can detract from the polished appearance of your braid. To tackle this issue:
- Use bobby pins to secure flyaways near your scalp
- Apply a small amount of hair gel or pomade to smooth down stray hairs
- For longer loose strands, try incorporating them into the nearest section as you braid
Remember, some texture can add character to your braid, so don’t stress over every tiny strand.
Adjusting braid tightness
Finding the right tension for your braid can be tricky. Too tight, and it might cause discomfort; too loose, and it may unravel quickly. If you realize your braid is too tight or loose after you’ve started, don’t worry. You can adjust the tension as you go.
For a too-tight braid, gently pull on the outer edges of each woven section to loosen it slightly. If it’s too loose, carefully tug on the strands to tighten them before continuing to braid. Practice will help you find the perfect balance.
Smoothing out bumps and lumps
Bumps and lumps can occur when hair isn’t distributed evenly throughout the braid. To fix this, locate the bump and gently pull on the surrounding hair to redistribute it. Sometimes, you might need to undo a few inches of the braid to smooth out a particularly stubborn bump.
A preventive measure is to maintain consistent tension as you braid. Keep your hands close to your head and braid downward in a steady motion.
Redoing sections without starting over
Made a mistake partway through your braid? No need to start from scratch. You can often fix issues by undoing only the problematic section. Here’s how:
- Carefully unravel the braid up to the point where the issue began.
- Re-section the hair if necessary.
- Resume braiding, paying extra attention to maintain even tension and section sizes.
This technique saves time and prevents frustration, especially when you’re nearly finished with your braid.
What if you’re struggling with the braiding pattern? Try this memory trick: think “over, under, over” as you move each strand. This can help you keep track of where each section should go.
Sometimes, hair texture can affect your braid’s appearance. If your hair is very fine or slippery, consider using a texturizing spray before braiding. This can add grip and make the braiding process easier.
Don’t get discouraged if your first few attempts aren’t perfect. Four strand braiding takes practice. Each time you create this style, you’ll improve your technique and develop muscle memory for the braiding pattern.
What are some variations of the four strand braid?

Four strand braids offer a world of creative possibilities. Once you’ve mastered the basic technique, you can explore various styles to suit different occasions and moods. Let’s explore some exciting variations that can elevate your braiding game.
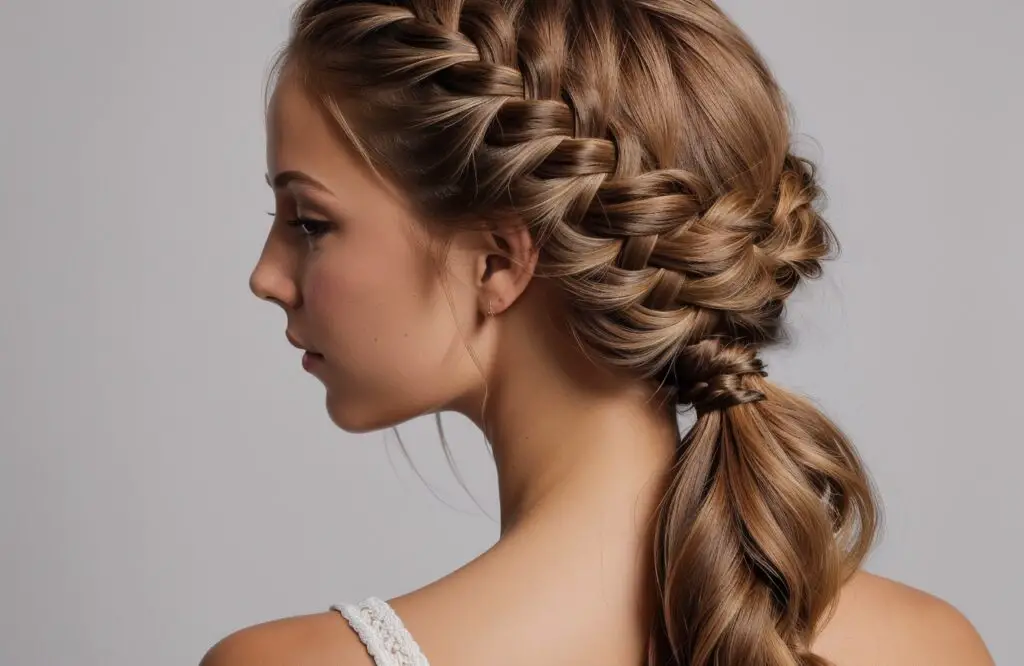
French four strand braid technique
The French four strand braid adds a sophisticated twist to the classic style. This technique involves incorporating loose hair into the braid as you work down the head, creating a seamless, polished look. To achieve this style:
- Begin at the crown of your head with four small sections.
- Start braiding using the standard four strand technique.
- As you braid, gradually add loose hair from the sides into each section.
The result is a braid that appears to be part of your scalp, flowing elegantly down your head. This style works well for both casual and formal occasions.
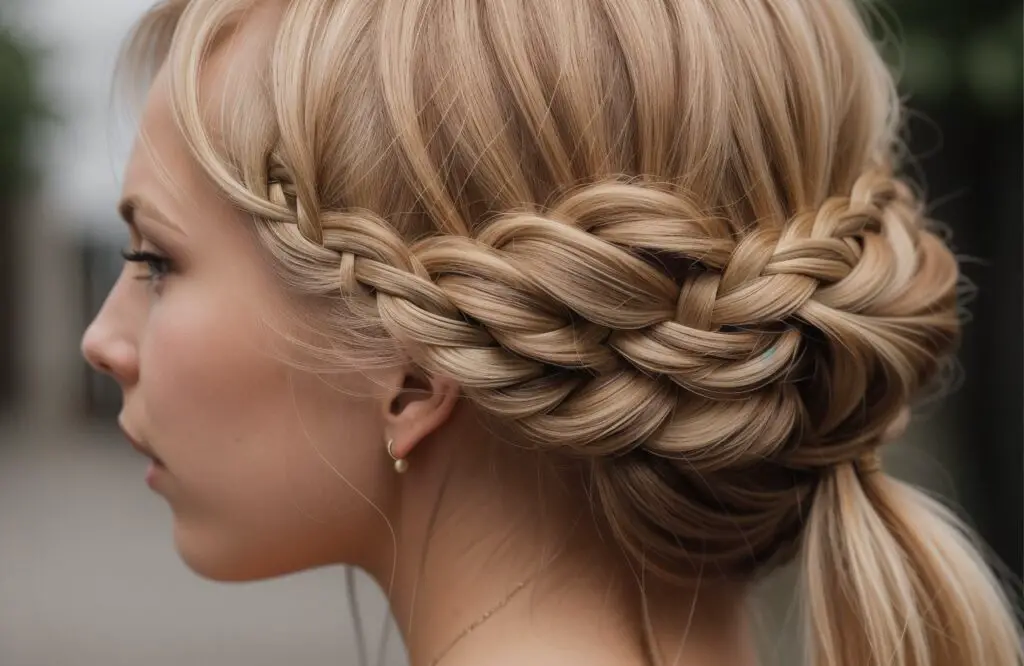
Dutch four strand braid method
Want a braid that stands out? Try the Dutch four strand braid. This method creates a raised braid that sits on top of your hair, rather than blending in. The key difference is in the weaving pattern:
- Instead of crossing strands over, you cross them under.
- This reverse technique makes the braid pop out from your head.
The Dutch style can create a bold, eye-catching look that’s perfect for making a statement. It’s particularly striking on those with highlighted or multi-toned hair.
Ribbon-incorporated four strand braid
Adding a ribbon to your four strand braid can create a charming, whimsical effect. This style is ideal for special occasions or when you want to add a pop of color to your look. How do you incorporate a ribbon?
- Choose a ribbon that complements your outfit or hair color.
- Fold the ribbon in half and secure it at the starting point of your braid.
- Treat the folded ribbon as one of your four strands while braiding.
The ribbon will weave through your braid, adding texture and visual interest. This technique works well with both thin, delicate ribbons and wider, more substantial ones.
Fishtail-inspired four strand braid
The fishtail-inspired four strand braid combines elements of two popular braiding styles. This fusion creates a intricate, textured look that’s sure to turn heads. To create this style:
- Divide your hair into four sections.
- Take a small piece from the outermost right section and cross it over to the left.
- Then, take a small piece from the outermost left section and cross it over to the right.
- Repeat this pattern, alternating sides.
This technique results in a braid with a distinctive herringbone pattern. It’s a bit more time-consuming than a standard four strand braid, but the unique texture is worth the extra effort.
Messy four strand braid style
For a relaxed, bohemian vibe, try the messy four strand braid. This style embraces imperfection and creates a soft, romantic look. To achieve this effortless appearance:
- Start with slightly textured hair. Day-old hair or hair spritzed with sea salt spray works well.
- Braid your hair using the standard four strand technique, but don’t worry about making it too neat.
- Once you’ve finished braiding, gently pull at the edges of the braid to loosen it.
- Pull out a few strands around your face for a softening effect.
The key to this style is not to aim for perfection. The slightly undone look is what gives it its charm.
Experimenting with these variations can help you find new ways to wear your hair. You might discover that certain styles work better for different hair types or lengths. For instance, those with longer hair might find the French technique particularly flattering, while shorter-haired individuals might prefer the messy style.
Don’t be afraid to mix and match elements from different variations. You could create a messy Dutch four strand braid or incorporate a ribbon into a fishtail-inspired style. The possibilities are nearly endless, allowing you to express your creativity through your hairstyle.
Remember, practice makes perfect. Each time you try a new variation, you’ll improve your skills and discover new ways to customize the style to suit your preferences. Happy braiding!
Elevate Your Style with Four Strand Braids
Four strand braids offer a versatile and stylish option for women looking to refresh their hairstyle repertoire. From the elegant French technique to the bold Dutch method, and from ribbon-incorporated designs to messy bohemian looks, this braiding style provides endless possibilities for personal expression. Each variation allows you to showcase your creativity and adapt your look to suit different occasions, moods, and outfits.
As you explore these braiding techniques, you’ll discover which styles work best for your hair type and personal preferences. Remember that perfection isn’t always the goal – sometimes, a slightly undone or messy braid can create a charmingly effortless appearance. With practice, you’ll develop the skills to quickly and easily create these eye-catching styles, adding a touch of sophistication or whimsy to your everyday look. So go ahead, experiment with these four strand braid variations and find your new favorite hairstyle.
Frequently Asked Questions
Q: What is a four strand braid?
A: A four strand braid is a hairstyle that uses four sections of hair instead of the traditional three, creating a more intricate and eye-catching pattern.
Q: How do you start a four strand braid?
A: To start a four strand braid, divide your hair into four equal sections at the crown of your head, then begin weaving them using an over-under pattern.
Q: What tools do I need for a four strand braid?
A: You’ll need a brush or comb, hair ties or elastics, hair clips for sectioning, and optionally, hairspray or styling products.
Q: How can I fix uneven sections in my four strand braid?
A: Stop braiding, reassess your sections, and redistribute the hair evenly among the four strands using a fine-toothed comb.
Q: What’s the difference between a French and Dutch four strand braid?
A: A French four strand braid incorporates loose hair as you braid down the head, while a Dutch four strand braid crosses strands under instead of over, creating a raised braid.
Q: How can I incorporate a ribbon into my four strand braid?
A: Fold a ribbon in half, secure it at the starting point of your braid, and treat the folded ribbon as one of your four strands while braiding.
Q: What’s the best way to create a messy four strand braid?
A: Start with slightly textured hair, braid using the standard technique without aiming for perfection, then gently pull at the edges to loosen it and pull out a few face-framing strands.
Q: How can I maintain tension while braiding?
A: Keep your hands close to your head and braid downward in a steady motion, adjusting the tightness as you go to find the right balance.