Greasy hair strikes at the worst possible moments. You wake up late for work, glance in the mirror, and discover your roots look like they’ve been dipped in oil. Maybe you planned to wash your hair last night but fell asleep on the couch instead. Now you’re faced with a dilemma: show up looking less than your best or scramble for a solution that actually works.
The natural oils your scalp produces serve an important purpose, protecting and nourishing your strands. Sometimes, though, these oils go into overdrive. Stress, hormonal changes, product buildup, or simply your genetics can turn your hair from fresh to greasy faster than you’d like. Women with fine hair often notice greasiness more quickly, as their strands can’t absorb as much oil as thicker textures.
Rather than panic or resort to another round of dry shampoo that leaves white residue, you can transform oily roots into an opportunity for creativity. The following sections will show you exactly how to style your way through greasy hair days with hairstyles that look intentional and polished. Let’s discover which techniques work best for disguising those telltale oily roots while keeping you looking put-together.
Why Greasy Hair Happens and When to Style It
Oily hair doesn’t follow a convenient schedule. Your scalp produces sebum continuously, and various factors influence how quickly this natural oil travels down your hair shaft. Understanding these patterns helps you anticipate when styling becomes your best option versus washing.
Morning vs evening styling for oily hair
Morning styling often works better for concealing greasy roots because your hair has natural lift after sleeping. The slight volume created by your pillow gives you something to work with, especially at the crown where oil tends to accumulate first. Evening styles tend to fall flatter as the day’s oil production weighs down your roots.
If you notice greasiness developing throughout the day, a quick afternoon restyle can refresh your look. Simply flipping your hair upside down and gently massaging the roots redistributes oils while adding volume. This technique buys you several more hours before needing a full restyle.
How natural oils affect different hair types
Fine, straight hair shows grease fastest because oil travels easily down smooth strands. Women with this hair type might notice visible oiliness within 24 hours of washing. Curly and coily textures can go longer between washes since their structure slows oil distribution.
Your hair’s porosity also plays a role. Low-porosity hair resists absorbing oils, causing them to sit on the surface and create that greasy appearance more quickly. High-porosity hair absorbs oils better, which can actually help with styling certain looks.
Best products to use before styling greasy hair
The right products make all the difference when working with oily hair. Texturizing spray applied to mid-lengths and ends creates grip without adding weight to already-oily roots. A light-hold hairspray can set your style without the heavy buildup that makes greasiness more obvious.
Skip heavy creams or oils when styling greasy hair. These products compound the problem, making your hair look even oilier. Instead, opt for powder-based products that absorb excess oil while adding texture and hold.
When to skip washing and style instead
Sometimes washing isn’t practical or even beneficial. Over-washing can trigger increased oil production as your scalp tries to compensate for stripped natural oils. If you washed yesterday and notice slight oiliness today, styling might be the better choice.
Consider your schedule too. If you have back-to-back early meetings or a busy morning with kids, a five-minute style beats a 30-minute wash-and-dry routine. Save washing for when you have time to properly cleanse and condition without rushing.
Travel presents another scenario where styling trumps washing. Hotel water can be harsh on hair, and irregular schedules make maintaining your normal wash routine challenging. Master these greasy hair styles, and you’ll navigate travel days with confidence.
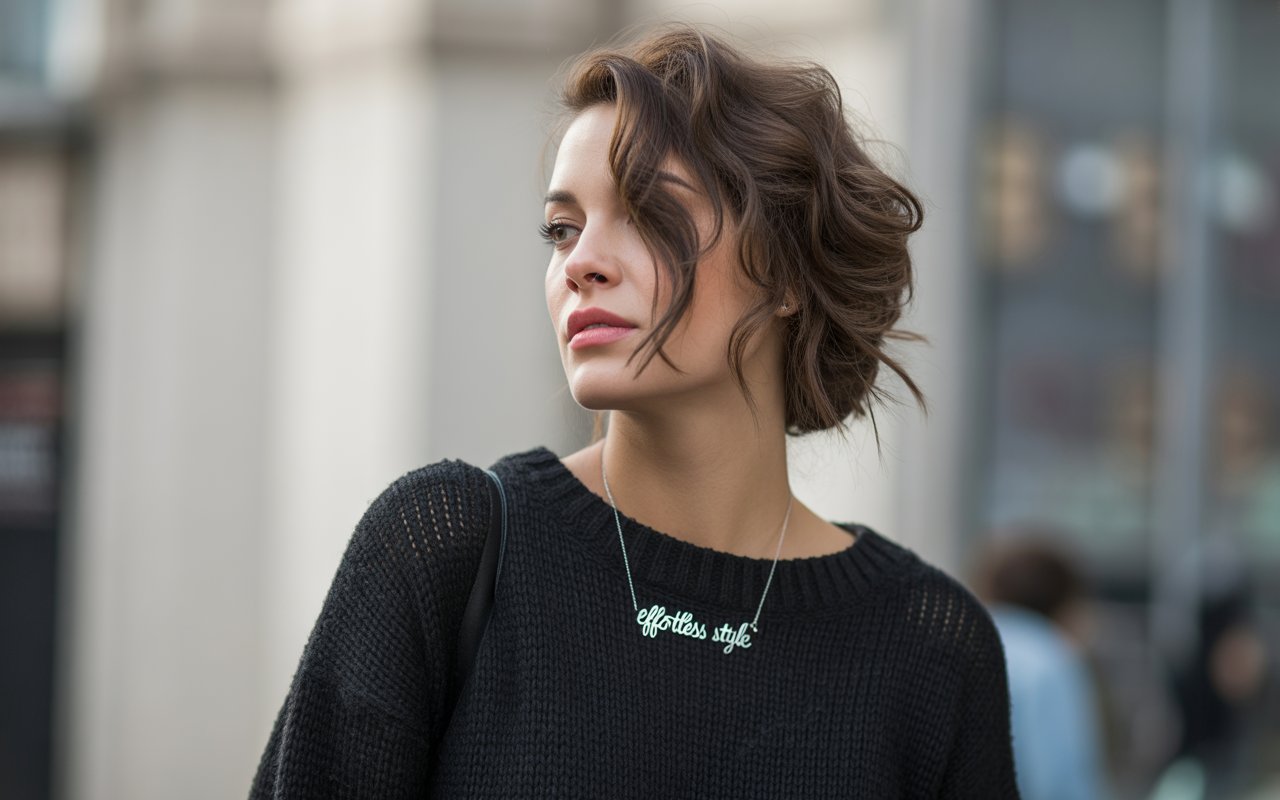
The Messy Bun: Your Ultimate Greasy Hair Disguise
The messy bun reigns supreme among hairstyles that actually improve with slightly oily hair. That natural grittiness gives your strands the perfect texture for creating a bun that stays put without sliding down throughout the day.
Creating volume at the crown despite oily roots
Start by flipping your head upside down and gently teasing the hair at your crown with your fingers. This motion lifts roots away from your scalp, instantly minimizing the appearance of oil. Avoid using a brush, which can distribute oils further down your strands.
Next, gather your hair into a high ponytail, but don’t pull it completely through the elastic on the last wrap. This creates a loop that forms the base of your bun. The key lies in keeping some tension at the roots while allowing the ends to remain loose and piece-y.
For extra volume, gently tug at sections around your crown after securing the bun. Pull small pieces forward and back, creating that perfectly imperfect silhouette. This technique draws the eye upward and away from any oiliness at your roots.
Securing the bun without slipping on greasy hair
Greasy hair can be slippery, making traditional securing methods less effective. Bobby pins become your best friend here, but placement matters more than quantity. Insert pins at an angle, creating an “X” pattern for maximum hold.
Hair elastics designed for thick hair work better on oily strands than thin ones. The extra grip compensates for the slickness. If your bun still feels unstable, try spraying bobby pins with hairspray before inserting them.
A trick professional stylists use involves creating anchor points. Before forming your bun, create two small braids on either side of your head, incorporating them into the final style. These braids act like built-in grip strips, preventing the entire style from sliding.
Adding texture to make oil work in your favor
Instead of fighting against your hair’s oiliness, use it strategically. Twist sections of hair before wrapping them into your bun. The oil helps these twists hold their shape better than freshly washed hair would.
Pull out face-framing pieces and twist them away from your face. The natural oils give these pieces a lived-in, effortless appearance that freshly washed hair can’t replicate. You’re working with what you have rather than against it.
Finishing touches that draw attention away from roots
Accessories strategically placed can shift focus entirely. A silk scarf wrapped around the base of your bun adds elegance while covering any visible oiliness at your hairline. Choose patterns or colors that complement your outfit.
Statement earrings also redirect attention. When people notice your beautiful jewelry, they’re less likely to scrutinize your hair. The messy bun actually showcases earrings better than many other styles since it keeps hair away from your face and neck.
Consider adding a subtle braid leading into your bun. Start at your temple and braid across your head, incorporating it into the bun. This detail adds interest while using up some of the oilier pieces near your face.
Dry shampoo applied strategically after styling (not before) can matte down any remaining shiny spots. Focus on your hairline and part, using a light hand to avoid that telltale white cast. Brush through gently with your fingers to blend.
The beauty of the messy bun lies in its forgiving nature. Unlike sleek styles that highlight every imperfection, this look thrives on imperfection. The messier and more textured your bun appears, the more intentional and stylish it looks.
Braided Styles That Work With Oily Hair
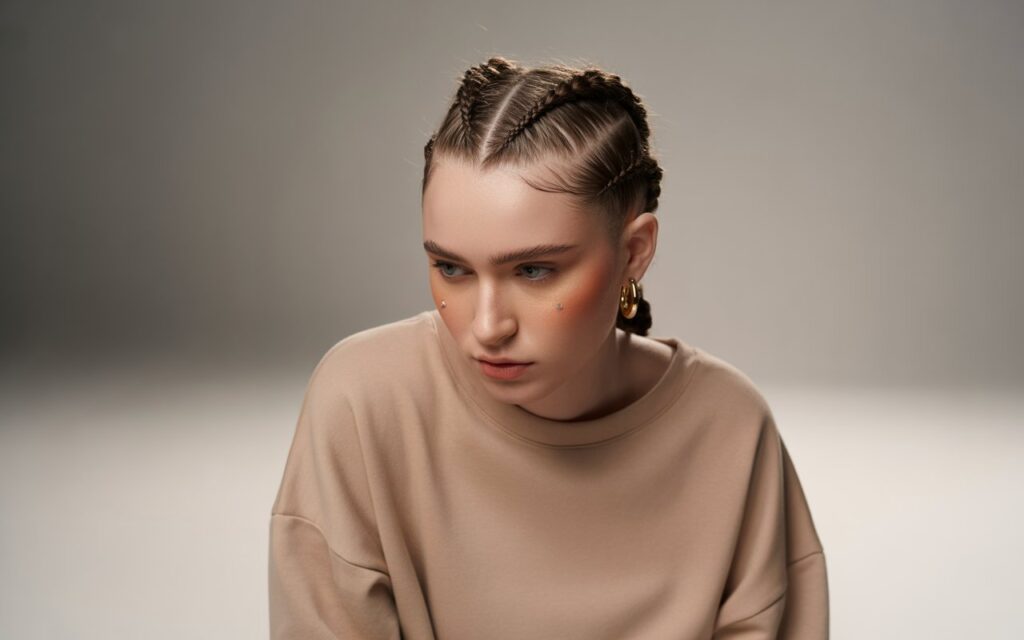
Braids and slightly greasy hair form an unexpectedly perfect partnership. The oils in your hair provide natural grip, helping braids hold their shape without constantly loosening throughout the day. This texture that frustrates you in other styles becomes your secret weapon for intricate braided looks.
French braids for concealing greasy parts
French braids excel at hiding oily roots because they pull hair flat against your scalp. Start your braid slightly off-center to avoid highlighting a greasy part. As you incorporate sections, pull them taut enough to smooth down any obvious oiliness.
The technique matters here. Instead of taking perfectly even sections, vary your pieces slightly. This creates a more organic look that disguises any shininess at the roots. Work your way down steadily, maintaining consistent tension.
Consider starting with a deep side part and French braiding across your head crown. This style redirects attention from the top of your head where oil typically concentrates. The diagonal line creates visual interest while practically covering problem areas.
For maximum coverage, try double French braids. Part your hair down the middle and create two braids. This style distributes oily sections throughout both braids rather than concentrating them in one area. Plus, the symmetry looks polished and intentional.
Side braids to redirect focus
A loose side braid offers the perfect solution when the top of your head looks oily but your lengths remain relatively fresh. Sweep all your hair to one side, beginning your braid behind your ear. This positioning naturally covers the oiliest parts.
Start with a regular three-strand braid but keep it loose and romantic. After securing with an elastic, gently tug at the edges of each section. This pancaking technique creates width and texture that makes any greasiness look like purposeful shine.
Mixed-texture side braids work particularly well. Incorporate small twists or leave some pieces out of the braid entirely. This variety in texture means no one section of hair draws too much attention, effectively camouflaging oily spots.
Fishtail variations for textured looks
Fishtail braids might seem complicated, but they’re actually more forgiving than traditional braids on greasy hair. The overlapping sections create natural texture that disguises oiliness while looking intricate and styled.
Begin with hair pulled to one side or straight back. Divide into two sections instead of three. Take a small piece from the outside of one section and cross it over to join the other section. Repeat on alternating sides.
The beauty of fishtails lies in their customization. Keep sections tiny for a detailed look, or use larger chunks for a quicker, more casual style. Either way, the crisscross pattern breaks up any visible oil concentration.
How oils actually help braids hold better
Your scalp’s natural oils act like a light-hold styling product. Clean hair often feels too silky, causing braids to slip and loosen within hours. That slight grittiness from day-two or day-three hair provides the perfect amount of friction.
Small braids especially benefit from this texture. When creating accent braids or incorporating braided details into other styles, you’ll notice they maintain their shape better than on freshly washed hair.
Even bobby pins and elastics grip better on slightly oily hair. This improved hold means your braided styles last all day without constant adjustments. What feels like a disadvantage actually saves you touch-up time.
Quick braid combinations for busy mornings
When time runs short, combine simple braiding techniques for maximum impact with minimal effort. Try these speedy options:
Half-crown braid: Pull sections from each temple, braid them back, and pin behind your head. Leave the rest of your hair down.
Braided headband: Create a thin braid from behind one ear, pull it across your head like a headband, and pin behind the opposite ear.
Twisted rope braid: Divide hair into two sections, twist each section in the same direction, then wrap them around each other in the opposite direction.
Mini accent braids: Add 2-3 tiny braids throughout your hair, leaving the rest loose. These details distract from any oiliness.
Braid into ponytail: Start with a loose braid at your crown, then gather everything into a low ponytail. The braided section adds interest while hiding greasy roots.
The versatility of braids means you can adapt them to any occasion. A tight, sleek braid works for professional settings, while loose, textured versions suit casual weekends. Once you master working with your hair’s natural oil rather than fighting it, braids become your go-to greasy hair solution.
Practice these styles on your second or third day hair when you’re not rushed. Building muscle memory makes executing them quickly on busy mornings much easier. Soon, you’ll find yourself looking forward to slight oiliness as an excuse to create these beautiful braided looks.
Sleek Low Ponytails and Slicked-Back Looks

That excess oil at your roots suddenly becomes an asset when creating intentionally sleek styles. Instead of trying to add shine with products, you’re working with what your scalp naturally provides. These polished looks transform greasy hair from problem to purposeful.
Low ponytails offer sophistication while strategically managing oily sections. The placement naturally pulls hair away from your scalp, stretching out roots and minimizing visible greasiness. This style works especially well for professional settings where you need to look pulled-together quickly.
Using natural oils for intentional sleekness
Your hair’s natural oils eliminate the need for smoothing serums or shine sprays. Start by brushing your hair straight back with a boar bristle brush. This distributes oils evenly from roots to mid-lengths, creating uniform sleekness rather than concentrated greasiness.
Apply a small amount of gel or pomade only to your edges and hairline. These areas need extra control to maintain the sleek look, but using products sparingly prevents adding more grease to already-oily hair. Smooth these sections with a fine-tooth comb for precision.
The key difference between greasy and sleek lies in intentionality. Create a defined part – whether center or side – using the tail of a comb. This crisp line signals that your style is deliberate. Smooth any flyaways with your palms, using your hair’s natural oils as styling aid.
Positioning ponytails to hide greasy sections
Ponytail placement dramatically affects how oily your hair appears. A ponytail positioned at the nape of your neck pulls hair taut against your head, stretching out roots and minimizing volume where oil accumulates. This low placement also feels more sophisticated than a high ponytail.
For severe oiliness concentrated at your crown, try a ponytail positioned just below the occipital bone. This placement creates a slight bump at the crown, lifting roots away from your scalp. The elevation prevents oil from lying flat against your head.
Angle matters too. Instead of pulling straight back, direct your ponytail slightly to one side. This diagonal line creates movement and prevents the style from looking too severe. The asymmetry also distracts from any unevenness in oil distribution.
Before securing your ponytail, lift sections at the crown and spray underneath with texturizing spray. This creates subtle volume that prevents the style from looking plastered to your head. The contrast between sleek sides and slight crown height adds dimension.
Adding accessories to elevate the style
The right accessory transforms a basic ponytail into an elegant statement. Silk scarves wound around the elastic instantly upgrade the look while covering any greasiness at the nape. Choose solid colors for professional settings or patterns for casual occasions.
Hair clips positioned strategically add polish while serving a practical purpose. Place a decorative clip at the base of your ponytail to hide the elastic, or use several small clips along one side to create an asymmetrical detail. Metallic finishes particularly complement the sleek texture.
For evening events, consider wrapping a small section of hair around the elastic. Take a piece from underneath your ponytail, wrap it around the band, and secure with a bobby pin. This polished detail makes the style look professionally done.
Creating different textures in the ponytail itself
While the top remains sleek, varying texture in the actual ponytail adds interest. Slightly wave the ends using a flat iron for movement that contrasts with the smooth base. This combination of textures looks intentional and modern.
Alternatively, braid the ponytail loosely and pull apart sections for volume. The braid holds better in slightly oily hair, and the texture disguises any greasiness that extends beyond your roots. Finish by pulling out a few pieces around the braid for softness.
Here are quick ways to add texture variety:
Bubble ponytail: Add hair ties every 3-4 inches down the ponytail, then gently tug each section for fullness
Twisted ponytail: Divide into two sections and twist them around each other
Fishtail accent: Fishtail just a small section while leaving the rest smooth
Crimped ends: Use a crimping iron on the last few inches only
Remember that sleek doesn’t mean boring. These textural elements keep the style interesting while maintaining that polished appearance oily hair naturally provides.
The slicked-back look takes this concept even further. Without gathering into a ponytail, simply brush all hair straight back and secure with bobby pins behind your ears. This severe style might feel bold, but it’s incredibly chic and makes oily roots look entirely purposeful.
Weather plays to your advantage with these styles. While humidity wreaks havoc on most hairstyles, sleek ponytails maintain their shape thanks to your hair’s natural oils acting as humidity barrier. You’ll find these styles last longer than on freshly washed hair.
Half-Up Styles and Strategic Hair Placement
Half-up styles offer the perfect compromise when your roots look greasy but your lengths remain presentable. These versatile looks let you control exactly which sections stay visible while hiding the oiliest parts. The key lies in strategic sectioning that makes the most of your hair’s varying textures.
Pulling back just the oily sections
Start by identifying where oil concentrates most heavily – typically the crown and hairline. Section off just these areas, leaving everything from ear level down completely loose. This targeted approach means you’re only dealing with problem areas rather than your entire head.
Use your fingers rather than a comb for sectioning. This creates softer, more natural-looking divisions that blend seamlessly with the hair you’re leaving down. Perfect precision actually makes the contrast between sections more obvious.
The pulled-back portion should include hair from temple to temple and extend back to just behind the crown. This captures the oiliest zone while maintaining enough loose hair to look balanced. Secure this section with a clear elastic placed where you want the style to sit.
Once secured, gently loosen the pulled-back section by tugging small pieces. This prevents the style from looking too tight or severe against your scalp. The slight messiness also helps disguise any visible oiliness in the secured portion.
Creating volume in the pulled-back portion
Volume becomes crucial when working with greasy roots. Before securing your half-up section, hold it straight up and backcomb gently at the base. This teasing creates lift that prevents oil from lying flat against your scalp.
Another technique involves twisting the section before securing. Gather your hair, twist it once or twice, then push slightly forward before pinning. This creates a subtle pouf that adds height and interest while lifting roots away from oil-prone areas.
For longer-lasting volume, spray the roots of your pulled-back section with dry texture spray before securing. Hold the product at least six inches away to avoid concentrated deposits. The powder in these sprays absorbs oil while adding grip for better height retention.
bobby pins inserted vertically at the base of your half-up section create invisible lift. Place them underneath the gathered hair, pushing up slightly as you insert. This foundation prevents the style from falling flat as the day progresses.
Leaving strategic pieces down to frame the face
Face-framing pieces serve multiple purposes in half-up styles. They soften the overall look while drawing attention away from any oiliness at your hairline. Select pieces from in front of your ears, keeping them about an inch wide.
These loose pieces work best with slight texture. If they’re not naturally wavy, create subtle bends with a flat iron. The movement prevents them from looking limp or greasy by association with your roots. Focus the waves from mid-length down.
Consider your face shape when deciding how much hair to leave down. Round faces benefit from longer pieces that create vertical lines. Square faces look softer with wispy, textured pieces. Oval faces can handle either option depending on personal preference.
Using clips and pins to secure greasy strands
The right securing method makes or breaks a half-up style on greasy hair. Traditional elastics can slip on oily strands, while the wrong clips might slide out entirely. Success comes from choosing accessories designed for grip.
Claw clips with rubberized teeth hold better than smooth plastic versions. Position the clip at a slight angle rather than straight horizontal for improved security. The angle also creates a more interesting visual line.
For a more delicate look, use multiple small bobby pins arranged in patterns. Create an “X” shape, a row, or scattered placement depending on your aesthetic. Pins with textured grips hold significantly better than smooth ones on oily hair.
Combining with waves or curls in the lower section
Contrast between textures makes half-up styles particularly striking. While your pulled-back section remains relatively smooth, adding waves or curls to loose hair creates beautiful dimension. This textural difference also minimizes focus on any oiliness up top.
Start curling from about ear level down, avoiding the roots entirely. This placement makes sense practically – you don’t want to add heat to already-oily roots – while creating the most flattering proportion. Use a 1.5-inch barrel for loose, modern waves.
Different curl techniques create varying effects:
Beach waves: Wrap hair around the curling iron, leaving ends out for an undone finish
Ribbon curls: Wrap flat sections around the barrel for uniform spirals
Bent waves: Use a flat iron to create S-shaped bends for editorial-style texture
Pin curls: Set lower sections in pin curls while doing your makeup, then release for vintage-inspired waves
The combination of a controlled top section with free-flowing waves below creates an effortlessly elegant look. This style works equally well for office meetings or dinner dates, making it incredibly versatile.
Dry shampoo becomes your finishing touch, but application timing matters. Spray it on the loose sections near your roots after completing the style. This prevents white residue from showing in the pulled-back portion while still reducing shine where hair frames your face.
These half-up options prove you don’t need to hide all your hair when dealing with oiliness. By working strategically with sections and textures, you create styles that look intentional rather than like desperate fixes. The variety within this category means you can adapt the basic concept to suit any occasion or outfit.
5 Must-Have Products for Greasy Hair Days
Having the right arsenal of products transforms greasy hair from a crisis into a manageable situation. These five essentials work together to absorb oil, add texture, and maintain your chosen style throughout the day.
Dry shampoo remains the holy grail product for oily hair, but choosing the right formula makes all the difference. Aerosol versions work fastest for all-over application, while powder formulas offer more targeted oil absorption. Apply at night before bed for best results – this gives the product time to absorb oils while you sleep.
Texturizing spray becomes invaluable when creating styles with grip. Unlike traditional hairsprays that can make oiliness more obvious, texture sprays add grit and hold without shine. Focus application on mid-lengths and ends where you need piece-y definition.
Bobby pins designed specifically for thick or slippery hair feature better grip mechanisms. Look for pins with crimped designs or rubberized coatings. Having various sizes allows you to secure different style elements effectively – longer pins for thick sections, tiny ones for detail work.
Clear dry wax or matte pomade helps control flyaways without adding grease. These products work especially well for sleek styles where you need to tame edges without contributing more shine. A tiny amount warmed between your palms goes a long way.
Silk scarves and decorative hair accessories serve double duty by adding style while concealing problem areas. Keep a selection in different colors and patterns to coordinate with various outfits. These accessories transform basic styles into polished looks instantly.
Frequently Asked Questions
Q: How many days can I go without washing my hair if I use these styles?
A: Most women can extend their wash cycle by 2-3 days using these styling techniques. Your specific timeline depends on your hair type, oil production, and lifestyle factors. Fine hair typically needs washing sooner than thick, coarse textures.
Q: Will using these styles frequently damage my hair?
A: These gentle styling methods won’t damage your hair when done correctly. Actually, reducing wash frequency can improve hair health by preserving natural oils. Avoid pulling too tightly or using excessive heat when creating these looks.
Q: Which style works best for very fine, straight hair that gets oily quickly?
A: The messy bun and strategic half-up styles work particularly well for fine hair. These options add volume while controlling oil. Braids can sometimes emphasize thinness, so focus on styles that create fullness and texture.
Q: Can I use these techniques if I have colored or chemically treated hair?
A: Yes, these styles work wonderfully on processed hair. Colored and chemically treated hair often has slightly more texture, which actually helps with grip and hold. Just be extra gentle to prevent breakage.
Q: What if my scalp gets itchy between washes?
A: Gentle scalp massage with your fingertips can relieve itchiness without disturbing your style. Some women find that peppermint or tea tree oil added to their styling products provides cooling relief. If itchiness persists, consider whether you need to adjust your washing frequency.
Q: Do these styles work for short hair too?
A: While some styles require length, many adapt well to shorter cuts. Half-up styles, small braids, and slicked-back looks work on hair as short as chin-length. Focus on accessories and strategic product placement for shorter styles.
Q: How do I prevent my hair from smelling oily between washes?
A: Dry shampoo often includes fragrance that helps neutralize odors. You can also lightly mist hair with a diluted essential oil spray, focusing on lengths rather than roots. Silk pillowcases help prevent additional oil transfer while sleeping.