Dutch braids have long been a favorite styling choice for women seeking both practicality and beauty in their hair arrangements. Adding flowers to these intricate braids creates a romantic and whimsical look that transforms an everyday hairstyle into something truly special. The combination brings together centuries-old braiding traditions with the timeless appeal of natural beauty, resulting in a versatile style that works for countless occasions.
This particular fusion has gained momentum as more women discover how accessible and customizable it can be. You don’t need to be a professional hairstylist to achieve stunning results – with some practice and the right approach, anyone can master this technique. The beauty lies in its flexibility: you can opt for delicate baby’s breath for a subtle effect, bold roses for drama, or colorful wildflowers for a bohemian vibe.
Ready to discover everything about creating your own floral Dutch braid masterpiece? The following sections will guide you through choosing the right flowers, mastering the braiding technique, and ensuring your style stays fresh throughout your event. Whether you’re planning for a special occasion or simply want to add some botanical charm to your everyday look, you’ll find all the tips and techniques you need right here.
- What Are Dutch Braids and How Do Floral Accents Transform Them?
- How to Choose the Perfect Flowers for Your Dutch Braid?
- Step-by-Step Guide to Creating Your Floral Dutch Braid
- Which Occasions Call for Dutch Braids with Flowers?
- How to Make Your Floral Dutch Braid Last All Day?
- Your Floral Crown Journey
- Frequently Asked Questions
What Are Dutch Braids and How Do Floral Accents Transform Them?
Dutch braids, often called reverse or inverted French braids, create a raised, three-dimensional effect that sits on top of your hair rather than blending into it. This technique involves crossing hair sections under rather than over, resulting in a braid that appears to pop out from your head. The raised nature of this style makes it particularly well-suited for incorporating decorative elements, especially flowers.
The basics of Dutch braiding technique
The fundamental difference between Dutch and French braiding lies in the direction you cross the hair sections. While French braids weave strands over each other, creating a flat appearance against the scalp, Dutch braids do the opposite. You’ll take the outer sections and pass them underneath the middle section, gradually adding more hair as you work down. This creates that signature raised effect that makes the braid appear fuller and more pronounced.
Starting with clean, slightly textured hair gives you the best foundation. Many stylists recommend using a texturizing spray or dry shampoo before beginning, as this provides grip and prevents sections from slipping. The key is maintaining consistent tension throughout the braiding process – not so tight that it causes discomfort, but firm enough to create clean, defined sections.
How flowers change the overall look
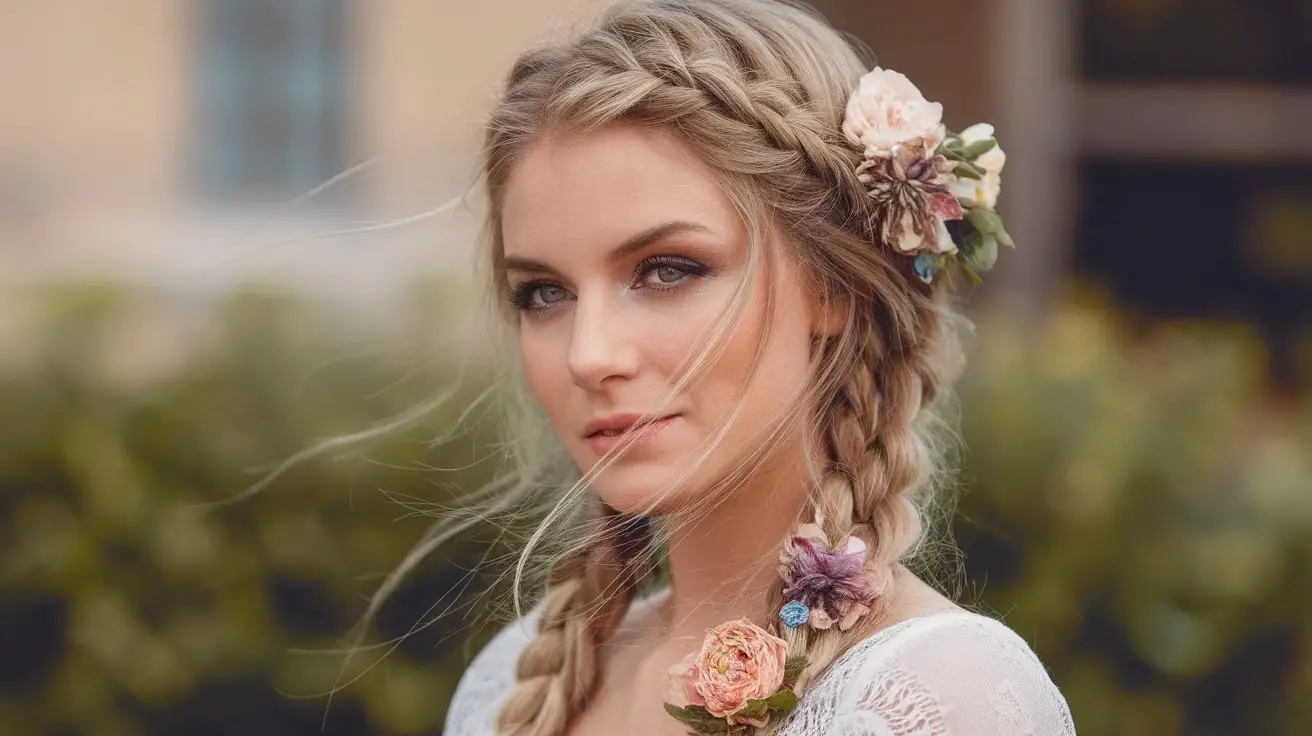
Introducing flowers into your Dutch braid transforms it from a practical hairstyle into an artistic expression. The raised structure of the braid creates natural pockets and curves where flowers can nestle comfortably, appearing as if they grew there naturally. Small blooms can be woven directly into the braid as you create it, while larger flowers work beautifully when placed strategically after completion.
The visual impact varies dramatically based on your flower choices. Delicate white flowers create an ethereal, fairy-tale appearance perfect for romantic occasions. Bright, bold blooms add energy and playfulness, ideal for festivals or summer gatherings. Even dried flowers or preserved options can create a vintage, nostalgic feel that photographs beautifully.
Different flower types that work best
Not all flowers are created equal when it comes to hair styling. Sturdy blooms with flexible stems work best for weaving directly into braids. Baby’s breath remains a popular choice due to its lightweight nature and ability to maintain freshness for hours. Small roses, particularly spray roses, offer elegance without overwhelming the braid structure.
Consider these flower characteristics when making your selection:
- Stem flexibility: Flowers with bendable stems integrate more easily into the braid structure
- Weight considerations: Heavy blooms can pull on your hair and cause discomfort over time
- Durability factor: Some flowers wilt quickly without water, while others remain fresh for hours
- Size proportion: Blooms should complement, not overpower, your braid thickness
Wildflowers like chamomile, lavender, and small daisies bring a natural, effortless charm. Tropical options such as small orchids or jasmine work wonderfully for destination events or beach settings. Even non-floral botanicals like eucalyptus leaves or ferns can add interesting texture and color variation.
When to wear this style
The versatility of floral Dutch braids means they suit numerous occasions beyond the obvious wedding or prom scenarios. Music festivals have popularized this look, with attendees using bright, bold flowers to complement their bohemian outfits. Garden parties, outdoor brunches, and picnics provide perfect settings for showcasing this nature-inspired style.
Professional photography sessions benefit from the dimensional quality of Dutch braids adorned with flowers. The raised braid creates interesting shadows and highlights, while flowers add pops of color and texture that photograph beautifully. Many women choose this style for maternity shoots, engagement photos, or family portraits in outdoor settings.
Even casual outings can be elevated with a simple Dutch braid featuring just a few small blooms. A sidewalk café lunch, farmers market visit, or afternoon in the park becomes more special when you’re wearing this charming hairstyle. The key lies in scaling the flower selection to match your activity – minimal for everyday wear, more elaborate for special events.
How to Choose the Perfect Flowers for Your Dutch Braid?
The debate between fresh and artificial flowers involves several practical factors beyond just aesthetics. Fresh flowers offer authentic beauty, natural fragrance, and that irreplaceable organic quality that photographs magnificently. They move naturally with your hair and provide subtle color variations that artificial options sometimes lack. However, they require careful timing, as most fresh blooms begin wilting after a few hours without water, especially in warm weather.
Artificial flowers have evolved tremendously, with high-quality silk and foam options nearly indistinguishable from real blooms in photographs. They eliminate concerns about wilting, allergies, or flowers falling apart during your event. You can prepare your hairstyle well in advance without worrying about flower freshness. Modern artificial flowers come in consistent colors, making it easier to match specific color schemes or themes.
Size and color coordination
Proportion plays a crucial role in creating a balanced, harmonious look. Your face shape, hair thickness, and the overall braid size should guide your flower selection. Women with delicate features often find that smaller blooms complement their appearance better, while those with stronger features can carry larger, bolder flowers beautifully.
Color theory applies directly to flower selection for your hair. Consider your skin undertone when choosing flower colors – warm undertones pair beautifully with peachy, yellow, or coral blooms, while cool undertones shine with pink, purple, or blue flowers. Your outfit colors matter too; flowers can either match, complement, or provide deliberate contrast depending on your desired effect.
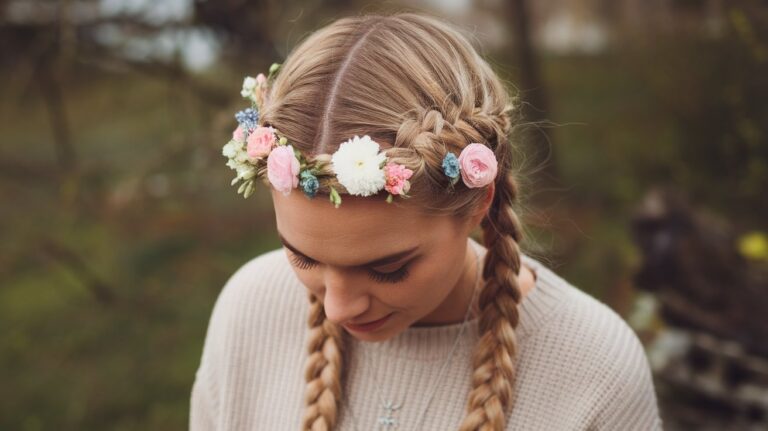
The number of flowers also impacts the overall aesthetic. A minimalist approach with just three or four blooms placed strategically creates understated elegance. Alternatively, creating a flower crown effect by incorporating blooms throughout the entire braid length makes a bold, romantic statement perfect for special occasions.
Seasonal flower options
Spring brings delicate options like cherry blossoms, tulips, and ranunculus that capture the season’s fresh awakening. These lighter blooms work wonderfully for Easter celebrations, spring weddings, or graduation ceremonies. Their soft colors and delicate petals create an innocent, youthful appearance.
Summer opens up possibilities for vibrant choices including sunflowers (in miniature form), zinnias, and marigolds. These hardy blooms withstand heat better than delicate spring flowers. Beach weddings and outdoor summer events call for tropical options like hibiscus or plumeria, which maintain their beauty despite humidity.
Autumn presents opportunities for richer tones with chrysanthemums, dahlias, and small preserved leaves. These deeper colors complement the season’s fashion trends and work beautifully for harvest celebrations or outdoor autumn weddings. Even berries and small fruits can add unexpected interest during this season.
Winter styling often incorporates evergreen sprigs, white roses, or preserved flowers in jewel tones. Small pine cones, silver-dusted leaves, or even tiny ornamental elements can create festive holiday looks. The key during colder months involves choosing elements that won’t be affected by temperature changes as you move between indoor and outdoor settings.
Flower placement strategies
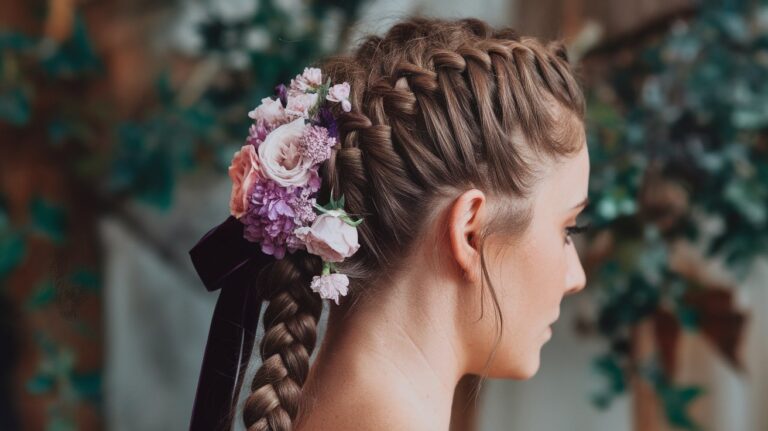
Strategic placement can completely change how your floral Dutch braid appears. Clustering flowers at the crown creates a tiara effect, drawing attention upward and elongating your silhouette. This placement works particularly well for formal events where you want to appear more statuesque. Alternatively, concentrating blooms at the nape creates a romantic, cascading effect that photographs beautifully from behind.
Evenly spacing flowers throughout the braid length creates rhythm and balance. This approach works best with smaller, uniform blooms that won’t compete for attention. The consistent pattern creates a cohesive look that appears intentional rather than haphazard. Consider using odd numbers of flowers (three, five, or seven) as this tends to appear more natural and visually pleasing than even numbers.
Some women prefer asymmetrical placement, perhaps grouping flowers on one side or creating a gradient effect from many flowers to few. This modern approach adds visual interest and can help balance facial features or complement asymmetrical clothing designs.
Step-by-Step Guide to Creating Your Floral Dutch Braid
Creating a floral Dutch braid requires patience and preparation, but the results justify the effort. Having all your materials ready before starting prevents frustration mid-styling.
Preparing your hair and flowers
Begin with day-old hair rather than freshly washed locks, as slight natural oils provide better grip for braiding. If your hair is too clean and slippery, apply texturizing spray from mid-length to ends, or use dry shampoo at the roots. Brush through thoroughly to remove any tangles, then create the section where your braid will begin – this might be at the crown for a single braid or at the temple for a side braid.
Your flowers need preparation too. Fresh flowers should have stems trimmed to about two inches, with excess leaves removed. Soak fresh blooms in cool water for at least an hour before use. Some stylists recommend spraying fresh flowers with a floral sealant to help them last longer. For artificial flowers, separate them into individual blooms or small clusters, and have small bobby pins or hairpins ready for securing them.
Wire can be wrapped around fresh flower stems to make them more pliable and easier to work into the braid. Floral tape in a color matching your hair can help camouflage any visible mechanics. Having these supplies within arm’s reach prevents awkward pauses during the braiding process.
Basic Dutch braiding technique
Start by dividing your initial section into three equal parts. Unlike a regular braid where you cross sections over, you’ll pass them underneath. Take the right section and pass it under the middle section – it now becomes your new middle. Then take the left section and pass it under this new middle section.
As you continue, add small sections of hair from the sides to each outer strand before crossing it under. This incorporation of additional hair is what creates the Dutch braid’s characteristic look. Keep your hands close to your head and maintain consistent tension. If the braid feels loose, you can gently tug on the edges of each section after completing a few crosses to tighten it.
The angle at which you hold your hands affects the braid’s direction. For a straight-back braid, keep your hands parallel to the ground. For a diagonal or side-swept braid, angle your hands accordingly. Many women find it helpful to practice the motion without flowers first, getting comfortable with the technique before adding the floral element.
Incorporating flowers during braiding
You have two main options for adding flowers: weaving them in as you braid or adding them after completion. Weaving during braiding creates the most secure and natural-looking result but requires more skill. As you add new sections of hair from the sides, include a flower stem with the hair. The stem becomes part of the braid structure, held firmly by the surrounding hair.
For this technique, position the flower so its bloom faces outward while the stem gets incorporated into the braid. Smaller flowers work best for this method, as large blooms can disrupt the braiding rhythm. Space your flowers thoughtfully – adding one every three or four crosses usually creates a balanced look without overwhelming the braid structure.
Practice helps develop the coordination needed to hold flowers, hair sections, and maintain tension simultaneously. Don’t get discouraged if your first attempts feel awkward. Most women find that after three or four practice sessions, the movement becomes much more natural.
Securing everything in place
Once you reach the end of your braid, secure it with a clear elastic or one matching your hair color. If you’ve woven flowers throughout, check that all stems are tucked securely into the braid structure. Any loose ends can be secured with bobby pins inserted at an angle for maximum hold.
Flowers added after braiding need individual securing. Slide bobby pins through the flower stem in an X pattern, anchoring them to the braid. This crossed-pin technique prevents flowers from shifting or falling out during wear. For extra security, especially for dancing or active events, a light misting of hairspray can help, though be careful not to spray directly on fresh flowers as this can cause wilting.
Finishing touches
The “pancaking” technique can enhance your braid’s appearance by making it appear fuller and more dimensional. Gently pull apart each section of the braid, working from bottom to top. This loosening creates a softer, more romantic look and provides more space for flowers to nestle naturally.
Final adjustments might include:
- Face-framing wisps: Pull out a few delicate strands around your face for softness
- Hidden pins: Tuck any visible bobby pins under the braid or behind flowers
- Spray shield: Hold a tissue over fresh flowers while applying hairspray to the braid
- Petal check: Ensure all flower faces are positioned optimally for photos
A hand mirror helps you check the back view, ensuring everything looks polished from all angles. If any flowers seem unstable, now is the time for final reinforcement. Some women like to add a decorative hair accessory at the braid’s end, such as a small ribbon or vintage barrette, to complete the look.
Which Occasions Call for Dutch Braids with Flowers?
Wedding and bridal events
Bridal parties have fully adopted floral Dutch braids as a stunning alternative to traditional updos. Brides choosing outdoor or garden venues find this style particularly fitting, as it echoes the natural surroundings. The romantic aesthetic photographs beautifully, creating timeless images that won’t look dated years later. Whether you’re the bride, bridesmaid, or wedding guest, this hairstyle offers elegance without appearing overly formal.
Bridesmaid hairstyles can coordinate through matching flower types while allowing individual braid variations. Some might wear single Dutch braids, others might opt for double braids, and some could choose side-swept versions. This coordinated yet unique approach creates visual cohesion in group photos without looking too uniform or rigid.
Festival and outdoor celebrations
Music festivals have become synonymous with creative hair styling, and floral Dutch braids fit perfectly into this expressive atmosphere. The practical aspect of keeping hair controlled during long outdoor days combines with the artistic opportunity for self-expression. Festival-goers often choose bright, bold flowers that complement their bohemian outfits or match their group’s color theme.
The style withstands outdoor conditions better than many alternatives. Wind won’t destroy a well-secured Dutch braid the way it might ruin loose curls. The flowers add personality without requiring constant maintenance or touch-ups throughout the day.
Outdoor birthday parties, especially milestone celebrations held in gardens or parks, provide another perfect setting. The natural backdrop enhances the floral elements, while the special occasion justifies the extra styling effort. Children’s birthday parties where you’re not the center of attention but still want to look put-together also suit this style well – it’s special without being overly formal.
Photography sessions
Professional photographers love working with dimensional hairstyles that create visual interest. Dutch braids with flowers offer multiple focal points – the intricate braid pattern, the flower colors and textures, and the overall silhouette. This variety allows for diverse shot compositions, from detailed close-ups highlighting individual blooms to full-length portraits showcasing the complete look.
Maternity photography sessions particularly benefit from this romantic styling choice. The feminine, nurturing aesthetic of flowers combined with the traditional braid creates images that celebrate motherhood beautifully. Many women choose flowers in soft pastels or whites for these sessions, though bold colors can create equally stunning results.
Senior portraits and graduation photos represent another opportunity for this style. The youthful yet sophisticated appearance bridges the gap between childhood and adulthood perfectly. Flowers can match school colors or simply reflect the graduate’s personality and style preferences.
Everyday styling options
You don’t need a special event to enjoy this hairstyle. Running errands becomes more enjoyable when you feel put-together and confident. A simple Dutch braid with just two or three small flowers takes only minutes longer than a regular braid but elevates your entire appearance.
Date nights, whether casual coffee meetings or romantic dinners, become more memorable with this thoughtful styling choice. The effort shows without appearing overdone. Your partner will appreciate the special touch, and you’ll feel more confident throughout the evening.
Weekend activities like farmers market visits, brunch with friends, or afternoon tea become Instagram-worthy moments. The hairstyle adds something special to ordinary activities, making regular weekends feel more like mini celebrations. You might inspire others to experiment with their own hair styling, creating a positive ripple effect of creativity and self-expression.
How to Make Your Floral Dutch Braid Last All Day?
The longevity of your floral Dutch braid depends largely on preparation and maintenance strategies implemented before, during, and after styling.
Pre-styling hair preparation
Your hair’s condition before braiding significantly impacts how long the style will last. Starting with the right texture prevents slipping and loosening throughout the day. If your hair is naturally silky and smooth, create some grip using texturizing products or sea salt spray. These products add just enough friction to keep the braid sections from sliding apart.
Second-day hair often works better than freshly washed locks. The natural oils present after a day provide hold without greasiness. If you must start with clean hair, apply a lightweight mousse or volumizing spray from roots to ends before blow-drying. This creates the foundation for a longer-lasting style.
Heat protection becomes important if you plan to use any hot tools for touch-ups later. Even if you’re not curling the ends or using a straightener initially, having that protection already in place gives you options throughout the day.
Product recommendations
The right products make the difference between a braid that lasts two hours versus one that survives an entire event. A workable hairspray applied in light layers throughout the braiding process provides hold without stiffness. Look for formulas that offer humidity resistance if you’ll be outdoors or in varying temperatures.
Setting powders or texture powders applied at the roots before braiding create volume and grip that prevent the style from falling flat. These products are particularly helpful for fine hair that tends to slip out of styles easily. Apply sparingly – too much can make hair feel gritty or look dull.
Bobby pins and hair elastics quality matters more than you might think. Invest in pins that match your hair color and have a good grip coating. Cheap pins often slide out or break, potentially ruining your style mid-event. Clear elastics work well for securing the braid end without drawing attention away from the flowers.
Weather-proofing techniques
Different weather conditions require different protective strategies. High humidity can cause fresh flowers to wilt quickly and make hair frizzy. Combat this by using anti-humidity spray on your hair (avoiding the flowers) and choosing hardy flower varieties. Roses, carnations, and chrysanthemums generally withstand humidity better than delicate blooms.
Wind presents challenges for both the braid structure and flower placement. Secure flowers with extra pins, crossing them for maximum hold. Consider using slightly less pancaking technique on windy days – a tighter braid withstands wind better than a very loose, full one. A final mist of strong-hold hairspray creates a protective shield against moderate wind.
Rain requires waterproof considerations. If there’s any chance of precipitation, opt for artificial flowers or choose fresh varieties that won’t immediately droop when damp. A small travel umbrella specifically for protecting your hairstyle might seem excessive, but it’s worthwhile for important events. Some women apply a light coat of hairspray mixed with water-repelling product for extra protection.
Quick fixes and touch-ups
Despite best efforts, you might need minor adjustments throughout your event. Carry a small emergency kit containing extra bobby pins, a travel-size hairspray, and one or two replacement flowers. This fits easily in most handbags and provides peace of mind.
Flyaways and frizz can appear as the day progresses. Rather than attempting to re-braid, smooth problem areas with a tiny amount of hair oil or serum on your fingertips. Pat gently rather than rubbing to avoid disrupting the overall style. A clean mascara wand sprayed with hairspray works wonderfully for taming small rebellious sections.
If a flower begins wilting or falls out, having a backup allows for quick replacement. Remove the damaged flower carefully to avoid pulling the surrounding braid. Insert the replacement at the same angle as the original, using the existing pin holes if possible. This maintains the style’s integrity without starting over.
Sometimes the braid itself might begin loosening, especially at the crown area where there’s the most movement. Gently push bobby pins into the loose sections, sliding them under the braid so they remain invisible. This reinforcement takes seconds but can save your style for several more hours.
For events lasting all day into evening, you might want to transition the look. Removing a few flowers creates a more subtle appearance for dinner after a daytime garden party. Alternatively, adding small battery-powered fairy lights (yes, they make them for hair now) transforms a day wedding look into something magical for the evening reception.
Your Floral Crown Journey
Creating Dutch braids adorned with flowers represents more than just a hairstyle choice – it’s an opportunity for self-expression and creativity. This versatile technique adapts to your personal style, whether you prefer minimalist elegance or abundant botanical beauty. The combination of traditional braiding methods with natural floral elements creates a look that feels both timeless and contemporary.
With the techniques and tips covered here, you’re equipped to design your perfect floral Dutch braid for any occasion. Practice makes the process smoother, and soon you’ll develop your own shortcuts and preferences. The joy comes not just from the final result, but from the creative process itself – selecting flowers, perfecting your technique, and seeing your vision come to life in a beautiful, wearable form.
Frequently Asked Questions
Q: How long before my event should I cut fresh flowers for my Dutch braid?
A: Cut fresh flowers the morning of your event and immediately place stems in water. For optimal freshness, prepare them 2-3 hours before styling, giving them time to hydrate properly while staying fresh.
Q: Can I sleep in a Dutch braid with flowers?
A: Sleeping in this style isn’t recommended with fresh flowers as they’ll likely get crushed and wilted. With artificial flowers, you could theoretically sleep in the braid, but you’ll probably need significant touch-ups in the morning.
Q: What’s the minimum hair length needed for a Dutch braid with flowers?
A: You’ll need at least shoulder-length hair for a successful Dutch braid. Shorter hair can work with modifications like multiple smaller braids or incorporating hair extensions for added length and volume.
Q: How do I remove flowers from my Dutch braid without damaging my hair?
A: Start from the bottom and work upward, carefully removing pins first, then gently sliding flowers out. If stems are tangled, use a wide-tooth comb to carefully separate hair sections rather than pulling forcefully.
Q: Will hairspray damage fresh flowers in my braid?
A: Direct hairspray contact can cause fresh flowers to wilt or discolor. Shield flowers with your hand or tissue while spraying, or apply hairspray before adding flowers for best results.
Q: Which flowers should I avoid for hair styling?
A: Avoid flowers with heavy pollen (like lilies) that might stain, those with strong fragrances that could cause headaches, and extremely delicate blooms that wilt within minutes of being cut from water.
Q: Can I reuse artificial flowers from my Dutch braid?
A: Yes, high-quality artificial flowers can be reused multiple times. Gently reshape petals after removal, store them in a cool, dry place, and they’ll be ready for your next styling session.
Q: How much should I expect to pay if I have this style done professionally?
A: Professional styling for Dutch braids with flowers typically ranges from $75 to $200, depending on your location, the complexity of the design, and whether fresh or artificial flowers are used.