Medium haircuts sit in that perfect sweet spot where versatility meets practicality. They offer enough length to pull back into a ponytail for workouts or messy mornings, yet they’re short enough to dry quickly and style without spending hours in front of the mirror. This goldilocks length has become increasingly popular among women who want fresh looks without committing to dramatic changes or high-maintenance routines.
The beauty of medium-length cuts lies in their adaptability. Whether your hair is straight, wavy, or curly, there’s a medium haircut that will work with your natural texture rather than against it. These cuts typically fall anywhere from just below the chin to shoulder-grazing lengths, giving you plenty of options to find what suits your lifestyle and personal style. They’re also forgiving when it comes to growing out, meaning you won’t need constant trims to maintain their shape.
We’ll explore five stunning medium haircut ideas that are both current and timeless. From sleek and sophisticated options to textured and playful styles, each cut offers its own personality while remaining manageable for everyday wear. Get ready to discover which medium haircut could become your new signature look.
- What Makes Medium Haircuts the Perfect Choice?
- The Classic Lob: Your Gateway to Effortless Style
- The Textured Shag: Adding Movement and Personality
- The Blunt Bob: Making a Statement with Clean Lines
- The Layered Medium Cut: Creating Volume and Dimension
- Your Perfect Medium Cut Awaits
- Frequently Asked Questions
What Makes Medium Haircuts the Perfect Choice?
Medium haircuts have gained momentum for practical reasons that go beyond aesthetics. They solve many common hair frustrations while offering enough variety to keep things interesting throughout different seasons and life phases.
The sweet spot between short and long
Finding the right hair length often feels like choosing between two extremes. Long hair requires significant maintenance time and products, while very short cuts demand frequent salon visits to maintain their shape. Medium cuts eliminate these challenges by offering manageable length that doesn’t require daily heat styling or monthly trims. You get the best aspects of both worlds without the downsides that come with extreme lengths.
This length also works wonderfully for women experiencing hair changes. Whether you’re dealing with postpartum hair loss, texture changes from hormonal shifts, or simply wanting healthier hair, medium cuts remove damaged ends while preserving enough length to feel feminine and versatile.
Styling flexibility and time management
Your morning routine becomes significantly simpler with a medium cut. Air-drying becomes a legitimate option that actually looks intentional rather than messy. On days when you want polished results, blow-drying takes half the time compared to longer lengths. This efficiency matters when you’re juggling work deadlines, school drop-offs, or early morning meetings.
The styling possibilities multiply at this length too. Sleek and straight works for professional settings, while beachy waves suit weekend brunches. You can create updos that actually stay put, unlike shorter cuts that lack sufficient length for secure pinning. Even simple accessories like headbands and clips work better with medium lengths, giving you instant style changes without additional effort.
Professional yet playful balance
Medium haircuts strike an ideal balance for women navigating different aspects of their lives. They look polished enough for boardroom presentations yet relaxed enough for playground duty. This versatility means you won’t feel overdressed at casual gatherings or underdone at formal events. The length provides enough sophistication for professional environments while allowing personality to shine through with different styling choices.
Works for different hair textures
Hair texture often dictates what lengths work best, but medium cuts prove remarkably universal. Fine hair gains body and movement without the weight that pulls down longer styles. Thick hair becomes more manageable when some length is removed, reducing bulk while maintaining enough weight to prevent poofiness. Curly textures find their sweet spot here, with enough length to show curl pattern without becoming overwhelming.
Natural hair particularly benefits from medium lengths. The weight helps define curl patterns while reducing shrinkage frustration. Women transitioning from relaxed to natural hair often find medium cuts perfect for managing two different textures simultaneously. The length provides styling options that work with both textures during the growing-out phase.
Seasonal adaptability
Weather changes affect how we wear our hair, and medium cuts adapt beautifully to seasonal shifts. Summer humidity becomes less problematic when there’s less hair to frizz. You can still pull hair back during hot days, unlike pixie cuts that leave you with limited cooling options. Winter static affects medium hair less dramatically than longer lengths, and hats don’t completely destroy your style since there’s less hair to flatten or tangle.
The seasonal color changes many women enjoy also look fantastic with medium cuts. Highlights and lowlights show dimension better at this length than on very short or very long hair. Balayage techniques create beautiful movement, while solid colors appear rich and healthy.
The Classic Lob: Your Gateway to Effortless Style
The long bob, affectionately known as the lob, revolutionized medium haircuts by proving that sophistication doesn’t require complexity. This cut typically hits between the chin and collarbone, creating a frame that flatters nearly every face shape while requiring minimal daily effort.
What defines a perfect lob
A well-executed lob maintains consistent density from roots to ends, avoiding the triangular shape that can plague poorly cut bobs. The length usually grazes the collarbones or sits just above them, though personal preference and neck length influence the exact placement. The key lies in the subtle graduation, where the back sits slightly shorter than the front, creating gentle movement without dramatic angles.
Weight distribution matters enormously in lob construction. Too much weight at the bottom creates an unflattering bell shape, while removing too much weight results in stringy ends. The perfect balance allows hair to move naturally while maintaining fullness throughout. Your stylist should consider your hair’s natural fall and growth patterns, ensuring the cut works with your hair’s tendencies rather than fighting them constantly.
The baseline can be completely blunt for a modern edge or softly textured for a lived-in feel. Neither approach is inherently better; the choice depends on your hair texture and maintenance preferences. Blunt ends create sleekness and the illusion of thickness, while textured ends offer movement and forgiveness between cuts.
How to customize the lob for your face
Round faces benefit from lobs that hit just below the jawline, creating vertical lines that elongate. Adding subtle layers around the face prevents the cut from adding width. Keep the overall silhouette sleek rather than voluminous at the sides.
Square faces soften with lobs featuring gentle layers that start around the cheekbones. The length should fall past the jawline to avoid emphasizing angular features. Soft waves or curves add femininity to strong bone structure. Avoid severe, geometric lines that mirror facial angles.
Heart-shaped faces look stunning with lobs that add fullness around the jawline. The length should hit at or slightly below the chin to balance a wider forehead. Side-swept bangs or face-framing pieces complement this combination beautifully. Volume at the ends creates proportion with the narrower chin area.
Oval faces can experiment with virtually any lob variation. This face shape allows for both blunt and layered approaches, with length ranging from chin to collarbone. The versatility means you can choose based on hair texture and lifestyle rather than facial structure limitations.
Styling techniques for different occasions
Daily styling for a lob can be remarkably simple. Apply a lightweight smoothing cream to damp hair, then blow-dry using a round brush for subtle bend at the ends. This creates polish without excessive effort. For second-day hair, a flat iron touched just to the ends refreshes the shape without complete restyling.
Special occasions call for more intentional styling. Create Hollywood waves by wrapping sections around a large barrel curling iron, all going in the same direction. Let curls cool completely before gently brushing through with a paddle brush. This technique produces glamorous waves that photograph beautifully.
Quick texture for casual days comes from scrunching sea salt spray into damp hair and either air-drying or diffusing. This method works particularly well for naturally wavy hair but can add interesting texture to straight hair too. The result looks effortlessly undone while still intentional.
Professional settings benefit from sleek, straight styling. Use a heat protectant before blow-drying hair completely straight, then run a flat iron through for extra smoothness. Finish with a light shine spray for glossy, healthy-looking results. This polished approach works for interviews, presentations, or any situation requiring extra sophistication.
Maintenance schedule for the ideal lob
Keeping your lob looking fresh requires regular attention but not excessive salon visits. Most women find six to eight-week trim intervals maintain the shape without drastic length changes. This schedule prevents the dreaded grow-out phase where the cut loses its intentional shape and becomes simply “medium-length hair.”
Between professional cuts, certain practices maintain the lob’s appeal:
Weekly Treatments: Deep conditioning masks prevent dryness that makes ends look stringy
Regular Dusting: Learning to trim just the very ends at home extends time between salon visits
Proper Drying: Always dry roots first to maintain volume and prevent flat, shapeless results
Night Protection: Silk pillowcases or loose braids prevent tangles that damage the cut’s line
Color-treated lobs need extra consideration. The length shows color grow-out more obviously than very short or long styles. Root touch-ups every four to six weeks keep the overall look polished. Consider shadow roots or balayage techniques that grow out more gracefully if frequent salon visits aren’t realistic.
Common mistakes to avoid
The biggest lob mistake involves cutting it yourself or letting inexperienced stylists attempt it. The precision required for a good lob means even small errors become glaringly obvious. This cut’s simplicity is deceptive – it requires significant skill to execute properly.
Over-layering ruins the lob’s essential structure. While some layering adds movement, too many layers create a shaggy, undefined shape that defeats the purpose. The lob should maintain substantial weight and density to achieve its characteristic swing and polish.
Neglecting regular trims transforms a chic lob into an awkward, shapeless style. Once the careful proportions grow out, you lose the intentional appearance that makes this cut special. Setting calendar reminders for trim appointments helps maintain consistency.
Using wrong products can sabotage even the best cut. Heavy oils and creams weigh down the hair, eliminating movement. Conversely, too much texturizing spray creates crunchiness that looks dated. Find lightweight products that enhance rather than mask your hair’s natural qualities.
The Textured Shag: Adding Movement and Personality
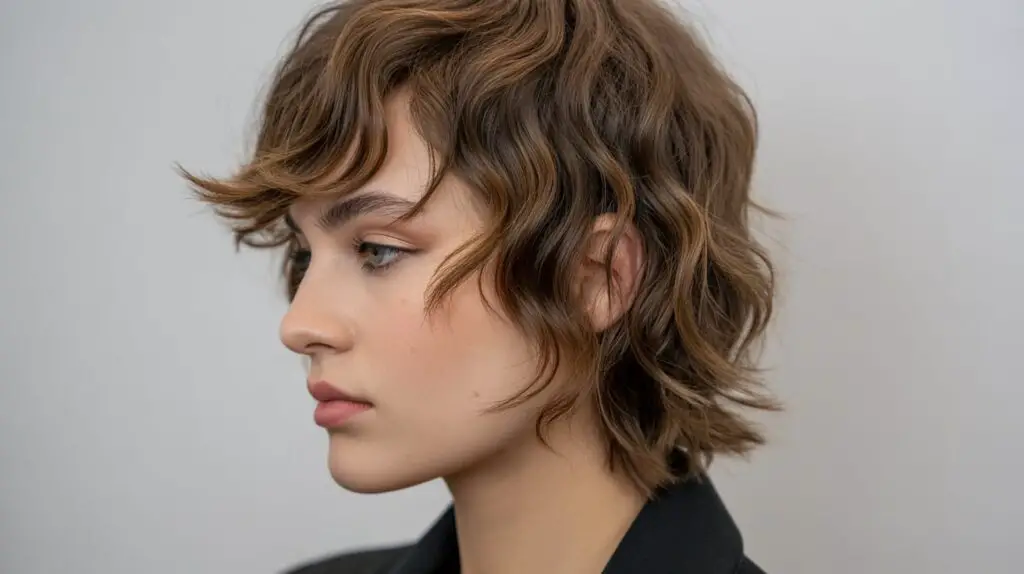
The modern shag brings controlled chaos to medium-length hair, creating an effortlessly cool aesthetic that works across age groups and style preferences. This updated version maintains the spirit of its 1970s predecessor while incorporating contemporary cutting techniques that prevent the infamous “mushroom effect.”
Understanding the modern shag structure
Today’s shag relies on strategic disconnection throughout the cut, creating pieces that move independently. Unlike traditional layering where everything blends seamlessly, shag layers intentionally separate to produce texture and movement. The crown area features shorter layers that add height without creating a bubble effect, while longer pieces through the middle and bottom maintain overall length.
The perimeter stays deliberately choppy rather than clean, giving that lived-in quality that defines current hair trends. This intentional imperfection means you won’t panic if pieces dry differently each day – variation is part of the design. The cut should look good whether you style it meticulously or let it air-dry naturally.
Texture cutting techniques matter more in shags than perhaps any other cut. Point cutting, slide cutting, and razor work all contribute to the final result. Each technique removes weight differently, creating various effects throughout the hair. Your stylist might use multiple approaches in one cut, tailoring the technique to your specific hair type and desired outcome.
Face-framing happens organically with a shag through the natural layer placement. Rather than distinct face-framing pieces, the graduated layers create soft framing that enhances without looking forced. This subtlety prevents the dated appearance that sometimes plagues heavily face-framed cuts.
Who benefits most from this cut
Women with natural wave or curl find shags particularly flattering. The cut works with natural texture patterns, enhancing what already exists rather than requiring daily manipulation. Each layer springs into its natural formation, creating effortless volume and movement. The built-in texture means minimal styling for maximum impact.
Fine hair transforms with a well-cut shag. The layers create an illusion of density by adding dimension throughout. Rather than lying flat against the head, each section has its own movement and body. The choppy ends prevent that see-through quality that frustrates women with thinner hair.
Thick hair becomes more manageable through the strategic weight removal in shag cutting. Rather than uniform thinning that can create frizz, the shag removes bulk in specific areas while maintaining weight where needed for control. This targeted approach prevents the pyramid shape thick hair often creates at medium lengths.
Products that enhance texture
Product selection can make or break a textured shag. The goal involves enhancing separation and movement without creating stiffness or weighing down the carefully crafted layers.
Texturizing sprays applied to damp hair create grit that helps pieces separate and hold their position. Spray from underneath sections rather than over the top to avoid flatness. Focus application on mid-lengths and ends where you want maximum texture and movement.
Lightweight mousses provide volume at the roots without the crunchiness associated with older formulations. Modern mousses offer flexible hold that moves naturally throughout the day. Work through damp hair from roots to ends, scrunching to encourage natural texture formation.
Dry shampoo serves double duty in shag maintenance. Beyond refreshing between washes, it adds grip and volume that enhances the cut’s inherent texture. Spray at roots and through the crown area where shorter layers benefit from extra lift. The added texture helps pieces stay separated rather than clumping together.
Sea salt sprays create beachy texture that complements the shag’s casual vibe. However, use sparingly as too much salt can dry hair excessively. Focus on areas where you want extra piece-y definition rather than coating all the hair.
Quick styling methods for busy mornings
The shag’s beauty lies in its versatility – it can look intentionally styled or perfectly undone with minimal effort. These techniques take minutes rather than hours.
The scrunch-and-go method works brilliantly for natural texture. Apply a curl-enhancing cream to soaking wet hair, squeeze out excess water with a microfiber towel, then scrunch sections while they air-dry. This technique takes literally two minutes of active styling time.
For straighter hair textures, the twist-and-pin method creates effortless waves. While hair is slightly damp, twist small sections and pin them to your head. Leave pinned while you complete your morning routine, then release for instant texture. No heat tools required.
The diffuser method speeds up air-drying while maintaining texture. Set your dryer to medium heat and low speed, then cup sections in the diffuser without disturbing the natural formation. This prevents frizz while encouraging each layer to find its place.
Refreshing day-two or day-three hair takes seconds with the right approach. Dampen pieces that have lost their shape with a spray bottle, scrunch to reactivate product, then either air-dry or hit quickly with a diffuser. This targeted refresh prevents over-washing while maintaining style.
Variations for different hair types
Straight hair shags require more dramatic layering to achieve the characteristic texture. The layers need enough variation to create movement even without natural wave. Razoring becomes particularly important here, creating the wispy ends that give straight hair shags their appeal. Consider adding subtle highlights to emphasize the layers further.
Wavy hair provides the ideal canvas for shag cutting. The natural movement means less dramatic layering still achieves excellent results. Focus on enhancing the existing wave pattern rather than creating entirely new texture. The cut should work with your specific wave type, whether loose S-waves or tighter spirals.
Curly shags need careful consideration of curl spring and shrinkage. Cutting curly hair for a shag requires expertise in how much each curl type bounces up when dry. The layers must account for this shrinkage to avoid unexpected shortness in certain areas. Dry cutting often works better for curly shags, allowing the stylist to see exactly how each curl will sit.
Coily and kinky textures can rock stunning shags with the right approach. The key involves maintaining enough weight to show the texture’s beauty while removing bulk strategically. These shags often feature less dramatic layering but more focus on shape and silhouette. The result celebrates natural texture while providing contemporary style.
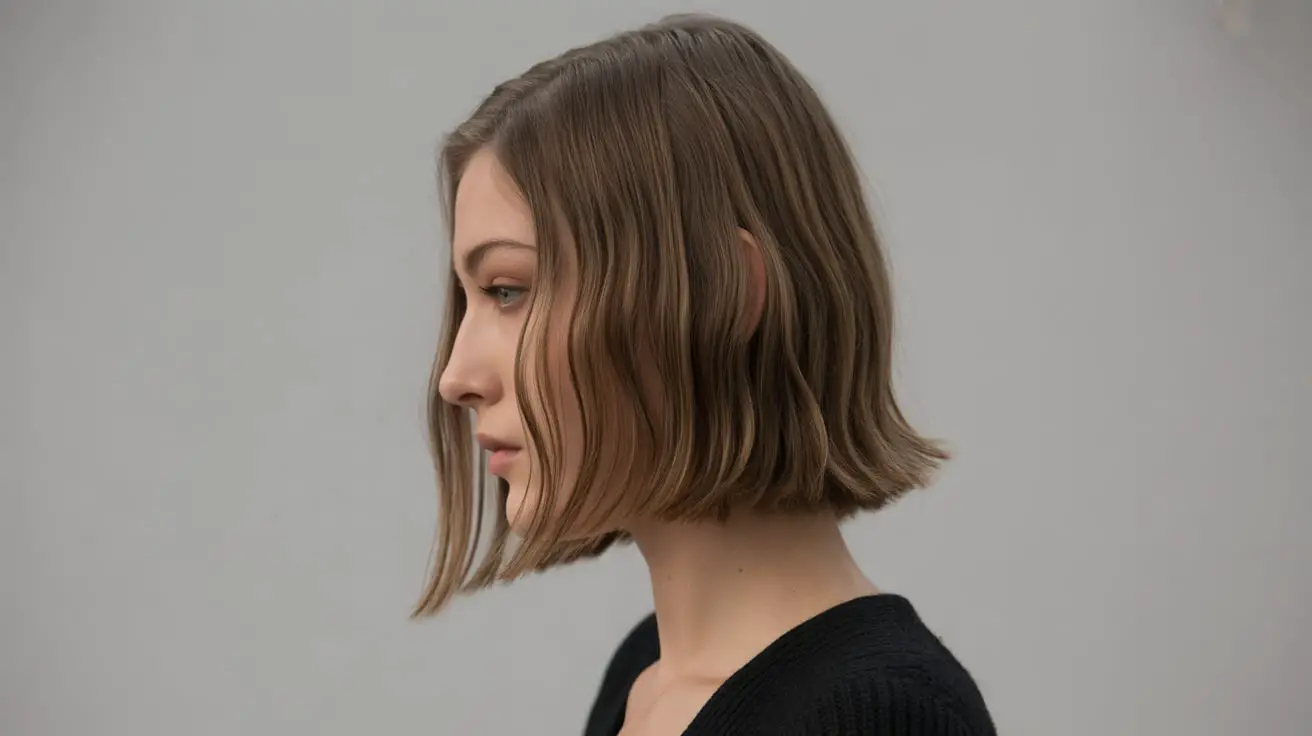
The Blunt Bob: Making a Statement with Clean Lines
The blunt bob represents minimalism at its finest – a cut where precision and simplicity create maximum impact. This geometric style sits typically between the chin and shoulders, featuring a sharp, even baseline that commands attention through its very starkness.
Why precision matters in this cut
Every millimeter counts in a blunt bob. The absence of layers or texture means any unevenness becomes immediately visible. This cut demands a skilled hand and keen eye, as there’s nowhere to hide imperfections. The straight line must remain consistent even as the head curves, requiring technical expertise that goes beyond basic cutting skills.
The angle of the cut affects the entire silhouette. A perfectly horizontal line creates one effect, while a subtle forward or backward angle produces entirely different results. Your stylist should evaluate your posture and how you naturally hold your head, ensuring the line appears straight in your normal stance rather than only when positioned perfectly in the salon chair.
Hair density plays a crucial role in achieving the ideal blunt bob. Thick hair might need internal weight removal to prevent a triangular shape, though this must happen invisibly without disrupting the clean perimeter. Fine hair benefits from the blunt cut’s ability to create an illusion of thickness, with every strand contributing to the solid line.
Achieving the glass hair effect
Glass hair – that ultra-smooth, reflective finish – pairs perfectly with blunt bobs. The combination of precise cutting and meticulous styling creates an almost liquid appearance that catches light beautifully.
Preparation starts in the shower with clarifying treatments that remove all product buildup. Clean hair accepts smoothing products better and reflects more light. Follow with a smoothing shampoo and conditioner specifically formulated for sleek styles. These products typically contain ingredients that seal the hair cuticle, creating the smooth surface necessary for glass hair.
The blow-dry process determines success or failure. Section hair horizontally, starting at the nape. Use a paddle brush or round brush, maintaining tension while directing airflow down the hair shaft. This technique smooths the cuticle in one direction, maximizing shine. Keep the dryer moving to prevent heat damage that would create frizz or dullness.
Flat iron work provides the final polish. Set the iron to the appropriate temperature for your hair type – too hot causes damage, too cool won’t achieve the desired smoothness. Pass through each section once or twice maximum, maintaining steady movement to prevent creases. The plates should glide smoothly without snagging or pulling.
Tools for maintaining sharp edges
Investing in quality tools makes home maintenance significantly easier. The right equipment helps preserve the cut’s precision between salon appointments.
Professional-grade flat irons with ceramic or titanium plates distribute heat evenly, preventing hot spots that could create unwanted texture. Look for irons with rounded edges that won’t create creases at the hair ends. Temperature control settings allow customization for your specific hair type and condition.
High-quality hair brushes make daily styling more effective. These tools should glide through hair without creating static or breaking strands:
Boar Bristle Brushes: Distribute natural oils while smoothing
Paddle Brushes: Create tension during blow-drying for sleek results
Round Brushes: Add subtle bend or flip to the ends
Detangling Brushes: Prevent breakage that could disrupt the clean line
Sharp hair-cutting scissors become essential if you plan to maintain the perimeter yourself between professional cuts. Never use regular scissors, which can create split ends and uneven cuts. Even with proper tools, limit home maintenance to removing obvious split ends rather than attempting to reshape the entire cut.
A quality hair dryer with multiple heat and speed settings provides styling control. Cool shot buttons help set the style and add shine. Ionic technology reduces frizz and speeds drying time, preserving hair health while achieving desired results.
Color combinations that enhance the look
Solid, single-process colors showcase the blunt bob’s geometric nature beautifully. Rich, uniform tones emphasize the cut’s precision while creating that expensive, salon-fresh appearance. Deep brunettes, jet blacks, and platinum blondes particularly complement the stark lines.
Subtle dimensions can add interest without disrupting the clean aesthetic. Babylights or barely-there highlights create movement while maintaining overall uniformity. These techniques add depth without creating obvious stripes or chunks that would compete with the cut’s simplicity.
Bold fashion colors make stunning statements with blunt bobs. The precise shape provides an ideal canvas for vivid hues like cobalt blue, cherry red, or lavender. The contrast between the strict geometry and playful color creates intriguing visual tension.
Money piece highlights – those face-framing streaks of lighter color – modernize the blunt bob without sacrificing its essential structure. These strategic highlights brighten the face while maintaining the cut’s overall sophistication. Keep the contrast subtle for professional environments or go bold for more dramatic effect.
Growing out gracefully
The blunt bob’s defined shape means growing it out requires strategy. Without planning, you’ll experience an awkward phase where the cut loses its intentional appearance but hasn’t yet reached a new, flattering length.
Regular micro-trims maintain the shape while allowing gradual length increase. Rather than letting the cut grow completely unchecked, remove just the damaged ends every six to eight weeks. This approach preserves health and shape while slowly gaining length.
Transitioning to layers requires patience and communication with your stylist. Adding subtle layers gradually prevents shocking change while moving toward a softer silhouette. Start with minimal layering around the face, then gradually increase texture throughout as length develops.
Styling adjustments help during transition phases. When the bob reaches that awkward shoulder-hitting length, creating waves or curls adds shape and interest. Temporary texture disguises the in-between stage while you work toward your goal length.
Accessories become valuable tools during grow-out periods. Headbands push back pieces that haven’t yet reached desired length. Decorative clips and pins create intentional styles from otherwise awkward lengths. These additions make the growing process feel deliberate rather than accidental.
The Layered Medium Cut: Creating Volume and Dimension
Strategic layering transforms medium-length hair from flat and lifeless to dynamic and multidimensional. This cutting technique removes weight selectively, creating movement that makes hair appear fuller and more vibrant regardless of natural density.
Strategic layer placement techniques
Successful layering requires understanding how hair naturally falls and moves. Layers cut at different angles create varying effects – steep angles produce dramatic movement, while subtle angles maintain length while adding gentle texture. The placement of the shortest layer determines the overall shape and where volume concentrates.
Crown layers deserve special attention. Starting layers too high can create unwanted height that ages the overall look. Beginning them around the cheekbones or chin level typically provides lift without the dreaded helmet effect. The graduation from this point should feel seamless, with no obvious steps or shelves.
The relationship between layers matters as much as their individual placement. Each layer should complement those around it, creating harmony rather than competition. Too many layers too close together produce stringiness, while sparse layering fails to achieve the desired movement. Finding the sweet spot requires evaluating hair thickness, texture, and styling preferences.
Weight distribution throughout the cut affects how layers behave. Maintaining appropriate weight in the perimeter prevents the flyaway look that sometimes plagues heavily layered cuts. This baseline density anchors the style while upper layers provide movement and body.
Fine hair versus thick hair approaches
Fine hair layering focuses on creating an illusion of density without removing too much precious volume. Long layers that start lower on the head maintain fullness while adding subtle movement. The key involves minimal weight removal – just enough to create shape without sacrificing substance.
Interior layers work better for fine hair than excessive perimeter layering. These hidden layers add lift from within while maintaining the appearance of density at the edges. Think of it as creating a support system underneath rather than removing weight from visible areas.
Thick hair can handle more aggressive layering to remove bulk and add manageability. Shorter layers throughout help distribute weight more evenly, preventing the bottom-heavy triangle that thick hair often creates. The abundance of hair means you can remove significant weight while maintaining fullness.
Texturizing techniques become crucial for thick hair. Beyond basic layering, methods like point cutting and thinning create additional movement and reduce bulk. These techniques should happen throughout the interior rather than just at the ends, ensuring even weight distribution.
Blow-drying for maximum volume
The way you dry layered hair determines whether those carefully cut layers create volume or fall flat. Proper technique maximizes the cut’s potential while minimizing styling time.
Root lifting starts while hair is still very damp. Apply volumizing products directly to the scalp area, then lift sections perpendicular to the head while drying. This technique creates lift that lasts throughout the day. Focus particularly on the crown area where natural volume tends to disappear first.
The round brush becomes your best friend for layered styles. Choose a size that allows you to wrap hair completely around the barrel with some tension. Smaller brushes create more curl and volume, while larger ones produce smoother results with gentle bend.
Direction matters when blow-drying layers. Alternating the direction you dry each section prevents hair from falling into predictable patterns. Dry some sections forward, others backward, creating natural volume through conflicting directions. This technique works particularly well for shorter layers around the crown.
Cool air sets each section after heating, locking in volume and smoothness. Many women skip this crucial step, but the cool shot button on your dryer serves an important purpose. It closes the cuticle and sets the style, making your efforts last longer.
Products that define layers
Choosing appropriate products can highlight or hide your layers depending on the day’s desired look. The right formulations enhance the cut’s movement without creating heaviness or stickiness.
Here’s how different products affect layered cuts:
Volumizing Mousse: Creates lift without weight, perfect for fine layered hair
Texturizing Cream: Defines individual layers while maintaining softness
Light-Hold Hairspray: Maintains volume without stiffness
Root Lift Spray: Targets the crown area for lasting height
Smoothing Serum: Controls frizz without eliminating movement
Application technique matters as much as product selection. Work products through damp hair in sections, ensuring even distribution. Concentrate volumizing products at roots and lighter products through lengths. Avoid applying anything too heavy to the ends where layers are most visible.
Layering products (using multiple products strategically) creates customized results. Start with a volumizing base, add defining cream to mid-lengths, then finish with light spray for hold. This approach addresses different needs throughout the hair without overwhelming any single area.
Refreshing between salon visits
Maintaining layered cuts between professional appointments keeps them looking intentional rather than overgrown. Simple techniques extend the time between cuts while preserving the style’s essential movement.
Dry cutting small amounts at home can remove obvious damage without disrupting the overall shape. Focus only on clearly split or damaged ends rather than attempting to recreate the layering. Twist small sections and carefully trim any pieces that stick out, removing just the damaged portion.
Styling variations help disguise growing layers. When layers start losing their shape, changing your styling approach can restore appeal. Switch from smooth blow-drying to textured air-drying, or add waves where you typically wear hair straight. These changes make growth less noticeable.
Regular deep conditioning maintains health that keeps layers looking fresh. Damaged hair never showcases layers well, regardless of cut quality. Weekly treatments prevent the dryness and breakage that make layers appear stringy or undefined.
Professional glossing treatments between cuts add shine that emphasizes layer movement. These semi-permanent treatments deposit minimal color while maximizing reflection. The result makes even growing-out layers appear intentional and polished.
Your Perfect Medium Cut Awaits
Medium haircuts offer the ideal combination of style versatility and manageable maintenance that suits real life. Whether you gravitate toward the polished sophistication of a blunt bob or prefer the effortless texture of a modern shag, these cuts provide endless possibilities for expressing your personality while working with your natural hair characteristics.
The key to finding your perfect medium cut lies in honest evaluation of your lifestyle, maintenance commitment, and hair’s natural tendencies. Consider how much time you realistically spend on hair each morning, whether you prefer wash-and-go styles or enjoy the styling process, and how often you can commit to salon visits. Your ideal cut should enhance your daily routine rather than complicate it, giving you confidence without requiring constant attention.
Frequently Asked Questions
Q: How often should I trim my medium haircut to maintain its shape?
A: Most medium haircuts need professional trimming every 6-8 weeks to maintain their intended shape. Blunt cuts and bobs may need attention every 5-6 weeks for crisp lines, while textured cuts like shags can stretch to 8-10 weeks.
Q: Can medium haircuts work with very fine or thin hair?
A: Yes, medium cuts actually work wonderfully for fine hair. Blunt bobs create an illusion of thickness, while strategic layering adds movement without sacrificing density. The key is choosing the right cutting technique for your specific hair type.
Q: What’s the best medium haircut for thick, coarse hair?
A: Layered cuts and textured shags work exceptionally well for thick hair. These cuts remove bulk strategically while maintaining shape. The graduated layers help distribute weight evenly, preventing the triangular shape thick hair often creates at medium lengths.
Q: How do I style a medium haircut when growing out bangs?
A: Side-parting works wonders during bang grow-out phases. Pin longer pieces back with decorative clips, or blend them into face-framing layers. Texturizing products help growing bangs blend naturally with the rest of your cut.
Q: Will a medium haircut make my round face look wider?
A: Not if cut correctly. Lobs that hit below the jawline with subtle face-framing layers actually elongate round faces. Avoid cuts that end exactly at the widest part of your face, and add height at the crown for vertical emphasis.
Q: Can I pull medium-length hair into a ponytail or bun?
A: Most medium cuts allow for ponytails and loose buns, though some shorter layers might escape. This versatility is actually one of the main advantages – you get styling options while maintaining manageability.
Q: What’s the difference between a lob and a regular bob?
A: A lob (long bob) typically falls between the chin and collarbone, while traditional bobs sit at or above chin length. Lobs offer more styling versatility and grow out more gracefully than shorter bobs.
Q: How do I prevent my medium haircut from looking triangular?
A: Regular texturizing and proper layering prevent the pyramid effect. Interior weight removal maintains the perimeter while eliminating bulk. Using the right styling products and techniques also helps maintain proper shape between cuts.