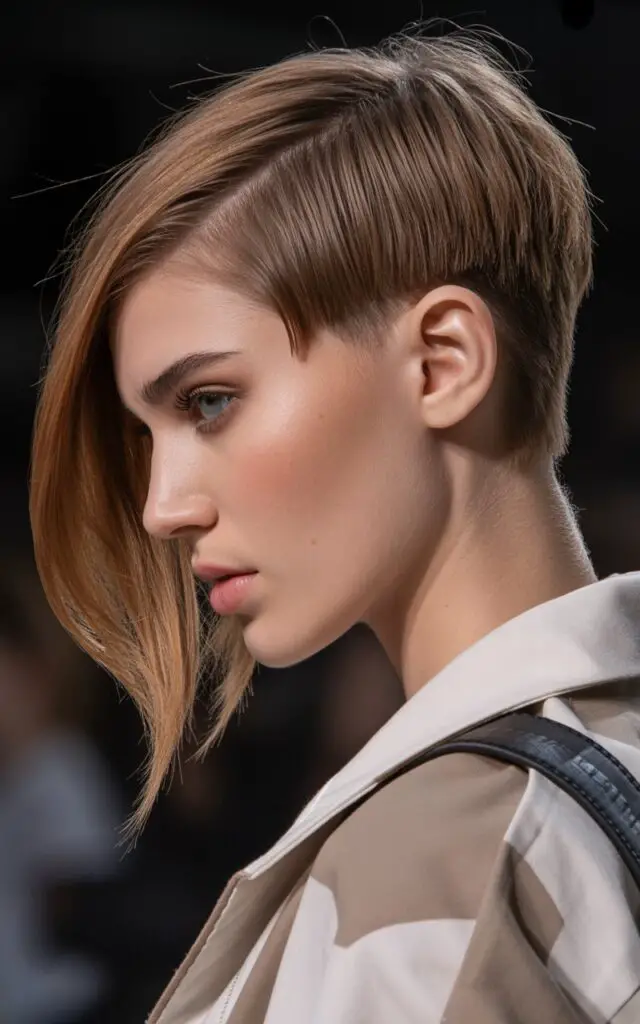
A blunt cut offers clean lines and precise edges that create an instantly polished look. But what happens when you add layers to this sharp style? You get the best of both worlds—structure and movement combined. This combination has become a go-to choice for women seeking fuller, thicker-looking hair without sacrificing that sleek finish.
The magic lies in how these two techniques work together. A blunt cut creates the illusion of density at the ends, while strategic layering adds dimension and lift throughout. Your hair gains body where it needs it most. The result is a style that looks thick and healthy from every angle, whether you have fine strands or medium-textured hair.
From classic bobs to longer styles, there are numerous ways to interpret this technique. Some approaches focus on hidden interior layers that boost volume without disrupting the perimeter line. Others feature more visible layering around the face or throughout the length. Below nine different takes on this versatile style, each offering something different for your hair goals.
- Classic Blunt Bob with Subtle Layers
- Long Blunt Cut with Internal Layers
- Blunt Lob with Face-Framing Layers
- Shoulder-Length Blunt Cut with Choppy Layers
- Blunt Cut with Wispy Layered Ends
- Blunt Midi Cut with Feathered Layers
- Blunt Cut with Crown Layers
- Asymmetrical Blunt Cut with Side Layers
- Blunt Cut with Micro Layers Throughout
- Bringing It All Together
- Frequently Asked Questions
Classic Blunt Bob with Subtle Layers
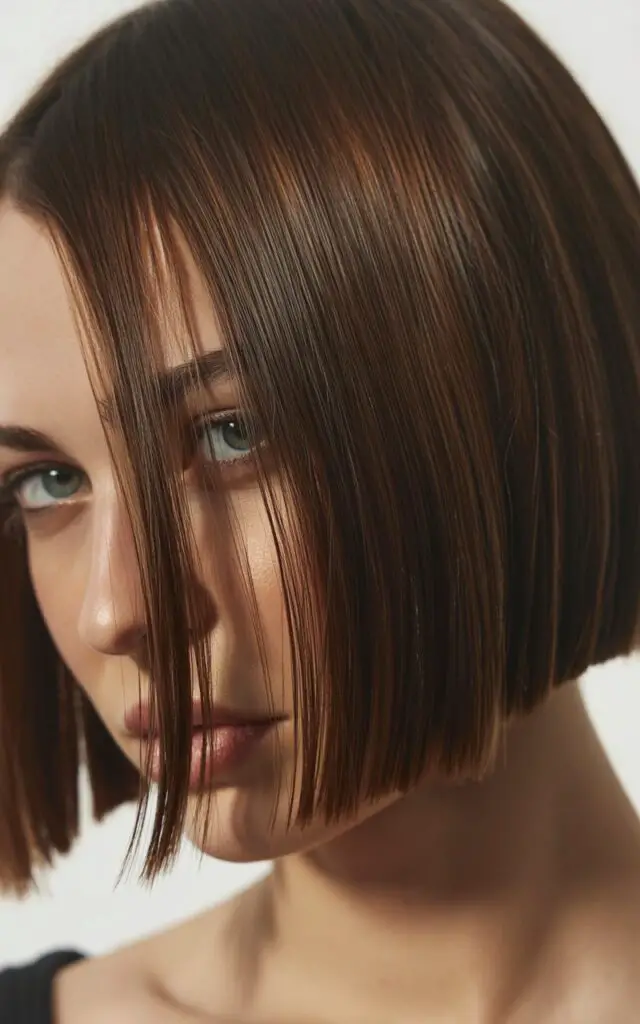
This timeless style sits right at the jawline or slightly below, creating a sharp horizontal line that naturally thickens the appearance of your ends. The exterior maintains that crisp, one-length look while hidden layers work underneath to lift roots and add fullness. You get a polished finish that moves beautifully.
Why This Works for Volume
The technique relies on keeping weight at the bottom while removing bulk from the interior. Your stylist cuts layers starting a few inches from the scalp, gradually blending them toward the blunt edge. This creates space for hair to stack upon itself, making it appear fuller than it actually is.
Fine hair benefits greatly from this approach. The blunt perimeter prevents the wispy, thin look that often comes with traditional layering. At the same time, those interior cuts give your roots room to lift.
Styling Considerations
A round brush becomes your best friend here. Blow-drying with one helps activate those hidden layers and creates lift at the crown. You can also use a flat iron to add a slight bend at the ends, which enhances the thickness illusion.
Here are some benefits this style offers:
Daily Versatility: The bob length works for both professional settings and casual outings without much adjustment.
Low Maintenance: A quick blow-dry is often enough to make it look polished and put-together.
Face Framing: The length typically hits at a flattering point that highlights your cheekbones and jawline.
This haircut holds its shape well between salon visits. The blunt edge doesn’t show growth as obviously as some other cuts. You can stretch appointments to every 6-8 weeks if you maintain the style properly at home.
Color can enhance the dimensional effect. Highlights or lowlights placed strategically through those interior layers create even more depth. The contrast makes your hair look thicker and more textured.
Long Blunt Cut with Internal Layers
Starting with length below your shoulders gives you plenty of room to work with. This version keeps all the hair at one length on the outside while incorporating layers that start mid-shaft and work inward. The technique is sometimes called invisible layering because you can’t see where the cuts were made.
The Hidden Volume Trick
Your stylist creates this effect by taking horizontal sections and cutting shorter pieces underneath while leaving the top layer untouched. Picture a wedding cake—each tier is slightly smaller than the one below it. Your hair does something similar, with shorter pieces supporting longer ones.
Does this really make a difference? Absolutely. Those hidden cuts prevent hair from lying flat against your head. They create natural separation and movement that makes your mane look twice as thick.
Best Candidates
This works particularly well if you have straight to slightly wavy hair. The blunt line shows up beautifully on straighter textures, while the layers give just enough movement to prevent it from looking too rigid.
Avoid this if your hair is very curly or coarse. The blunt edge can create a triangle shape as curls expand outward. You’d be better served by a different layering pattern.
Maintenance Requirements
Length requires commitment. Split ends travel up the hair shaft faster on longer strands, so regular trims every 8-10 weeks keep things healthy. Deep conditioning treatments also become important—damaged ends won’t hold that crisp line.
Styling takes more time than shorter versions. You’ll need to section your hair and work through it methodically with your tools. A good heat protectant is necessary since you’re applying hot tools to more surface area.
Consider these practical aspects:
Drying Time: Longer hair naturally takes more time to dry, so factor in extra minutes for your routine.
Product Usage: You’ll go through styling products faster since you need more to cover all that length.
Weight Management: Without those internal layers, long hair can pull flat and look limp at the roots.
The payoff is significant volume and swing. Your hair moves in a way that catches light beautifully. It’s a statement-making length that still maintains structure through that precise bottom edge.
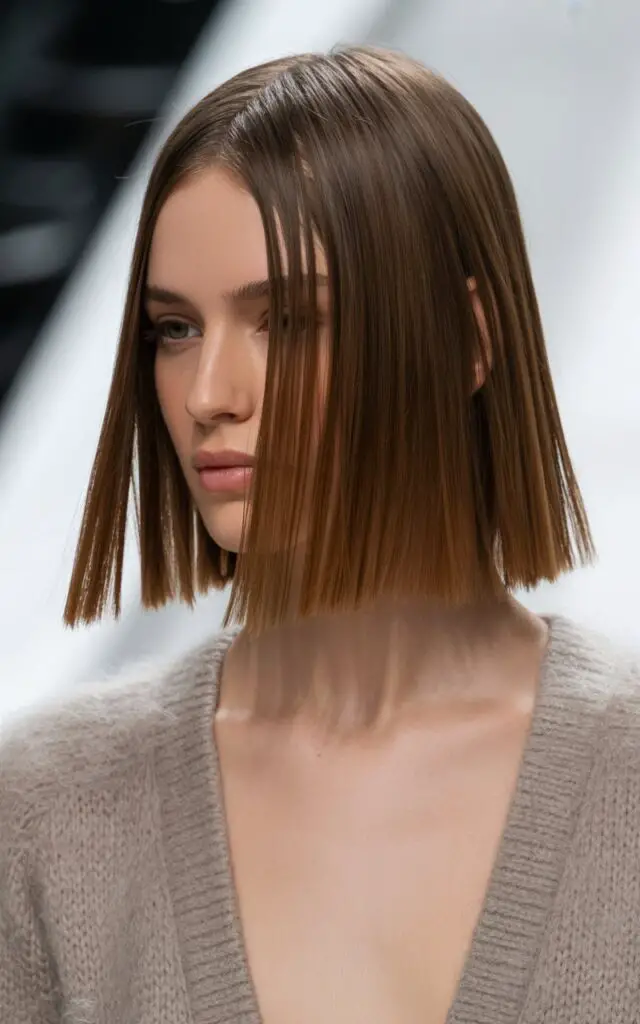
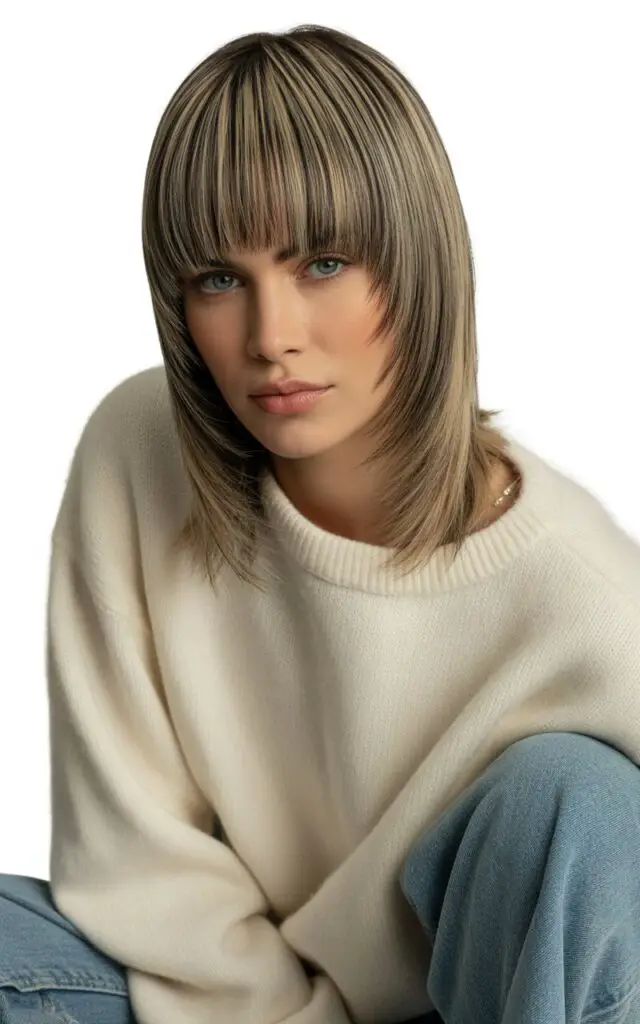
Blunt Lob with Face-Framing Layers
The long bob—or lob—has earned its popularity for good reason. Falling somewhere between your chin and collarbone, this length flatters most face shapes. Adding layers specifically around your face takes it further, creating angles that enhance your features while maintaining thickness.
Strategic Placement
These aren’t random cuts. Your stylist considers your face shape and where you naturally part your hair. Layers typically start around your cheekbones or chin, gradually blending into the longer back sections. This creates a soft frame without compromising the blunt effect.
You’ll notice immediate differences in how your hair falls. Those shorter front pieces add movement when you turn your head. They also prevent the heavy, one-length look from overwhelming smaller features.
Texture Variations
Straight hair shows off the precision of this cut beautifully. Every line is visible, and the contrast between the face-framing pieces and the back creates clear definition.
Wavy textures add another dimension. The layers around your face will curl or wave more readily than the longer pieces, creating natural variation. You get an effortless look without much styling effort.
Can you achieve this with curly hair? It’s trickier. Curls shrink up significantly when dry, so those face-framing layers might end up much shorter than anticipated. Discuss length carefully with your stylist if you have tight curls.
Here’s what makes this cut special:
Adaptable Length: Not too short, not too long—it works for women who want change without going drastic.
Professional Appearance: The polished edges make it suitable for any workplace environment.
Styling Options: Wear it straight, wavy, or tucked behind your ears for different looks.
Daily Styling
A flat iron or curling wand can refine those face-framing pieces. Pull them slightly forward as you style to emphasize the layering. The back section usually needs less attention since it maintains its blunt line naturally.
This length works well with center or side parts. Switching between them creates entirely different looks from the same cut. It’s an easy way to refresh your style without visiting the salon.
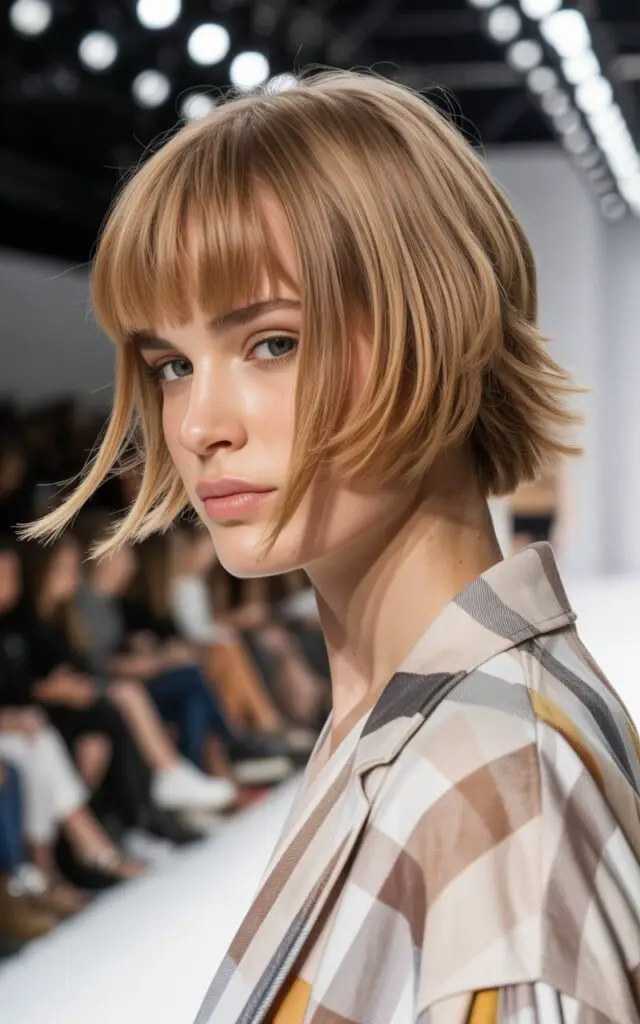
Shoulder-Length Blunt Cut with Choppy Layers
This interpretation takes a more textured approach. Instead of smooth, blended layers, the cuts are intentionally jagged and piece-y throughout. The result is a modern, slightly edgy style that adds serious thickness and dimension to your hair.
Understanding Choppy Layers
Think of these as controlled chaos. Your stylist uses point-cutting or razor techniques to create uneven ends within the layers. This makes your hair separate into distinct pieces rather than falling as one smooth curtain. Each section catches light differently, creating the illusion of more hair.
The blunt perimeter still exists—it’s just softened by all that texture above it. You maintain the thick baseline while gaining movement and interest through the middle sections.
Who Should Try This
This style suits women who want a less polished, more lived-in aesthetic. It’s perfect for second-day hair because it actually looks better with a bit of natural texture and movement.
Fine hair transforms with this technique. The choppy cuts make thin strands appear thicker and more substantial. You’re adding visual weight without actual heaviness.
Thicker hair also benefits, though for different reasons. The texture removes bulk and prevents that heavy, triangular shape that can develop with blunt cuts on dense hair.
Styling Approach
Less is more here. Over-styling defeats the purpose of the textured layers. A texturizing spray or sea salt spray works better than smoothing products. Scrunch it into damp hair and let it air-dry, or use a diffuser for light enhancement.
Straight hair might need help achieving the piece-y effect. A small amount of pomade or wax rubbed between your fingers and pulled through random sections creates separation. Don’t overdo it—you want texture, not greasiness.
These points highlight the style’s advantages:
Effortless Vibe: It looks good whether freshly styled or a few days old.
Dimensional Color: Highlights and lowlights show up beautifully through all that texture.
Volume Boost: The separation between pieces creates gaps that make hair look fuller.
The choppy texture also disguises growth better than precise cuts. Your roots can go a bit longer before you notice that “I need a haircut” feeling. This makes it practical for busy schedules.
Color plays wonderfully with this style. Balayage or ombre techniques emphasize the different layers and create even more dimension. The varied lengths show off the color graduation beautifully.
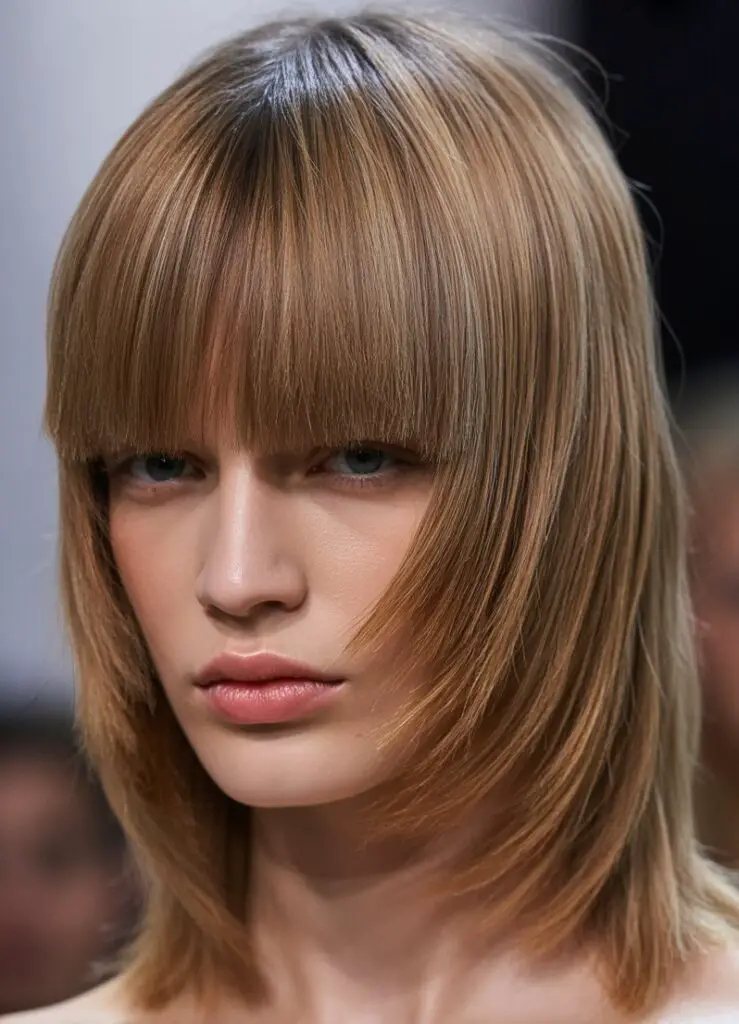
Blunt Cut with Wispy Layered Ends
Softness meets structure in this version. The majority of your hair maintains a blunt edge, but the very ends are texturized with wispy, feathered layers. This creates a less severe finish while preserving the thickness that comes with a straight-across cut.
The Feathering Technique
Your stylist uses thinning shears or a razor to remove tiny amounts of hair from the very bottom of your style. This creates soft, tapered ends that move freely. The effect is gentler than a harsh blunt line but doesn’t sacrifice the appearance of fullness.
This works especially well if you find traditional blunt cuts too heavy or rigid. You get the volume benefits without that solid wall of hair. The wispy ends soften your overall look and add a feminine touch.
Ideal Hair Types
Medium to thick hair handles this best. You need enough density to support the wispy ends without them looking sparse or damaged. Fine hair might appear too thin at the bottom with this technique.
Wavy and straight textures both work well. The feathered ends blend naturally with waves, creating a beachy, relaxed finish. On straight hair, they provide just enough movement to prevent a stiff appearance.
Color Enhancement
Lighter ends through balayage or ombre complement this style perfectly. The wispy layers show off the color transition beautifully. The lightness also makes the ends appear even softer and more delicate.
Avoid dark, solid colors if you want the full effect of the feathering to show. High contrast highlights work better, allowing light to catch those textured pieces.
How do you maintain this at home? These tips help:
Minimal Heat: The wispy ends are more delicate, so limit flat iron use directly on them.
Regular Conditioning: Keep ends hydrated to prevent the feathered pieces from looking damaged.
Careful Brushing: Use a wide-tooth comb on the bottom sections to avoid breaking those fine pieces.
The style grows out gracefully. As your hair gets longer, the wispy ends simply extend, maintaining their soft quality. You won’t get that harsh line of demarcation that shows obvious growth.
This cut offers flexibility in styling. Curl just the ends for a flipped-out look, or straighten everything for a sleeker finish. The feathered pieces adapt to whatever you’re doing, adding movement regardless of the style choice.
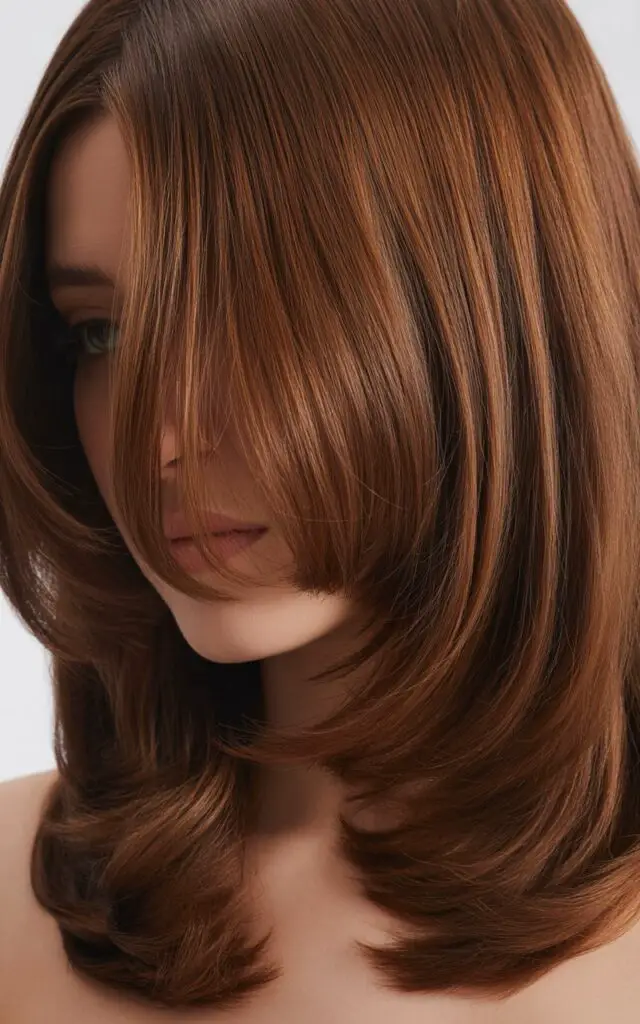
Blunt Midi Cut with Feathered Layers
Midi length—falling somewhere between your shoulders and mid-back—provides the perfect canvas for combining blunt edges with feathered layering. This creates a balanced style that’s neither too short nor too long, with built-in volume and movement throughout.
Finding the Right Length
The midi cut typically ends around your bra strap or slightly above. This placement is intentional—it’s long enough to pull into a ponytail but short enough to dry relatively quickly. Adding feathered layers throughout this length builds dimension from root to tip.
Your stylist creates these by cutting at slight angles rather than straight across, then texturizing the ends. Each layer is longer than the one above it, but only by small increments. This graduated effect stacks beautifully, creating fullness.
Volume Distribution
The feathering prevents flatness at the crown. Those shorter layers near the top have less weight pulling them down, so they lift naturally. As you move down the length, each section supports the one above it.
This addresses a common problem with longer hair—the dreaded flat top, puffy bottom triangle. The layering redistributes weight more evenly, so you maintain volume where you want it.
Can you achieve this without professional help? It’s risky. The precision required to blend feathered layers properly is difficult to replicate at home. One wrong angle and you’ll have uneven lengths that don’t stack correctly.
Styling Versatility
This length and layer combination works for multiple styling approaches. Blow it straight for a polished office look. Add beach waves for weekend casual. Pin half up for a romantic style. The layers provide enough movement for all these variations.
Updos become more interesting too. Those shorter pieces create texture when you pull hair back, preventing that slicked, severe appearance. Wisps fall around your face naturally, softening the overall effect.
Consider these practical benefits:
Workout Friendly: Long enough to tie back securely during exercise without short pieces falling out.
Heat Styling: The midi length is manageable enough to curl or straighten without taking forever.
Professional Plus: Sophisticated enough for conservative work environments but still current and stylish.
Maintenance sits somewhere between short and long styles. You’ll need trims every 6-8 weeks to maintain the feathered edges and prevent split ends from traveling up. The length requires more care than a bob but less than truly long hair.
Color techniques like balayage work beautifully here. The feathered layers show off dimensional color, making highlights and lowlights more visible. The movement of the layers catches light from multiple angles.
Blunt Cut with Crown Layers
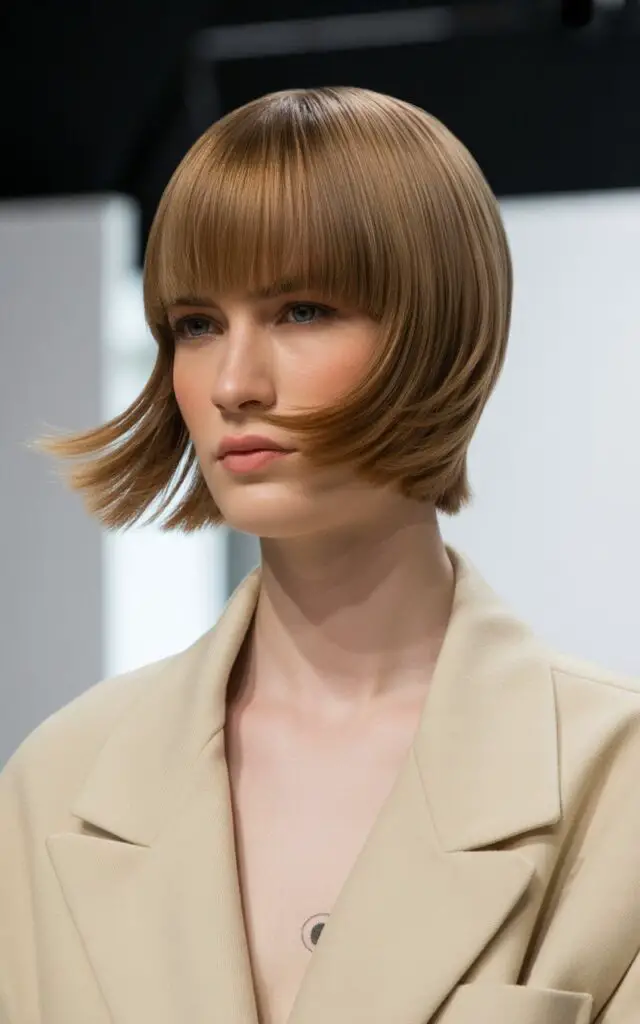
Concentrating layers specifically at the crown creates lift where most women need it—at the top of the head. The rest of your hair maintains a blunt, thick appearance while the strategic cuts at your roots add height and body. This targeted approach solves flatness without creating a triangular shape.
The Crown Focus
Your stylist cuts shorter pieces concentrated at the very top of your head. These layers might be just a few inches long, depending on your desired height. They blend gradually into the longer lengths, so you don’t see where one section ends and another begins.
This technique works particularly well for fine or aging hair. As we get older, hair naturally loses density at the crown. Adding layers there creates the appearance of fullness and youthful volume.
Styling for Maximum Lift
Round brushing while blow-drying becomes essential here. Roll the brush under those crown layers and direct heat at the roots. This sets the lift into place. Once cool, the volume holds throughout the day.
Root-lifting products help too. Apply mousse or volumizing spray directly at the scalp before drying. The crown layers grab onto these products better than one-length hair, creating more dramatic height.
Can you skip the styling? You’ll lose most of the benefit. Those short crown pieces need encouragement to stand up. Without proper drying technique, they’ll lie flat like the rest of your hair.
Face Shape Considerations
This cut flatters round and heart-shaped faces particularly well. The added height at the crown elongates your overall silhouette, creating balance. Oval faces can wear it too, though the effect is less transformative.
Avoid this if you have a very long face. Adding height at the crown will exaggerate length, potentially making your face appear even longer than it is.
Here’s what you gain from this approach:
Targeted Volume: You add fullness exactly where you need it without creating bulk elsewhere.
Natural Movement: The crown layers catch wind and move when you turn your head, adding life to your style.
Style Longevity: Even as your hair gets oily, those shorter crown pieces maintain some lift.
The blunt perimeter stays intact, so you keep that thick, healthy appearance at your ends. The layers are hidden within the upper sections, creating volume that looks natural rather than obviously cut.
Growing this out requires patience. As those short crown pieces get longer, there’s an awkward phase where they stick out. Regular trims help blend them back in if you decide to go back to one length.
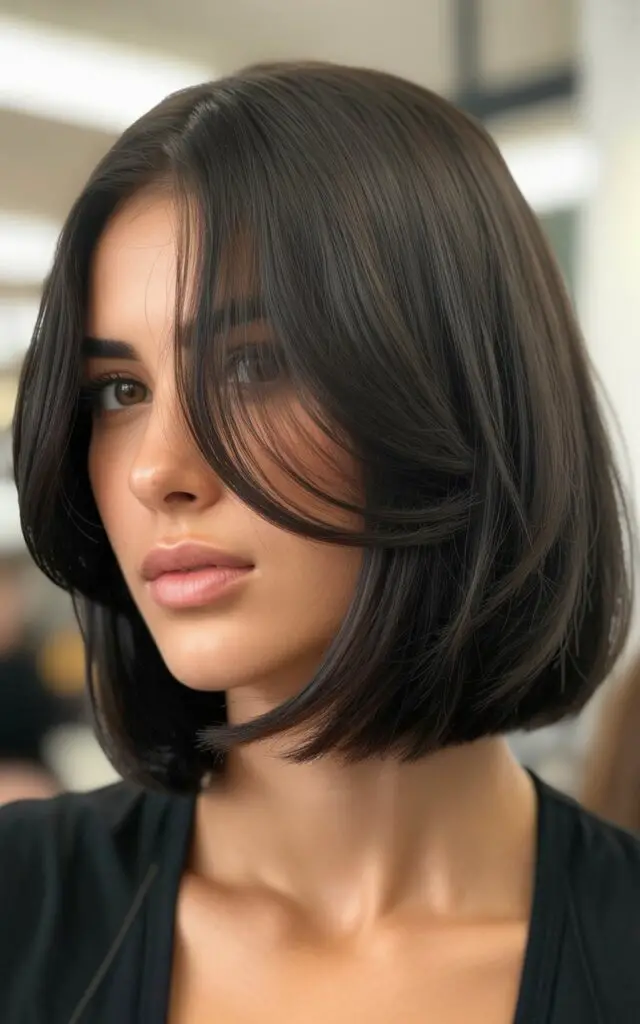
Asymmetrical Blunt Cut with Side Layers
Breaking symmetry adds instant interest to any blunt cut. This version creates dramatic angles by cutting one side shorter than the other, then adding layers specifically to the shorter side. The result is bold, modern, and surprisingly wearable for everyday life.
Understanding the Asymmetry
The difference between sides can be subtle—just an inch or two—or dramatic, with one side at your chin and the other at your shoulder. Your stylist adds layers to the shorter side to create texture and movement, while the longer side maintains its blunt edge for contrast.
This creates a style that looks different from every angle. Turn your head and people see entirely different lengths. The asymmetry draws the eye and makes even simple hair colors look more interesting.
Who Can Pull This Off
This cut requires confidence. You’re making a deliberate style choice rather than following a conventional pattern. If you like standing out slightly from the crowd, this works beautifully.
Face shapes matter here. The shorter side typically falls on the side you prefer to show—maybe you like your left profile better than your right. The longer side can hide features you’re less confident about.
Straight hair shows the asymmetry most clearly. Every angle is visible and precise. Wavy hair creates a softer interpretation, with the different lengths blending slightly more as texture takes over.
Styling Strategies
You’ll need to style both sides differently. The shorter, layered side benefits from texturizing products and piece-y separation. The longer side can stay smoother and sleeker for maximum contrast.
Flat ironing both sides creates a dramatic, editorial look. The sharp lines and different lengths make a strong statement. Adding waves to just one side—usually the longer one—creates interesting variation.
Consider these aspects before committing:
Grow-Out Challenge: You can’t easily grow this out evenly—one side will always be longer during the process.
Styling Time: You’re essentially styling two different haircuts, which takes more effort than uniform length.
Attention Factor: People will notice and comment on this cut more than traditional styles.
The layered side requires more frequent trims to maintain its texture. The blunt side can go longer between appointments. This creates an interesting maintenance schedule where you might refresh one side more often than the other.
Color placement becomes a creative opportunity. You can go bold on the shorter side with brighter shades while keeping the longer side more natural. Or reverse it—subdued color on the visible short side, creative color hidden on the long side that shows when you move.
Blunt Cut with Micro Layers Throughout
The most subtle interpretation involves tiny, frequent layers distributed evenly through your entire head of hair. These micro layers—cut just millimeters apart—create cumulative volume without obvious layering. The effect is thickness and body that looks completely natural.
The Micro Layering Process
Your stylist takes small sections and cuts them at very slight angles. The difference between each layer might be just half an inch or less. Repeated throughout your head, these minimal variations add up to significant volume and movement.
This technique takes longer than standard layering. Creating all those small, precise cuts requires time and attention to detail. But the payoff is worth it—you get fullness without visible lines or steps in your hair.
Texture and Type
Fine hair benefits most from this approach. Those small layers create the illusion of density without removing too much length. Your hair looks thicker from every angle because the micro layers prevent it from lying completely flat.
Medium-textured hair gains movement and swing. The subtle layering makes it easier to style because your hair isn’t fighting against itself. Each section can move independently while still looking cohesive.
Thick, coarse hair might not see dramatic results. You already have natural volume, so the micro layers mainly affect ease of styling rather than creating noticeable thickness.
Maintenance Requirements
This cut holds its shape well. Because the layers are so small and frequent, you don’t get that overgrown, straggly look as quickly. Growth appears even across all sections.
Trims every 8-10 weeks keep things fresh. Your stylist will re-establish those micro layers, removing any split ends that developed since your last visit.
Can you maintain this yourself? Absolutely not. The precision required makes this strictly a professional service. Home attempts will create uneven, choppy results instead of those smooth micro variations.
Here are the key advantages:
Natural Appearance: No one can tell where the layers are—it just looks like naturally thick, healthy hair.
Easy Styling: The micro layers make your hair more cooperative with styling tools and products.
Damage Camouflage: Small variations in length hide minor split ends better than blunt, one-length cuts.
Styling approaches vary based on your natural texture. Straight hair can be blown smooth with a paddle brush, and those micro layers will still create subtle body. Curly or wavy hair can air-dry, and the layers will enhance natural movement.
This works beautifully with most coloring techniques. Balayage, highlights, and lowlights all benefit from the dimensional quality the micro layers create. Light hits your hair at multiple angles, showing off color variations.
The blunt perimeter remains intact despite all the interior layering. This preserves that full, thick appearance at the ends while the micro layers handle volume throughout the length. It’s truly the best of both approaches.
Bringing It All Together
These variations prove that blunt cuts and layers aren’t mutually exclusive. You can have sharp, defined edges while still achieving the volume and movement that layering provides. The key lies in strategic placement and understanding which technique serves your specific hair needs.
Each approach addresses different concerns. Some target flatness at the crown, while others focus on creating dimension throughout. Some work better for fine hair, others for thick. Your hair type, face shape, and lifestyle all factor into which version works best for you. A skilled stylist can assess these elements and create a customized interpretation that maximizes thickness and volume for your particular situation.
Frequently Asked Questions
Q: How often do I need to trim a blunt cut with layers to maintain the style?
A: Most versions require trims every 6-8 weeks. The blunt edge needs refreshing to prevent it from looking ragged, and the layers need reshaping to maintain their volume-boosting properties. Micro layers and hidden interior layers can sometimes stretch to 10 weeks.
Q: Will a blunt cut with layers work on curly hair?
A: It depends on your curl pattern and which variation you choose. Loose waves and wavy textures work well with most versions. Tight curls can be trickier because they shrink significantly when dry, potentially creating unwanted shapes. The long blunt cut with internal layers or crown layers tend to work best for curlier textures.
Q: Can I style this straight even if I have wavy hair?
A: Yes, these cuts work well when heat-styled straight. The blunt edge shows up beautifully on straightened hair, and the layers provide enough movement to prevent it from looking too flat or stiff. Use a heat protectant and take your time sectioning for best results.
Q: Does adding layers reduce the thickness of my hair?
A: Not when done correctly. Strategic layering actually creates the illusion of more thickness by adding volume and dimension. The key is maintaining enough weight at the ends through the blunt cut while the layers boost fullness through the mid-lengths and crown.
Q: What products work best for styling a blunt cut with layers?
A: Volumizing mousse applied at the roots helps activate the layers. A lightweight texturizing spray adds separation and movement without weighing hair down. For finishing, a small amount of smoothing serum on the ends maintains that crisp blunt edge. Avoid heavy oils or creams that flatten the volume the layers create.
Q: Can I get this cut if my hair is very fine and thin?
A: Absolutely. Fine hair often benefits most from this combination. The blunt edge prevents thin, wispy ends, while the layers create the appearance of density. Choose versions with hidden interior layers or micro layers for the most natural-looking thickness boost.
Q: How do I know which version is right for my face shape?
A: Round and heart-shaped faces benefit from crown layers that add height. Long faces should avoid too much height at the crown and instead opt for face-framing layers or the lob version. Oval faces can wear most variations successfully. Square faces look great with the asymmetrical version or choppy layers that soften angular jawlines.
Q: Will this style work with my current hair color?
A: These cuts work with any color, but dimensional coloring techniques like balayage or highlights enhance the layering. The varied lengths catch light differently, making color variations more visible. Solid, single-process color looks good too but won’t show off the layers as dramatically.
Q: How long does it take to style these cuts in the morning?
A: Shorter versions like the classic bob take 10-15 minutes with a blow dryer and round brush. Mid-length and longer versions need 20-30 minutes for a polished look. The choppy layered version actually styles fastest because it looks better with minimal effort—air-dry with texturizing spray and you’re done.
Q: Can I still put my hair in a ponytail with layers?
A: Yes, though the face-framing and crown layers will create shorter pieces that fall out. This actually creates a softer, more romantic look. If you need everything pulled back neatly for work or workouts, choose versions with minimal face-framing layers and focus the layering on interior sections instead.