Medium-length hair offers the perfect balance between manageability and styling versatility. You can wear it straight, wavy, or curled without spending hours in front of the mirror. Layered cuts take this length to another level by adding movement, dimension, and shape that flatters most face types. The right layers can transform flat, lifeless hair into a bouncy, voluminous style that turns heads.
Layers work by removing weight from specific sections of your hair. This creates texture and allows your hair to move more naturally. Different layering techniques produce different results. Some add volume at the crown, while others frame your face or create a sleek, polished look. The key is finding the right type of layers for your hair texture and personal style.
Let’s share here eight medium-length layered haircuts that bring fresh energy to your look. Each style offers something different, from subtle sophistication to bold, edgy vibes. These cuts work with various hair types and can be customized to suit your preferences.
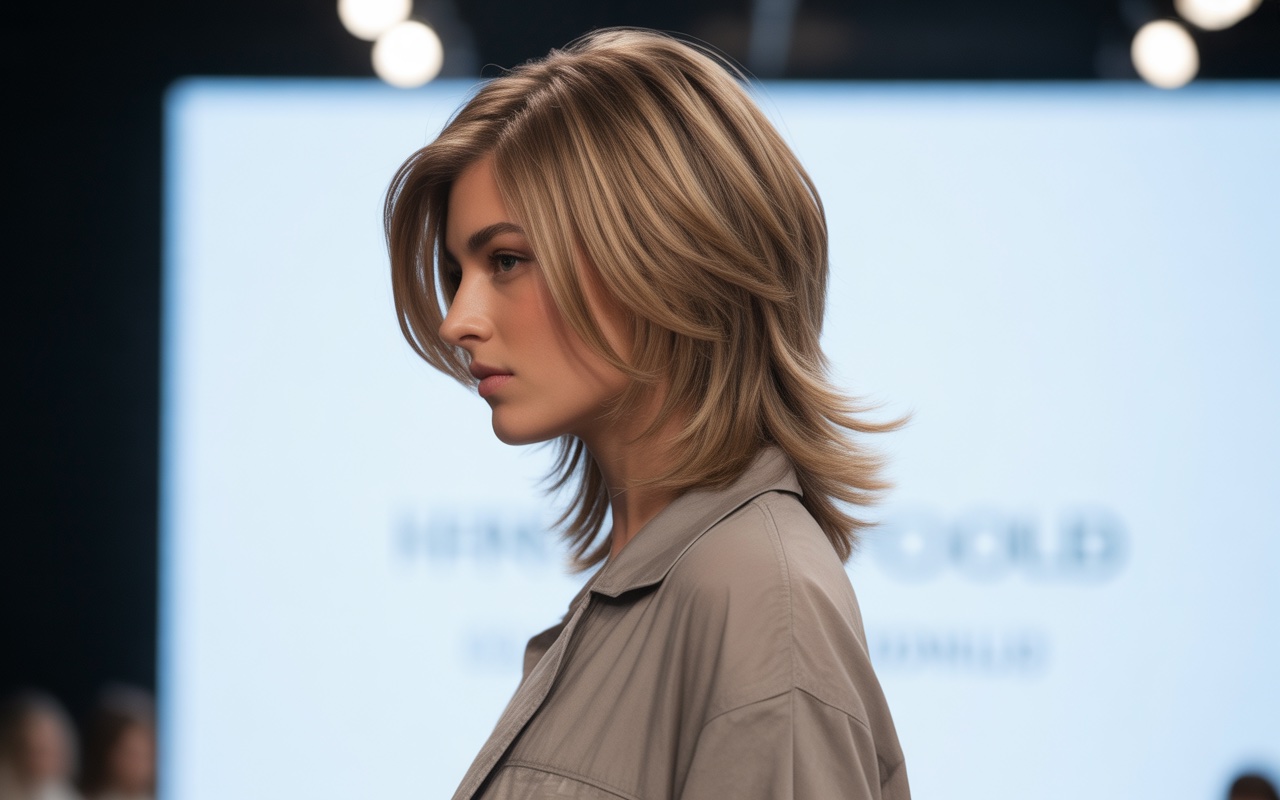
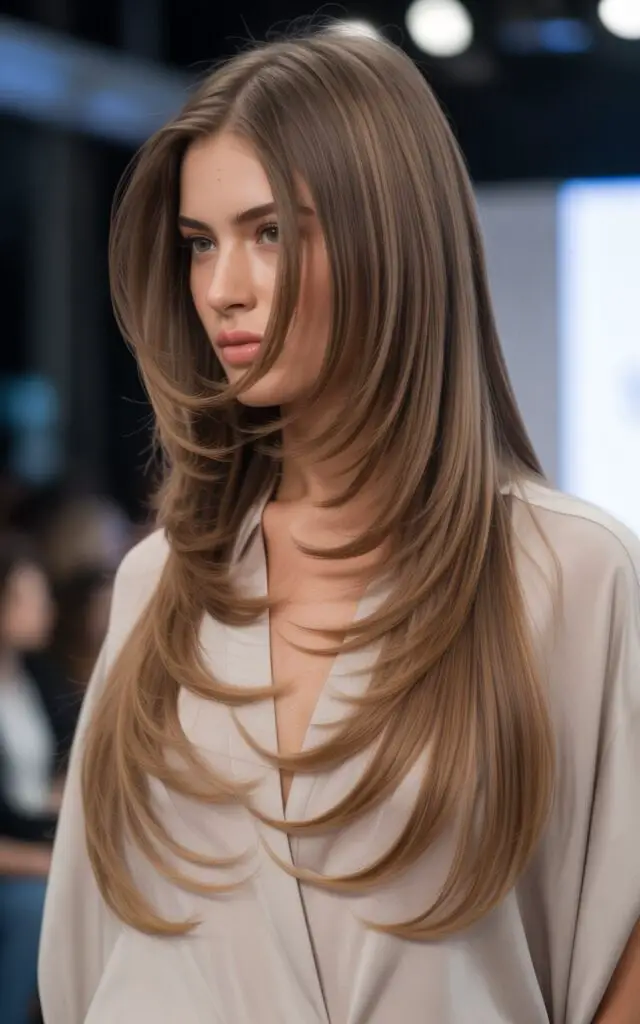
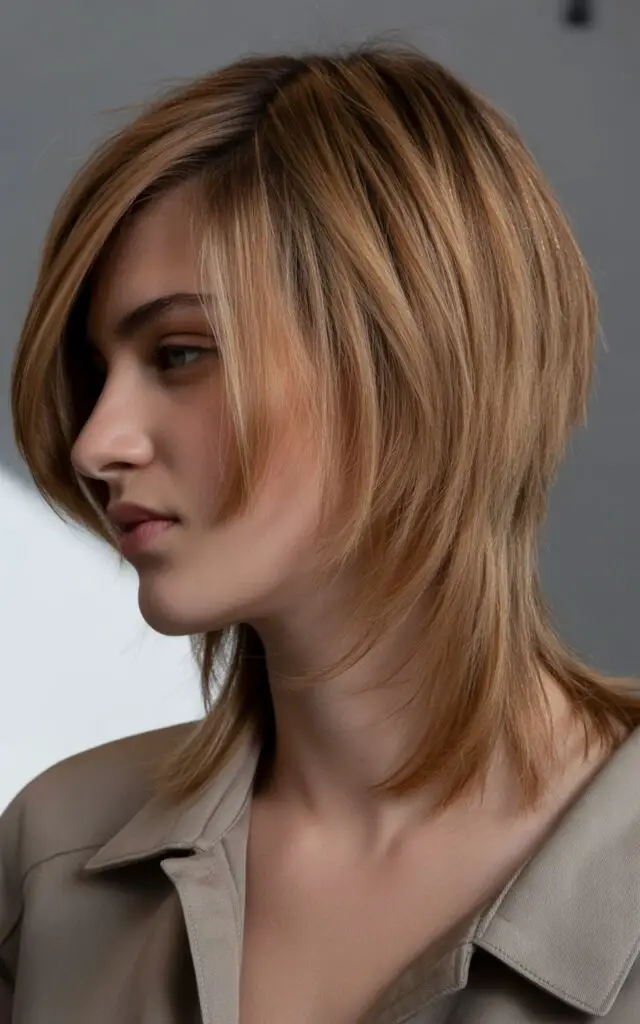
Long Layers with Face-Framing Pieces
This cut features longer layers throughout the hair with shorter pieces around the face. The face-framing sections start around your cheekbones or chin and gradually blend into the rest of your hair. These shorter pieces highlight your best features while the longer layers maintain length and fullness.
Why It Works
The face-framing pieces create a flattering effect without requiring a dramatic change. You keep most of your length while getting the movement that layers provide. Hair falls naturally around your face, drawing attention to your eyes and cheekbones. This cut adds dimension without feeling too choppy or textured.
Styling Options
You can straighten this cut for a sleek, polished appearance or add loose waves for a softer vibe. The layers move beautifully whether you wear your hair down or pull it into a ponytail. Blow-drying with a round brush creates volume at the roots while keeping the ends smooth.
Best Hair Types
This style works particularly well for straight to wavy hair. Fine hair benefits from the added movement and volume. Thick hair becomes more manageable as the layers remove excess weight. If you have naturally straight hair, the face-framing pieces will hold their shape throughout the day with minimal styling.
Maintenance Requirements
Regular trims every 6-8 weeks keep the face-framing pieces at the right length. The longer layers require less frequent cuts. You’ll need basic styling tools like a blow dryer and round brush. Heat protectant spray helps maintain hair health if you style with hot tools regularly.
Choppy Layered Lob
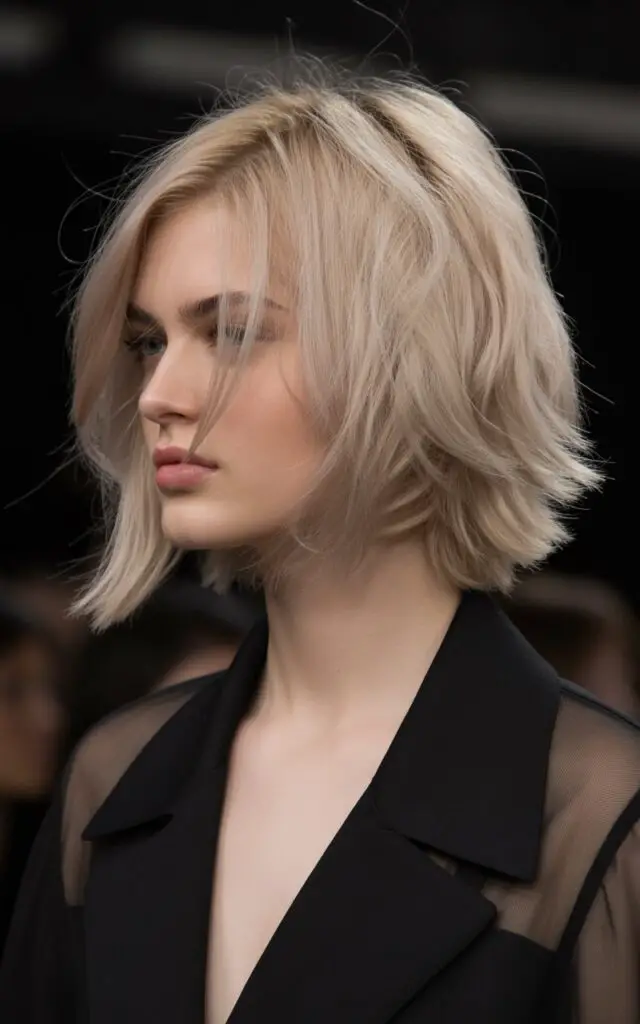
A lob sits between your shoulders and collarbone. Adding choppy layers creates an edgy, modern twist on this classic length. The layers are cut at different lengths throughout, creating a deliberately uneven, textured finish. This gives your hair a cool, undone quality that looks effortless.
Choppy layers add personality to what might otherwise be a safe, predictable cut. The varied lengths catch light differently, creating natural highlights and lowlights. Your hair moves with you instead of hanging flat against your head. This cut has an inherently youthful, carefree energy.
Texture and Volume
The choppy technique removes weight from your hair’s interior while keeping the perimeter fuller. This builds volume from within. Each layer sits at a slightly different length, preventing the hair from clumping together. The result is airy, piece-y texture that feels light and bouncy.
Styling Flexibility
This cut looks great both styled and unstyled. Air-drying gives you a relaxed, beachy texture. For more polish, blow-dry with your fingers to enhance the choppy pieces. A flat iron can smooth things out for special occasions. Here are styling products that work well:
Sea Salt Spray: Creates beachy texture and enhances the choppy layers naturally.
Texturizing Paste: Defines individual pieces and adds separation throughout.
Dry Shampoo: Adds grip and volume to second-day hair while absorbing oil.
Who Should Try It
This cut suits adventurous personalities who appreciate a modern aesthetic. If you have thick or medium-textured hair, the choppy layers will sit beautifully. Wavy hair types get the most from this cut as the natural movement complements the intentionally uneven lengths.
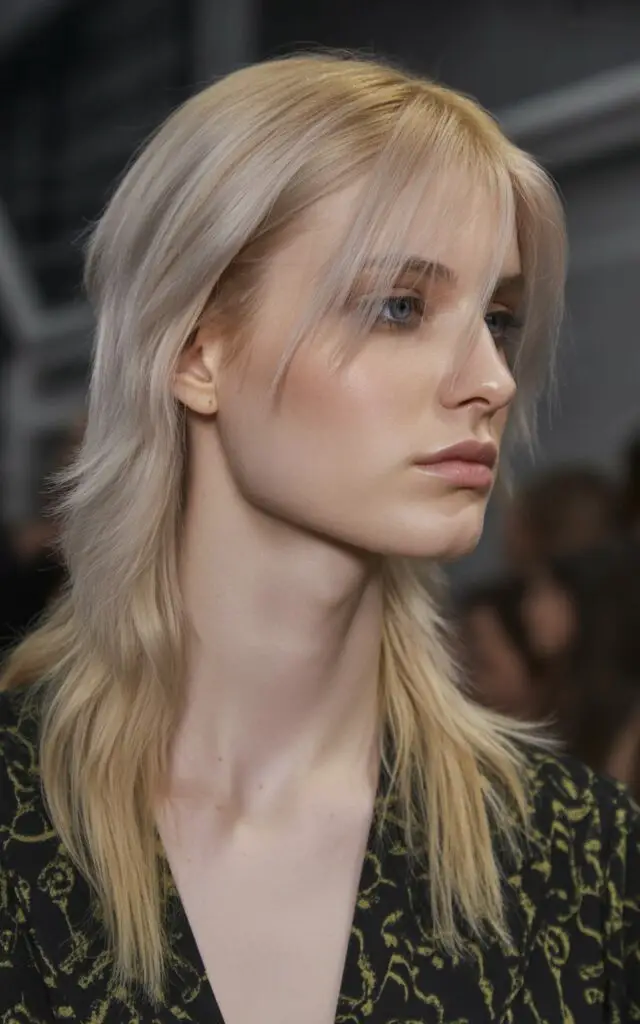
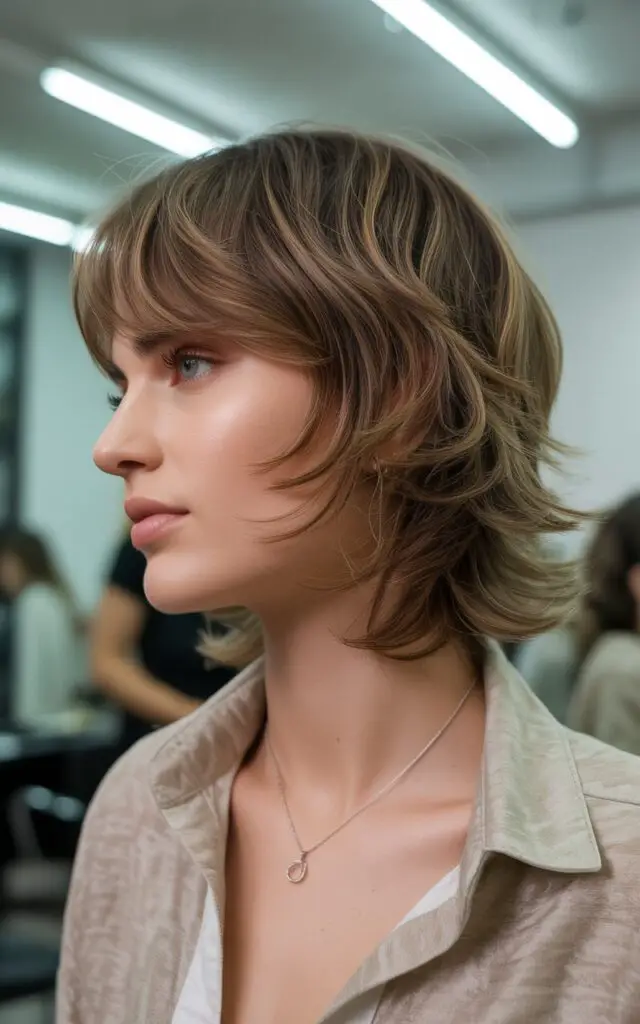
Feathered Layers with Curtain Bangs
Feathering creates soft, wispy layers that blend seamlessly together. The technique involves cutting hair at an angle and using thinning shears to create delicate, feather-like ends. Paired with curtain bangs that part down the middle, this style has a retro-inspired charm that feels fresh and contemporary.
The Feathering Technique
Feathered layers differ from blunt cuts by creating softer, more gradual transitions. The hair tapers toward the ends rather than cutting straight across. This produces a lightweight, airy quality. The layers flow into each other without harsh lines or obvious separations.
Your hair gains movement without looking overly layered or choppy. The feathering technique works especially well for creating face-framing pieces that blend naturally into the rest of your cut. This approach suits those who want subtle enhancement rather than dramatic transformation.
Curtain Bangs Component
Curtain bangs part in the middle and sweep to either side of your face. They typically start shorter in the center and gradually lengthen toward the outer edges. This creates a soft frame around your face that flatters most features. The bangs blend into the feathered layers for a cohesive look.
Styling Considerations
A round brush helps shape the curtain bangs during blow-drying. Pull the bangs forward and slightly to the side as you dry them. The feathered layers need minimal styling beyond basic blow-drying. A light hair oil on the ends prevents frizz and adds shine. This cut air-dries beautifully if you prefer low-maintenance styling.
Hair Type Compatibility
Fine to medium hair responds best to feathering. The technique might remove too much weight from very thick hair, making it difficult to control. Straight or slightly wavy hair shows off the feathered texture most clearly. Natural waves add extra movement that complements the soft layers.
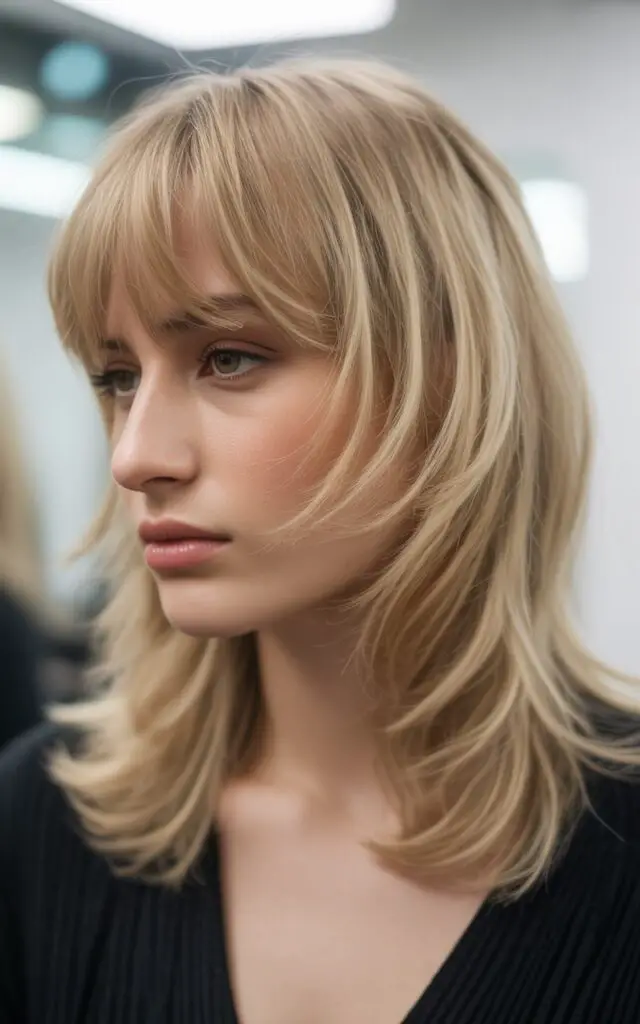
Textured Shag Layers
The shag features multiple layers throughout the head, creating maximum volume and movement. Modern versions incorporate choppy, textured pieces rather than the heavily feathered look of vintage shags. Medium-length shags fall somewhere between your shoulders and collarbone, offering easier styling than shorter versions.
This cut gives you rockstar vibes without requiring rockstar-level maintenance. The layers start higher on the head, building volume at the crown. As the layers progress downward, they get longer and heavier. This creates an inverted triangle shape that adds height and movement.
Layer Placement
Shag layers begin near the crown of your head. These shorter pieces create lift and volume at the top. Layers gradually increase in length as they move toward the bottom. The overall effect is full at the top with movement throughout. The perimeter stays relatively longer, preventing the cut from feeling too short.
Texture Creation
Razors or point-cutting techniques create the shag’s signature texture. The ends look purposefully choppy and piece-y. This breaks up the hair’s weight and prevents it from lying flat. You get built-in movement without needing extensive styling products or tools.
Styling Routine
Shags look best with a slightly tousled finish. Scrunch mousse or texturizing spray into damp hair and let it air-dry. For more volume, flip your head upside down while blow-drying. A diffuser attachment enhances natural texture. These products enhance the shag’s appeal:
Volumizing Mousse: Amplifies the natural volume created by the layers.
Texturizing Spray: Enhances separation and piece-y definition throughout.
Light Hold Hairspray: Maintains the tousled look without stiffness or crunch.
The shag requires minimal heat styling, making it healthier for your hair. Embrace the slightly messy aesthetic rather than fighting for perfection. This cut shines when it looks a bit undone.
V-Cut Layers
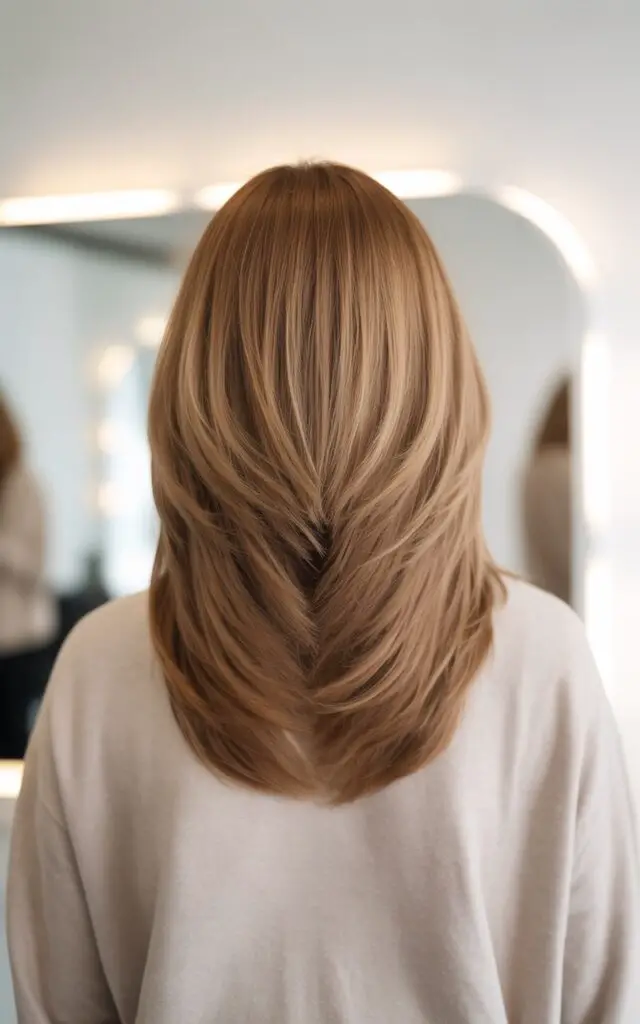
A V-cut creates a distinctive shape when viewed from behind. The hair is cut so the back forms a V-point, with the longest pieces in the center and shorter pieces toward the sides. Adding layers throughout creates dimension while maintaining the signature V-shape. This cut combines geometric precision with soft, flowing layers.
The V-Shape Effect
Looking at this cut from behind reveals its defining feature. The hair creates a clear V or chevron pattern. The center-back hair hangs longest, gradually shortening as it moves toward the sides. This creates visual interest and makes the hair appear fuller and thicker than it actually is.
From the front, V-cut layers look like standard layered hair. You see face-framing pieces and natural movement. The V-shape becomes apparent when you turn around or wear your hair in a ponytail. This hidden detail adds a special touch to an otherwise classic layered cut.
Volume and Movement
The V-shape naturally creates volume because more hair concentrates in the back-center area. The layers prevent this concentration from looking heavy or triangular. Instead, you get fullness with movement. The sides stay lighter and frame your face nicely.
Styling Techniques
This cut looks gorgeous with loose curls or waves that emphasize the V-shape. Curl your hair away from your face using a curling iron or wand. The curls will cascade down following the V-pattern. Straight styling also works well and showcases the geometric precision of the cut.
Ideal Candidates
If you have naturally thick hair, the V-cut helps manage bulk while maintaining length. The shape distributes weight effectively. Thin hair appears fuller thanks to the concentrated volume in back. Both straight and wavy textures work beautifully with this cut.
Layered Bob with Soft Waves
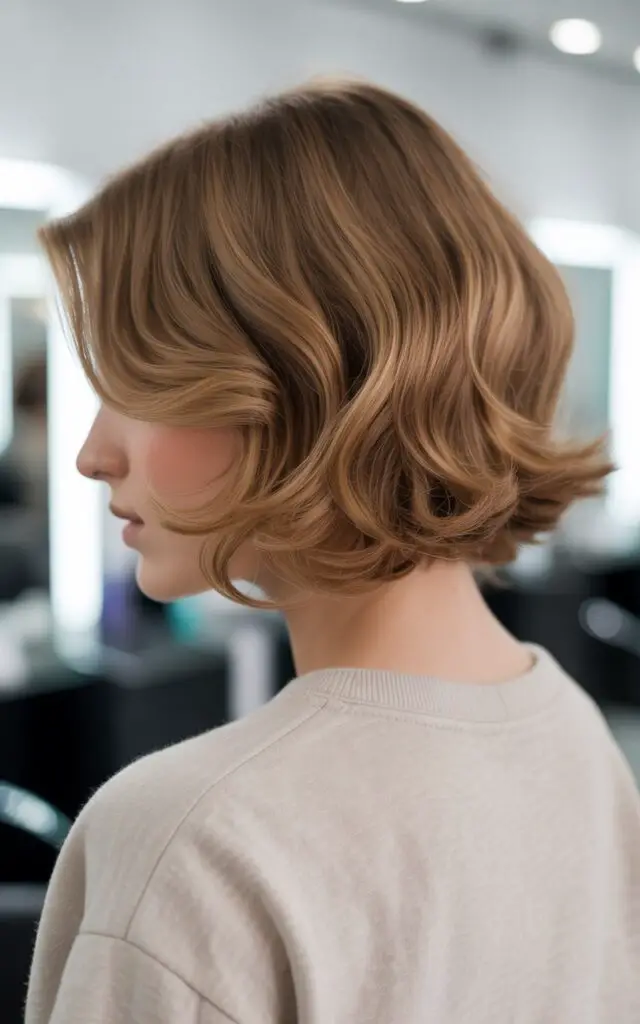
A medium-length bob hits around your shoulders. Adding layers throughout creates movement and prevents the cut from looking too blunt or heavy. Styling with soft waves enhances the layers’ dimension and gives the bob a romantic, feminine quality. This combination balances structure with softness.
The layered bob offers professional polish with versatile styling options. You can wear it straight for work meetings or add waves for weekend outings. The cut itself provides the foundation, while your styling choices transform the overall vibe. This makes it perfect for those who want one haircut with multiple looks.
Layer Distribution
Layers in a bob typically concentrate around the face and crown area. These create movement near your face while the back maintains more weight. Some versions include layers throughout for maximum texture. The choice depends on your hair thickness and desired volume level.
Wave Styling Process
Soft waves differ from tight curls or beach waves. They’re gentle, flowing bends in the hair rather than defined spirals. Use a large-barrel curling iron or wand to create these waves. Wrap medium-sized sections around the barrel and hold for a few seconds. Alternate the direction you wrap each section for natural-looking movement.
After curling, run your fingers through your hair to soften the waves. Don’t brush them or you’ll lose the texture. A light texturizing spray adds hold without making the waves feel stiff or crunchy. The finished look should appear soft and touchable.
Maintenance Needs
Regular trims every 6-8 weeks maintain the bob’s shape. Layers grow out faster than the overall length, so consistent trimming keeps the cut looking fresh. Daily styling takes about 15-20 minutes if you’re adding waves. Air-drying produces a sleeker look that requires less time.
Butterfly Layers
Butterfly layers get their name from the shape they create. The shortest layers sit around the crown and sides of your head, similar to butterfly wings. These layers gradually lengthen as they move down, creating a rounded, voluminous silhouette. The technique focuses on the top and mid-sections of your hair while leaving the bottom relatively heavier.
This cut became popular on social media for its face-framing effect and volume-boosting properties. The shorter upper layers create lift without requiring extensive styling. The longer bottom sections maintain length, so you don’t sacrifice the ability to pull your hair up or wear it down.
How It Differs
Butterfly layers concentrate volume in specific areas rather than distributing layers evenly throughout. Traditional layers might start at various points and blend uniformly. Butterfly layers intentionally create more dramatic variation between the shortest and longest pieces. This produces a distinctive rounded shape that resembles butterfly wings.
The top layers frame your face beautifully. They create movement around your cheeks and eyes without going too short. The weight stays in the bottom sections, preventing the cut from feeling too light or choppy overall.
Volume Creation
The shorter crown layers naturally lift away from your head. This built-in volume means you spend less time blow-drying or teasing your hair. The layers create space and air between sections, preventing the hair from lying flat against your scalp. You get height and dimension automatically.
Styling Recommendations
Butterfly layers look fantastic when blow-dried with a round brush. Focus the brush on the shorter upper layers to enhance their natural lift. The bottom sections can air-dry or receive gentle heat styling. These products work particularly well:
Root Lifting Spray: Maximizes the volume created by the shorter crown layers.
Light Leave-In Conditioner: Keeps the ends hydrated without weighing down the layers.
Shine Serum: Adds gloss and polish to finished styles without greasiness.
This cut suits medium to thick hair best. Fine hair might lack the density needed to create the full, rounded shape. Wavy or curly textures enhance the butterfly effect naturally.
Angled Layers with Side Part
An angled cut is longer in front than in back, creating a diagonal line from your nape to your front sections. Adding layers throughout prevents this from looking too severe or triangular. A deep side part complements the angle and adds asymmetry to your overall look. This cut feels modern and sophisticated.
The angled shape flatters most face types by creating diagonal lines that lead the eye. The front pieces elongate your face and neck, while the shorter back prevents the style from feeling too heavy or dated. Layers soften the angle and add movement throughout.
Angle Considerations
The degree of angle varies based on personal preference. Some versions show a subtle difference between front and back lengths. Others create dramatic angles with several inches of variation. A consultation with your stylist helps determine what works best for your features and lifestyle.
Steeper angles make more of a statement but require more frequent trims to maintain the shape. Gentler angles offer easier maintenance while still providing the angled silhouette. Both options look current and stylish when combined with properly placed layers.
Side Part Benefits
A deep side part creates asymmetry that complements the angled cut. Part your hair far to one side, exposing more scalp than a traditional center or side part would. This creates volume on the heavier side while the other side stays sleeker and closer to your head.
The side part draws attention to your face and creates visual interest. You can switch which side you part on for a different look. Spray the part line with hairspray or apply a small amount of gel to keep it defined throughout the day.
Layer Integration
Layers in an angled cut typically follow the diagonal line of the cut itself. This creates cohesion between the shape and the texture. Face-framing layers start near the front and gradually blend into the longer front sections. Back layers remove weight without disrupting the angled silhouette.
Best Styling Approach
This cut looks polished when blow-dried smooth. Use a paddle brush and direct the airflow down the hair shaft to create shine. The angled shape shows up most clearly with straight styling. You can add waves or curls for special occasions, but the geometric precision of the cut shines through best when worn sleek.
Finding Your Perfect Medium-Length Layered Cut
These eight cuts prove that medium-length layered hair offers endless possibilities. You can choose subtle layers for easy maintenance or dramatic layers for maximum impact. The right cut depends on your hair texture, face shape, and personal style preferences. Consider which features you want to highlight and how much time you can dedicate to styling.
Consultation with a skilled stylist helps you select the best option for your hair type. Bring photos of cuts you like and discuss how they might work with your natural texture. A good stylist can modify any of these styles to suit your specific needs. The beauty of layered cuts lies in their customization potential, allowing you to create a look that feels authentically yours.
Frequently Asked Questions
Q: How often should I trim medium-length layered hair?
A: You should schedule trims every 6-8 weeks to maintain the shape and health of your layers. The shorter layers grow out faster than the rest of your hair, so regular trims keep everything balanced. If you’re growing your hair out, you can stretch this to 10-12 weeks, but the layers may lose some definition.
Q: Will layers make my thin hair look thinner?
A: No, strategic layers actually make thin hair appear fuller. The layers create movement and dimension that add visual volume. Avoid heavily thinned or feathered layers, which can remove too much density. Long, face-framing layers work best for fine hair types.
Q: Can I add layers to curly or wavy hair?
A: Yes, layers work beautifully with textured hair. They remove weight that can pull curls down and create a pyramid shape. Layers allow your natural curl pattern to spring up and show its full potential. Make sure your stylist cuts your hair dry so they can see how the curls will sit naturally.
Q: What’s the difference between choppy and feathered layers?
A: Choppy layers create defined, piece-y texture with more separation between sections. Feathered layers blend softly together with tapered ends that create a lighter, airier quality. Choppy layers suit edgy, modern styles while feathered layers create classic, feminine looks.
Q: Do layers require more styling time?
A: Not necessarily. Many layered cuts actually air-dry beautifully because the layers create natural movement. If you want a polished look, layers do benefit from blow-drying with a round brush. The styling time depends more on your desired finish than the cut itself.
Q: How do I know which type of layers will suit my face shape?
A: Face-framing layers work well for most face shapes. Round faces benefit from longer layers that create length. Square faces look great with soft, feathered layers that soften angular features. Oval faces can pull off most layer types. Your stylist can recommend the best placement based on your specific features.
Q: Can I transition from long hair to medium-length layers gradually?
A: Yes, you can cut a few inches at a time while adding subtle layers. This allows you to adjust to the new length without shocking yourself with a dramatic change. Start with long layers and progressively shorten them over several appointments until you reach your desired length and layer intensity.
Q: What products do I need for styling layered hair?
A: Basic essentials include heat protectant spray, a volumizing mousse or spray, and a light texturizing product. You don’t need an extensive product collection. Choose formulas suited to your hair type and desired finish. A good blow dryer and round brush are the most important tools.
Q: Will layers damage my hair?
A: Layers themselves don’t damage hair. The cutting technique simply removes length at different points. However, if you increase heat styling to maintain your layered look, that can cause damage. Use heat protectant products and give your hair breaks from hot tools to maintain health.
Q: How long does it take for layers to grow out?
A: Layers typically take 4-6 months to grow out significantly, depending on your hair growth rate. The shortest layers will gradually catch up to the longer ones. If you’re growing out layers, regular trims can help blend them more smoothly during the transition period.