Creating radiant, healthy-looking skin doesn’t require expensive products or complicated routines. Your kitchen likely contains everything you need to craft effective face masks that rival premium skincare treatments. These simple DIY solutions offer fresh, potent ingredients without preservatives, artificial fragrances, or mysterious chemicals that might irritate sensitive skin.
The beauty of making your own face masks lies in complete control over what touches your skin. You select each ingredient based on your specific needs, whether targeting dullness, dryness, or uneven texture. Fresh ingredients deliver vitamins and nutrients at their peak potency, something store-bought masks can’t match after months on shelves. Plus, the satisfaction of mixing your own skincare creates a mindful self-care ritual that goes beyond basic application.
Natural face masks have transformed complexions for centuries, passed down through generations of women who understood the power of simple ingredients. From ancient Egyptian honey treatments to Asian rice water traditions, these time-tested methods continue proving their worth. Ready to discover which homemade masks will give you that coveted glow? The following sections reveal everything from essential ingredients to application techniques that maximize results.
Why Homemade Face Masks Work for Glowing Skin
Fresh ingredients contain active compounds that diminish quickly after processing. When you mash an avocado or mix honey with oats moments before application, those nutrients reach your skin at maximum strength. Commercial products undergo heating, preserving, and packaging processes that reduce ingredient potency significantly.
The science behind natural ingredients
Your skin recognizes and responds to natural substances differently than synthetic compounds. Enzymes in fresh fruits break down dead skin cells gently, while raw honey’s antimicrobial properties help clear pores without harsh chemicals. These ingredients work with your skin’s natural processes rather than forcing dramatic changes that might cause irritation.
Plant-based ingredients contain molecular structures similar to your skin’s own components. This compatibility allows deeper penetration and better absorption of beneficial nutrients. For instance, the fatty acids in avocado closely match those in human sebum, making them particularly effective for nourishment.
How fresh ingredients benefit your skin
Living enzymes remain active in fresh ingredients until the moment you apply them. Papaya contains papain, an enzyme that dissolves dead cells and reveals brighter skin underneath. This enzyme starts breaking down within hours of cutting the fruit, explaining why fresh applications work so much better than packaged versions.
Raw ingredients also maintain their full vitamin content. Vitamin C in fresh lemon juice brightens and evens skin tone, but this vitamin oxidizes rapidly when exposed to air and light. Making masks immediately before use guarantees you receive these benefits rather than applying degraded compounds.
The water content in fresh ingredients provides instant hydration without added fillers. Cucumber, for example, delivers moisture along with silica and other minerals that support skin elasticity. This natural hydration penetrates better than synthetic moisturizers that might sit on skin’s surface.
Absorption and skin compatibility
Natural ingredients typically have smaller molecular sizes that penetrate skin barriers more effectively. Honey molecules slip between skin cells, carrying moisture and nutrients deeper than many commercial creams can reach. This enhanced absorption means faster, more noticeable results from regular use.
Your skin produces its own oils, proteins, and acids that match those found in many foods. Yogurt’s lactic acid mimics the alpha-hydroxy acids your skin naturally produces, making it an ideal gentle exfoliant. This similarity reduces the risk of adverse reactions common with synthetic alternatives.
Temperature plays a role too. Room-temperature or slightly warm natural masks open pores gently, allowing ingredients to work more effectively. You control this factor completely with homemade versions, unlike pre-packaged masks that might contain heating or cooling agents.
Cost-effectiveness and customization
A single avocado, some honey, and a tablespoon of olive oil cost less than most single-use sheet masks, yet provide enough mixture for multiple applications. Building a collection of mask ingredients requires minimal investment compared to purchasing numerous specialized products.
Customization extends beyond just choosing ingredients. You adjust consistency, add or reduce certain components based on daily skin needs, and modify recipes seasonally. Winter might call for richer, more moisturizing masks, while summer benefits from lighter, clarifying options.
Homemade masks eliminate packaging waste and reduce environmental impact. No plastic containers, foil packets, or synthetic materials end up in landfills. This sustainable approach to skincare aligns with growing awareness about beauty’s environmental footprint. Each batch you make reduces demand for industrially produced, heavily packaged products that contribute to pollution throughout their lifecycle.
The freedom to experiment leads to discovering perfect combinations for your specific skin type. Maybe honey and cinnamon create your ideal brightening mask, or perhaps banana and yogurt provide the exact moisture balance you need. This personalized approach beats any one-size-fits-all commercial product.
Essential Ingredients for Radiant Skin Masks
Understanding which ingredients deliver specific benefits helps you create targeted treatments for your skin concerns. The most effective masks combine multiple ingredients that work synergistically, enhancing each other’s properties while addressing various skin needs simultaneously.
Natural moisturizers and hydrators
Honey stands out as the ultimate multitasking ingredient for glowing skin. Its humectant properties draw moisture from the air into your skin, while natural enzymes gently exfoliate dead cells. Raw, unprocessed honey works best, containing propolis and royal jelly that provide additional anti-inflammatory benefits.
Avocado brings deep nourishment through its rich oil content and vitamin E concentration. The creamy texture creates a protective barrier that locks in moisture while delivering fatty acids that strengthen skin’s natural moisture barrier. Overripe avocados work particularly well, as their softer texture blends smoothly into masks.
Aloe vera gel soothes while hydrating, making it perfect for sensitive or sun-exposed skin. Fresh gel scraped directly from leaves contains polysaccharides that help skin retain moisture longer than water alone. The cooling sensation also reduces inflammation and redness.
Natural yogurt provides probiotics along with hydration. These beneficial bacteria help balance skin’s microbiome, potentially reducing breakouts and irritation. Greek yogurt’s thicker consistency makes it ideal for masks, staying put during application rather than dripping.
Coconut oil, though controversial for some skin types, offers intense moisture for dry areas. Its medium-chain fatty acids penetrate deeply, though those with oily or acne-prone skin might prefer lighter options. Virgin coconut oil retains more beneficial compounds than processed versions.
Exfoliating ingredients that brighten
Lemon juice naturally lightens dark spots and evens skin tone through its citric acid content. However, its strength requires careful dilution – never apply pure lemon juice directly. Mixed with soothing ingredients, it provides gentle brightening without harsh bleaching effects.
Oatmeal offers physical and chemical exfoliation simultaneously. Its texture buffs away dead cells while saponins provide gentle cleansing action. Colloidal oatmeal (finely ground) works best in masks, creating a smooth paste that won’t scratch delicate facial skin.
Papaya contains powerful enzymes that dissolve the bonds holding dead skin cells together. This fruit-based exfoliation feels gentler than physical scrubs while delivering comparable results. Green papaya contains higher enzyme levels than fully ripe fruit.
Sugar makes an excellent physical exfoliant when you want immediate smoothness. Its granules dissolve gradually during application, preventing over-exfoliation. Brown sugar’s molasses content adds minerals that benefit skin health. Here’s how different sugars work in masks:
Fine White Sugar: Dissolves quickly for gentle exfoliation on sensitive areas
Brown Sugar: Contains glycolic acid from molasses for added chemical exfoliation
Raw Sugar: Provides more aggressive exfoliation for rough patches
Powdered Sugar: Blends smoothly for barely-there texture in creamy masks
Vitamins and antioxidants for skin health
Vitamin C from citrus fruits and berries fights free radical damage while promoting collagen production. Fresh orange juice, mashed strawberries, or kiwi pulp deliver this vital nutrient directly to skin cells. The fresher your source, the more potent the vitamin content remains.
Green tea provides catechins and polyphenols that protect against environmental damage. Cooled green tea can replace water in any mask recipe, adding antioxidant benefits without changing texture. Matcha powder offers concentrated benefits in powder form.
Turmeric brings powerful anti-inflammatory properties through its curcumin content. This golden spice reduces redness and can help fade hyperpigmentation over time. A tiny pinch goes far – too much might temporarily stain fair skin yellow.
Tomatoes supply lycopene, an antioxidant that protects against UV damage and supports skin structure. Their natural acidity also helps tighten pores and control oil production. Overripe tomatoes mash easily into smooth mask bases.
Ingredients to avoid for sensitive skin
Cinnamon, though popular in DIY recipes, can cause severe irritation or burns on sensitive skin. Its warming effect might feel pleasant initially but often leads to redness and discomfort. Those with sensitive skin should skip this ingredient entirely.
Baking soda’s high pH disrupts skin’s acid mantle, potentially causing dryness and irritation. Despite its popularity for acne treatment, dermatologists generally advise against facial use. Your skin functions best at a slightly acidic pH, which baking soda severely alters.
Essential oils require extreme caution in face masks. Their concentration can trigger reactions even in typically non-sensitive skin. Tea tree, peppermint, and citrus oils particularly tend toward irritation. If you choose to include them, one drop per mask application provides plenty of potency.
Apple cider vinegar needs significant dilution to avoid chemical burns. While its acids can help with certain skin conditions, undiluted application causes more harm than good.
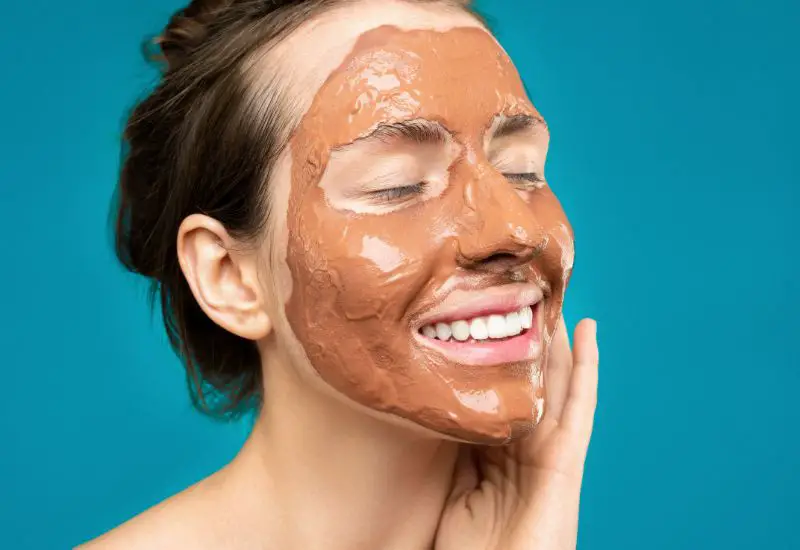
How to Apply Face Masks for Maximum Glow
The way you prepare, apply, and remove face masks impacts their effectiveness as much as the ingredients themselves. Creating the right conditions for mask application ensures ingredients penetrate properly while avoiding irritation or waste.
Preparing your skin beforehand
Clean skin absorbs mask ingredients better than skin covered in makeup, oil, or daily grime. Start with gentle cleansing using lukewarm water – hot water strips natural oils while cold water won’t remove debris effectively. Pat your face dry with a clean towel, leaving skin slightly damp for better ingredient absorption.
Steam opens pores naturally before mask application. Hold your face over a bowl of hot water with a towel draped over your head for 2-3 minutes. This simple step helps ingredients penetrate deeper while softening dead skin cells for easier removal. If steaming feels too intense, a warm, damp washcloth pressed against skin for 30 seconds works similarly.
Consider gentle exfoliation before masks targeting brightening or deep cleansing. A soft washcloth with circular motions removes surface dead cells that might block ingredient absorption. Skip this step if using masks with strong exfoliating ingredients to avoid overdoing it.
Application techniques that work
Apply masks with clean fingers or a dedicated brush, never double-dipping into your mixture. Start from the center of your face, working outward in gentle upward strokes. This technique supports natural lymphatic drainage while ensuring even coverage.
Layer thickness matters more than you might think. Too thin, and ingredients dry out before working effectively. Too thick wastes product without additional benefits. Aim for coverage that obscures skin color but doesn’t drip or slide off your face.
Avoid the eye area unless specifically using ingredients safe for this delicate zone. The skin here differs from facial skin – thinner, more sensitive, and prone to irritation. Similarly, lips need special consideration as many mask ingredients cause dryness or peeling.
Multi-masking addresses different skin concerns simultaneously. Apply clay-based masks to oily zones like the T-zone while using hydrating masks on dry cheeks. This targeted approach maximizes benefits without overwhelming any single area.
Timing and frequency guidelines
Most natural masks work best within 10-15 minutes. Leaving them longer doesn’t increase benefits and might cause irritation, especially with acidic ingredients. Clay masks should be removed before completely drying to prevent moisture loss from skin.
Weekly masking suits most skin types, though you might adjust based on individual needs. Oily skin might benefit from twice-weekly clay masks, while dry skin prefers weekly hydrating treatments. Listen to your skin’s response rather than following rigid schedules.
Morning versus evening application depends on ingredients and your schedule. Brightening masks work well in the morning, giving skin an immediate glow. Deeply nourishing treatments suit evening application when skin naturally repairs itself.
Seasonal adjustments keep masks relevant to changing skin needs. Summer might require more clarifying treatments due to increased oil production and sweat. Winter calls for richer, more protective masks against harsh weather. Spring and fall provide opportunities to address transitional skin changes.
Post-mask skincare routine
Removing masks properly preserves the benefits you’ve just provided your skin. Use lukewarm water and gentle circular motions, avoiding harsh rubbing that might irritate freshly treated skin. A soft cloth helps remove stubborn residue without aggressive scrubbing.
Toner after masking helps restore skin’s pH balance while removing any lingering mask particles. Choose alcohol-free versions that won’t dry out newly treated skin. Rose water or green tea makes excellent natural toners that complement mask treatments.
Lock in mask benefits with appropriate moisturizer while skin remains slightly damp. This timing helps seal in hydration and any beneficial ingredients still absorbing into skin. Choose lighter lotions for daytime and richer creams for nighttime application.
Sun protection becomes even more important after certain mask ingredients. Acids and enzymes can increase photosensitivity temporarily. Apply SPF 30 or higher if going outside within 24 hours of using masks containing citrus, glycolic acid, or strong exfoliants.
Track your skin’s response over several applications rather than expecting instant transformation. Take photos in consistent lighting weekly to notice gradual improvements. This documentation helps identify which recipes work best for your changing skin needs.
Best Homemade Face Mask Recipes
Creating effective face masks requires understanding ingredient ratios and combinations that work harmoniously together. These tested recipes target specific skin concerns while promoting overall radiance.
Honey and oat brightening mask
This gentle combination suits all skin types, particularly those seeking subtle brightening without irritation. Mix two tablespoons of raw honey with one tablespoon of finely ground oats and a teaspoon of plain yogurt. The consistency should resemble thick pancake batter – add more oats if too runny or a splash of milk if too thick.
Apply this mixture after cleansing, focusing on areas with uneven tone or texture. The honey draws moisture into skin while its enzymes gently dissolve dead cells. Oats provide mild physical exfoliation and anti-inflammatory benefits. Yogurt’s lactic acid brightens without the intensity of stronger acids.
Leave on for 12 minutes before rinsing with warm water. Your skin should feel immediately softer and look more luminous. Use weekly for gradual brightening or before special events for instant glow. This mask stores well in the refrigerator for up to three days, though fresh preparation yields best results.
Avocado nourishment treatment
Perfect for dry or mature skin needing intensive moisture and nutrients. Mash half a ripe avocado until completely smooth – lumps make application difficult and waste product. Add one teaspoon of honey and one teaspoon of olive oil, mixing until creamy.
The richness of this mask requires lying down during application to prevent sliding. Apply a thick layer, avoiding the eye area where the oils might cause puffiness. Avocado’s vitamins E and C support collagen production while fatty acids strengthen skin’s moisture barrier.
Natural oils in this recipe penetrate deeply, so limit use to once weekly for normal skin or twice weekly for very dry skin. Remove after 15 minutes with lukewarm water and a soft cloth. Follow immediately with lightweight moisturizer to seal in benefits without overwhelming skin.
Turmeric glow booster
Mix one tablespoon of plain yogurt with half a teaspoon of turmeric powder and one teaspoon of honey. Add a squeeze of fresh lemon juice for extra brightening power. This golden mask fights inflammation while evening skin tone over time.
Application requires care to avoid staining – wear old clothing and protect surfaces. The yellow tinge on skin fades within an hour, faster if you wipe with milk-soaked cotton after rinsing. Despite this minor inconvenience, results justify the extra effort.
Turmeric’s curcumin reduces redness and calms irritated skin while promoting natural radiance. Combined with yogurt’s probiotics and honey’s antibacterial properties, this mask addresses multiple concerns simultaneously.
Yogurt and lemon clarifying mask
Ideal for oily or congested skin needing deep cleansing without harsh stripping. Combine two tablespoons of Greek yogurt with one teaspoon of fresh lemon juice and half a teaspoon of honey. The mixture should be smooth and spreadable.
Important considerations for this acidic combination:
Patch Test First: Lemon can irritate sensitive skin, so test on your jaw area
Dilute if Needed: Add more yogurt if tingling becomes uncomfortable
Night Application: Use evening only as lemon increases sun sensitivity
Avoid Broken Skin: Skip this mask if you have active acne or cuts
Limit Frequency: Once weekly maximum to prevent over-exfoliation
Results include tighter-looking pores, reduced oiliness, and brighter overall appearance. The acids dissolve dead skin cells and excess sebum while probiotics support healthy skin bacteria balance.
Coffee grounds energizing mask
Combine one tablespoon of fresh coffee grounds with one tablespoon of cocoa powder and two tablespoons of milk or yogurt. This stimulating blend increases circulation while providing antioxidant benefits.
Fresh grounds work better than used ones, retaining more caffeine and beneficial compounds. The texture provides gentle physical exfoliation while caffeine temporarily tightens and firms skin appearance. Cocoa adds minerals and additional antioxidants that protect against environmental damage.
Apply in gentle circular motions, avoiding aggressive rubbing that might scratch. The immediate effects include reduced puffiness and a healthy flush from increased blood flow. Regular use may help minimize the appearance of fine lines through improved circulation and antioxidant protection.
Morning application maximizes the energizing effects, though the temporary skin tightening also works well before evening events. Rinse thoroughly as grounds can cling to fine facial hair.
Common Mistakes That Reduce Face Mask Effectiveness
Understanding what not to do proves as valuable as knowing proper techniques. These frequent errors prevent you from achieving the glowing results natural masks can deliver.
Using expired ingredients
Fresh ingredients lose potency quickly once cut or mashed. That leftover mask mixture from last week harbors bacteria that could cause breakouts or infection. Dairy-based ingredients spoil fastest, developing harmful bacteria within hours at room temperature.
Even seemingly stable ingredients like honey have limits. While pure honey rarely spoils, mixing it with fresh ingredients introduces moisture that encourages bacterial growth. Prepare only what you’ll use immediately, treating homemade masks like fresh food rather than commercial products.
Fruits past their prime might seem economical for masks, but overripe produce often contains mold spores invisible to the naked eye. These organisms cause skin reactions ranging from mild irritation to serious infections. Choose ingredients you’d feel comfortable eating for safest results.
Dried ingredients like oats or clay require proper storage to maintain effectiveness. Humidity causes clumping and potential mold growth. Store these items in airtight containers away from bathroom moisture. Replace any ingredients showing discoloration, strange odors, or texture changes.
Incorrect mixing ratios
Too much of any active ingredient overwhelms skin, causing irritation instead of improvement. Lemon juice, apple cider vinegar, and essential oils particularly require careful measurement. More doesn’t equal better results – it often means redness, burning, or peeling.
Consistency affects how well masks adhere and work on skin. Runny mixtures drip off before ingredients have time to absorb. Overly thick pastes dry too quickly, pulling moisture from skin rather than providing it. Adjust textures gradually, adding liquid or dry ingredients in small amounts.
Incompatible ingredients cancel out each other’s benefits or create irritating compounds. Vitamin C from citrus becomes unstable when mixed with certain ingredients. Baking soda and vinegar neutralize each other despite both being popular DIY ingredients. Research combinations before experimenting.
Leaving masks on too long
The belief that longer application equals better results causes unnecessary skin stress. Once ingredients have delivered their benefits, usually within 10-15 minutes, extended wear provides no advantage. Clay masks particularly shouldn’t dry completely on skin, as this draws out beneficial moisture along with impurities.
Acidic masks containing fruit enzymes or citrus begin breaking down healthy skin cells if left too long. What starts as gentle exfoliation becomes chemical irritation. Set a timer rather than estimating – those extra minutes make a difference.
Sleeping in masks meant for short application causes severe drying or irritation. Even hydrating masks aren’t designed for overnight wear without specific formulation for extended contact. The concentration of ingredients in DIY masks requires controlled exposure times.
Skipping patch tests
Assuming natural equals safe leads to preventable reactions. Many people discover allergies or sensitivities through skincare mishaps that patch testing would have prevented. Food allergies often translate to topical reactions – avoid ingredients you can’t eat safely.
Proper patch testing involves applying a small amount of the complete mask mixture to your inner arm or behind your ear. Wait 24 hours before full facial application. This delay might feel frustrating but prevents whole-face reactions requiring days or weeks to heal.
Skin sensitivity changes with hormones, weather, and other factors. A mask that worked perfectly last month might irritate this week. Pay attention to how your skin responds rather than following rigid routines. Redness, itching, or burning signals to remove the mask immediately.
New ingredients deserve extra caution regardless of their reputation for gentleness. Start with lower concentrations and shorter application times, gradually increasing as your skin adjusts. Building tolerance prevents shocking skin with sudden intense treatments that cause more harm than good.
Final Thoughts on Your Natural Glow Journey
Creating your own face masks transforms skincare from expensive obligation into enjoyable self-care ritual. The knowledge you’ve gained about ingredients, techniques, and proper application puts professional-level treatments within reach using simple kitchen supplies. Your unique skin needs no longer depend on mass-produced formulas that might or might not address your specific concerns.
The path to glowing skin through natural masks requires patience and consistency rather than dramatic overnight changes. Each application builds upon previous treatments, gradually improving texture, tone, and overall radiance. Track your progress through photos and notes about which combinations work best during different seasons or skin conditions. This personalized approach yields results no store-bought product can match because you’re creating exactly what your skin needs when it needs it.
Frequently Asked Questions
Q: How often should I use homemade face masks for the best glow?
A: Most skin types benefit from masking once or twice weekly. Start with once per week to see how your skin responds, then adjust based on your needs. Oily skin might handle twice-weekly treatments, while sensitive skin may prefer every 10 days.
Q: Can I make face masks ahead and store them for later use?
A: Fresh preparation works best since natural ingredients lose potency quickly and can harbor bacteria. If you must prepare ahead, store in an airtight container in the refrigerator for maximum 2-3 days, though immediate use provides superior results.
Q: Will natural face masks stain my skin?
A: Turmeric can leave a temporary yellow tint that fades within an hour or two. Remove it faster by wiping with milk or oil after rinsing. Berries might also cause slight staining, but this disappears with gentle cleansing.
Q: Should I use face masks if I have acne-prone skin?
A: Yes, but choose ingredients carefully. Honey, yogurt, and oatmeal suit acne-prone skin well. Avoid heavy oils like coconut if you break out easily. Clay masks help control oil without over-drying.
Q: What’s the best time of day to apply a face mask?
A: Evening application allows ingredients to work while you sleep and gives any temporary redness time to fade. Morning masks work well for instant brightening before special events. Choose based on your schedule and the mask’s ingredients.
Q: Can I use different masks on different areas of my face?
A: Absolutely! This technique, called multi-masking, addresses various skin concerns simultaneously. Apply clay to oily areas and hydrating masks to dry zones for customized treatment.
Q: Do homemade masks work as well as expensive store-bought ones?
A: Fresh, natural ingredients often work better than preserved commercial products because they contain active compounds at full strength. However, consistency and proper technique matter more than price for achieving glowing skin.
Q: Is it normal for my skin to tingle during a face mask?
A: Mild tingling from ingredients like citrus or yogurt is normal, but burning, intense stinging, or increasing discomfort means you should remove the mask immediately. Your skin shouldn’t feel painful during treatment.