The four strand braid stands out as one of the most visually striking braiding techniques you can master. Unlike the classic three strand version that most people learned in childhood, this style creates a more intricate pattern with remarkable depth and texture. The woven appearance catches attention wherever you go, making it perfect for both casual outings and special occasions.
Learning this braiding method opens up countless styling possibilities for your hair. You can create everything from tight, polished braids suitable for professional settings to loose, flowing styles that add romance to wedding hairstyles. The technique works beautifully on various hair lengths and textures, though the final look will vary depending on your specific hair type and the products you use.
Throughout the following sections, we’ll walk through everything from basic preparation to advanced styling variations. You’ll discover the exact hand positions that make the process easier, learn which common mistakes to avoid, and find solutions for typical problems that arise during braiding. Let’s start transforming your hair styling repertoire with this versatile technique.
Understanding the Four Strand Braid Basics
Adding an extra strand to your braiding technique changes the entire dynamic of how the hairstyle comes together. The additional section creates more crossing points, resulting in a flatter, wider braid with distinctive diagonal patterns running through it. This structural difference means you’ll need to adjust your typical braiding approach and develop new muscle memory for handling the extra strand.
How does a four strand braid differ from traditional braids?
The fundamental difference lies in the weaving pattern itself. While three strand braids follow a simple over-under sequence, the four strand version requires you to work with two strands in each hand simultaneously. The pattern typically involves weaving the outer strands through the middle ones in a specific sequence. This creates a braid that appears almost flat against the head initially but develops beautiful dimension as it progresses down the length of your hair.
The visual impact sets this style apart immediately. Where traditional braids create a rounded, rope-like appearance, four strand versions produce a broader, more intricate design. The finished result often resembles a piece of woven fabric or decorative cord, with clear definition between each crossing point.
What tools do you need for four strand braiding?
Your success with this technique depends partly on having the right supplies ready before you begin. A quality paddle brush helps smooth hair before sectioning, while a rat-tail comb creates precise parts. Small clear elastic bands work better than thick hair ties for securing the end, as they won’t overwhelm the delicate pattern you’ve created.
Hair clips or small claw clips prove invaluable for keeping sections separated as you work. You’ll want at least three clips to hold strands you’re not actively braiding. A hand mirror helps check your progress from different angles, especially when braiding your own hair.
Which hair types work best with this technique?
Medium to thick hair typically holds this style most effectively. The weight and volume provide enough substance for each strand to maintain its definition throughout the braid. Fine hair can work wonderfully too, though you might need texturizing products to add grip and prevent slipping.
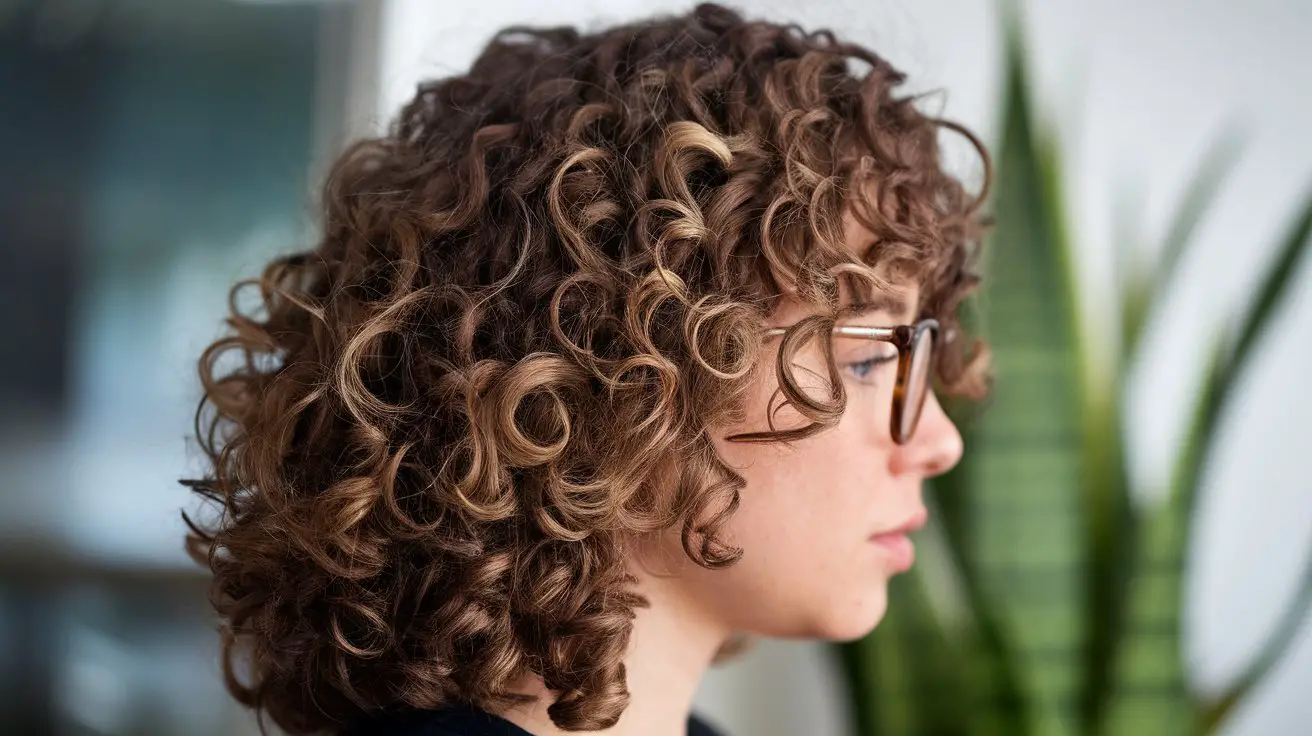
Wavy and curly textures often create the most dramatic results, as the natural texture adds volume and interest to each strand. Straight hair produces cleaner, more geometric patterns that showcase the weaving technique beautifully. Very short layers might pop out during braiding, but this can add to the style’s charm rather than detracting from it.
When should you choose a four strand braid over other styles?
This braiding method shines when you want something more sophisticated than everyday styles but less formal than elaborate updos. It works particularly well for outdoor events where wind might disturb looser hairstyles. The secure weaving keeps hair controlled without looking severe or overly structured.
Consider this technique for occasions when you’ll be photographed frequently. The intricate pattern photographs beautifully from multiple angles, creating visual interest in both professional portraits and casual snapshots. The style also transitions seamlessly from day to evening events, maintaining its structure for hours without requiring touch-ups.
How to Prepare Your Hair for Four Strand Braiding
The foundation you create before starting to braid determines how well your finished style will hold and how polished it will appear. Taking time with preparation prevents frustration during the braiding process and ensures a result that lasts throughout your day.
Should you braid on wet or dry hair?
Completely dry hair generally provides the best results for this particular technique. Wet strands tend to stretch and change shape as they dry, potentially loosening your carefully crafted pattern. However, slightly damp hair can offer more control if you struggle with static or flyaways.
The key lies in finding the moisture level that works for your specific hair type. Some women find that misting dry hair lightly with water provides the perfect balance of control and stability. Others prefer working with day-old hair that has natural oils providing grip without excess moisture. Experiment during practice sessions to discover your ideal starting point.
If you must braid damp hair, use a lower tension to account for the stretching that will occur as it dries. This prevents the uncomfortable pulling sensation that can develop hours after styling. Apply a light-hold mousse or foam to damp strands for added structure without stiffness.
What products help maintain the braid structure?
The right products make the difference between a braid that stays pristine and one that becomes fuzzy within hours. Here are essential products to consider:
Texturizing Spray: Adds grip to slippery hair, making strands easier to control
Light-hold Gel: Smooths flyaways without creating stiffness or crunch
Dry Shampoo: Absorbs oils and adds volume at the roots for better grip
Finishing Spray: Sets the completed style without weighing down the pattern
Anti-frizz Serum: Controls static and smooths the hair cuticle for neater sections
Apply products sparingly to avoid buildup that makes hair feel heavy or look greasy. Focus application on the mid-lengths and ends rather than roots, unless you specifically need volume at the crown. Allow each product to dry or absorb before adding another layer.
How do you section hair properly for four strands?
Creating even sections forms the backbone of a balanced braid. Start by dividing all your hair into four equal parts using the tail of a comb. The precision of these initial divisions affects the entire style, so take your time getting them right.
Hold each section separately between different fingers to maintain the divisions. Your index and middle fingers can hold the two middle sections, while your thumbs and remaining fingers manage the outer strands. This hand position might feel awkward initially but becomes natural with practice.
For beginners, securing three sections with clips while you work can simplify the process. This prevents sections from merging accidentally and lets you focus on the weaving pattern without juggling multiple strands simultaneously. As your confidence grows, you’ll naturally progress to holding all sections at once.
Which brushing techniques prevent tangling?
Start brushing from the ends and work gradually toward the roots. This approach removes knots without creating additional tangles or causing breakage. Use long, smooth strokes rather than short, aggressive movements that can create static and disturb your sections.
A boar bristle brush or mixed bristle brush works particularly well for distributing natural oils and smoothing the hair shaft. These brushes also help blend any products you’ve applied, ensuring even coverage throughout each section. For very thick or textured hair, a wide-tooth comb might work better for initial detangling.
Pay special attention to the nape area where tangles often hide. Hair at the back of the head tends to mat more easily due to friction from clothing and pillows. Missing these tangles during prep work leads to painful pulling when you reach that area during braiding.
What’s the ideal hair length for this style?
Hair reaching at least shoulder length provides enough material to create a visible pattern and maintain the braid structure. Shorter lengths can work, but you’ll have less braid to showcase the intricate weaving. The finished braid will be shorter than your loose hair length due to the take-up from weaving.
Longer hair creates more dramatic results and allows for various finishing options. You can wrap the braid into a bun, create a crown braid, or leave it hanging for maximum impact. Hair reaching mid-back or longer produces especially stunning results, though the weight can make handling the sections more challenging.
Consider your lifestyle and maintenance preferences when deciding if this style suits your current length. Shorter hair requires more frequent adjustments as pieces escape, while very long hair might need additional securing points to prevent sagging. The sweet spot for most women falls between shoulder blade and mid-back length.
Step-by-Step Four Strand Braid Technique
Mastering the actual braiding technique requires patience and practice, but breaking it down into manageable steps makes the learning process much smoother. Focus on maintaining consistent tension and keeping your sections clearly defined as you work through the pattern.
How do you position your hands correctly?
Your hand position determines both your comfort level and your ability to maintain control over all four sections. Start with your palms facing upward, creating a stable platform for the strands to rest on. Position your hands at roughly shoulder height to prevent arm fatigue during longer braiding sessions.
The two outer strands should rest over your pinkie fingers, while the inner strands lie across your middle and index fingers. This positioning keeps each section separate and allows for smooth transitions during the weaving process. Your thumbs remain free to guide strands as needed and adjust tension throughout the braid.
As you become more comfortable with the technique, you’ll develop your own variations on hand positioning. Some women prefer holding strands between their fingers rather than over them. Others find that angling their hands slightly inward provides better control. The key is finding what feels natural for your hand size and flexibility.
Practice the hand positions without actually braiding at first. Simply holding the four sections and getting comfortable with the weight distribution helps build muscle memory. This preparatory practice pays off when you begin the actual weaving process.
What’s the weaving pattern for four strands?
The basic pattern follows a specific sequence that creates the characteristic woven appearance. Take the far-right strand and weave it under the strand next to it, then over the following strand. Next, take the far-left strand and weave it under its neighbor, then over the next strand. This creates one complete sequence.
Continue alternating between the right and left outer strands, always following the under-over pattern. The rhythm becomes meditative once you establish the flow. Count out loud if needed: “Right under, over. Left under, over.” This verbal reinforcement helps maintain the pattern when you’re learning.
Some variations exist on this basic pattern. You might see instructions for over-under-over sequences or patterns that involve more complex crossing. Start with the fundamental under-over pattern first, as it provides the foundation for understanding more elaborate variations.
Visual learners benefit from practicing with ribbons or strips of fabric before attempting the technique on hair. The different colors make it easier to track each strand’s path through the weave. This practice method also eliminates the complications of dealing with flyaways or varying textures while you’re learning the pattern.
How tight should you pull each section?
Consistent, moderate tension creates the most attractive and comfortable result. Pulling too tightly causes scalp discomfort and can lead to tension headaches, especially if you plan to wear the style all day. Conversely, insufficient tension results in a loose, messy braid that won’t hold its shape.
The ideal tension allows the braid to lie smoothly against your head without creating pulling sensations at the roots. You should be able to gently move the completed sections without feeling resistance or pain. Each new crossing should match the tension of previous ones to maintain uniformity throughout the length.
Adjust your tension based on your hair’s thickness and texture. Finer hair typically requires slightly less tension to prevent breakage, while thicker hair can handle firmer pulling. Curly or textured hair often needs looser tension to accommodate the natural volume and prevent the pattern from becoming distorted.
Where do most beginners make mistakes?
The most common error involves losing track of which strand goes where in the pattern. This confusion typically happens around the third or fourth repetition when the rhythm hasn’t yet become automatic. Slow down and verbalize each movement until the pattern feels natural.
Another frequent mistake is allowing the sections to become uneven as you progress. The outer strands naturally use up more length due to their longer path through the weave. Compensate by occasionally adjusting the size of your sections, borrowing small amounts of hair from thicker sections to even things out.
Many beginners also struggle with maintaining consistent spacing between crossings. Rushing through the pattern creates irregular gaps that make the braid look amateur. Focus on creating uniform distances between each weaving point for a professional appearance.
Hand cramping presents another challenge, particularly for those with smaller hands or limited flexibility. Take breaks every few inches to shake out your hands and reset your grip. There’s no prize for speed – working slowly and comfortably produces better results than rushing through with tired hands.
How can you maintain even tension throughout?
Developing a steady rhythm helps maintain consistent tension from start to finish. Think of it like knitting or crocheting – the repetitive motion becomes smoother with practice. Set a pace that feels sustainable rather than racing through the pattern.
Check your progress frequently using a hand mirror or asking someone to evaluate the back sections. Looking for areas where the pattern appears looser or tighter helps you adjust your technique before problems become too pronounced. Small corrections during braiding prevent major issues in the finished style.
Rest your arms periodically to prevent fatigue from affecting your tension. Tired arms naturally pull harder or become shaky, creating inconsistencies in the braid. Supporting your elbows on a table or counter while braiding can help maintain steady control for longer periods.
Keep your sections organized and separated throughout the process. When strands start blending together, you unconsciously pull harder to maintain control, creating uneven tension. Clear definition between sections naturally promotes more consistent handling.
Creative Variations and Styling Options

Once you’ve mastered the basic technique, endless possibilities open up for customizing and enhancing your four strand braids. These variations let you adapt the style for different occasions and personal preferences.
What are the different four strand patterns?
The flat four strand braid creates a wide, ribbon-like effect perfect for showcasing hair color variations or highlights. This version involves keeping all strands in the same plane rather than allowing them to round naturally. The result resembles an intricate piece of woven trim.
A round four strand braid produces a rope-like appearance with more dimension than the flat version. This pattern works beautifully for creating faux hawks or mohawk-inspired styles. The rounded shape also makes it ideal for wrapping into buns or other updo elements.
The ladder braid incorporates a four strand technique while leaving one strand loose to create a cascading effect. This romantic variation works wonderfully for special occasions. The loose strand can be curled or waved for added drama.
Chain link patterns emerge when you adjust the tension and crossing angles during braiding. These create sections that appear to interlock like chain links rather than weaving smoothly. This edgier interpretation suits rock concert looks or alternative fashion styles.
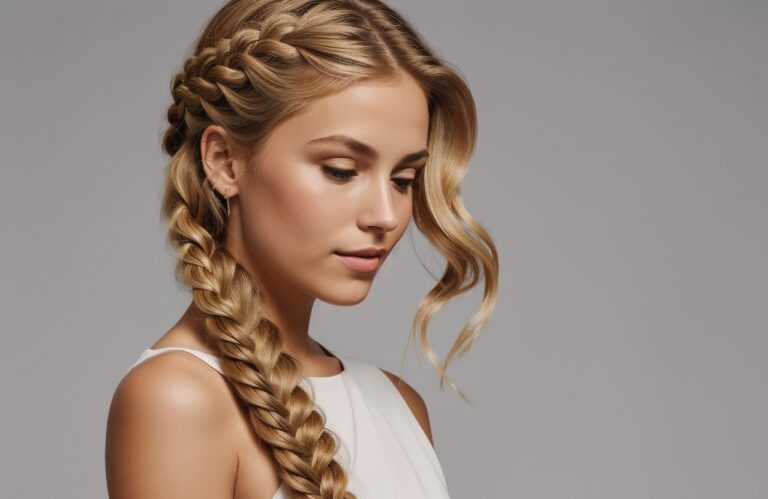
How do you create a loose, romantic version?
Start with the basic technique but use considerably less tension throughout the braiding process. Allow the strands to lie gently against each other rather than pulling them tight. This creates natural gaps and movement within the pattern.
After completing the braid, gently tug at the edges of each woven section. This technique, called pancaking, spreads the braid wider and creates a softer silhouette. Work from bottom to top for the most control over the final shape.
Leave face-framing pieces out of the initial sections for a softer appearance. These wisps can be curled or left natural to enhance the romantic feeling. You might also pull a few strategic pieces loose after braiding for an effortlessly undone look.
Incorporating flowers, delicate pins, or ribbon woven through the braid enhances the romantic aesthetic. Choose accessories that complement rather than compete with the intricate pattern. Small pearls or crystals scattered throughout add subtle sparkle for evening events.
Which accessories complement this braid style?
Minimalist metal cuffs designed specifically for braids add modern sophistication without overwhelming the pattern. These accessories simply slide onto the braid at various points, creating accent moments that draw the eye.
Silk scarves woven through the strands during braiding add color and movement. Choose lightweight fabrics that won’t add excessive bulk to the sections. The scarf ends can be tied in a bow at the bottom or left flowing for added drama.
Fresh or silk flowers tucked into the weave create garden party perfection. Smaller blooms work better than large statement flowers, which can obscure the braiding pattern. Baby’s breath, small roses, or delicate wildflowers integrate beautifully.
Bobby pins decorated with pearls, crystals, or small charms can be placed strategically throughout the braid. Rather than clustering them in one area, distribute them evenly for balanced visual interest. Match the metal tone to your jewelry for a coordinated look.
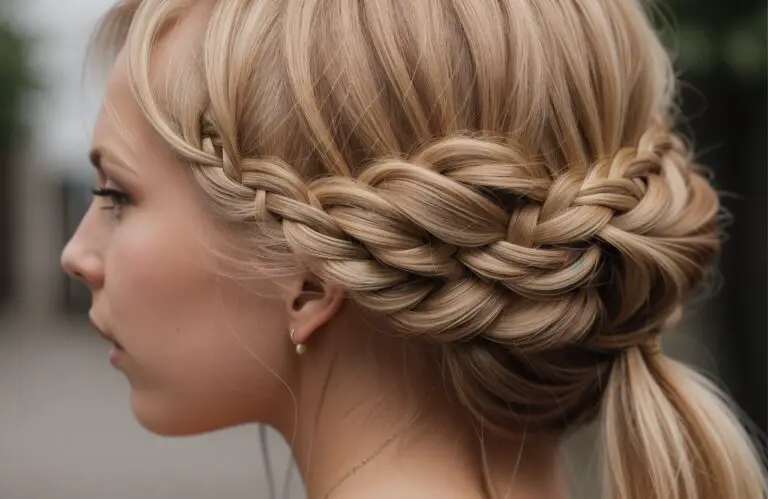
How can you incorporate it into updos?
Transform your four strand braid into an elegant low bun by coiling it at the nape of your neck. Secure with bobby pins inserted at angles to grip both the braid and the hair beneath. This creates a textured alternative to standard bun styles.
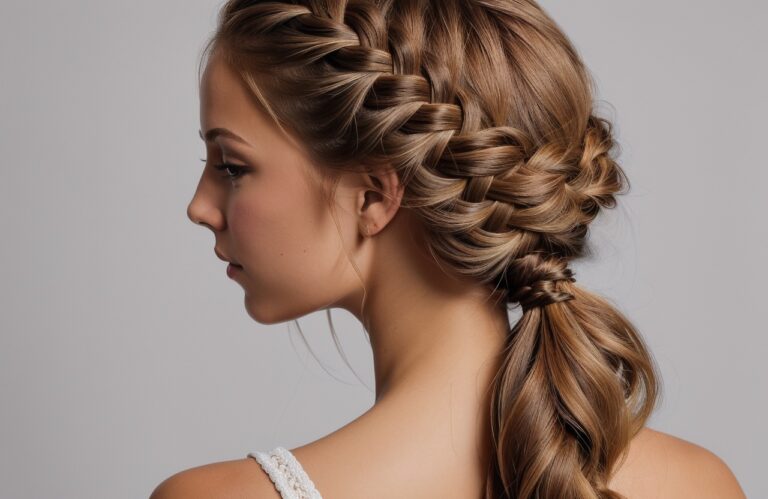
Create a crown braid by starting at one ear and working around your head. The four strand technique adds extra interest to this classic style. Leave the ends loose for a half-up effect or continue braiding all hair for complete coverage.
Multiple small four strand braids can be combined into elaborate updos. Try creating two or three braids from different sections, then pin them in overlapping patterns. This technique works particularly well for wedding hairstyles or formal events.
A side-swept four strand braid draped over one shoulder creates an asymmetrical updo when the opposite side is pinned back. Add volume at the crown for balance and secure everything with decorative pins. This style photographs beautifully from all angles.
Troubleshooting Common Four Strand Braid Problems
Even experienced braiders encounter challenges with this technique occasionally. Understanding common issues and their solutions helps you achieve better results and reduces frustration during the learning process.
Why does your braid look uneven?
Uneven sections from the initial division create imbalance throughout the entire braid. If one strand contains significantly more hair than the others, it will appear thicker and throw off the pattern. Always double-check your sections before beginning to weave.
Inconsistent tension between different parts of the braid creates an irregular appearance. The beginning might be tight while the middle loosens, or vice versa. Practice maintaining steady pressure throughout helps develop muscle memory for consistent results.
Natural hair growth patterns can affect how evenly the braid lies. Cowlicks or directional growth at the crown might cause certain sections to stick out or pull differently. Working with your hair’s natural tendencies rather than against them produces better results.
How do you fix sections that slip out?
Short layers popping out during braiding can be managed with strategic product application. A small amount of pomade or wax applied to shorter pieces helps them grip onto longer strands. Focus on problem areas rather than coating all your hair.
If sections consistently escape during braiding, you might be pulling at too sharp an angle. Keep the strands relatively parallel to prevent shorter pieces from sliding out. Adjusting your hand position can make a significant difference.
Bobby pins that match your hair color can secure rebellious sections without being visible. Slide them carefully under the braid to catch loose pieces and anchor them to more stable sections. This works particularly well for pieces around the face or nape.
Sometimes starting over produces better results than trying to fix multiple escaped sections. If more than a few pieces have come loose, the structural integrity of the braid is compromised. Taking a brief break and restarting often leads to a neater final result.
What causes the braid to loosen quickly?
Product buildup or overly conditioned hair can be too slippery to maintain the braid structure. If your hair feels silky and slides easily through your fingers, it might need more texture for braiding. Try using a clarifying shampoo before styling or skip conditioner on braiding days.
Environmental factors like humidity affect how well braids hold. High humidity causes hair to expand and change texture, potentially loosening the weave. Using anti-humidity products or choosing tighter initial tension can compensate for weather-related changes.
Your hair’s natural characteristics play a role in longevity. Very fine, straight hair typically doesn’t hold braided styles as long as thicker or textured hair. Accept your hair’s limitations and plan accordingly – you might need to refresh the style partway through the day.
Movement and activity naturally loosen any hairstyle over time. If you know you’ll be very active, start with slightly firmer tension and use a finishing spray to set the style. Consider the braid’s purpose when deciding how tightly to secure it.
How can you speed up the braiding process?
Preparation dramatically affects braiding speed. Having all tools within reach and hair properly prepped eliminates time-wasting interruptions. Set up your station before starting, with clips, elastics, and products arranged conveniently.
Practicing the hand movements without hair builds muscle memory faster than always working with actual strands. Use rope, ribbon, or even shoelaces to rehearse the pattern while watching television or during other downtime.
Working in sections can make the process feel less overwhelming. For very long hair, secure the braid periodically with temporary clips, then remove them once you’ve completed the entire length. This prevents hand fatigue and maintains better control.
Setting realistic expectations helps maintain motivation during practice. Your first attempts might take 20-30 minutes, but with regular practice, you can complete a four strand braid in under 10 minutes. Speed comes naturally with repetition.
When should you start over versus fixing mistakes?
Minor pattern errors in the first few crossings warrant starting fresh. The beginning sets the foundation for the entire braid, so early mistakes compound as you continue. Taking a moment to restart prevents greater frustration later.
If you notice the error immediately after making it, you can usually backtrack one or two crossings without completely undoing your work. Carefully reverse the last movements and resume with the correct pattern. This works best when sections remain clearly defined.
Mistakes noticed after several inches of braiding often aren’t worth fixing unless they’re glaringly obvious. Small pattern irregularities often blend into the overall texture, especially in looser, more romantic styles. Perfection isn’t always necessary for a beautiful result.
Consider your time constraints and the event you’re preparing for. A casual braid for running errands doesn’t require the same precision as a wedding hairstyle. Sometimes “good enough” truly is sufficient, especially while you’re still learning.
Mastering Your Signature Four Strand Style
The four strand braid technique you’ve learned opens up a world of sophisticated styling options that go far beyond basic braiding. With consistent practice, those initially awkward hand positions and confusing patterns will become second nature, allowing you to create intricate styles in minutes rather than struggling for half an hour. Your personal braiding style will naturally develop as you discover which variations work best with your hair type and lifestyle.
The journey from beginner to confident four strand braider happens gradually through patient practice and experimentation. Each attempt teaches you something new about tension, hand positioning, or pattern variations that work for your unique hair characteristics. Whether you prefer polished professional styles or relaxed bohemian vibes, this versatile technique adapts to match your vision, giving you the creative freedom to express yourself through your hairstyle choices.
Frequently Asked Questions
Q: How long does it take to learn four strand braiding?
A: Most people can grasp the basic pattern within 2-3 practice sessions, though developing speed and consistency typically takes 2-3 weeks of regular practice. Your learning curve depends on your previous braiding experience and natural dexterity.
Q: Can you do a four strand braid on yourself or do you need help?
A: You can definitely master this technique on your own hair with practice. Starting with a side braid where you can see your hands makes learning easier before progressing to braiding behind your head.
Q: What’s the minimum hair length needed for this style?
A: Hair reaching at least to your shoulders provides enough length to create a visible pattern. Shorter hair can work but produces a very short braid that might not showcase the weaving effectively.
Q: Will four strand braiding damage my hair?
A: When done correctly with appropriate tension, this technique causes no more stress than regular braiding. Avoid pulling too tightly and give your hair breaks between braiding sessions to prevent any tension-related damage.
Q: How do you sleep with a four strand braid?
A: Wrap the braid in a silk or satin scarf or use a silk pillowcase to reduce friction. A loose braid holds up better overnight than a tight one, which might cause discomfort and leave pronounced waves.
Q: Can you four strand braid with hair extensions?
A: Yes, extensions actually make the process easier by providing consistent texture and length throughout each section. Blend them thoroughly with your natural hair before beginning the braid for seamless results.
Q: Why does my four strand braid turn into a three strand?
A: This usually happens when sections merge accidentally during braiding. Focus on keeping clear separation between all four strands, and consider using clips to maintain divisions until the pattern becomes automatic.
Q: How often should you practice to improve quickly?
A: Practicing for 10-15 minutes every other day produces better results than occasional long sessions. Regular short practices build muscle memory more effectively than sporadic intensive efforts.