Finding the right eyeliner brush can transform your makeup routine from frustrating to effortless. Whether you’re just starting your makeup journey or you’ve been perfecting your technique for years, the brush you choose directly impacts the precision, smoothness, and overall quality of your liner application. The difference between a shaky, uneven line and a crisp, professional finish often comes down to having the proper tool in your hand.
The market offers countless options, from budget-friendly synthetic brushes to high-end natural hair varieties, each promising to deliver flawless results. This overwhelming selection leaves many women confused about which brush truly suits their needs and skill level. Price doesn’t always guarantee quality, and the most expensive option might not be the best choice for your particular technique or preferred liner formula.
In the following sections, we’ll explore everything from basic brush anatomy to advanced application techniques, helping you identify which brushes deserve a spot in your collection. You’ll discover how different bristle types affect your application, why handle design matters more than you might think, and which specific brushes work best with various liner formulas. Continue reading to find your perfect eyeliner brush match and master techniques that will elevate your eye makeup game.
- What Makes an Eyeliner Brush Perfect for Your Skill Level
- Essential Eyeliner Brush Types Every Makeup Kit Needs
- How to Choose Your First Professional Eyeliner Brush
- Proper Care and Maintenance for Long-Lasting Brushes
- Advanced Techniques That Require Specific Brush Types
- Master Your Liner Game With the Right Tools
- Frequently Asked Questions
What Makes an Eyeliner Brush Perfect for Your Skill Level
The bristles of your eyeliner brush determine how much control you have during application and how your chosen liner formula distributes across your lid. Synthetic bristles work exceptionally well with liquid and gel formulas because they don’t absorb product the way natural hair does. This characteristic means more product ends up on your lid rather than trapped within the brush fibers. These brushes also tend to maintain their shape better after washing, making them ideal for beginners who might not yet have perfected their cleaning routine.
Natural hair bristles, typically made from sable, squirrel, or goat hair, offer a softer application that many experienced makeup artists prefer for powder products. The microscopic scales on natural hair help pick up and deposit powder particles more effectively than smooth synthetic fibers. However, these brushes require more careful maintenance and tend to cost significantly more than their synthetic counterparts.
Handle Length and Grip Considerations
Your brush handle might seem like a minor detail, but its design significantly impacts your application precision. Shorter handles, typically measuring between 4-5 inches, offer greater control for detailed work. You’ll find these particularly helpful when creating intricate designs or working on your own eyes in a mirror. The reduced distance between your hand and the brush tip minimizes shaking and allows for steadier strokes.
Longer handles, ranging from 6-8 inches, work better for makeup artists applying liner on others or for those who prefer to work at arm’s length from their mirror. Some brushes feature ergonomic grips with textured sections or wider barrels that prevent hand fatigue during extended use. If you struggle with grip strength or have arthritis, look for brushes with cushioned or rubberized handles that won’t slip from your fingers mid-application.
Tip Shapes for Different Techniques
The shape of your brush tip determines which liner styles you can easily achieve. Ultra-fine pointed tips, often less than 1mm wide, excel at creating hair-thin lines and precise details. These brushes give you the control needed for tightlining or drawing sharp wings. Beginners might find these challenging initially, as they require a steady hand and consistent pressure.
Angled tips combine the precision of a fine point with the coverage ability of a flat brush. The slanted edge lets you create both thin and thick lines by adjusting the angle at which you hold the brush. Many makeup artists consider this style the most versatile option, particularly for those still developing their technique.
Price Ranges and Quality Indicators
Budget brushes priced under $10 can perform surprisingly well, especially when you’re still experimenting with different techniques. Look for densely packed bristles that don’t shed when you run your fingers through them. The ferrule (metal part connecting bristles to handle) should feel secure without any wobbling or gaps where bacteria could accumulate.
Professional-grade brushes ranging from $15-40 typically offer superior longevity and performance consistency. These often feature hand-shaped tips that maintain their form through hundreds of uses and washes. The investment makes sense once you’ve identified your preferred brush styles and techniques. Signs of quality include smooth, even bristle cuts, balanced weight distribution, and seamless ferrule attachment.
Mid-range options between $10-15 often provide the best value for most users. These brushes incorporate many professional features without the premium price tag. They work particularly well for building your collection gradually while learning which shapes and sizes suit your style best.
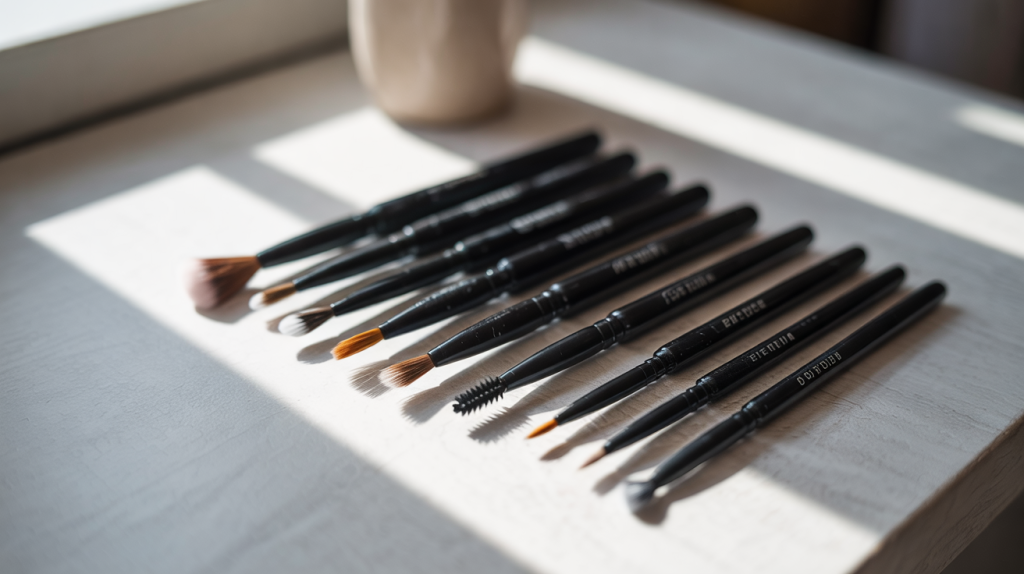
Essential Eyeliner Brush Types Every Makeup Kit Needs
Every makeup enthusiast needs a carefully curated selection of brushes to handle different liner formulas and create various looks. Understanding which brushes serve specific purposes helps you build a versatile collection without purchasing redundant tools.
Angled Brushes for Precise Wings
The angled eyeliner brush has become a staple for good reason – its slanted tip naturally creates the perfect wing angle when pressed against the outer corner of your eye. This design takes the guesswork out of achieving symmetrical wings on both eyes. The flat edge also works wonderfully for filling in your wing shape after outlining it.
When shopping for an angled brush, pay attention to the angle degree. A 45-degree angle offers maximum versatility, while sharper angles around 30 degrees provide more precision for detailed work. The bristle length matters too; shorter bristles give firmer application for gel liners, while slightly longer ones work better with powders.
Fine Liner Brushes for Detailed Work
Fine liner brushes, sometimes called detail brushes, feature incredibly thin tips that taper to an almost needle-like point. These precision tools excel at creating the thinnest possible lines and adding minute details to more elaborate eye looks. Professional makeup artists rely on these brushes for editorial work where every line must be perfectly placed.
The key to mastering this brush type lies in maintaining light pressure throughout your stroke. Pressing too hard splays the bristles and destroys the precise point you need for detailed work. Many women find success by resting their elbow on a stable surface while using these brushes, as this position reduces hand tremors.
Flat Brushes for Smudging and Blending
Flat liner brushes might not create the sharpest lines, but they excel at creating softer, smokier effects. The straight edge deposits product evenly across your lash line, making them perfect for creating a base that you’ll later smudge out. These brushes also work beautifully for applying eyeshadow as liner, giving you more color options than traditional liner products offer.
Bent Liner Brushes for Easier Application
Here are the key benefits of bent liner brushes:
Ergonomic Design: The angled handle reduces wrist strain during application
Better Visibility: The bend keeps your hand from blocking your view in the mirror
Natural Movement: Follows the curve of your eye more intuitively
Reduced Mistakes: The angle helps maintain consistent pressure and direction
This innovative design particularly benefits those with hooded eyes or limited mobility in their wrists. The bent handle positions your hand at a more comfortable angle, reducing the need to contort your arm while applying liner. Some versions feature a double bend that further improves control and visibility.
How to Choose Your First Professional Eyeliner Brush
Your eye shape influences which brush styles will give you the best results. Women with hooded eyes often struggle with straight brushes that require holding their arm at awkward angles to avoid the fold. For these eye shapes, shorter handles or bent brushes provide better control and visibility. The reduced length means less leverage working against you as you navigate around the hooded area.
Those with deep-set eyes benefit from brushes with slightly longer, more flexible bristles that can reach into the recessed areas without requiring excessive pressure. Stiff brushes might skip or drag across the skin in these cases, creating uneven application.
Round eyes typically work well with any brush style, though angled brushes help create the elongating effect many women with this eye shape desire. Almond-shaped eyes also accommodate most brush types easily, making them ideal for experimenting with different techniques and tools.
Matching Brush Types to Liner Formulas
Gel liners require firm, densely packed bristles that can pick up and distribute the thick formula without absorbing too much product. Synthetic bristles typically perform best with gels because they maintain their shape when pushing through the creamy texture. Look for brushes specifically labeled for gel or cream products, as these feature the appropriate bristle density and stiffness.
Liquid liners work differently depending on whether you’re using a traditional liquid or a cake liner activated with water. Traditional liquids need brushes that won’t absorb the formula, making synthetic options ideal. Cake liners, however, often apply more smoothly with natural hair brushes that hold moisture better.
Testing Brush Quality Before Purchase
When possible, test brushes before buying by running them across the back of your hand. Quality brushes should feel smooth without any scratching or uneven spots. The bristles should spring back to their original shape immediately after bending them gently. Any brush that maintains a bent shape or feels overly stiff likely won’t perform well during actual application.
Check for shedding by gently tugging on the bristles. While one or two loose hairs are normal in new brushes, excessive shedding indicates poor construction that will only worsen with use. The ferrule should feel completely secure when you gently wiggle it – any movement suggests the brush won’t last long.
Synthetic Versus Natural Bristles
The debate between synthetic and natural bristles has evolved significantly as synthetic technology has improved. Modern synthetic brushes can mimic the performance of natural hair remarkably well, often surpassing it for certain applications. They’re also cruelty-free, more affordable, and easier to maintain, making them excellent choices for beginners and professionals alike.
Natural bristles still hold advantages for specific techniques, particularly when working with powder products or creating very soft, diffused lines. They tend to pick up less product initially, giving you more control over color intensity. However, they require more frequent replacement as the hair degrades over time, and they’re not suitable for those seeking vegan beauty tools.
Consider starting with synthetic brushes and adding natural options only for specific techniques where you notice a performance difference. This approach keeps costs down while you develop your skills and preferences.
Proper Care and Maintenance for Long-Lasting Brushes
Taking care of your eyeliner brushes extends their lifespan significantly and prevents bacteria buildup that could lead to eye infections. A well-maintained brush performs better and provides more consistent results than one that’s been neglected.
Daily cleaning techniques
After each use, a quick clean removes product buildup and prevents bristles from becoming stiff or misshapen. Spray brush cleaners offer the fastest solution – simply spritz the bristles and wipe them on a clean tissue until no more color transfers. This method works particularly well for powder products but might not completely remove stubborn gel or liquid formulas.
For cream and gel products, keep a small container of makeup remover or micellar water near your vanity. Dip just the bristle tips into the solution, then gently squeeze out excess product with a tissue. Avoid soaking the ferrule area, as this can loosen the glue holding the bristles in place.
Deep Cleaning Methods
Weekly deep cleaning removes all traces of product, bacteria, and oils that quick cleaning might miss. Use a gentle shampoo or specialized brush cleanser mixed with lukewarm water. Swirl the brush in your palm with the cleaning solution, working up a lather that pulls out embedded product. Rinse thoroughly under running water, keeping the ferrule pointed downward to prevent water from seeping into the handle.
Some makeup artists swear by olive oil for breaking down stubborn waterproof formulas before shampooing. This two-step process ensures complete product removal but requires thorough rinsing to eliminate oil residue that could affect future applications.
Storage Solutions That Preserve Bristles
How you store your brushes between uses impacts their shape and longevity. Stand brushes upright in a holder that keeps them separated – bristles touching can cause them to bend or lose their precise shape. For travel, use a brush roll or case with individual slots that protect the tips from crushing.
Never store brushes with damp bristles pointing upward, as water can seep into the ferrule and cause rust or loosening. After washing, reshape the bristles gently with your fingers and lay brushes flat on a towel with the bristles hanging over the edge of a counter. This position allows air circulation while maintaining the brush shape.
When to Replace Your Brushes
Even with excellent care, brushes eventually wear out and need replacement. Signs include persistent shedding after the initial break-in period, bristles that won’t return to their original shape, or a ferrule that’s become loose or corroded. Most quality brushes last 6-12 months with daily use, though this varies based on care and frequency of use.
Scratchy or rough-feeling bristles indicate it’s time for a new brush, as damaged bristles can irritate the delicate eye area. If you notice your application becoming increasingly difficult or uneven despite cleaning, the brush has likely reached the end of its useful life.
Advanced Techniques That Require Specific Brush Types
Geometric and graphic liner designs require brushes with extremely precise tips and firm bristles that won’t bend under pressure. A ruler-flat brush helps create perfectly straight lines for editorial looks, while an ultra-fine detail brush handles the intricate connecting points. These dramatic styles demand tools that maintain their shape throughout extended application sessions.
Start with a flat brush to map out your basic shapes using light pressure. This initial sketch gives you a guide to follow with your detail brush. The combination of these two brush types allows you to achieve the sharp corners and clean edges that define graphic liner styles.
Tightlining With Precision Brushes
Tightlining – applying liner between your lashes rather than above them – creates the illusion of fuller lashes without visible liner. This technique requires an extremely thin, firm brush that can navigate the tight space between lashes. Look for brushes specifically marketed for tightlining, as these feature shorter, stiffer bristles that provide the necessary control.
The ideal tightlining brush measures less than 2mm at its widest point and maintains its shape even when pressed firmly against the lash line. Some versions feature a slightly curved tip that follows the natural curve of your lash line, making application more intuitive.
Work in small sections, wiggling the brush between lashes rather than drawing a continuous line. This method deposits color exactly where you want it while avoiding the waterline, which can cause irritation or smudging.
Achieving the Perfect Cat Eye
The cat eye remains one of the most requested looks, yet many women struggle to achieve symmetrical wings. Success often comes from using multiple brushes for different parts of the process. Start with an angled brush to create your wing outline – its straight edge naturally creates the upward flick when positioned correctly.
Switch to a fine liner brush for connecting the wing to your lash line and filling any gaps. This two-brush approach gives you the benefits of each tool’s strengths rather than trying to make one brush do everything. The angled brush provides structure and shape, while the fine liner adds precision and smoothness.
Blending Gel and Powder Liners
Combining different liner formulas creates dimension and longevity that single products can’t achieve alone. This technique requires brushes that work well with both textures. A firm synthetic brush applies your gel base, while a softer natural or high-quality synthetic brush blends powder on top.
The layering process starts with a thin gel application using a flat or angled brush. While the gel is still slightly tacky, use a small, fluffy brush to press powder shadow over it. This combination locks the color in place while softening any harsh edges. The result looks professionally blended and lasts significantly longer than either product alone.
For the smoothest blend, use a clean, dry brush to feather the edges where your liner meets bare skin. This final step creates a gradual transition that looks intentional rather than smudged.
Master Your Liner Game With the Right Tools
The journey from shaky lines to perfect wings becomes significantly easier when you have the right brushes in your collection. Your ideal brush depends on numerous factors including your skill level, preferred liner formula, eye shape, and the styles you want to create. Starting with a few versatile options and gradually expanding your collection as you develop preferences makes more sense than purchasing an extensive set immediately.
Quality brushes paired with proper maintenance will serve you for months or even years, making them worthwhile investments in your beauty routine. The techniques you’ve learned here provide a foundation for experimenting with different looks and finding your signature style. Whether you prefer subtle definition or dramatic graphic designs, having the appropriate tools transforms liner application from a daily struggle into an enjoyable part of your makeup routine.
Frequently Asked Questions
Q: How many eyeliner brushes do I really need as a beginner?
A: Start with two essential brushes: an angled brush for versatility and a fine detail brush for precision work. These two options will handle most basic liner looks while you develop your skills.
Q: Can I use the same brush for gel and powder liners?
A: While possible, it’s not ideal. Gel formulas can leave residue that affects powder application, even after cleaning. Having dedicated brushes for each formula gives better results.
Q: Why does my eyeliner brush keep fraying after a few uses?
A: Fraying usually results from pressing too hard during application or improper cleaning and storage. Use lighter pressure and ensure brushes dry completely with bristles reshaped after washing.
Q: Should I spend more on natural hair brushes?
A: Not necessarily. Modern synthetic brushes perform excellently with most liner formulas and cost less. Natural brushes only offer significant advantages for specific powder techniques.
Q: How do I prevent my angled brush from losing its sharp edge?
A: After washing, reshape the bristles while damp using your fingers to reform the angle. Store the brush upright or in a protective case to maintain its shape between uses.
Q: What’s the difference between a bent liner brush and just angling my wrist?
A: Bent brushes maintain a consistent angle without wrist strain, providing better control and visibility. They’re particularly helpful for those with limited wrist mobility or hooded eyes.
Q: How often should I clean my eyeliner brushes?
A: Quick clean after each use with spray cleanser, and deep clean weekly with shampoo or brush cleanser. More frequent deep cleaning may be necessary if you use waterproof or long-wear formulas.
Q: Can I sharpen the tip of my liner brush if it becomes dull?
A: No, don’t trim brush bristles as this permanently damages them. If a brush loses its point, it’s time for replacement rather than attempting to reshape it by cutting.