Long layers have become a go-to choice for women with straight hair who want to add life and dimension to their locks without sacrificing length. These strategic cuts create movement, prevent that flat, one-dimensional look, and offer versatility in styling options. Whether your straight hair tends to hang limp or you simply want to refresh your current style, long layers can completely transform your appearance.
The beauty of long layers lies in their ability to work with your natural hair texture rather than against it. Straight hair, while often envied for its sleek appearance, can sometimes lack body and movement. By incorporating carefully placed layers throughout the length, stylists can create the illusion of fuller, more dynamic hair that catches light beautifully and moves naturally as you walk.
In the following sections, we’ll explore six stunning long layer styles specifically designed for straight hair. From subtle face-framing cuts to dramatic V-shaped layers, each technique offers its own unique benefits and styling possibilities. Keep reading to discover which layered look will best complement your face shape, lifestyle, and personal style preferences.
Why Long Layers Transform Straight Hair Beautifully
Straight hair naturally wants to fall in one direction, creating a curtain-like effect that can appear heavy and lifeless. When strategically cut layers are introduced, they break up this uniform length and create multiple levels within your hair. Each layer moves independently, catching air and light differently, which produces that coveted flowing effect you see in shampoo commercials.
The key to successful layering lies in the angle and placement of each cut. Your stylist will typically work with vertical or diagonal sections, removing weight from specific areas while maintaining length in others. This technique prevents your hair from clumping together and allows individual strands to move more freely. The result? Hair that swings, bounces, and flows with every turn of your head.
The difference between regular cuts and layered cuts
A regular blunt cut creates a solid, uniform line across the bottom of your hair. While this can look polished and healthy, it often lacks dimension, especially on straight hair. The weight of all that hair at one length can pull down any natural volume you might have, leaving you with a flat appearance from root to tip.
Layered cuts work differently by removing bulk from strategic points throughout your hair’s length. Think of it as creating a staircase effect within your hair structure. The shorter pieces on top can spring up slightly, adding volume at the crown, while the longer pieces underneath maintain your desired length. This graduation creates depth and the illusion of thickness, even in fine straight hair.
Regular cuts require less maintenance and grow out more predictably. You might notice a clear line as your hair grows, making it obvious when you need a trim. Layered cuts, on the other hand, tend to grow out more gracefully. The varying lengths mean there’s no single line of demarcation, allowing you to go slightly longer between salon visits.
Which face shapes benefit most from long layers
Oval faces have won the genetic lottery when it comes to long layers – nearly any variation will flatter their balanced proportions. For these lucky women, the focus can be purely on personal preference rather than corrective styling. Whether you choose subtle layers or dramatic ones, your face shape will carry them beautifully.
Round faces benefit tremendously from long layers that start below the chin. These create vertical lines that elongate the face and add definition to the jawline. The key is avoiding layers that add width at the cheekbone level. Instead, opt for longer layers that draw the eye downward, creating a slimming effect.
Square faces soften beautifully with long layers, particularly those that add movement around the jawline. The flowing nature of layers helps counteract angular features, creating a more feminine silhouette. Starting layers at or slightly below the jaw works particularly well, as this adds curves where your face is most angular.
Maintenance requirements for layered straight hair
Maintaining long layers in straight hair requires a different approach than caring for a blunt cut. The varying lengths mean you’ll need to pay attention to how each section dries and styles. Regular trims every 8-12 weeks keep the layers looking fresh and prevent them from growing out unevenly.
Your washing routine might need adjustment too. Since layers can make hair appear less dense, you’ll want to avoid heavy conditioners that weigh down your hair. Focus conditioning treatments on the mid-lengths to ends, keeping the shorter layers light and bouncy. A clarifying shampoo used weekly can prevent product buildup that might make layers fall flat.
Heat styling becomes both easier and more important with layers. A good blow-dry can enhance the movement and shape of your cut, while air-drying might not show the layers to their best advantage. Invest in a quality round brush and learn to lift sections while drying to maximize the volumizing effect of your layers. The effort pays off in hair that looks professionally styled every day.
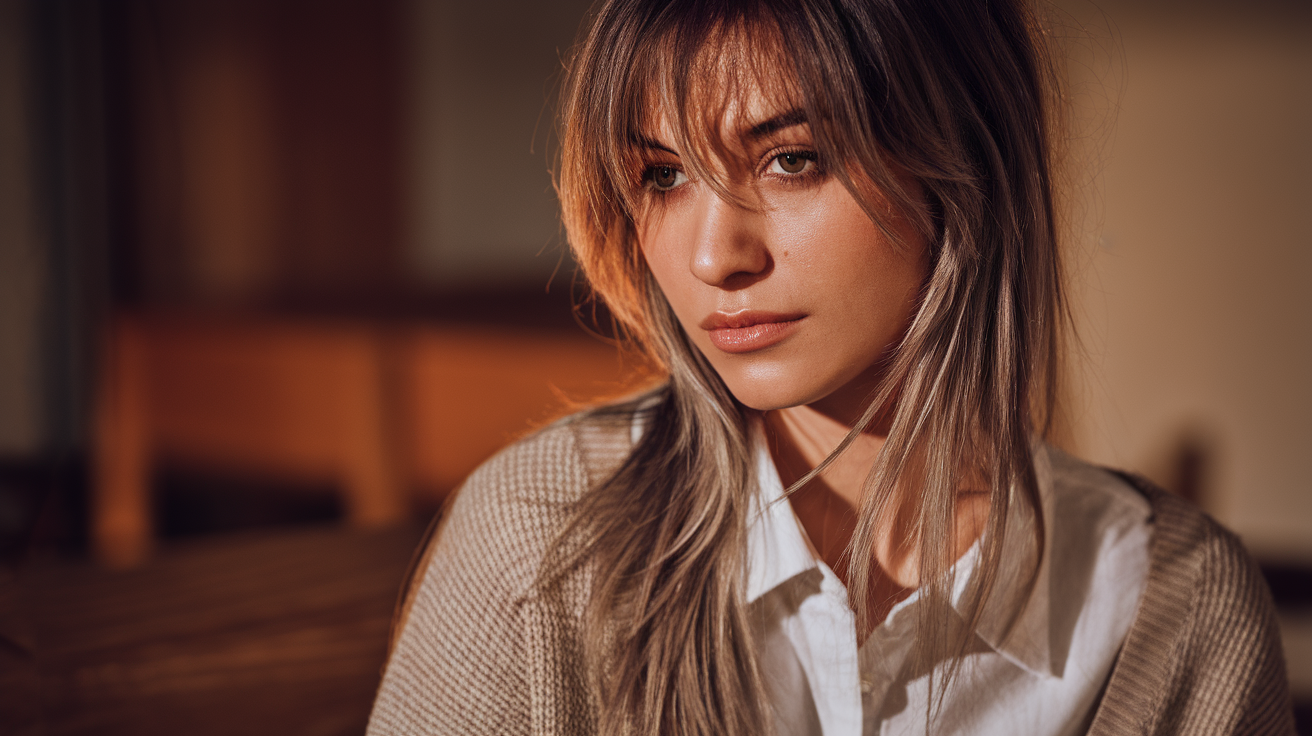
The Classic Face-Framing Long Layers
Face-framing layers have earned their timeless status for good reason – they flatter virtually everyone while requiring minimal styling effort. These carefully positioned shorter pieces around your face create a soft, romantic look that enhances your features without overwhelming them. Unlike bold bangs or dramatic cuts, face-framing layers offer subtlety and versatility.
What defines face-framing layers
The signature characteristic of face-framing layers starts with their placement. Beginning typically at the cheekbone or jaw level, these layers graduate longer as they move away from your face. The shortest pieces usually hit somewhere between your collarbone and shoulders, creating a gentle cascade effect that draws attention to your best features.
What sets this style apart from other layering techniques is the concentration of shorter pieces specifically around the face perimeter. While the back and sides of your hair might have minimal layering or none at all, the front sections receive special attention. This focused approach means you get maximum impact with minimum commitment – perfect for those hesitant about dramatic changes.
The angle of the cut matters significantly. Rather than harsh, choppy lines, face-framing layers feature soft, blended edges that seamlessly integrate with the rest of your hair. Your stylist will likely use point-cutting or slide-cutting techniques to achieve this feathered effect, ensuring no stark lines disrupt the flow.
How to ask your stylist for this cut
Communication with your stylist starts with visual references. Bring at least three photos showing the specific type of face-framing layers you want. Point out what you like about each image – perhaps the length of the shortest layer in one photo, the blending technique in another, and the overall shape in a third.
Be specific about your starting point. Tell your stylist exactly where you’d like the shortest layer to begin – at your cheekbones, lips, or chin. This detail makes a huge difference in the final result. Also discuss how dramatic you want the graduation. Some women prefer a subtle difference between the shortest and longest layers, while others want a more noticeable contrast.
Mention your styling habits honestly. If you rarely use heat tools, your stylist needs to cut the layers in a way that looks good air-dried. If you blow-dry daily, the cut can be more precise, relying on styling to achieve the final look. This conversation prevents disappointment and ensures your new layers fit your lifestyle.
Best lengths for different face shapes
Heart-shaped faces shine with face-framing layers that begin at the chin or slightly below. This placement adds fullness to the lower portion of the face, balancing a wider forehead. The graduated lengths create width where needed while the movement of the layers softens the overall look.
For long faces, starting layers higher up – around the cheekbone area – works wonders. These shorter pieces add horizontal lines that visually widen the face. The key is creating enough variation in lengths to add dimension without elongating the face further. Multiple layer points between cheekbones and shoulders achieve this beautifully.
Women with round faces should request layers beginning at or below the lips. This lower starting point creates vertical lines that slim and elongate. The layers should be cut at a steeper angle, creating more dramatic length differences that enhance the lengthening effect.
Styling techniques for face-framing layers
The beauty of well-cut face-framing layers lies in their versatility. For everyday styling, a simple blow-dry with a round brush can enhance their shape. Section your hair horizontally, starting at the bottom. As you dry each section, direct the brush away from your face at the roots, then curve it slightly inward at the ends.
For a more polished look, use a flat iron to create subtle bends in the layers. Rather than curling them completely, create soft S-waves by alternating the direction of the iron as you glide down each section. This technique adds movement without the formality of traditional curls.
Quick styling options for busy mornings include:
Twist and Pin: Twist the face-framing sections back and secure with bobby pins for an instant face-lift effect
Beach Waves: Scrunch damp layers with texturizing spray and let air dry for effortless texture
Sleek and Straight: Use a smoothing serum and flat iron for a glossy, professional finish
Half-Up Style: Pull back just the top layers, letting face-framing pieces fall naturally
Products that enhance this style
The right products can make or break your face-framing layers. Start with a lightweight volumizing mousse applied to damp hair, concentrating on the roots of your shorter layers. This foundation prevents them from falling flat against your face as the day progresses.
Heat protectant becomes non-negotiable when you have layers, as these shorter pieces tend to receive more styling attention. Choose one that doesn’t weigh hair down – spray formulas often work better than creams for straight hair. Apply before any heat styling to maintain hair health and prevent damage to those face-framing pieces you’ll style most often.
For finishing, a light-hold hairspray maintains movement while preventing flyaways. Avoid anything too stiff, as this defeats the purpose of flowing layers. Some women find that a small amount of hair oil or serum applied to just the ends of the layers adds shine and prevents any dryness from frequent styling. The goal is enhancement, not alteration – your layers should move naturally while looking polished and intentional.
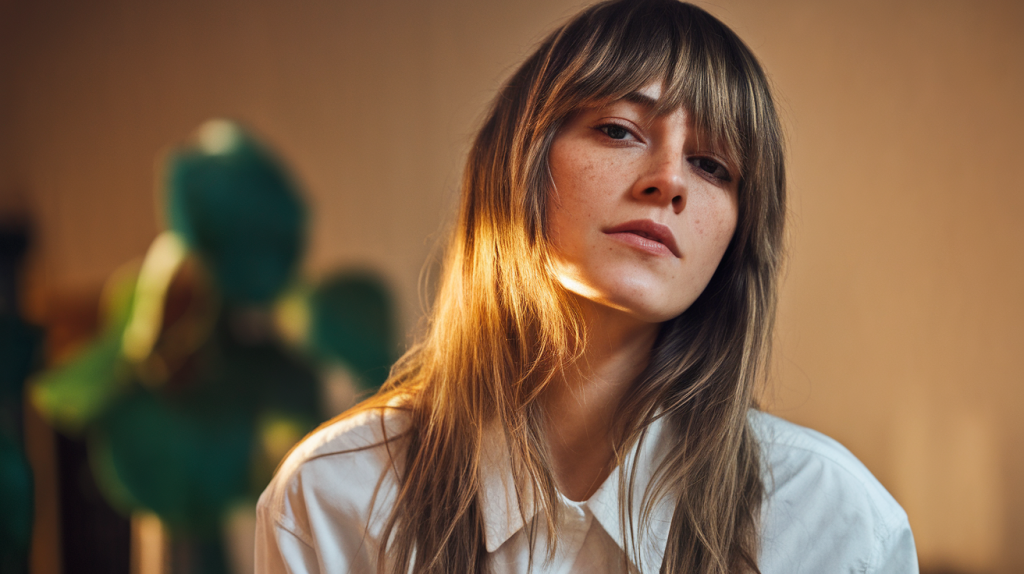
Subtle V-Cut Layers for Maximum Movement
The V-cut technique creates a distinctive shape where hair forms a gentle V when viewed from behind. This cutting method involves creating the longest point at the center back, with lengths gradually decreasing toward the sides. Unlike traditional straight-across cuts, this approach naturally encourages hair to fall in a more dynamic pattern.
What makes V-cuts particularly effective for straight hair is how they distribute weight throughout the length. The graduated shape prevents hair from hanging in a single, heavy sheet. Instead, the varying lengths create natural movement as different sections fall at different points. This inherent structure means less styling effort for more visual interest.
Professional stylists achieve this look through careful sectioning and precise angle work. They typically start by establishing the center point length, then work outward in diagonal sections. Each cut follows the intended V-line, creating seamless graduation. The angle can be subtle for a barely-there effect or more dramatic for bold movement.
The technique differs from standard layering because it maintains density while creating shape. Rather than removing bulk throughout, V-cuts preserve thickness while directing how hair naturally falls. This makes them ideal for those who want movement without sacrificing the appearance of full, healthy hair.
Why V-cuts work exceptionally well on straight hair
Straight hair showcases the precision of V-cuts better than any other texture. The clean lines and graduated lengths are clearly visible, creating an architectural quality that’s both modern and flattering. Without natural waves or curls to disguise cutting lines, every angle serves a specific purpose in the overall design.
The physics of straight hair actually complement the V-shape perfectly. As hair hangs naturally, gravity pulls each section down according to its length. The shorter side pieces frame the body while the longer center section creates a slimming vertical line. This natural fall pattern requires no manipulation – the cut does the work for you.
V-cuts also solve common straight hair complaints. The shape automatically prevents that boxy, bottom-heavy look that plagues one-length cuts. By removing weight from the sides while maintaining center length, the style creates an illusion of movement even in the straightest, most stubborn hair.
Additionally, this cutting technique helps straight hair hold style better. The varied lengths mean different sections dry at different rates and fall at different angles. This built-in variation makes it easier to create waves or curls that last, as the hair isn’t fighting against a uniform weight distribution.
Difference between V-cut and U-cut layers
While both create curved shapes at the back, V-cuts and U-cuts serve different purposes and create distinct looks. V-cuts feature a definite point at the center back, with straight diagonal lines extending to the sides. This creates a more dramatic, edgy appearance that adds serious movement to straight hair.
U-cuts, conversely, form a rounded, softer curve at the back. The graduation is more gradual, creating a gentler transition from center to sides. This shape tends to look more classic and natural, making it popular among those seeking subtle enhancement rather than dramatic change.
The layering approach also differs between these techniques. V-cuts often incorporate minimal interior layering, relying on the perimeter shape for movement. U-cuts frequently include more traditional layering throughout, combining the curved baseline with interior texture for maximum body.
How to style V-cut layers at home
Styling V-cut layers at home starts with proper washing and conditioning. Focus shampoo at the scalp and let suds run through lengths without aggressive scrubbing. This preserves the cut’s precise lines. When conditioning, concentrate product on the ends, particularly the longer center section which needs extra moisture.
The drying process can enhance or diminish your V-cut’s impact. For maximum movement, flip hair upside down while blow-drying until about 70% dry. Then, section hair horizontally and dry each layer with a large round brush, directing airflow down the hair shaft. This technique enhances the natural movement built into the cut.
For days when time is limited, work with the V-cut’s natural tendencies. Apply a small amount of smoothing serum to damp hair, focusing on the ends. Create a center part and gently comb each side forward. As hair dries, it will naturally fall into the intended V-shape, requiring minimal intervention.
Creating waves in V-cut hair requires a strategic approach:
- Section hair based on the cut’s natural divisions
- Start curling at the shortest side sections
- Work toward the center, adjusting iron position for each length
- Finish by gently separating waves with fingers
When to refresh your V-cut
The beauty of V-cuts lies partly in how well they grow out. Unlike blunt cuts that show obvious growth lines, the graduated shape means new length blends relatively seamlessly. Most women find they can go 10-12 weeks between major appointments, though this varies based on hair growth rate and personal preferences.
Watch for signs that your V-cut needs attention. When the side pieces begin approaching the center length, the distinctive shape starts disappearing. The cut loses its movement-creating properties and begins resembling a standard long layer cut. This usually happens around the three-month mark for average hair growth.
Minor maintenance between full cuts can extend your style’s lifespan. Many stylists offer “dusting” appointments where they refresh just the perimeter shape without adjusting overall length. This preserves your V-cut’s movement while allowing you to grow length if desired.
Consider seasonal adjustments too. Summer humidity might require a slightly more dramatic V to combat hair expansion, while winter’s dry air might call for a subtler angle to prevent excessive static. These minor modifications keep your cut working with your environment rather than against it.
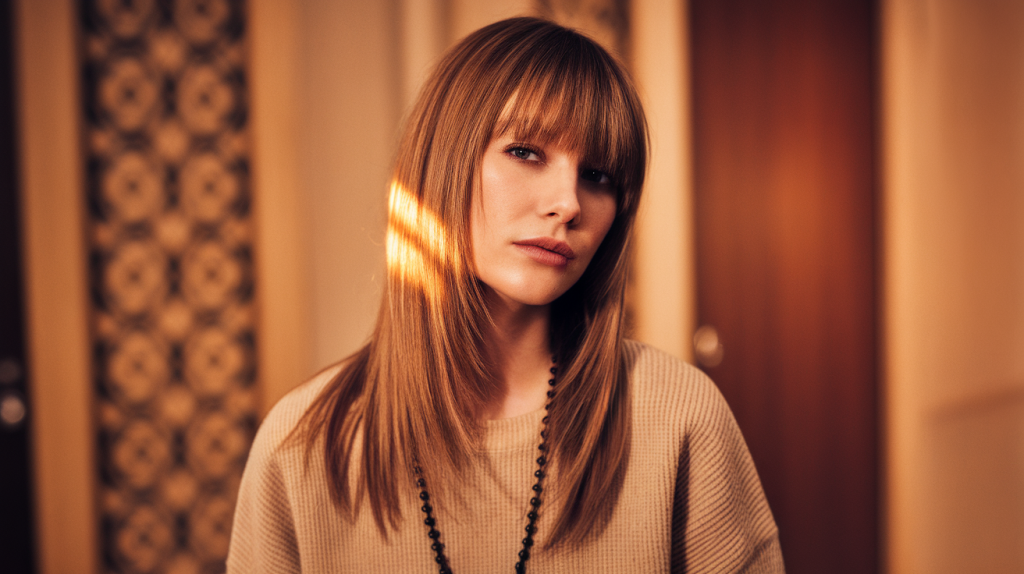
Feathered Long Layers for Vintage Glamour
Feathered layers have shed their dated reputation and emerged as a sophisticated option for modern women. Today’s interpretation takes the best elements of the original style – soft, sweeping movement and incredible volume – while eliminating the high-maintenance aspects that made it impractical for contemporary lifestyles.
The renewed interest in feathered styles stems from their incredible versatility. Unlike the rigid, hairspray-heavy versions of decades past, current feathering techniques create touchable, natural-looking texture. Social media has played a significant role in this revival, with stylists showcasing how feathering can look fresh and current on straight hair.
What distinguishes modern feathering from its predecessors is the cutting technique. Rather than creating distinct, wing-like sections, today’s stylists use razoring and point-cutting to achieve a softer, more blended effect. The result maintains that characteristic feathered movement without the obvious sectioning that dated the original style.
The contemporary approach also considers individual hair density and texture more carefully. Fine straight hair receives lighter feathering to avoid a wispy appearance, while thicker hair can handle more dramatic layering. This customization ensures each woman gets a version that enhances rather than overwhelms her natural hair.
Modern updates to classic feathering
Today’s feathering techniques incorporate lessons learned from decades of hair innovation. The most significant change involves the tools used. While vintage feathering relied heavily on traditional scissors creating distinct steps, modern stylists employ texturizing shears and razors for seamless blending.
The direction of the feathering has evolved too. Classic styles always directed hair away from the face in uniform wings. Contemporary interpretations mix directions, with some sections sweeping back while others curve forward. This varied approach creates more natural movement and allows for versatile styling options.
Length distribution represents another major update. Original feathered cuts often featured dramatic length differences between layers, creating that characteristic 70s silhouette. Modern versions maintain longer overall lengths with subtler graduation. The feathering effect comes from technique rather than excessive layering.
Product usage has transformed completely. Where vintage feathering demanded heavy-hold sprays and mousses, today’s versions work with lightweight texturizers and sea salt sprays. The goal is enhancement rather than sculpture – hair should move freely while maintaining its feathered shape.
Color techniques now complement feathered cuts beautifully. Subtle highlights and lowlights enhance the layered texture, creating dimension that wasn’t possible with the solid colors popular during feathering’s original heyday. This interplay between cut and color modernizes the overall aesthetic.
Tools needed for feathered styling
A quality blow dryer with multiple heat settings forms the foundation of feathered styling. Look for one with a concentrator nozzle to direct airflow precisely along each feathered section. The ability to switch between hot and cool settings helps set the style while maintaining hair health.
Round brushes in various sizes are essential for achieving authentic feathered movement. A large barrel works best for the longer layers, creating gentle bends and lifts. Medium-sized brushes handle the mid-length sections, while a smaller brush can perfect the shorter, face-framing pieces. Natural bristle brushes grip hair better than synthetic ones, giving you more control over each section.
The right styling products make the difference between limp, separated sections and gorgeously integrated feathers. You’ll need:
Volumizing Mousse: Applied to roots before blow-drying for lift without stiffness
Heat Protectant Spray: Essential for preventing damage during daily styling
Texturizing Spray: Adds grip and enhances the feathered texture
Light-Hold Hairspray: Maintains shape without creating helmet hair
Shine Serum: Just a drop smooths any frizz while adding glossy finish
Daily maintenance tips
Morning styling for feathered layers doesn’t have to be time-consuming. Start by refreshing your hair with a quick spritz of water mixed with leave-in conditioner. This reactivates yesterday’s products while adding moisture. Focus on the mid-lengths and ends where feathering is most prominent.
The key to maintaining feathered layers overnight lies in protection. Swap your cotton pillowcase for silk or satin to reduce friction that can flatten your carefully styled layers. Before bed, loosely gather hair at the crown with a soft scrunchie, allowing the feathered sections to fall naturally without creasing.
Between washes, dry shampoo becomes your best friend. Apply it before bed rather than in the morning – this gives the product time to absorb oils without leaving residue. In the morning, simply massage your scalp and shake out the layers for refreshed volume.
Quick touch-ups throughout the day keep feathers looking fresh. Carry a small texturizing spray for midday refreshing. A few spritzes at the roots followed by gentle scrunching reactivate the feathered texture. Avoid touching hair excessively, as natural oils from hands can weigh down the delicate layering.
Adapting feathers for different occasions
Casual weekend feathering requires minimal effort for maximum impact. After washing, apply mousse to damp hair and rough-dry with your head flipped upside down. Once hair is 80% dry, use a large round brush to direct sections away from your face, creating that signature feathered movement. Finish with texturizing spray scrunched through the ends.
Professional settings call for polished feathering that maintains movement without appearing overdone. Start with a smoothing primer to control any flyaways. Blow-dry each section with tension, creating sleek feathers that curve gently rather than dramatically. A flat iron can perfect any pieces that need extra attention. Set with a light hairspray that allows natural movement.
Evening glamour transforms feathered layers into red-carpet worthy styles. Begin with volumizing mousse and blow-dry for maximum lift. Use hot rollers on alternate sections, creating varied curl patterns that enhance the feathered cut. Once cooled, gently brush through with a paddle brush, allowing the layers to fall into soft, glamorous waves. Finish with shine spray for that lit-from-within glow.
Special occasions might call for updos that showcase your feathering. Create a low, loose bun, allowing the shorter feathered pieces to frame your face. These sections can be curled or straightened depending on the event’s formality. The contrast between the structured updo and soft, feathered face-framing pieces creates an elegant, balanced look that photographs beautifully.
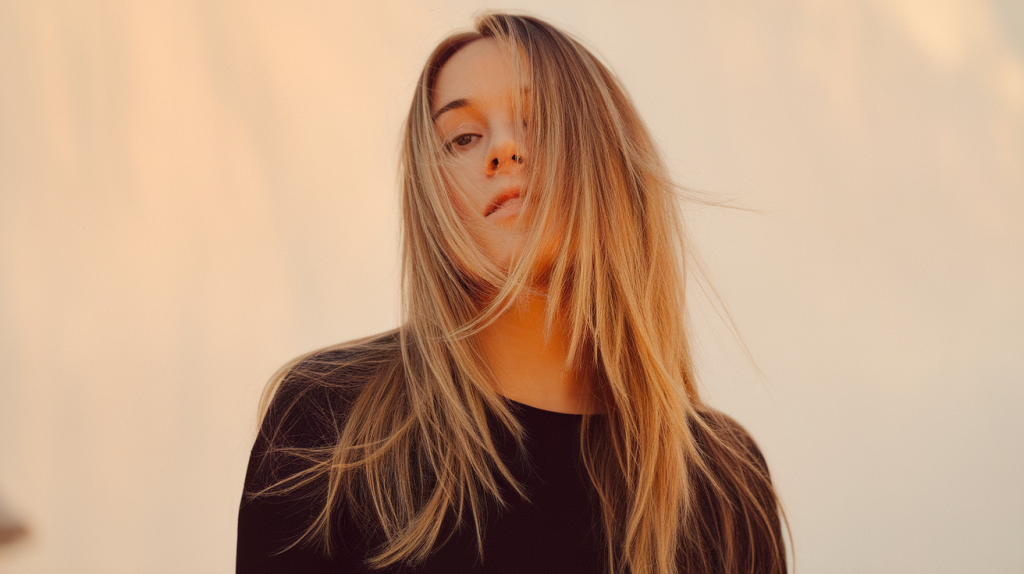
Graduated Long Layers for Added Volume
Graduated layers represent precision cutting at its finest, with each layer meticulously planned to build upon the previous one. This technique creates a stacked effect that generates incredible volume, particularly beneficial for straight hair that tends to lie flat. The graduation refers to the systematic length increase from the shortest layer to the longest, creating a harmonious progression that adds body without bulk.
The magic happens in how these layers interact with each other. Unlike uniform layers cut at the same angle, graduated layers feature varying angles that create lift and movement. The shorter layers push up the longer ones, creating natural volume that doesn’t rely on products or tools. This architectural approach to cutting means your hair maintains shape and body even on lazy styling days.
Professional stylists achieve graduation through careful sectioning and elevation changes. They might lift hair at 45 degrees for one section, then adjust to 90 degrees for another, creating different effects throughout the cut. This variation in technique results in layers that work together rather than sitting separately, producing cohesive volume from roots to ends.
The science behind volume creation
Understanding how graduated layers create volume helps appreciate their effectiveness. When hair is cut at increasing lengths with specific angles, it disrupts the natural fall pattern of straight hair. Instead of lying flat against the head, each layer has space to expand and move independently, creating air pockets that translate to visible fullness.
The weight distribution in graduated layers plays a crucial role. By removing strategic amounts of hair from different areas, stylists create a balance that encourages natural lift. The shorter layers on top weigh less, allowing them to spring up, while maintaining enough length in lower layers provides a stable foundation. This careful weight management prevents the thin, wispy appearance that can plague poorly executed layered cuts.
Physics also favors graduated layers. The varying lengths create different tension points along the hair shaft. When hair dries or is styled, these tension differences cause slight bends and curves, even in perfectly straight hair. These micro-movements compound to create overall volume and prevent the flat, pressed-down look common with one-length cuts.
Root lift becomes almost automatic with properly graduated layers. The shorter pieces near the crown naturally want to stand away from the scalp rather than lying flat. This creates volume at the most important area – where hair meets head – establishing a lifted foundation that carries through the entire length.
Best graduated layer lengths
The optimal length for starting graduated layers depends heavily on your overall hair length and volume goals. For those with hair reaching mid-back or longer, beginning graduation around the shoulder blades creates dramatic volume without sacrificing too much length. This starting point allows for numerous layers while maintaining a long overall appearance.
Women with bra-strap length hair often find success starting graduation just below the shoulders. This creates enough short layers for significant volume while preserving the versatility of medium-long hair. The key lies in creating at least four to five distinct layer lengths for maximum effect.
Collarbone-length starting points work beautifully for those with hair reaching the mid-chest area. This creates a more moderate graduated effect that adds body without drastically changing the silhouette. The layers can be cut closer together for a denser, more voluminous result.
The spacing between layers matters as much as their starting point. Optimal results come from:
Dense Graduation: Layers spaced 1-2 inches apart for maximum volume
Moderate Graduation: Layers spaced 2-3 inches apart for balanced fullness
Subtle Graduation: Layers spaced 3-4 inches apart for gentle movement
Face Shape Consideration: Adjust layer placement to flatter specific features
Blow-drying techniques for maximum lift
Proper blow-drying can amplify the volume built into graduated layers exponentially. Start with soaking wet hair and apply a golf-ball-sized amount of mousse from roots to ends. This creates the foundation for lasting volume. Flip your head upside down and rough-dry until hair reaches about 60% dryness, constantly moving the dryer to prevent directional drying.
Section hair horizontally, starting at the nape. This methodical approach ensures each graduated layer receives proper attention. Clip upper sections away and focus on one layer at a time. Place a large round brush under each section at the roots, lifting hair perpendicular to the head. Direct heat at the roots first, then glide the brush through to the ends.
The crucial technique for graduated layers involves over-directing each section. As you dry, pull hair up and slightly forward rather than straight down. This creates memory in the hair that maintains lift even after styling is complete. The shorter layers especially benefit from this technique, as it trains them to stand away from longer layers beneath.
Temperature variation enhances results significantly. Use high heat for initial drying and root lift, then switch to medium heat for mid-lengths. Finish each section with a blast of cool air to set the style. This temperature progression creates longer-lasting volume while minimizing heat damage to delicate ends.
Common mistakes to avoid
The most frequent error with graduated layers involves over-thinning. Enthusiastic stylists sometimes remove too much bulk, creating stringy, lifeless layers that achieve the opposite of the intended volume. Quality graduated cuts maintain density while creating shape. If your hair feels significantly thinner after cutting, the graduation technique needs adjustment.
Improper home maintenance can quickly deflate graduated layers. Using heavy conditioners from root to tip weighs down the carefully created lift. Instead, concentrate conditioning treatments on ends only, keeping the graduated sections light and bouncy. Similarly, avoid oil-based products near the roots where shorter layers need freedom to move.
Heat styling mistakes can damage the precise cut lines of graduated layers. Using extreme heat or holding hot tools too long on shorter sections creates frizz and breakage that disrupts the clean graduation. Always use heat protectant and keep tools moving smoothly through each section.
Poor timing between cuts represents another common issue. Graduated layers require more frequent maintenance than single-length cuts. Waiting too long between appointments allows layers to grow out unevenly, losing their volume-creating properties. Most women need touch-ups every 8-10 weeks to maintain optimal graduation.
Product buildup poses a particular threat to graduated layers. The multiple lengths and angles can trap styling products, creating dull, lifeless hair. Weekly clarifying treatments remove residue that weighs down layers. Pay special attention to the shorter graduated sections near the crown where product tends to accumulate most heavily.
Your Perfect Long Layers Await
Long layers offer endless possibilities for transforming straight hair from flat to fabulous. Whether you choose subtle face-framing pieces or dramatic graduated cuts, the right layering technique can revolutionize your daily style while maintaining the length you love.
The key to success lies in honest communication with your stylist about your lifestyle, maintenance preferences, and styling abilities. Armed with knowledge about these six stunning options, you’re ready to make an informed decision that will leave you loving your hair every single day.
Frequently Asked Questions
Q: Will long layers make my straight hair look thinner?
A: When cut properly, long layers actually create an illusion of fuller hair by adding movement and dimension. The key is working with a skilled stylist who maintains density while creating shape.
Q: How often should I trim long layers to maintain their shape?
A: Most women need trims every 8-12 weeks to keep layers looking fresh. Graduated and V-cut styles may need attention slightly more frequently than subtle face-framing layers.
Q: Can I still wear my hair in a ponytail with long layers?
A: Absolutely! Long layers can actually make ponytails more interesting by creating texture and preventing that severe, pulled-back look. Some shorter pieces may escape, creating a soft, romantic effect.
Q: What’s the best layering option for very fine straight hair?
A: Subtle face-framing layers or gentle V-cuts work best for fine hair. These techniques add movement without removing too much density. Avoid heavy graduation or excessive thinning.
Q: Do long layers require daily heat styling?
A: Not necessarily. While blow-drying can enhance layers, many cuts look great air-dried with the right products. Discuss your styling preferences with your stylist for a cut that suits your routine.
Q: How do I know if my stylist understands the layering technique I want?
A: A skilled stylist will ask detailed questions about your desired outcome, show you exactly where they plan to cut, and explain their technique. They should also provide styling tips specific to your chosen layer type.
Q: Can I transition from a blunt cut to layers without losing much length?
A: Yes! Most layering techniques preserve significant length, especially at the perimeter. Face-framing layers and subtle graduation remove minimal length while creating maximum movement.
Q: What’s the difference between layers and thinning?
A: Layers create distinct length variations for movement and shape. Thinning removes bulk without changing length. Quality layered cuts shouldn’t require excessive thinning.
Q: Will layers work with my natural center part?
A: Long layers complement center parts beautifully, creating symmetrical movement on both sides. Your stylist can customize the cut to enhance your natural part placement.