Getting a flatter stomach doesn’t require expensive gym memberships or complicated equipment. Women everywhere are discovering that effective ab workouts can happen right in their living rooms, using nothing more than their body weight and determination. The convenience of home exercise removes common barriers like travel time, childcare concerns, and the intimidation factor that many experience in traditional gym settings.
Core strength goes far beyond aesthetic goals. A strong midsection supports better posture, reduces back pain, and improves balance during daily activities. Whether you’re lifting groceries, playing with children, or sitting at a desk for hours, your abdominal muscles play a crucial role in maintaining stability and preventing injury. These muscles act as your body’s natural corset, supporting your spine and internal organs while helping you move efficiently through life.
The following sections will guide you through five proven exercises that target different areas of your core. Each movement has been selected for its effectiveness and accessibility, requiring minimal space and zero equipment. You’ll discover proper form techniques, common mistakes to avoid, and modifications that match your current fitness level, setting you up for success in your journey toward a stronger, more defined midsection.
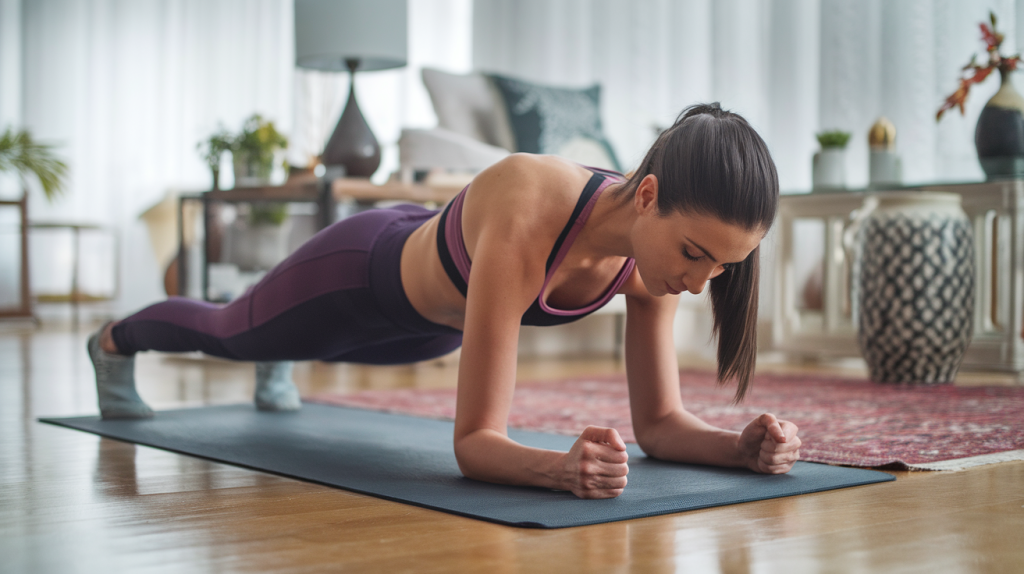
The Classic Plank Hold for Core Stability
The plank might look simple, but this powerhouse exercise engages your entire core while building endurance and mental toughness. Unlike traditional crunches that only work the front of your stomach, planks activate deep stabilizing muscles that create real functional strength.
How to perform the basic plank
Start by positioning yourself face-down on the floor. Place your forearms on the ground with elbows directly beneath your shoulders. Your arms should form a 90-degree angle, with forearms parallel to each other. Push up onto your toes, lifting your body into a straight line from head to heels.
Keep your neck neutral by looking at a spot on the floor about a foot beyond your hands. Your body should form one long, straight line without any sagging or arching. Hold this position while breathing normally, starting with 20-30 seconds if you’re new to the exercise.
Common mistakes to avoid
Many women unknowingly let their hips drop toward the floor, which puts unnecessary strain on the lower back. This sagging position reduces the effectiveness of the exercise and can lead to discomfort or injury. To correct this, imagine someone placing a glass of water on your back – you want to keep it level enough that nothing spills.
Another frequent error involves holding your breath during the hold. Oxygen deprivation makes the exercise unnecessarily difficult and can cause dizziness. Focus on taking slow, steady breaths through your nose, allowing your ribcage to expand and contract naturally. Your shoulders might also creep up toward your ears when fatigue sets in. Consciously press your shoulder blades down and back to maintain proper alignment.
Watch for the tendency to crane your neck upward or let it hang down. Both positions create tension and distract from the core work. Keep your spine aligned from the base of your skull through your tailbone.
Modifications for beginners
If a full plank feels impossible right now, start with your knees on the ground. This modified position still challenges your core while reducing the load by about 40%. Position your knees behind your hips rather than directly beneath them to maintain some challenge for your abdominal muscles.
Wall planks offer another excellent starting point. Stand arm’s length from a wall, place your palms flat against it at shoulder height, and lean forward into a plank position. The more upright your body, the easier the exercise becomes. Gradually increase the angle as you build strength.
You might also try planking on an incline using a bench, couch, or sturdy coffee table. The higher the surface, the less challenging the position. This approach lets you practice proper form while building the strength needed for floor planks.
Progression tips for advanced fitness levels
Once you can hold a standard plank for 60 seconds with perfect form, several variations will increase the challenge. Try lifting one leg slightly off the ground, which forces your core to work harder to maintain stability. Hold for 10 seconds, then switch legs.
Add arm movements by extending one arm forward while maintaining your plank position. This creates an anti-rotation challenge that fires up your obliques. Alternate arms every 5-10 seconds, focusing on keeping your hips square to the floor.
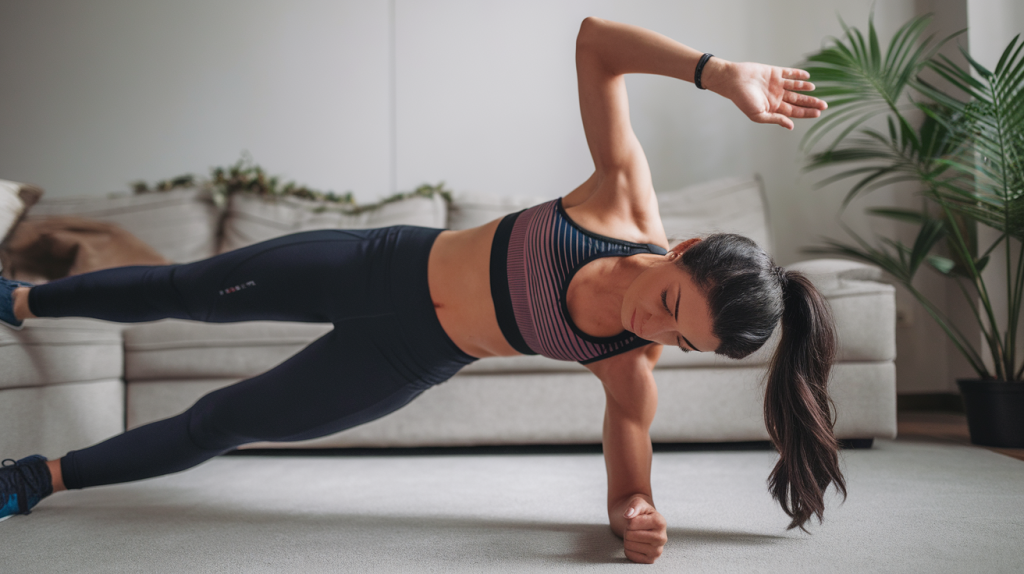
Side planks target your obliques more directly. From a standard plank, rotate onto one forearm, stacking your feet and lifting your top arm toward the ceiling. This variation strengthens the often-neglected side muscles that contribute to a defined waistline.
Consider incorporating plank jacks, where you jump your feet apart and together while holding the plank position. This dynamic movement adds a cardiovascular element while maintaining constant core engagement. Start with 10 repetitions and build from there.
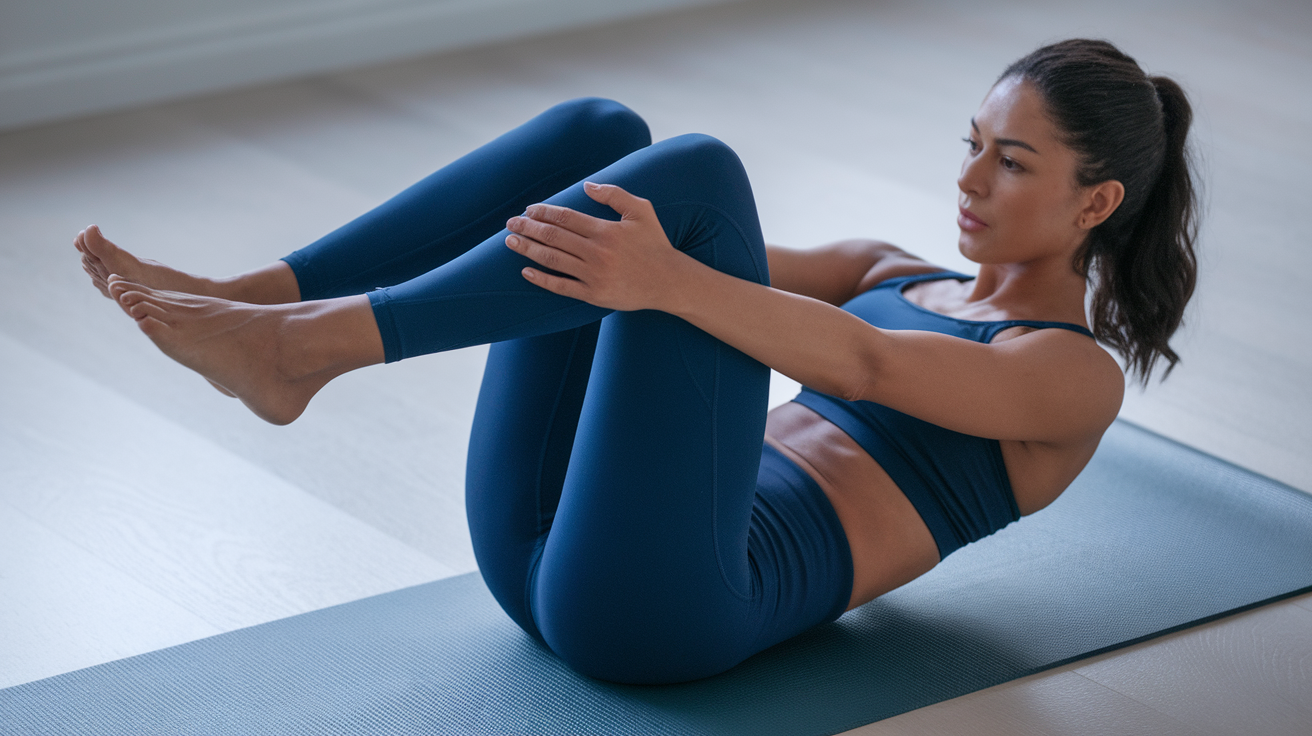
Bicycle Crunches That Target Multiple Ab Muscles
Bicycle crunches rank among the most effective exercises for comprehensive core development. Research consistently shows this movement activates both the rectus abdominis (your six-pack muscles) and the obliques simultaneously, making it incredibly time-efficient for busy women.
Proper form and technique
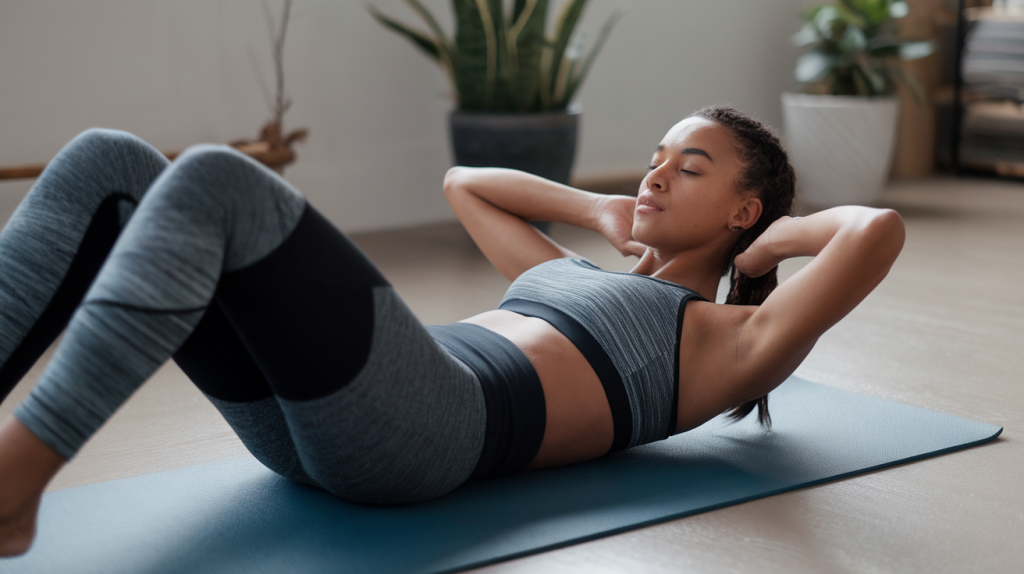
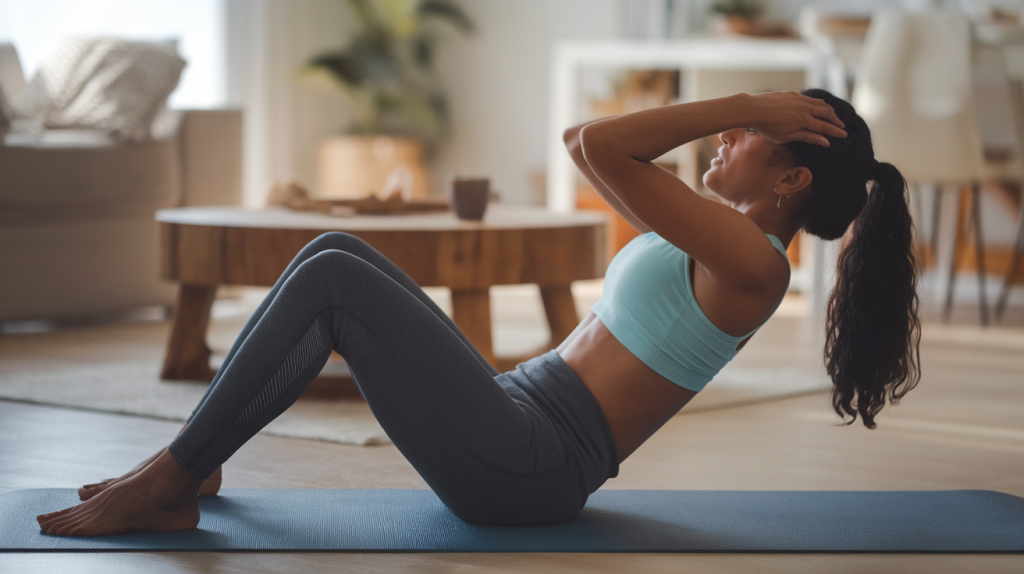
Lie on your back with your lower back pressed firmly into the floor. Place your hands lightly behind your head, with elbows pointing out to the sides. Avoid interlacing your fingers, as this can lead to pulling on your neck. Instead, let your fingertips barely touch behind your ears.
Lift your shoulder blades off the ground and bring your knees up to a 90-degree angle, with your shins parallel to the floor. This is your starting position. Now, simultaneously extend your right leg out straight while rotating your upper body to bring your right elbow toward your left knee. The movement should come from your core rotation, not from pulling your elbow across your body.
Without pausing, switch sides by extending your left leg while bringing your left elbow toward your right knee. Continue alternating in a smooth, controlled pedaling motion. The extended leg should hover about 6 inches off the ground, though you can lift it higher if you feel strain in your lower back.
Breathing patterns during the movement
Proper breathing transforms this exercise from merely challenging to truly effective. Exhale as you twist and bring your elbow toward the opposite knee. This exhalation helps activate your deep core muscles and creates greater contraction in your abs.
Inhale as you transition through the center position between twists. This rhythm – exhale on the twist, inhale on the transition – creates a natural flow that prevents you from holding your breath. Some women find counting their breaths helps maintain consistency: breathe out for a count of two during the twist, breathe in for one count during the switch.
How many repetitions work best
Quality always trumps quantity with bicycle crunches. Starting with 10-15 controlled repetitions per side provides sufficient stimulus without sacrificing form. As you build strength and endurance, gradually increase to 20-25 per side.
Rather than counting total crunches, think in terms of complete cycles. One cycle equals twisting to both sides once. Aim for 10-15 complete cycles initially, performed in 2-3 sets with 30-60 seconds rest between sets. This structure allows you to maintain proper form throughout while still challenging your muscles.
Some women prefer time-based sets, performing the movement for 30-45 seconds rather than counting repetitions. This approach eliminates the temptation to rush through a specific number and encourages consistent pacing throughout the set.
Why this exercise targets obliques effectively
The twisting motion of bicycle crunches creates unique demands on your oblique muscles. These side muscles must work dynamically to rotate your torso while simultaneously stabilizing against the movement of your legs. This dual action makes the exercise particularly effective for creating definition along your waistline.
Your obliques consist of two layers – external and internal – that run in opposing diagonal directions. The alternating rotation pattern of bicycle crunches engages both layers through their full range of motion. Traditional crunches primarily work your front abs, missing this crucial oblique engagement entirely.
The extended leg position adds another layer of challenge. Your core must resist the pull of gravity on the extended leg while maintaining spinal stability. This anti-extension component strengthens the deep transverse abdominis, which acts like an internal weight belt to flatten your stomach.
Research using electromyography (EMG) to measure muscle activation consistently ranks bicycle crunches among the top three exercises for oblique engagement. The combination of rotation, flexion, and stabilization creates a perfect storm of muscle activation that few other exercises can match.
Mountain Climbers for Dynamic Core Engagement

Mountain climbers transform static core work into an explosive, heart-pumping exercise that burns calories while building abdominal strength. This full-body movement challenges your core stability while adding a metabolic boost that continues long after your workout ends.
Starting position and movement pattern
Begin in a high plank position with your hands directly under your shoulders, arms straight but not locked. Your body should form a straight line from your head to your heels. Spread your fingers wide for better stability and press firmly through your palms.
Drive your right knee toward your chest, keeping your foot off the ground. Your core should remain tight, preventing your hips from bouncing up as you move. Quickly extend your right leg back to the starting position while simultaneously driving your left knee forward. This alternating pattern mimics a running motion while maintaining the plank position.
Focus on keeping your upper body as still as possible. Your shoulders should stay stacked over your wrists throughout the movement. Many women make the mistake of shifting their weight too far forward or backward, which reduces core engagement and can strain the shoulders or lower back.
The movement should feel controlled yet explosive. Think about driving through the balls of your feet as you switch legs, creating a rhythmic pattern that you can sustain. Your breathing will naturally become more labored as this exercise challenges both your muscular and cardiovascular systems.
Speed variations for different goals
Slow mountain climbers emphasize strength and control. Perform each knee drive deliberately, taking 2-3 seconds to bring your knee forward and another 2-3 seconds to return it. This tempo maximizes time under tension, creating greater muscle fiber recruitment in your core. Hold briefly when your knee reaches its highest point to increase the stability challenge.
Moderate-pace mountain climbers balance strength and endurance. Aim for one knee drive per second, maintaining consistent speed throughout your set. This pace allows you to accumulate more total repetitions while still maintaining good form. Most women find this speed sustainable for 30-45 second intervals.
Sprint-pace mountain climbers maximize caloric burn and cardiovascular challenge. Drive your knees as quickly as possible while maintaining proper form – typically 2-3 knee drives per second. These high-intensity intervals should last just 15-20 seconds, as form typically deteriorates with longer sprint efforts.
Consider these interval structures for different fitness goals:
- Fat Loss Focus: 20 seconds fast, 10 seconds rest, repeated 8 times
- Endurance Building: 45 seconds moderate pace, 15 seconds rest, repeated 4-6 times
- Strength Development: 30 seconds slow and controlled, 30 seconds rest, repeated 3-4 times
- Mixed Training: Alternate between 15 seconds fast and 15 seconds slow for 2-3 minutes total
Safety considerations for knees and back
Proper alignment protects your joints during this high-impact exercise. Your knees should track straight forward as they drive toward your chest, not angling outward or inward. If you experience knee discomfort, try performing the movement on a softer surface like a yoga mat or carpeted floor.
Lower back protection starts with maintaining a neutral spine throughout the movement. Avoid letting your hips pike up or sag down, both of which place unnecessary stress on your lumbar spine. If you feel your form breaking down, take a brief rest rather than pushing through with poor technique.
Wrist discomfort affects many women during mountain climbers. Spread your fingers wide and press through your entire palm, not just the heel of your hand. If pain persists, try performing the exercise on your fists or using push-up handles to keep your wrists in a neutral position.
Your neck position matters too. Keep your gaze focused on a spot on the floor slightly ahead of your hands. This prevents neck strain while helping maintain proper spinal alignment from head to tailbone.
Combining with other exercises
Mountain climbers work exceptionally well in circuit training formats. Pair them with static holds like planks for a strength-endurance combination that challenges your core in different ways. Try 30 seconds of mountain climbers followed immediately by a 30-second plank hold.
For a complete ab workout, alternate between mountain climbers and exercises that target different core angles. Perform 20 mountain climbers, then 15 bicycle crunches, followed by a 20-second side plank on each side. This combination ensures comprehensive core development without overworking any single muscle group.
High-intensity interval training (HIIT) workouts benefit greatly from mountain climbers. Use them as active recovery between upper body exercises, maintaining elevated heart rate while giving other muscle groups a break. For example, alternate between push-ups and mountain climbers for a challenging upper body and core combination.
Creating supersets with mountain climbers amplifies their effectiveness. Pair them with lower body exercises like squats or lunges to create total-body combinations that maximize calorie burn. The transition between exercises keeps your core engaged continuously, increasing overall workout intensity.
Russian Twists to Sculpt Your Waistline
Russian twists specifically target the muscles responsible for rotation and lateral flexion, creating definition along your sides while strengthening your entire midsection. This versatile exercise adapts easily to different fitness levels and equipment availability.
Equipment options (with or without weights)
Starting without any weight allows you to master the movement pattern before adding resistance. Simply clasp your hands together in front of your chest, creating light tension through your arms. This bodyweight version still provides significant challenge, especially for beginners.
A medicine ball adds substantial resistance and helps maintain proper form. Choose a weight between 5-10 pounds initially – heavy enough to feel challenging but light enough to maintain control throughout the movement. Hold the ball with both hands at chest level, keeping your arms slightly bent.
Dumbbells offer another excellent option, particularly if you don’t have access to medicine balls. Hold a single dumbbell with both hands, gripping it by the ends rather than the handle. This grip position keeps the weight centered and prevents it from shifting during rotation.
Household items work perfectly when gym equipment isn’t available. A filled water bottle, heavy book, or bag of rice can provide adequate resistance. The key is choosing something you can grip securely that won’t shift or become unwieldy during the movement.
For advanced practitioners, resistance bands create variable resistance that increases through the range of motion. Anchor the band behind you and hold both handles at chest level. The elastic resistance challenges your muscles differently than static weight, promoting strength through the entire rotation.
Foot position variations
The classic position involves sitting with knees bent at about 45 degrees, feet flat on the floor. Lean back slightly to create a V-shape between your torso and thighs. This angle engages your core before you even begin rotating. Keep your chest lifted and shoulders back to maintain proper posture.
Elevating your feet intensifies the exercise significantly. Lift your feet a few inches off the ground, keeping your knees bent at the same angle. Your core must now stabilize against rotation while maintaining the lifted leg position. Balance becomes an additional challenge that recruits more muscle fibers throughout your midsection.
Straight-leg variations provide maximum difficulty. Extend your legs fully, creating a wider V-shape. This position places greater demands on your hip flexors and lower abs while requiring exceptional balance. Only attempt this variation after mastering the bent-knee versions.
Crossed ankles offer a stability compromise between feet down and feet elevated. Cross your ankles and lift them slightly off the ground. This position provides a stable base while still increasing core activation compared to keeping feet planted.
Common form errors to watch for
Rushing through rotations reduces effectiveness and increases injury risk. Each twist should be deliberate and controlled, with a brief pause at each side to maximize muscle engagement. The movement comes from your core, not from swinging your arms across your body.
Many women collapse through their chest as fatigue sets in. This rounded position reduces core activation and strains the lower back. Imagine a string pulling from the crown of your head toward the ceiling, keeping your spine long and chest proud throughout the exercise.
Using momentum rather than muscle control is another frequent mistake. Your arms and weight should move as one unit with your torso, not leading or lagging behind the rotation. If you find yourself swinging the weight to generate movement, reduce the resistance or take a break.
Rotating only from the shoulders while keeping the core static defeats the purpose entirely. Your entire torso should rotate as a unit, with the movement initiating from your obliques. Place your hands on your sides initially to feel these muscles working during the twist.
How to increase difficulty gradually
Progressive overload ensures continuous improvement in strength and definition. Start by increasing repetitions before adding weight. Once you can perform 25-30 controlled twists per side with good form, consider adding resistance.
Weight progression should be gradual – increase by no more than 2-3 pounds at a time. This conservative approach prevents form breakdown and reduces injury risk. If your form suffers with the heavier weight, return to the lighter option and focus on increasing repetitions first.
Tempo manipulation creates new challenges without adding weight. Try a 3-1-3 pattern: take three seconds to rotate to one side, pause for one second, then take three seconds to rotate to the other side. This slow, controlled movement eliminates momentum and maximizes time under tension.
Range of motion adjustments provide another progression option. Start with smaller rotations and gradually increase how far you twist to each side. Fuller rotation requires greater flexibility and control, challenging your obliques through a larger movement arc.
Combining Russian twists with other core exercises creates compound challenges. Perform a set of twists immediately followed by bicycle crunches or plank holds. These combinations test muscular endurance while promoting greater overall core development.
Dead Bug Exercise for Deep Core Activation
The dead bug exercise might have an unusual name, but its effectiveness in building deep core stability is unmatched. This deceptively challenging movement trains your body to maintain spinal stability while your limbs move independently, mimicking real-world activities where core control matters most.
Step-by-step movement breakdown
Start by lying on your back with your arms extended straight up toward the ceiling, directly over your shoulders. Bring your knees up to 90 degrees, with your shins parallel to the floor. Press your lower back firmly into the floor – this posterior pelvic tilt is crucial for proper execution.
Take a deep breath in. As you exhale, slowly lower your right arm overhead while simultaneously extending your left leg straight out. Lower both limbs until they hover just above the floor. Your arm should stay straight throughout, reaching back past your head. The extended leg should remain a few inches off the ground.
Throughout this movement, your lower back must maintain contact with the floor. If you feel your back beginning to arch, you’ve lowered your limbs too far. Return to a range of motion where you can maintain the flat-back position.
Slowly return your arm and leg to the starting position while inhaling. Without pausing, repeat on the opposite side, lowering your left arm and right leg. This contralateral pattern – opposite arm and leg – creates a unique stability challenge that engages your entire core.
Coordination tips for beginners
The opposing limb movement often feels awkward initially. Your brain needs time to develop the motor pattern for moving opposite limbs simultaneously. Start by practicing arms only – lower one arm at a time while keeping your legs in the starting position. Master this before adding leg movement.
Next, practice legs only. Keep your arms reaching toward the ceiling while alternating leg extensions. This isolation helps you understand how to maintain core stability during single-limb movement. Focus on keeping your lower back pressed down throughout.
When you’re ready to combine movements, go slowly. Count to four as you lower your limbs, hold for two counts, then count to four as you return. This deliberate pace gives your nervous system time to coordinate the complex movement pattern. Speed will naturally increase as the pattern becomes familiar.
Visual cues help many women master the coordination. Imagine your belly button being magnetized to the floor, unable to lift away. Or picture yourself balancing a cup of water on your stomach that you can’t spill. These mental images reinforce the stability component while your limbs move.
Some find it helpful to practice the movement pattern while standing first. Stand tall and simultaneously reach one arm overhead while lifting the opposite knee. This standing version helps establish the contralateral pattern without the added challenge of maintaining floor contact.
Why this protects your lower back
The dead bug teaches your core to resist extension – preventing your back from arching under load. This anti-extension strength translates directly to safer movement patterns during daily activities like lifting, carrying, and reaching.
Your transverse abdominis, the deepest layer of abdominal muscle, acts as your body’s natural weight belt. The dead bug specifically targets this muscle through the challenge of maintaining neutral spine while your limbs create leverage against your core. Strengthening this deep stabilizer reduces lower back pain and improves posture.
Traditional crunches and sit-ups often reinforce poor movement patterns that stress the spine. They encourage spinal flexion (rounding), which can aggravate existing back issues. The dead bug, conversely, trains your core to maintain optimal spinal position while other parts of your body move.
The exercise also strengthens the multifidus muscles, small but crucial stabilizers that run along your spine. These muscles provide segmental stability between individual vertebrae. When strong, they prevent excessive movement that can lead to disc problems or chronic pain. The controlled, precise nature of dead bugs activates these often-neglected muscles effectively.
Progression to harder variations
Once you master the basic dead bug with perfect form for 10-12 repetitions per side, several progressions will continue challenging your core. Add a stability ball between your hands and knees, squeezing it throughout the movement. This addition requires constant tension and prevents you from relaxing between repetitions.
Resistance bands provide external load that your core must overcome. Loop a band around your foot and hold the other end in the opposite hand. As you extend your limbs, the band creates tension that tries to pull you out of position. Your core must work harder to maintain stability against this external force.
The hollow body dead bug combines two challenging exercises. Before beginning your dead bug repetitions, lift your shoulder blades off the ground into a hollow body position. Maintain this upper body elevation throughout all repetitions. This variation dramatically increases the demand on your upper abs while performing the limb movements.
Weight can be added once you’ve mastered bodyweight variations. Hold a light dumbbell in the moving hand or wear ankle weights on the extending leg. Start with just 2-3 pounds – the long lever arm created by extended limbs makes even light weight challenging.
Double-limb progressions challenge advanced practitioners. Lower both arms overhead simultaneously, or extend both legs together. These bilateral movements remove the counterbalance provided by the opposite limbs, requiring exceptional core control to maintain position.
Your Path to Stronger Abs Starts Today
These five exercises create a complete home workout system that targets every area of your core without requiring any gym equipment or significant time investment. By rotating through planks, bicycle crunches, mountain climbers, Russian twists, and dead bugs, you’re addressing core strength from multiple angles while building the functional fitness that supports everyday activities.
Consistency matters more than perfection as you begin incorporating these movements into your routine. Start with just 2-3 exercises performed three times per week, gradually building to complete all five movements as your strength improves. Your body needs time to adapt to these new challenges, and pushing too hard too quickly often leads to burnout or injury rather than faster results. Focus on quality movement patterns first, allowing repetitions and intensity to increase naturally as your core becomes stronger and more resilient.
Frequently Asked Questions
Q: How long before I see visible results in my stomach area?
A: Most women notice improved core strength and posture within 2-3 weeks of consistent training. Visible definition typically appears after 6-8 weeks, though this varies based on body fat percentage, nutrition habits, and workout consistency.
Q: Should I do ab exercises every day for faster results?
A: Your abs need recovery time just like any other muscle group. Training them 3-4 times per week allows adequate recovery for muscle growth and prevents overtraining, which can actually slow progress.
Q: Which exercise burns the most belly fat?
A: No exercise specifically burns belly fat, as spot reduction isn’t possible. Mountain climbers burn the most overall calories among these five exercises, contributing to total fat loss when combined with proper nutrition.
Q: Can I do these exercises during pregnancy?
A: Always consult your healthcare provider before exercising during pregnancy. Many of these movements require modification or replacement with pregnancy-safe alternatives, particularly after the first trimester.
Q: Why does my lower back hurt during ab exercises?
A: Lower back pain usually indicates improper form or attempting exercises beyond your current strength level. Focus on maintaining neutral spine position and consider starting with easier modifications until your core strength improves.
Q: What should I eat before and after ab workouts?
A: A light snack containing carbohydrates and protein 30-60 minutes before exercise provides energy without causing discomfort. Post-workout, eat a balanced meal within two hours to support muscle recovery.
Q: How many repetitions should beginners start with?
A: Begin with 8-10 repetitions per exercise or 15-20 second holds for planks. Quality always beats quantity – perfect form with fewer reps produces better results than sloppy execution of many repetitions.
Q: Can these exercises help with diastasis recti after pregnancy?
A: Some of these exercises may worsen diastasis recti if performed incorrectly. Work with a physical therapist specializing in postpartum recovery to determine safe exercises for your specific condition.