Long wavy hairstyles have captured the attention of women everywhere, offering the perfect balance between sophistication and effortless beauty. These versatile cuts work with natural texture rather than against it, creating looks that feel both polished and relaxed. Whether you’re blessed with natural waves or prefer to create them with styling tools, these haircuts provide endless possibilities for expressing your personal style.
The beauty of wavy long haircuts lies in their adaptability. They transition seamlessly from professional settings to weekend adventures, requiring minimal effort to look put-together. Unlike pin-straight styles that demand constant maintenance or tight curls that need specific care routines, waves offer flexibility that fits into busy lifestyles while still looking intentionally styled.
In the following sections, we’ll explore five stunning wavy long haircuts that have captured hearts this year. From beachy textures to romantic layers, each style offers its own unique charm and styling potential. Ready to discover which wavy look will become your new signature? Let’s explore these gorgeous options that promise to transform your hair game.
What Makes Wavy Long Haircuts So Flattering?
Wavy long haircuts possess an almost magical ability to flatter virtually every face shape and personal style. The movement created by waves adds dimension that straight hair simply cannot match, while the length provides weight that prevents excessive volume or frizz. This combination creates a harmonious balance that works beautifully on oval, round, square, and heart-shaped faces alike.
Face Shape Compatibility
The way waves frame your face can soften angular features or add definition to rounder faces. Long waves naturally create vertical lines that elongate the face, making them particularly flattering for those concerned about width. The curves and bends in wavy hair also break up the straight lines that might otherwise emphasize a square jawline or prominent forehead.
Texture and Movement Benefits
Natural movement in hair creates visual interest without requiring complex styling techniques. Waves catch light differently than straight hair, creating highlights and shadows that make hair appear fuller and more dynamic. This built-in texture means you can achieve a styled look with minimal effort, perfect for busy mornings or humid weather when fighting your natural texture proves futile.
Women with fine hair particularly benefit from wavy cuts. The bends and curves create an illusion of thickness that straight styles cannot achieve. Each wave adds a layer of dimension, making hair appear more substantial without requiring volumizing products or teasing.
Styling Versatility
One of the greatest advantages of wavy long hair is its incredible versatility. You can enhance your natural waves for a casual look, smooth them into loose curls for formal events, or even straighten sections for a sleek appearance. This adaptability means one haircut can serve multiple purposes in your life.
Age-Appropriate Appeal
Wavy long haircuts transcend age boundaries beautifully. Younger women appreciate the carefree, bohemian vibe waves can create, while mature women find that waves soften their features and add youthful movement to their appearance. The key lies in choosing the right type of wave pattern and styling approach for your lifestyle and preferences.
Professional vs Casual Looks
The same wavy cut can appear polished and professional with proper styling or relaxed and beachy with different techniques. For office settings, defined waves created with a curling iron or wand project sophistication. On weekends, air-dried waves with texturizing spray create an effortless, casual appearance. This dual nature makes wavy long haircuts practical investments for women juggling various roles and environments.
Long wavy cuts also photograph beautifully, making them ideal for women who frequently appear in professional headshots or social media. The texture and movement create visual interest that translates well to both professional portraits and casual selfies.
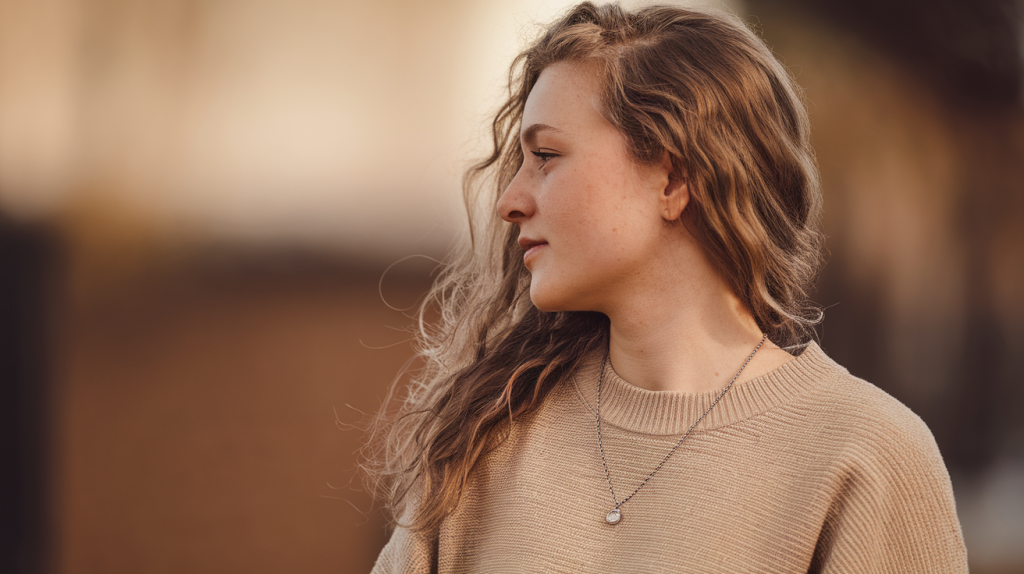
The Beach Wave Long Cut
Nothing captures the essence of effortless beauty quite like beach waves cascading down long hair. This style mimics the natural texture hair develops after a day by the ocean – slightly tousled, perfectly imperfect, and utterly romantic. The beach wave long cut has become a go-to choice for women seeking a low-maintenance style that still looks intentionally crafted.
How to Achieve the Look
Creating authentic-looking beach waves starts with the right cut. Your stylist should incorporate long layers throughout your hair, focusing on creating movement rather than removing bulk. The layers should start below your shoulders to maintain length while encouraging your natural wave pattern. Avoid layers that are too short or choppy, as these can disrupt the flowing nature of beach waves.
The cutting technique matters significantly. Point cutting and slide cutting create the soft, seamless edges that give beach waves their characteristic flow. These techniques remove weight without creating harsh lines, allowing waves to form naturally and blend beautifully. Your stylist might also use a razor for even softer edges, though this technique works best on thicker hair that can handle the texture without becoming too wispy.
Best Hair Types for This Style
While beach waves can work on various hair types, certain textures achieve this look more easily. Women with naturally wavy or slightly curly hair find this style particularly effortless, as their hair already wants to create the desired pattern. Those with straight hair can still rock this look but may need more styling products and tools to maintain the waves throughout the day.
Fine hair benefits from this cut when paired with volumizing products and proper layering. The waves add body and movement that fine hair often lacks. Thick hair works wonderfully with beach waves, though it may require more aggressive layering to prevent the style from becoming too heavy or triangular.
Maintenance Requirements
The beauty of beach waves lies in their low-maintenance nature. This style actually looks better with less frequent washing – every three to four days is ideal. Between washes, dry shampoo helps absorb oils while adding texture that enhances the beachy effect. When you do wash, use sulfate-free shampoos that won’t strip natural oils essential for healthy waves.
Regular trims every 8-10 weeks keep the layers fresh and prevent split ends from traveling up the hair shaft. Beach waves hide grow-out better than blunt cuts, giving you more flexibility between salon visits. This makes the style budget-friendly despite requiring initial investment in the right cut.
Styling Products Needed
The right products make achieving beach waves significantly easier. A good sea salt spray forms the foundation of this look, adding texture and enhancing natural wave patterns. Apply it to damp hair, scrunch gently, and either air dry or diffuse on low heat. For those needing extra hold, a lightweight mousse applied before the salt spray provides structure without stiffness.
Here’s what you’ll want in your beach wave arsenal:
Salt Spray: Creates texture and enhances natural waves without weighing hair down
Texturizing Cream: Defines waves while controlling frizz in humid conditions
Light-Hold Mousse: Provides structure for waves that tend to fall flat
Dry Shampoo: Extends time between washes while adding volume at roots
Wave-Enhancing Serum: Smooths flyaways and adds shine without disrupting wave pattern
Day to Night Transformation
Beach waves transition beautifully from casual daytime looks to evening elegance. During the day, wear them loose and natural with perhaps a middle part for that effortless vibe. For evening, sweep one side behind your ear and secure with a decorative pin, or gather the top section into a loose half-updo. These simple changes elevate the style without requiring complete restyling.
The versatility extends to accessories too. A simple headband or silk scarf woven through sections creates a bohemian daytime look. For evening, delicate hair jewelry or metallic clips add sophistication while maintaining the relaxed wave pattern. This adaptability makes beach waves perfect for women who need one style to work across multiple occasions.
Air-Drying Methods
Mastering the air-dry method for beach waves saves time and prevents heat damage. After washing, gently squeeze excess water with a microfiber towel – never rub vigorously, as this disrupts the wave pattern and causes frizz. Apply your products to damp hair, then use these techniques for best results.
The scrunch method involves gathering sections of hair in your palm and pushing upward, encouraging waves to form. The twist method requires twisting small sections around your finger, then releasing for more defined waves. Some women find success combining both techniques – scrunching for overall texture, then twisting face-framing pieces for more polished definition.
Position matters during air drying too. Flipping your head upside down periodically encourages volume at the roots. Alternatively, the “pineapple” method – loosely gathering hair at the crown – creates lift while maintaining wave integrity. Experiment to find which technique works best with your hair’s natural tendencies.
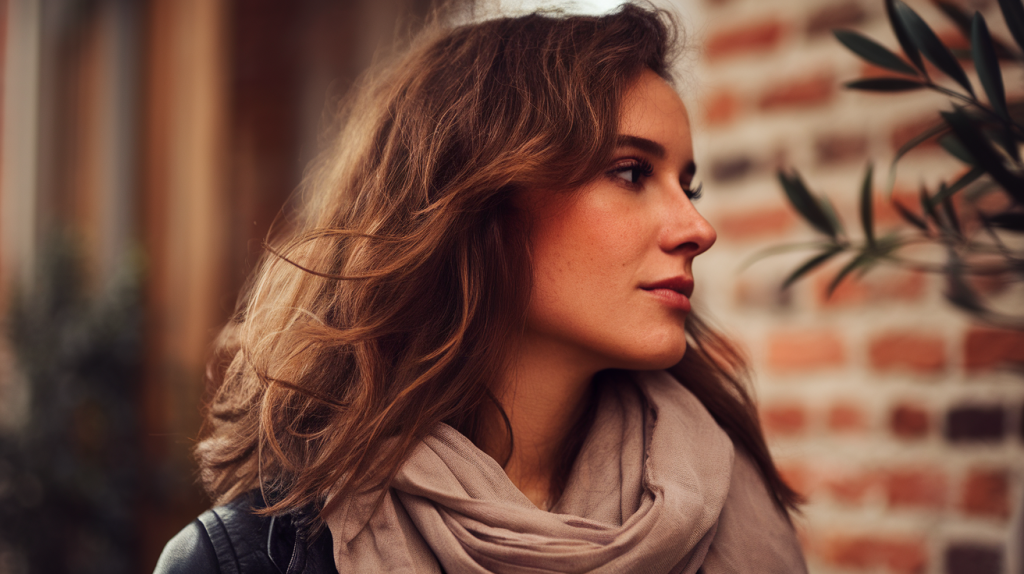
Soft Romantic Waves with Long Layers
Soft romantic waves represent the epitome of feminine elegance in long hair styling. This timeless look combines gentle S-shaped waves with strategically placed layers that create movement without sacrificing length. Unlike the more casual beach wave, romantic waves appear polished and refined, making them perfect for women who prefer a more sophisticated aesthetic while still maintaining softness and flow.
The foundation of this style lies in precise layering that starts around the collarbone area. These layers should blend seamlessly, creating a waterfall effect as waves cascade down. The key difference between romantic waves and other wavy styles is their uniformity – each wave flows into the next with deliberate grace rather than tousled randomness.
Layer Placement Importance
Strategic layer placement transforms ordinary long hair into a romantic masterpiece. Your stylist should focus on creating invisible layers that add movement without obvious lines or shelves. The longest layers frame your face, starting at or below your collarbones, while shorter internal layers add volume and encourage wave formation throughout the length.
Face-framing layers require particular attention in this style. They should begin no higher than your cheekbones to maintain the romantic flow. These pieces curve gently around your face when styled, creating a soft frame that flatters without overwhelming your features. Too many short layers around the face can make the style appear choppy rather than flowing.
Creating Volume and Dimension
Romantic waves rely on balanced volume distribution. Root lift provides the foundation, while mid-length volume creates the characteristic fullness of this style. The ends should taper gently, avoiding both blunt heaviness and over-thinned weakness. This balance creates the illusion of thick, healthy hair regardless of your natural density.
Professional colorists often recommend subtle highlighting techniques to enhance romantic waves. Balayage or babylights add dimension that makes waves appear more pronounced. The play of light and shadow through different tones creates depth that single-color hair cannot achieve. Choose tones just two to three shades lighter than your base for the most natural, romantic effect.
Color Recommendations
The most flattering colors for romantic waves tend toward warmer tones. Honey blondes, caramel browns, and auburn shades complement the soft nature of this style beautifully. Cool tones can work but require careful placement to avoid appearing harsh against the gentle waves. Multi-dimensional color always trumps solid shades for this style.
Consider your skin tone when selecting colors. Warm skin tones glow with golden and copper highlights woven through chocolate or chestnut bases. Cool skin tones benefit from ash-based colors with subtle pearl or champagne highlights. The goal remains creating depth and movement through color that enhances your wave pattern.
Heat Styling Techniques
Achieving perfect romantic waves requires specific heat styling techniques. Start with a heat protectant applied to damp hair, focusing on mid-lengths and ends where damage occurs most easily. Blow-dry using a round brush to create smooth volume at the roots while encouraging wave formation through the lengths.
For wave creation, a large barrel curling iron (1.5 to 2 inches) works best. Section hair horizontally, starting at the bottom. Wrap sections around the barrel, leaving ends out for a more modern finish. The crucial technique involves curling away from your face on both sides, creating the characteristic romantic flow. Hold each section for 8-10 seconds, then release and allow the curl to cool in your palm before letting it fall.
After curling all sections, resist the urge to immediately brush through. Let waves cool completely to set the pattern. Then, use a wide-tooth comb or your fingers to gently separate waves, creating that soft, romantic finish. A light misting of flexible-hold hairspray preserves the style without stiffness.
Preserving Wave Pattern
Maintaining romantic waves between styling sessions requires strategic care. Silk or satin pillowcases prevent friction that disrupts wave patterns during sleep. Before bed, loosely twist hair into a high bun, securing with a silk scrunchie. This pineapple method maintains waves while preventing tangles and flatness.
Second-day romantic waves often look even better than fresh styling. Refresh them by misting with water mixed with leave-in conditioner, then re-curling only the pieces that have lost their shape. This selective touch-up approach prevents over-styling while maintaining the romantic aesthetic. A texturizing spray can revive waves that have fallen flat without adding weight.
For special occasions requiring longer-lasting waves, consider setting techniques used by professional stylists. Pin each wave to your head immediately after curling, allowing them to cool completely in formation. This old-fashioned technique creates waves that last through dancing, humidity, and long events. Remove pins gently and finger-comb for that signature romantic flow.
Protecting romantic waves from humidity requires the right products. Anti-humidity serums create an invisible barrier against moisture that causes frizz and drop-out. Apply these products sparingly to avoid weighing down waves. Focus on areas prone to frizz, typically around the hairline and crown. During extremely humid conditions, accepting slightly less perfect waves often looks better than fighting nature with excessive product.
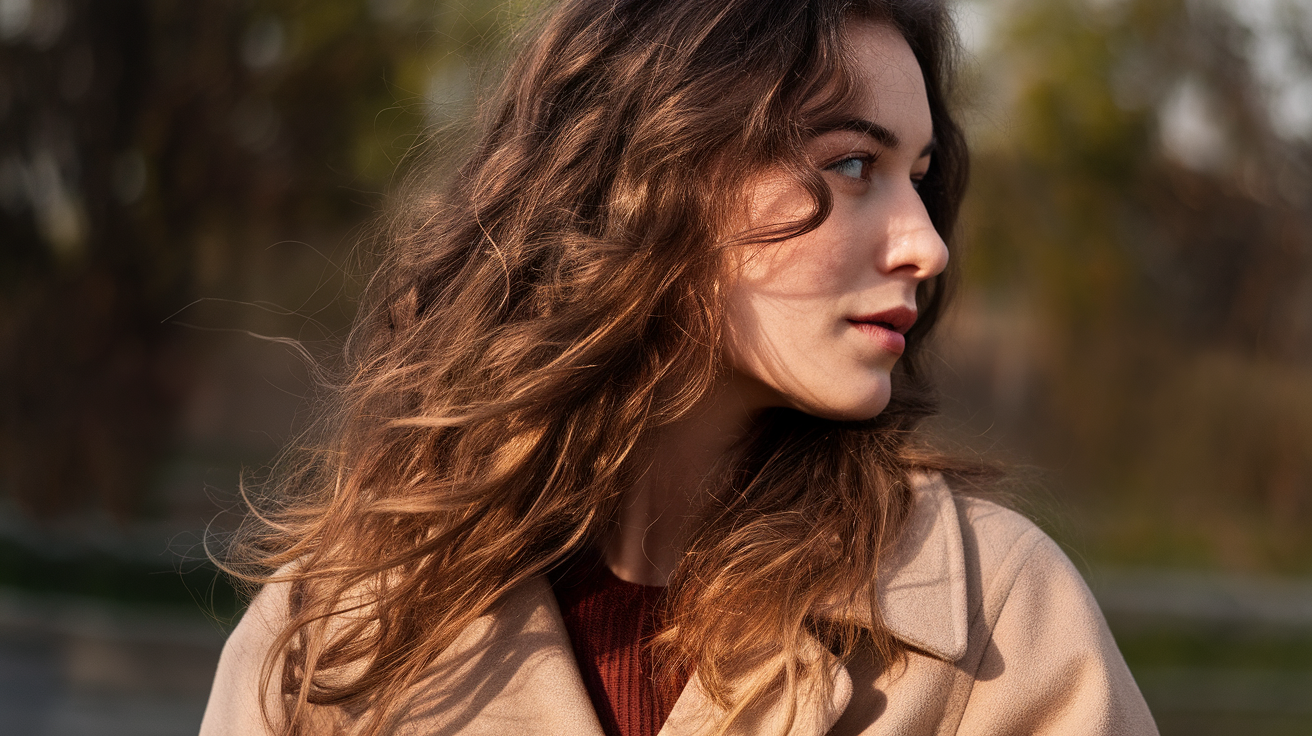
The Tousled Textured Long Wave
The tousled textured long wave represents the perfect marriage between intentional style and natural beauty. This cut celebrates hair’s inherent texture while adding strategic elements that enhance movement and body. Unlike more polished wave styles, this look thrives on controlled chaos – pieces that move independently, varied wave sizes, and an overall lived-in appearance that suggests you woke up with perfectly imperfect hair.
Creating this coveted texture starts with a specialized cutting approach. Your stylist will use techniques like point cutting, slicing, and razor work to build texture throughout your lengths. The goal involves removing weight strategically while maintaining enough density for waves to form properly. Each snip should contribute to the overall movement without creating holes or stringy sections.
Cutting Techniques for Texture
Modern texturizing goes beyond simple thinning shears. Skilled stylists employ multiple techniques to create the layered texture this style demands. Channel cutting involves creating invisible layers within the hair by cutting vertically into sections. This technique adds movement without obvious layer lines, perfect for the seamless flow tousled waves require.
The disconnected layering approach works particularly well for this style. Rather than uniform layers that follow a pattern, disconnected layers create pockets of different lengths throughout. This variation allows waves to form at different points, contributing to that perfectly imperfect aesthetic. Your stylist might cut some sections shorter while leaving others long, creating natural texture variations.
Perimeter texturizing plays a crucial role too. The ends shouldn’t appear blunt or too wispy. Instead, they need enough weight to form waves while maintaining piece-y separation. Stylists achieve this through careful point cutting around the perimeter, creating ends that separate naturally when styled.
Natural vs Styled Texture
Understanding your hair’s natural texture helps determine how much styling intervention you’ll need. Women with naturally textured hair – whether slightly wavy, curly, or coarse – often find this style easier to achieve and maintain. Their hair already wants to separate and move independently, requiring only enhancement rather than complete transformation.
For those with naturally straight or fine hair, creating tousled texture requires more effort but remains absolutely achievable. The key lies in using the right products and techniques to encourage texture formation. Heat styling tools, texturizing products, and strategic styling methods can create the appearance of natural texture even in the smoothest hair types.
Working with your natural texture rather than against it always yields better results. If your hair has a slight natural wave, enhance it rather than trying to create entirely different patterns. If your hair tends toward frizz, incorporate that into the tousled aesthetic rather than fighting for smoothness. This style celebrates imperfection, making it forgiving for various hair types.
Product Recommendations
Success with tousled textured waves depends heavily on product selection. Unlike sleek styles that rely on smoothing products, this look benefits from items that enhance separation and grip. Start with a volumizing mousse or root lift spray applied to damp hair. These products provide the foundation for texture without weighing down your waves.
Texturizing sprays become your best friend with this style. Look for formulas that promise “piece-y” or “beachy” texture. These typically contain ingredients that coat hair strands lightly, encouraging them to separate rather than clump together. Apply throughout damp or dry hair, focusing on areas where you want maximum texture.
A good texture paste or cream helps define individual pieces once hair is dry. Work a small amount between your palms, then scrunch and twist random sections. This targeted application creates variation in texture – some pieces more defined, others softer. The result mimics how hair naturally behaves after a day of movement and wind.
Air-Drying Methods
The tousled textured wave style lends itself perfectly to air-drying methods. After applying your products to damp hair, use these techniques to encourage texture formation:
Scrunch and Release: Gather sections in your palm, squeeze gently, then release
Twist and Untwist: Create loose twists throughout your hair, leave for 10 minutes, then release
Accordion Method: Gather horizontal sections and push up toward your scalp, holding briefly
Finger Coiling: Wrap small sections around your finger for more defined pieces
Shake and Separate: Once 80% dry, flip hair and shake at roots for volume
The beauty of air-drying this style lies in its unpredictability. Each time you style, waves form slightly differently, contributing to that effortless appearance. Don’t aim for perfection – the variations make this style authentic and interesting.
Managing Frizz and Flyaways
While tousled waves celebrate some imperfection, excessive frizz can overwhelm the style. Managing frizz starts with proper hair care. Use moisturizing shampoos and conditioners that hydrate without weighing down waves. Weekly deep conditioning treatments keep hair healthy and less prone to frizz.
During styling, anti-frizz serums applied sparingly to the most problematic areas help maintain control. Focus application on your hairline, crown, and any areas that typically frizz first. Remember that some flyaways actually contribute to the tousled aesthetic – you’re aiming for controlled messiness, not complete smoothness.
Environmental factors significantly impact frizz levels. On humid days, adjust your expectations and product usage accordingly. A stronger-hold texturizing spray or a humidity-blocking product can help, but accepting slightly frizzier texture often looks more natural than overly controlled hair. This style’s forgiving nature means moderate frizz actually enhances rather than detracts from the overall look.
For quick frizz control throughout the day, keep a small amount of hair oil or serum mixed with water in a spray bottle. A light mist followed by gentle scrunching refreshes texture while taming flyaways. This method works better than applying product directly, which can weigh down waves and disrupt the tousled texture you’ve worked to create.
Long Shag with Natural Waves
The modern long shag has experienced a remarkable renaissance, particularly when paired with natural waves. This contemporary interpretation of the classic 1970s style maintains the signature layers and texture while offering a more refined, wearable approach. Today’s long shag celebrates natural wave patterns, creating an effortlessly cool aesthetic that works beautifully on various hair types and face shapes.
What sets the modern shag apart from its vintage predecessor is the sophisticated layering technique. Instead of choppy, disconnected pieces, current shag cuts feature seamless blending that maintains length while adding incredible movement. The layers start higher than traditional long cuts, often beginning around the cheekbones or jawline, creating that characteristic shag silhouette without sacrificing too much length.
Modern Shag Characteristics
The defining features of today’s long shag include graduated layers that create natural volume at the crown while maintaining density through the lengths. These layers work in harmony with natural waves, encouraging them to form and bounce rather than hanging heavily. The cut typically features shorter layers around the face that gradually lengthen toward the back, creating a flattering frame that suits most face shapes.
Texture plays a crucial role in the modern shag. Your stylist will incorporate various texturizing techniques throughout the cut, creating pieces that move independently. This built-in texture means the style looks intentionally crafted even when air-dried, making it perfect for women who prefer low-maintenance styling routines. The combination of layers and texture creates natural separation that defines waves beautifully.
The perimeter of a modern shag differs from traditional long cuts too. Rather than a blunt or uniformly layered bottom edge, shag cuts feature a more organic, piece-y perimeter. This irregular edge contributes to the overall relaxed vibe while preventing the triangular shape that can plague poorly executed layered cuts on wavy hair.
Bangs and Fringe Options
Bangs transform a long shag from simply layered to distinctly shag-inspired. The most popular option remains curtain bangs – those face-framing pieces that part naturally in the center. These work exceptionally well with wavy hair, as the natural texture prevents them from appearing too severe or requiring daily straightening. Curtain bangs can start at various lengths, from cheekbone-grazing to true bang length at the eyebrows.
Wispy, textured bangs offer another excellent option for wavy shag cuts. These lighter-weight bangs blend seamlessly into the face-framing layers, creating a soft transition rather than a harsh line. They require minimal styling – often just a quick scrunch with your fingers and some texturizing spray. This type of fringe works particularly well for women with finer hair who worry about bangs overwhelming their features.
For those hesitant about committing to bangs, longer face-framing pieces styled as pseudo-bangs provide a compromise. These pieces, cut slightly shorter than the rest of the front layers, can be styled forward when you want a bang effect or blended back for a more open face. This versatility makes them ideal for women who like changing their look frequently.
Styling for Different Occasions
The beauty of a wavy shag lies in its versatility across various settings and occasions. For everyday wear, enhance your natural texture with a leave-in conditioner and texturizing spray, then air dry for that perfectly undone look. This effortless approach works wonderfully for casual outings, errands, and relaxed work environments.
Professional settings might call for more polished styling. Use a large round brush while blow-drying to smooth the roots and upper layers while maintaining wave through the lengths. This technique creates a more controlled version of the shag that still maintains its characteristic movement and texture. A light smoothing serum applied to face-framing pieces adds polish without eliminating the style’s inherent casual nature.
Special occasions allow for creative styling possibilities. The layered nature of a shag creates beautiful updos with naturally loose, romantic pieces. Half-up styles work particularly well, as the shorter layers around the face naturally fall free, creating an effortlessly elegant look. For formal events, define waves with a curling iron, then gently separate for a more glamorous interpretation of the shag aesthetic.
Growing Out Process
One advantage of choosing a shag cut involves its graceful growing-out process. Unlike blunt cuts that develop obvious growth lines, shags evolve naturally as hair lengthens. The layered structure means growth happens gradually throughout, maintaining the style’s shape even as length increases. This forgiving nature extends the time between salon visits, making shags economical despite their initially complex cutting requirements.
During the growth process, regular mini-trims help maintain the shag’s characteristic texture without sacrificing length gains. Focus these maintenance cuts on preserving the face-framing pieces and preventing the back layers from becoming too heavy. Many women find their shag actually improves after a few months of growth, as the layers settle and find their natural pattern.
Strategic styling adjustments help manage the awkward phases that can occur during grow-out. When shorter layers begin feeling disconnected, use styling products to encourage them to blend with longer pieces. Texturizing sprays and light-hold mousses help shorter pieces integrate rather than sticking out awkwardly. Accessories like headbands or decorative clips can also disguise troublesome layers during transition periods.
Customization Possibilities
The modern shag offers endless customization options to suit individual preferences and lifestyles. The density of layers can be adjusted based on hair thickness – those with fine hair might prefer fewer, more strategic layers, while thick-haired women can handle more aggressive layering. Your stylist can tailor the cut to enhance your specific wave pattern, whether you have loose S-waves or tighter spirals.
Color placement takes on special importance with shag cuts. The varied lengths and layers create perfect opportunities for dimensional color techniques. Highlights or lowlights placed strategically throughout the layers enhance movement and create visual interest. Face-framing highlights brighten the complexion while deeper tones through the underneath layers add depth and richness.
Personal style preferences guide customization too. Edgier interpretations might feature more dramatic layer differences and piece-y texture, while softer versions blend layers more seamlessly. The length of face-framing pieces, the degree of texturizing, and the overall silhouette can all be adjusted to match your aesthetic. This adaptability makes the shag suitable for women across various age groups and style preferences.
Some women opt for asymmetrical elements in their shag, with one side cut slightly shorter or more heavily layered. This subtle variation adds interest without appearing too avant-garde for everyday wear. Others prefer maintaining symmetry for a more classic interpretation. These choices allow each woman to make the shag uniquely her own while maintaining its essential characteristics.
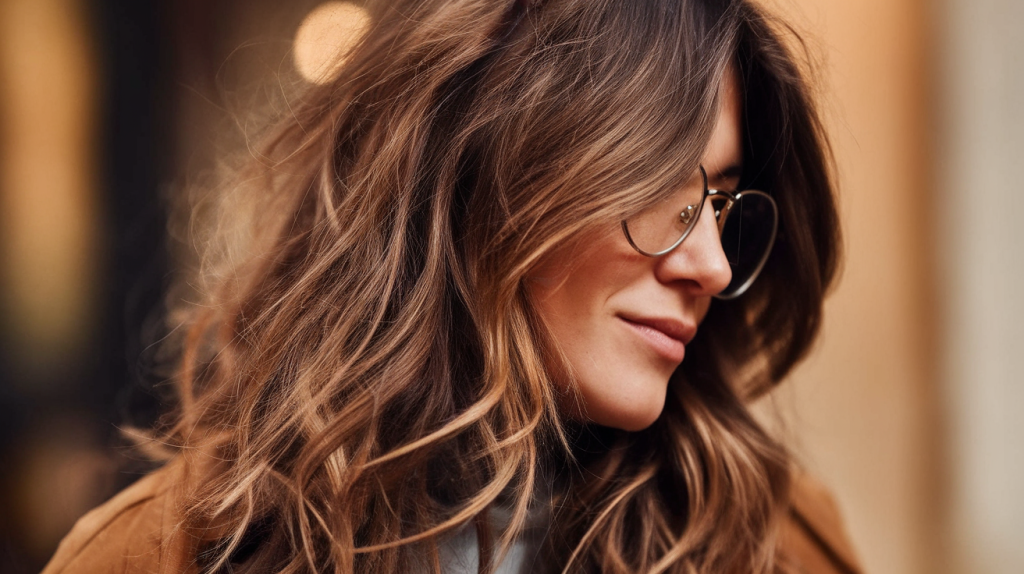
Loose Mermaid Waves
Loose mermaid waves epitomize glamorous long hair, creating that coveted Hollywood starlet look that never goes out of style. These flowing, glossy waves differ from beachy or tousled styles through their uniform pattern and polished finish. Picture the hair of mythical sea sirens – impossibly long, perfectly waved, and gleaming with health. This style requires commitment to both length maintenance and styling technique but rewards you with show-stopping results.
The foundation of mermaid waves starts with healthy, well-maintained long hair. Unlike other wavy styles that can disguise damage through texture, mermaid waves showcase every aspect of your hair’s condition. The uniform wave pattern and glossy finish mean split ends, dryness, or damage become immediately apparent. This style works best on hair that extends at least to the mid-back, though brave souls with shorter lengths can achieve a modified version.
Creating the Hollywood Look
Achieving authentic mermaid waves requires specific techniques that differ from creating other wave types. The waves should appear uniform in size and direction, flowing seamlessly from roots to ends. Start with freshly washed hair, using smoothing shampoo and conditioner to create the perfect canvas. Apply a heat protectant liberally, as this style relies heavily on hot tools for its polished appearance.
The key tool for mermaid waves is a large barrel curling iron or wand – ideally 1.5 to 2 inches in diameter. Section hair horizontally, starting at the nape. Take 2-inch sections and wrap them around the barrel, maintaining consistent tension and direction. All sections should curl away from the face for that signature mermaid flow. Hold each section for 10-12 seconds to ensure the wave sets properly.
After curling each section, the crucial step involves preserving the wave pattern while creating that seamless flow. Instead of letting curls drop immediately, catch each one in your palm and allow it to cool while maintaining its shape. Once cool, gently pull the curl downward to elongate it into a wave rather than a spiral. This technique creates the characteristic stretched S-pattern of mermaid waves.
Length Requirements
True mermaid waves require substantial length to achieve their full impact. Hair should ideally reach at least the bottom of the ribcage, though the style becomes increasingly dramatic with additional length. The weight of long hair helps waves hang properly, creating that flowing movement mermaid waves are known for. Shorter hair can achieve a similar pattern but lacks the dramatic cascade effect.
Maintaining healthy hair at extreme lengths requires dedication. Regular trims every 10-12 weeks prevent split ends from traveling upward. Deep conditioning treatments become non-negotiable, ideally weekly. Protective styling while sleeping, minimal heat exposure on non-styling days, and gentle handling all contribute to achieving and maintaining mermaid-worthy lengths.
For those building toward mermaid wave length, patience and proper care yield the best results. Focus on maintaining healthy ends rather than avoiding all trims. Strategic dusting – removing only the damaged tips – allows length retention while keeping hair healthy enough to showcase in glossy waves. Hair growth supplements and scalp treatments can support faster growth, though genetics ultimately determine your maximum length potential.
Color and Highlights
Mermaid waves reach their full potential when enhanced with strategic color placement. The flowing nature of these waves showcases dimensional color beautifully. Traditional highlights work well, but modern techniques like balayage or color melting create even more stunning effects. The key involves placing lighter pieces where waves naturally catch light, enhancing the undulating pattern.
Consider these color strategies for maximum impact:
Face-Framing Brightness: Lighter pieces around the face create a halo effect when waves flow forward
Dimensional Depth: Darker undertones prevent the style from appearing flat or one-dimensional
Strategic Placement: Color applied to follow wave patterns enhances movement
Glossing Treatments: Regular glosses maintain shine essential to the mermaid aesthetic
Root Shadowing: Darker roots create depth while reducing maintenance requirements
Vivid fashion colors have gained popularity in mermaid wave styling. Jewel tones like emerald, sapphire, or amethyst create literal mermaid vibes. Pastel shades offer a softer fantasy element. These unconventional colors require bleaching for most hair types, demanding extra care to maintain the health necessary for beautiful waves.
Special Occasion Styling
Mermaid waves naturally suit special occasions, from weddings to red carpet events. Their formal appearance requires minimal adaptation for elegant settings. For ultimate glamour, add subtle accessories that complement rather than compete with the waves. Delicate hair vines woven through upper sections, minimalist pins securing one side, or a ethereal tiara nestled at the crown all enhance without overwhelming.
The longevity required for special events demands extra setting power. After creating waves, mist each section with strong-hold hairspray before moving to the next. Once all waves are complete and cool, use a wide-tooth comb to blend sections gently. This creates one flowing mass rather than individual curl sections. A final mist of shine spray adds the glossy finish essential to mermaid waves.
Photography loves mermaid waves, making them ideal for events involving professional photos. The uniform pattern and high shine translate beautifully to images. Position waves over one shoulder for variety in photos, or allow them to cascade down the back for dramatic shots. The style’s consistency means it photographs well from every angle, eliminating concerns about bad hair moments captured forever.
Maintaining Healthy Length
The health requirements for mermaid-worthy hair extend beyond basic care routines. Protective measures become essential when maintaining extreme length. Silk pillowcases reduce friction during sleep, while protective styles like loose braids prevent tangling. During exercise or swimming, secure hair gently to prevent stress on strands.
Nutrition plays a surprising role in achieving mermaid hair. Adequate protein supports hair growth and strength. Omega-3 fatty acids contribute to shine and flexibility. Biotin and other hair-supporting vitamins can supplement a healthy diet. Hydration affects hair health too – drinking sufficient water supports overall hair condition from within.
Regular professional treatments elevate home care results. Keratin treatments or professional deep conditioning services address damage more effectively than home treatments alone. Olaplex or similar bond-building treatments help maintain hair integrity during the chemical processes often involved in achieving mermaid-worthy color. These investments pay dividends in the health and appearance of your waves.
The journey to mermaid waves requires patience and commitment, but the results justify the effort. Women who achieve this style often report feeling more confident and glamorous in their daily lives. The compliments and attention these waves generate make every minute spent styling worthwhile. With proper care and technique, mermaid waves can become your signature look, turning heads and inspiring hair envy wherever you go.
Transform Your Look with Confidence
These five wavy long haircuts offer endless possibilities for expressing your personal style while working with your hair’s natural tendencies. Whether you gravitate toward the relaxed vibe of beach waves or the polished elegance of mermaid waves, each style provides a unique way to showcase long, flowing locks. The key lies in choosing the cut that aligns with your lifestyle, maintenance preferences, and desired aesthetic.
Remember that the best haircut is one that makes you feel confident and beautiful every day. These wavy styles celebrate movement, texture, and natural beauty – qualities that resonate with women seeking both sophistication and authenticity in their appearance. Consult with a skilled stylist who understands your hair type and can customize any of these cuts to flatter your individual features and complement your daily routine.
Frequently Asked Questions
Q: How often should I trim my wavy long hair to maintain its shape?
A: Wavy long hair typically needs trimming every 8-12 weeks to maintain shape and prevent split ends. If you’re growing out your hair, you can extend this to every 12-14 weeks with proper care and regular deep conditioning treatments.
Q: Can I achieve these wavy styles if my hair is naturally pin-straight?
A: Yes, straight-haired women can absolutely achieve these wavy looks. You’ll need heat styling tools, texturizing products, and possibly overnight braiding or twisting techniques. Some styles like beach waves may require more maintenance on straight hair.
Q: Which wavy long haircut works best for fine, thin hair?
A: The beach wave long cut and soft romantic waves with long layers work wonderfully for fine hair. These styles add visual volume through texture and movement without requiring heavy layering that might make thin hair appear stringier.
Q: How do I prevent my waves from falling flat by midday?
A: Use volumizing products at the roots, set your waves with hairspray while they’re still warm from styling, and avoid touching your hair throughout the day. Dry shampoo can also help refresh waves and add volume when they start to fall.
Q: What’s the difference between beach waves and mermaid waves?
A: Beach waves are tousled, irregular, and casual-looking with varied sizes and directions. Mermaid waves are uniform, polished, and glossy with consistent S-shaped patterns flowing in the same direction for a more glamorous appearance.
Q: Will these haircuts work with my natural curly hair?
A: Most of these cuts adapt beautifully to naturally curly hair, especially the tousled textured wave and modern shag styles. Your stylist can modify the cutting techniques to work with your curl pattern rather than against it.
Q: How can I sleep without ruining my waves?
A: Use a silk or satin pillowcase, loosely gather hair in a high ponytail (pineapple method), or create a loose braid. Avoid tight elastics and use silk scrunchies instead to prevent creasing and maintain wave patterns overnight.
Q: Which products are absolutely essential for maintaining wavy long hair?
A: The essentials include a good heat protectant, texturizing spray, lightweight leave-in conditioner, and flexible-hold hairspray. Additional helpful products include sea salt spray for beach waves and smoothing serum for more polished styles.