Old money hairstyles carry a certain sophistication that transcends trends and decades. These looks speak quietly of refinement, with their polished finish and careful attention to detail setting them apart from flashy, attention-seeking styles. The women who wear these hairstyles understand that true elegance comes from restraint rather than excess, from quality rather than quantity.
What makes these particular hairstyles so enduring? They share common characteristics: smooth textures, controlled volume, and an emphasis on healthy, well-maintained hair rather than complicated techniques. Each style works with natural hair movement rather than against it, creating looks that appear effortless despite requiring skill to execute properly. The beauty lies in their versatility – they suit boardrooms and ballrooms equally well.
In the following sections, you’ll discover five hairstyles that have graced the heads of society’s most refined women for generations. From the sculptural chignon to the sleek low ponytail, each offers its own interpretation of understated luxury. These aren’t just hairstyles; they’re statements of confidence and class that never go out of style. Read on to master these timeless looks.
The Chignon: A Classic Old Money Signature
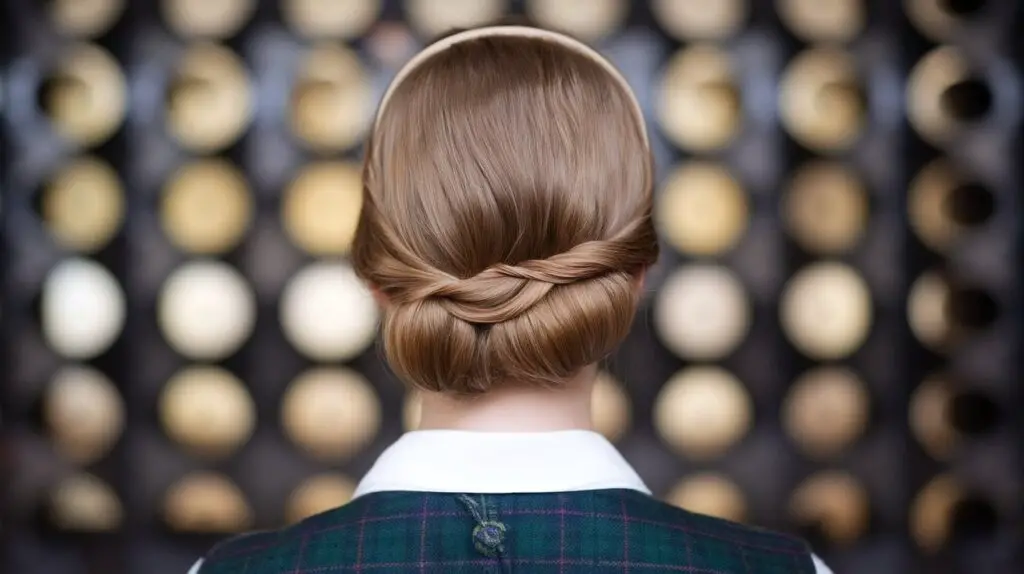
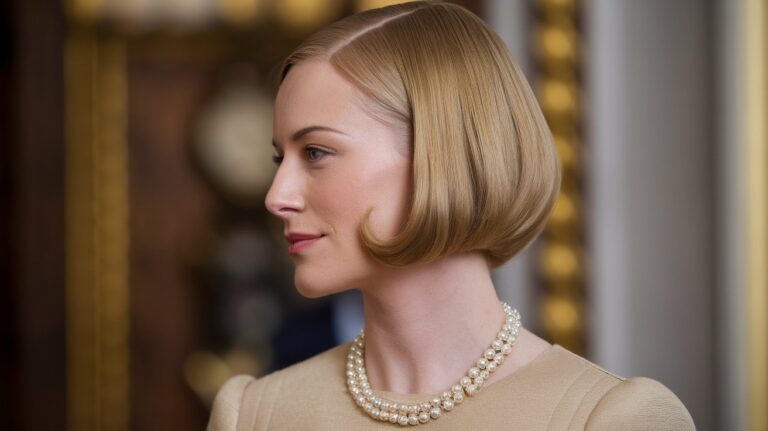
The chignon stands as perhaps the most recognizable symbol of refined elegance in hairstyling. This gathered updo has graced formal events and sophisticated gatherings for centuries, maintaining its status as a go-to choice for women who understand the power of classic beauty. Its appeal lies not in complexity but in the graceful way it frames the face while showcasing the neck and shoulders.
Low versus high chignon placement
Placement dramatically changes the entire character of this updo. A low chignon, positioned at the nape of the neck, creates an especially graceful silhouette that elongates the neck beautifully. This positioning works wonderfully for formal evening events or professional settings where understated sophistication matters most.
Higher placements, sitting at the mid-back of the head, offer a slightly more youthful appearance while maintaining formality. The choice often depends on your outfit’s neckline – high necklines pair beautifully with low chignons, while strapless or off-shoulder designs benefit from mid-height positioning.
How to create texture without losing polish
Modern chignons often incorporate subtle texture to avoid looking too severe or dated. The key lies in finding the sweet spot between movement and control. Start by adding gentle waves to your hair before gathering it – use a large barrel curling iron but brush through the curls lightly.
Leave a few pieces slightly looser within the bun itself. This doesn’t mean messy – think of it as controlled imperfection. Each strand should still appear intentional, just not shellacked into place. A light texturizing spray applied before styling helps create grip without visible product buildup. The goal remains sophistication, just with a touch more approachability than the ultra-smooth versions of decades past.
Best hair types for chignon styles
Medium to thick hair naturally creates the most impressive chignons, as the style requires enough length and density to form a substantial bun. Hair that reaches at least shoulder length works best, though longer lengths offer more styling options. The texture matters less than the condition – healthy, well-maintained hair always looks better regardless of whether it’s naturally straight, wavy, or curly.
Women with fine hair shouldn’t feel excluded from this classic style. Strategic use of volumizing products at the roots and a bit of backcombing can create the illusion of fuller hair. Hair padding or small bun forms, discretely placed, can also help achieve the desired fullness without anyone being the wiser.
When to wear this sophisticated updo
The chignon suits virtually any occasion requiring polished presentation. Business meetings, charity galas, weddings, and cultural events all call for this level of sophistication. The style particularly shines at events where you’ll be photographed, as it photographs beautifully from every angle.
Daytime chignons tend toward smoother, simpler construction. Evening versions can incorporate more elaborate techniques or subtle accessories. Consider the overall formality of your event – a museum opening might call for a sleek, minimal chignon, while a black-tie gala could warrant a more elaborate interpretation.
Modern variations that maintain tradition
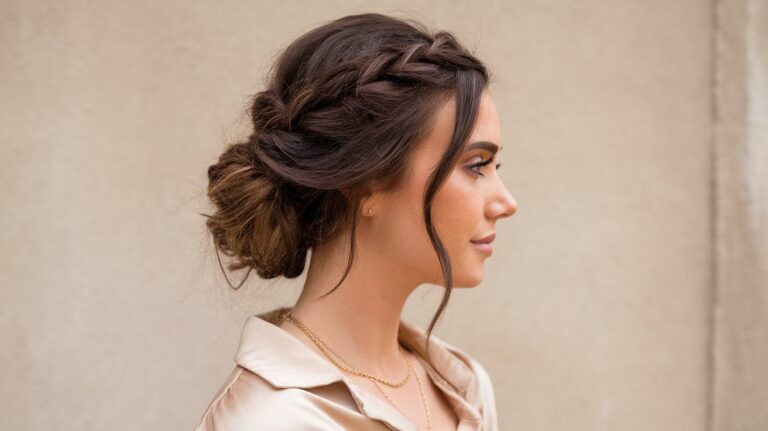
Contemporary takes on the chignon respect its classic roots while adding fresh elements. The braided chignon incorporates a loose braid into the twisted bun, adding visual interest without sacrificing elegance. Side-swept versions position the bun slightly off-center, creating an asymmetrical look that feels current yet timeless.
Some women now opt for deliberately imperfect chignons with face-framing pieces left free. This softer approach works particularly well for less formal occasions while maintaining the sophisticated foundation of the traditional style. The key remains balance – any modern twist should enhance rather than overshadow the inherent refinement of this classic updo.
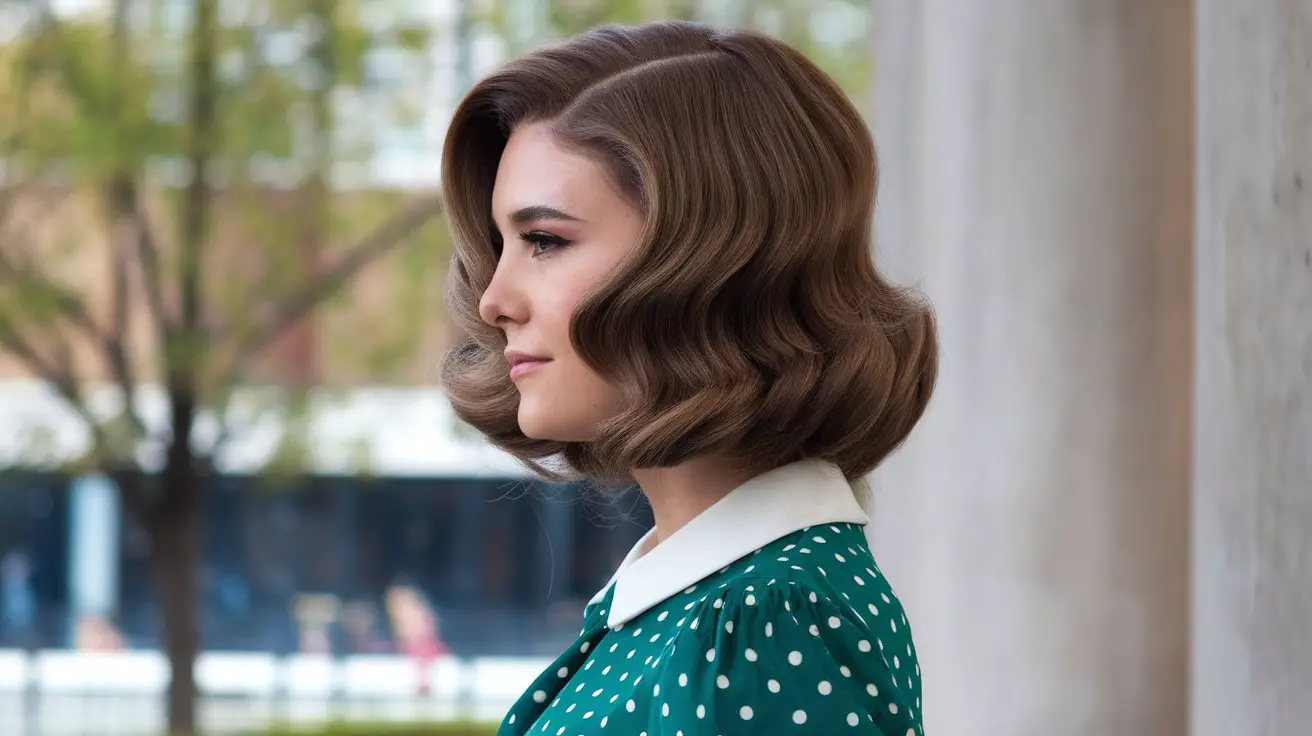
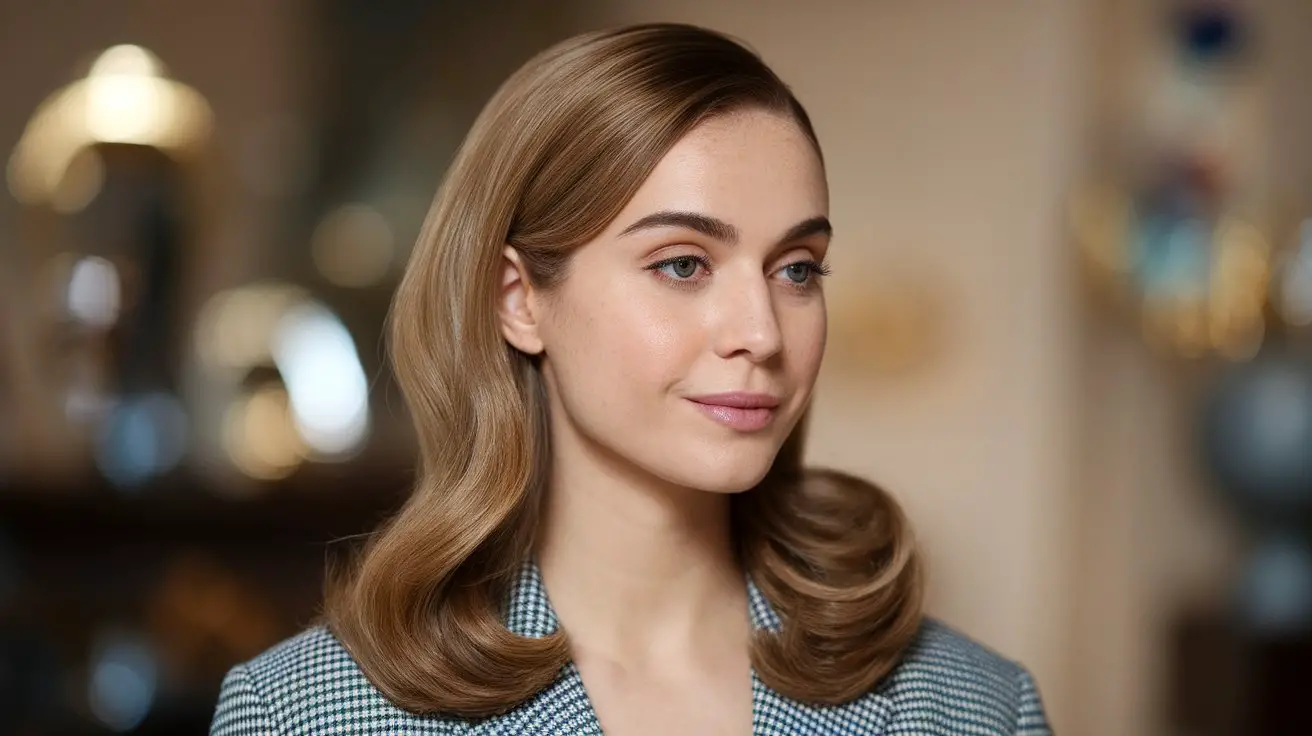
The Grace Kelly Wave: Hollywood Meets High Society
Few hairstyles capture the intersection of glamour and breeding quite like the deep side-parted waves popularized by Grace Kelly. This style represents the perfect marriage between Hollywood glamour and aristocratic restraint. The Princess of Monaco’s signature waves continue to influence formal hairstyling decades after her reign, proving that certain looks transcend time.
Creating the perfect side part
The foundation of this iconic style begins with precise parting. Position your part approximately above the arch of one eyebrow – this creates the ideal asymmetry that defines the look. Use a rattail comb for accuracy, drawing the line from front to crown in one confident motion. The part should be sharp and defined, not casual or zigzagged.
Your natural hair growth pattern might resist a deep side part initially. Combat this by setting the part while hair is damp, using clips to hold sections in place as they dry. Some women find that creating the part in slightly damp hair, then blow-drying with a round brush, helps train hair into the new position.
Consider your face shape when determining exact placement. Round faces benefit from parts placed slightly closer to center, while longer faces can handle more extreme side positioning. The depth of your part affects the overall drama of the style – deeper parts create more striking asymmetry.
Finger wave technique for modern hair
Traditional finger waves required specific techniques that seem complex today, but modern adaptations simplify the process while maintaining the elegant result. Begin with damp, not soaking, hair. Apply a strong-hold gel or mousse from roots to ends, ensuring even distribution. Today’s products offer better hold with less stiffness than vintage formulas.
Working in sections, create S-shaped waves using your fingers and a fine-tooth comb. Press hair forward with your finger while using the comb to push in the opposite direction, creating ridges and valleys. Pin each wave with flat clips as you work. This method takes patience but produces the most authentic results.
Setting methods that last all day
Longevity separates amateur attempts from professional-looking waves. Heat setting remains crucial – whether using hot rollers, a curling iron, or pin curls, temperature helps lock in the pattern. After creating your waves, allow them to cool completely before removing any clips or pins. This cooling period lets the hair’s hydrogen bonds reform in the new shape.
Setting spray applied both before and after styling doubles your hold time. Look for formulas that offer humidity resistance without creating a helmet-like finish. The goal: waves that move naturally while maintaining their shape through an entire evening.
For special occasions, consider these setting techniques:
- Pin Curl Foundation: Set damp hair in pin curls overnight for the strongest base
- Hot Roller Method: Use large velcro rollers on dry hair for 20 minutes minimum
- Curling Iron Technique: Wrap sections around a 1.5-inch barrel, pinning each curl to cool
- Overnight Preparation: Sleep with hair wrapped around a silk headband for gentle waves
Hair products for glossy finish
The hallmark of this style lies in its lustrous shine. Start with a smoothing shampoo and conditioner to create the ideal canvas. Avoid volumizing formulas that might add unwanted texture or frizz. A weekly glossing treatment keeps hair in optimal condition for this polished style.
During styling, apply a lightweight serum or oil to damp hair before heat styling. These products smooth the cuticle while adding reflective properties. Finish with a shine spray applied lightly from mid-length to ends. Hold the can at least 10 inches away to avoid concentrated spots that might look greasy.
Product buildup kills shine faster than anything else. Use clarifying shampoo weekly if you style frequently, and avoid heavy waxes or pomades that can dull hair’s natural luster. Quality matters here – invest in professional-grade finishing products for the most refined results.
Styling tips for different hair lengths
Shoulder-length hair creates the most authentic Grace Kelly waves, offering enough length for dramatic sweeps without overwhelming weight. This length allows the waves to curve naturally around the face before ending in a polished curl at the collarbone.
Longer hair requires additional support to prevent waves from falling flat. Use more holding product and consider pinning the back section into a low chignon or ponytail, leaving only the front sections waved. This hybrid approach maintains the iconic front view while managing extra length practically. Very short hair can achieve a modified version using strong-hold gel and emphasizing the deep side part with a defined wave across the forehead.
The French Twist: Understated Sophistication
The French twist epitomizes Parisian elegance with its seemingly effortless vertical roll of hair. This updo has adorned women at diplomatic dinners, opera premieres, and exclusive gatherings where quiet luxury speaks loudest. Despite its refined appearance, mastering the French twist requires understanding specific techniques that transform simple hair gathering into architectural beauty. The style’s endurance through decades proves that certain looks become classics for good reason – they flatter almost everyone while requiring minimal accessories or embellishment.
Mastering the basic twist technique
Creating a proper French twist starts with preparation. Your hair should be completely dry and lightly coated with texturizing spray for grip. Brush all hair to one side as if creating a low side ponytail, but instead of securing with an elastic, hold the gathered hair with your non-dominant hand.
With your dominant hand, begin twisting the length of hair upward, keeping tension consistent. As you twist, the hair naturally wants to roll into itself. Guide this roll against your head, maintaining close contact with your scalp. The twist should travel vertically from nape to crown.
The final tuck defines success or failure. Once you’ve twisted to the ends, fold the remaining hair under and into the roll. This creates the clean line that distinguishes a French twist from other updos. The entire twisted section should feel secure before you begin pinning.
Securing methods for all-day hold
Bobby pins alone won’t sustain a French twist through an entire event. The secret lies in creating an invisible support structure using various pin types and strategic placement. Start with large U-shaped pins inserted horizontally at the base of the twist, catching both the roll and the hair beneath.
Next, use bobby pins in an overlapping pattern along the seam where the twist meets your head. Insert them at an angle, catching hair from both the twist and your scalp. Think of it as sewing the twist to your head with metal instead of thread. You’ll need more pins than seems reasonable – typically 15 to 20 for secure hold.
The top requires special attention since this area experiences the most movement. Crisscross bobby pins here, creating an X pattern that locks the upper portion in place.
Volume control for different occasions
A sleek, tight French twist suits professional environments and minimalist fashion choices. Achieve this by brushing hair completely smooth before twisting and maintaining firm tension throughout. Use a fine-tooth comb to smooth any bumps after pinning, and finish with light hairspray for a polished look.
More relaxed occasions allow for softer volume. Before twisting, gently tease the crown area and leave the initial brushing less severe. As you form the twist, allow some natural fullness rather than pulling everything tight. This creates a romantic silhouette that feels less rigid while maintaining sophistication.
Face-framing wisps change the entire mood. For black-tie events, every strand should be secured. For garden parties or art gallery openings, a few carefully chosen pieces around the hairline soften the overall effect without compromising the essential elegance.
Accessory choices that complement
The French twist provides an ideal backdrop for statement accessories, though restraint remains key. A single vintage brooch pinned at the base of the twist adds personality without overwhelming. Choose pieces with historical significance or personal meaning rather than trendy options.
Decorative pins inserted along the twist itself create subtle sparkle. Look for sets that match your jewelry’s metal tone. Pearl-topped pins particularly suit this classic style, echoing its timeless appeal. Insert them at regular intervals for a rhythmic pattern or cluster them asymmetrically for modern interest.
For evening events, consider a delicate hair vine wrapped around the base of the twist. These flexible accessories follow the curve naturally while adding dimension. Avoid anything too elaborate – the twist itself should remain the focal point, with accessories serving as refined accents.
Common mistakes to avoid
Attempting a French twist on freshly washed hair typically ends in frustration. Clean hair lacks the grip necessary for the style to hold. Wait at least a day after washing, or use dry shampoo to add texture. This isn’t about having dirty hair – it’s about creating the right foundation for success.
Starting the twist too high or too low throws off the entire proportion. The base should begin at the occipital bone – that slight protrusion at the lower back of your skull. Starting higher creates an unstable twist that won’t last; starting lower results in an unflattering droopy appearance that ages the wearer.
Rushing the process guarantees a messy result. Each step builds on the previous one. Take time to smooth sections properly, maintain even tension, and secure thoroughly. A well-executed French twist might take 15 minutes to perfect, but it will maintain its shape for hours. Quick attempts unravel just as quickly, often at the worst possible moment.
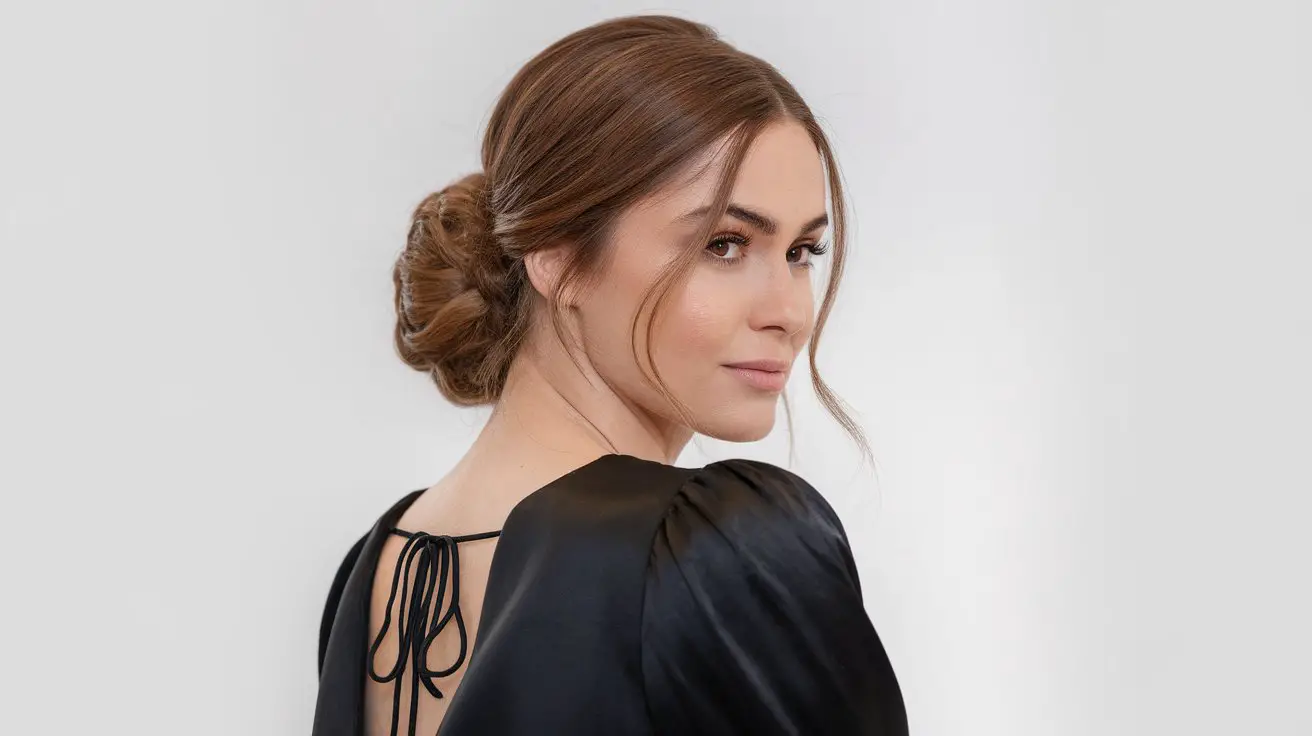
The Low Ponytail: Refined Simplicity
The low ponytail might seem like the simplest option among old money hairstyles, yet its execution separates true elegance from casual convenience. This style has appeared at polo matches, yacht clubs, and private member’s clubs for generations. When done correctly, it projects quiet confidence and natural grace that no amount of elaborate styling can match.
Achieving the perfect smooth finish
Preparation determines whether your low ponytail looks expensive or elementary. Begin with blow-dried hair, using a paddle brush to pull sections taut while drying. Direct the airflow down the hair shaft to seal cuticles and eliminate frizz. This initial smoothing makes everything that follows easier.
Apply a small amount of smoothing cream from mid-length to ends before you begin gathering your hair. Use a boar bristle brush rather than plastic – natural bristles distribute oils evenly while creating that glossy finish associated with well-maintained hair. Brush thoroughly from roots to ends, ensuring no bumps or irregularities.
Positioning matters tremendously. The ponytail should sit at the nape of your neck, aligned with your earlobes when viewed from the side. This placement creates the most flattering angle for all face shapes while maintaining the sophisticated aesthetic. Too high reads as casual; too low appears dowdy.
Wrapping technique for concealing elastics
Visible hair ties immediately downgrade any hairstyle. The wrapped base technique transforms a simple ponytail into something special. After securing your ponytail with a clear elastic or one matching your hair color, separate a half-inch section from the underside of the ponytail.
Wrap this section tightly around the elastic, maintaining tension to create a smooth spiral. The wrapping should be tight enough to stay in place but not so tight it creates bumps. Continue wrapping until you reach the end of the section.
Secure the wrapped piece using one of two methods. Either tuck the end under the elastic itself, or use a small bobby pin inserted from underneath, catching both the wrapped end and some hair from the ponytail base. The pin should be completely invisible when done correctly. A tiny drop of clear hair gel on the end helps it stay tucked without adding visible product.
Some women prefer the double-elastic method for extra security. Use one elastic to create the ponytail, wrap the section around it, then carefully slide a second elastic over the wrapped section. This locks everything in place for all-day wear.
Height placement for face shapes
While the low ponytail generally sits at the nape, slight adjustments in exact positioning can flatter different face shapes. Oval faces enjoy the most flexibility, looking equally good with the ponytail centered or slightly shifted to either side.
Round faces benefit from creating height at the crown before gathering the ponytail. This elongates the face visually. Leave the crown area slightly looser rather than pulling everything severely back. The ponytail itself should sit just below the occipital bone to create the illusion of length.
Square faces soften with strategic looseness around the temples and jawline. While the overall look remains polished, allowing minimal volume at these points prevents the style from appearing too severe. Heart-shaped faces look best with the ponytail positioned slightly off-center, creating asymmetry that balances wider foreheads.
Long faces should avoid adding any height at the crown. Instead, keep everything smooth and close to the head. Position the ponytail at the true nape, as low as possible while still maintaining the refined aesthetic.
Adding subtle waves for movement
Not every low ponytail needs to be pin-straight. Gentle waves through the length add movement and prevent the style from looking too severe. The key word here remains “subtle” – think soft bends rather than defined curls.
Create these waves after securing the ponytail, not before:
- Large Barrel Iron: Wrap sections loosely around a 2-inch barrel
- Flat Iron Waves: Twist the iron slightly as you glide down sections
- Braid Method: Loosely braid the ponytail while damp, release when dry
- Velcro Roller: Roll the ponytail onto one large roller for 20 minutes
After creating waves, run your fingers through them gently to soften any definition. The result should look like your hair naturally has beautiful movement, not like you spent time curling it. A light misting of flexible hold spray maintains the waves without stiffness.
Professional versus casual styling options
The boardroom demands the most refined version of this style. Every hair should be smoothed into place, the base wrapped meticulously, and the length kept straight or with only the slightest wave. Pair this version with structured blazers and sheath dresses for a commanding presence.
Weekend events at country clubs or casual charity luncheons allow for relaxed interpretation. You might leave a few face-framing pieces loose, though never messy. The ponytail itself can have more movement, perhaps with ends that flip slightly. This version pairs beautifully with cashmere sweaters and tailored trousers.
The transition between professional and casual often involves just a few adjustments. Loosen the crown slightly by gently pulling up small sections with a tail comb. Allow natural wave patterns to show rather than straightening completely. These minor changes shift the entire mood while maintaining the essential sophistication that defines old money style.
The Slicked-Back Bun: Modern Polish
The slicked-back bun represents the evolution of classic styling into contemporary sophistication. This hairstyle has become the signature look for women who navigate boardrooms and social clubs with equal grace, offering a modern interpretation of traditional elegance. Its appeal lies in the contradiction – maximum impact through minimal ornamentation. The style demands precision and quality products but rewards the effort with a look that photographs beautifully and maintains its shape through long days.
Creating the ideal sleek base
The foundation for this style requires more than just brushing hair back. Start with damp, towel-dried hair and apply a golf ball-sized amount of mousse from roots to ends. The product should be lightweight but offer strong hold – avoid anything that leaves residue or flakes.
Use a blow dryer with a concentrator nozzle attached, directing air flow from roots to tips while brushing with a dense bristle brush. This technique seals the hair cuticle while training every strand to lie flat. Work in sections, spending extra time at the hairline where baby hairs tend to resist. The hair should look wet when pulled back, but feel completely dry.
Temperature plays a crucial role. After blow-drying, use a flat iron on medium heat to smooth any resistant sections. Run the iron from roots to mid-length only – the ends will be hidden in the bun. This extra step ensures that shorter layers around the face won’t pop out hours later.
Bun positioning for different effects
The exact placement of your bun changes everything about this look. A bun positioned at the crown creates an almost balletic aesthetic, elongating the neck dramatically. This height works particularly well for photographed events or when wearing statement earrings that deserve showcase positioning.
Mid-height placement, aligned with the tops of your ears, offers the most versatility. This position suits virtually every face shape and occasion, from morning meetings to evening cocktails. It’s high enough to look intentional and styled, yet low enough to avoid appearing too trendy or costume-like.
A bun at the nape maintains maximum sophistication with minimum drama. This placement particularly flatters women with longer faces or those who prefer understated elegance. The low position also provides practical benefits – it won’t interfere with chair backs or car headrests during a typical day.
Products for lasting smoothness
Product selection can make or break this style. Begin with a strong-hold gel applied to soaking wet hair, working it through with a fine-tooth comb. The gel should be clear and alcohol-free to prevent flaking or drying. Apply generously at the hairline and crown where control matters most.
Layer a smoothing serum over the gel before blow-drying. This combination provides both hold and shine without the helmet-like stiffness of gel alone. Focus the serum on areas prone to frizz, typically around the hairline and crown. Use sparingly – too much creates an unwanted greasy appearance.
Once the bun is formed, finishing spray locks everything in place. Choose an aerosol formula for even distribution and hold the can at least eight inches from your head. Apply in light layers rather than one heavy coating. For humid conditions, add an anti-humidity barrier spray as your final step.
Dealing with flyaways professionally
Even the most careful styling can’t prevent every flyaway, but knowing how to manage them maintains the polished appearance. A clean mascara wand sprayed with hairspray becomes your secret weapon. Brush it gently over any pieces that escape, coaxing them back into formation without disturbing the overall style.
For stubborn baby hairs around the hairline, use a tiny amount of clear eyebrow gel on a clean spoolie. This provides stronger hold than hairspray for these particularly rebellious strands. Work in small sections, brushing the hairs in the direction you want them to lie.
Prevention beats correction. Before styling, apply a light leave-in conditioner to eliminate static that causes flyaways. During styling, ensure every section is properly saturated with product before moving on. Missing spots become obvious hours later when random pieces begin to lift.
Keep an emergency kit for touch-ups: travel-sized hairspray, bobby pins that match your hair color, and a small amount of gel in a contact lens case. These tools let you maintain the sleek appearance throughout even the longest days.
Variations for different hair textures
Naturally straight hair achieves this look most easily but can lack the grip needed for all-day hold. Add texture with salt spray before applying smoothing products, or use dry shampoo at the roots even on clean hair. These products provide the friction necessary for bobby pins and elastics to grip properly.
Wavy and curly hair requires more intensive smoothing but often holds the style better once achieved. Allow extra time for the blow-drying process, working in smaller sections. Consider using a keratin treatment spray before heat styling to temporarily relax the curl pattern. The natural texture actually helps the bun maintain its shape without sliding.
Coily and kinky hair textures can create stunning slicked-back buns with the right approach. Use heavier products like edge control or pomade rather than lightweight gels. These provide the hold needed while respecting the hair’s natural properties. Consider using the banding method – securing multiple elastics down the ponytail length – before forming the bun to maintain smoothness.
Women with very thick hair might need to divide hair into two sections, creating two separate twists that wrap together into one bun. This prevents the bulky appearance that can occur when gathering dense hair into a single mass. Fine hair benefits from volumizing powder applied at the roots before slicking back, creating the illusion of fuller hair while maintaining the sleek aesthetic.
Final Thoughts on Timeless Elegance
These five hairstyles represent more than just ways to arrange your hair – they embody a philosophy of presentation that values quality over trends. Each style has weathered decades of changing fashions precisely because it enhances natural beauty rather than overwhelming it. The women who choose these looks understand that true sophistication comes from perfecting classic techniques rather than chasing every new trend that appears.
Mastering these hairstyles requires practice and patience, but the investment pays dividends. Once you’ve learned to execute a proper French twist or create genuinely smooth ponytail, you’ll possess skills that serve you throughout life. These aren’t just special occasion styles – modified versions work beautifully for everyday wear when you want to project polish and confidence. The key lies in understanding that old money hairstyles aren’t about perfection but about intentionality, quality, and the quiet confidence that comes from knowing you look timelessly elegant.
Frequently Asked Questions
Q: Which old money hairstyle works best for thin or fine hair?
A: The low ponytail typically works best for fine hair since it doesn’t require as much volume as updos. Use volumizing products at the roots and consider adding clip-in extensions for fuller appearance. The French twist can also work well with strategic use of hair padding.
Q: How far in advance should I wash my hair before attempting these styles?
A: Most of these styles work best on day-old hair. Freshly washed hair tends to be too slippery and lacks the natural texture needed for pins and elastics to grip properly. If you must style clean hair, use texturizing spray or dry shampoo first.
Q: Can these hairstyles work with shoulder-length hair?
A: Yes, shoulder-length hair can achieve most of these styles. The Grace Kelly waves and low ponytail work particularly well at this length. For updos like the chignon or French twist, you might need extra bobby pins and possibly small hair pieces for fullness.
Q: What’s the best way to prevent these styles from looking dated or aging?
A: Keep the finish modern by avoiding excessive hairspray or completely shellacked looks. Allow some natural texture and movement rather than making everything perfectly smooth. Also, consider your makeup and outfit – modern touches in these areas keep the overall look fresh.
Q: Which style holds up best in humid weather?
A: The slicked-back bun typically performs best in humidity when properly secured with anti-humidity products. Its close-to-the-head styling and product usage make it resistant to weather-related frizz and drooping.
Q: Do I need professional tools to achieve these looks at home?
A: While professional tools help, you can achieve these styles with basic equipment. Essential items include a good bristle brush, bobby pins, clear elastics, and a blow dryer. A flat iron and hot rollers expand your options but aren’t absolutely necessary.
Q: How do I choose between these styles for a formal event?
A: Consider your outfit’s neckline and the event’s formality level. High necklines pair beautifully with updos like the chignon or French twist. Strapless dresses work well with the Grace Kelly waves. The slicked-back bun suits modern, minimalist fashion choices.
Q: What if my hair won’t hold these styles despite using products?
A: Your hair might need more texture or grip. Try using a texturizing treatment or sea salt spray the day before styling. Some women find that slightly dirty hair or hair with dry shampoo holds styles better than squeaky clean strands.