
Getting that coveted natural glow doesn’t require an arsenal of products or hours in front of the mirror. The beauty industry might push complex routines with dozens of steps, but achieving radiant, healthy-looking skin often comes down to mastering a few simple techniques. Women everywhere are discovering that the secret to luminous skin lies not in heavy coverage but in strategic application of minimal products that work with your skin rather than against it.
Your morning routine shouldn’t feel like a chore or leave you rushing out the door. A streamlined approach to makeup can deliver that fresh-faced radiance in just minutes while actually improving your skin’s health over time. The key lies in understanding which products truly matter and which application methods bring out your natural beauty. This approach saves both time and money while delivering results that look effortlessly beautiful rather than heavily made-up.
Ready to transform your daily makeup routine into something quick, effective, and genuinely enhancing? The following sections will walk you through five essential steps that create natural radiance without the complexity. From understanding what makes skin glow to mastering the final touches that pull everything together, you’ll discover practical techniques that work for real women with real schedules. Keep reading to unlock the simple secrets that makeup artists use to create that coveted lit-from-within look.
What Makes Skin Truly Glow Naturally?
Natural radiance starts with understanding the fundamental difference between healthy glow and unwanted shine. Many women confuse the two, either powdering away all luminosity or ending up with an oily appearance by midday. The distinction lies in where the light hits your face and how your skin reflects it.
The difference between dewy and oily
Dewy skin catches light on the high points of your face – cheekbones, nose bridge, cupid’s bow – creating dimension and vitality. Oily skin, on the other hand, tends to shine uniformly across larger areas, particularly the T-zone, creating a flat, greasy appearance. The goal is achieving selective luminosity that mimics how healthy, hydrated skin naturally reflects light. This targeted approach to glow makes all the difference between looking fresh and looking like you need blotting papers.
How light reflects on healthy skin
Healthy skin has a smooth surface that reflects light evenly, creating a soft luminosity rather than harsh shine. Think about how a pearl catches light versus how plastic reflects it – one appears luxurious and dimensional while the other looks flat and artificial. Your skin’s texture plays a crucial role here. Smooth, well-hydrated skin creates tiny, uniform reflections that our eyes perceive as glow. Rough or dry patches scatter light irregularly, creating a dull appearance no matter how much highlighter you apply.
The angle of light matters too. Natural daylight reveals texture and creates shadows that add depth to your face. Indoor lighting, particularly overhead fluorescents, can flatten features and emphasize imperfections. Understanding how different lighting affects your appearance helps you adjust your makeup accordingly. What looks perfect in your bathroom mirror might appear entirely different in your office or car.
The role of skin texture in radiance
Texture trumps everything when creating natural glow. You can layer on illuminating products, but if your skin’s surface is rough or flaky, you’ll never achieve that smooth radiance you’re after. Think of your face as a canvas – the smoother the surface, the better your makeup will look.
Fine lines, enlarged pores, and dry patches all interrupt light reflection, creating shadows and dullness. This doesn’t mean you need perfect skin to glow. It means working with your texture rather than against it. Sometimes this involves gentle exfoliation to remove dead skin cells. Other times it means using hydrating products that plump the skin temporarily, minimizing the appearance of texture.
Regular exfoliation, whether chemical or physical, keeps skin surface smooth. But overdoing it creates irritation and redness that no amount of makeup can disguise. Finding your skin’s sweet spot – typically exfoliating one to three times weekly – maintains optimal texture without causing damage.
Why less makeup often means more glow
Heavy makeup sits on top of skin, creating a barrier that blocks natural luminosity. Picture the difference between sheer curtains and blackout drapes – one allows light to filter through while the other blocks it completely. Your skin works the same way with makeup coverage.
When you pile on foundation, concealer, and powder, you’re essentially creating an opaque layer that prevents your skin’s natural radiance from showing through. This heavy application also tends to settle into fine lines and pores throughout the day, emphasizing texture rather than smoothing it. The result? A cakey, mask-like appearance that ages you rather than enhancing your features.
The solution involves using less product but placing it strategically. Instead of full coverage foundation all over, try spot-concealing only where needed. Rather than mattifying your entire face with powder, dust it only where you tend to get oily. This selective approach maintains your skin’s natural variation in texture and tone, which paradoxically makes you look more polished than uniform coverage ever could.
Building coverage gradually gives you control over the final result. Start with the smallest amount of product possible, then add more only where necessary. This technique prevents that heavy, overdone look while ensuring your natural skin texture remains visible. Many women discover they need far less coverage than they thought once they master proper application techniques.
Your skin changes daily based on hormones, weather, sleep, and hydration levels. What worked yesterday might not work today. Paying attention to these changes and adjusting your routine accordingly keeps your glow looking fresh and natural rather than forced. Some days you might need extra hydration, while others call for oil control. Learning to read your skin’s needs becomes second nature with practice.
How Do You Prep Your Skin for That Perfect Canvas?
The moments before makeup application determine whether your look will last all day or fade by lunch. Proper preparation transforms even problematic skin into a smooth base that holds products beautifully while maintaining that natural radiance you’re after.
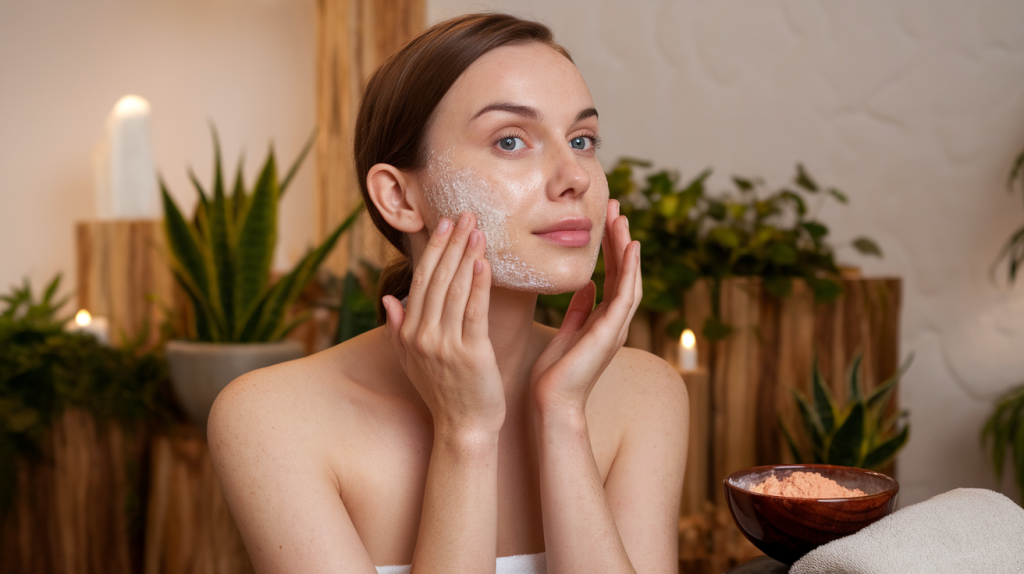
The importance of cleansing before makeup
Starting with clean skin might seem obvious, yet many women skip this crucial step during rushed mornings. Overnight, your skin produces oils, sheds dead cells, and accumulates bacteria from your pillowcase. Applying makeup over this buildup is like painting over a dirty wall – the results will never look smooth or last properly.
The right cleanser depends on your skin type and the season. Gel cleansers work well for oily skin, removing excess sebum without stripping natural moisture. Cream or oil cleansers suit dry skin better, maintaining the lipid barrier while removing impurities. Some mornings, especially if you cleansed thoroughly the night before, a splash of lukewarm water might suffice.
Temperature matters more than most women realize. Hot water strips natural oils and causes redness that shows through makeup. Cold water doesn’t effectively remove oils or open pores for thorough cleaning. Lukewarm water provides the perfect balance, cleansing effectively without irritating skin or causing unnecessary dryness.
Which moisturizer works best for your skin type
Moisturizer creates the barrier between your skin and makeup, determining how products sit on your face throughout the day. The wrong formula can cause makeup to slip, pill, or separate within hours. Finding your perfect match requires understanding both your skin type and how different ingredients interact with makeup.
Oily skin still needs moisture – skipping this step actually triggers more oil production as skin tries to compensate for dryness. Lightweight, gel-based moisturizers or hydrating serums provide necessary hydration without adding heaviness. Look for ingredients like hyaluronic acid that draw moisture into skin without leaving residue.
Dry skin benefits from richer formulations, but timing is everything. Applying a heavy cream immediately before makeup can prevent products from adhering properly. Allow at least five minutes for moisturizer to absorb before moving to the next step. Some women find that mixing a drop of facial oil into their foundation creates the perfect dewy finish for particularly dry skin.
Why primer isn’t always necessary
The beauty industry pushes primers as essential, but many women achieve better results without them. Adding another layer between skin and makeup can actually create more problems than it solves, especially if you’re using the wrong formula for your skin type.
Primers work by creating a smooth surface and helping makeup adhere better. But if you’ve properly prepped your skin with appropriate skincare, you might already have the perfect base. Well-moisturized, smooth skin often holds makeup beautifully without additional products. Adding primer when you don’t need it can lead to pilling, where products ball up on your skin, or cause makeup to slide around rather than staying put.
If you do choose to use primer, less is more. A pea-sized amount for your entire face prevents that heavy, silicone-y feeling that many primers create. Focus on areas where you want makeup to last longest or where you have specific concerns like large pores or fine lines.
The secret of facial massage before makeup
Before reaching for any makeup, spend thirty seconds massaging your face. This simple technique boosts circulation, bringing fresh blood to the surface and creating natural flush and vitality that no blush can replicate.
Use your fingertips to make small circular motions, starting at your jawline and working upward. Pay special attention to areas that tend to look dull or puffy, like under eyes and around the nose. This gentle stimulation wakes up your skin, reduces puffiness, and creates a natural glow that shines through makeup.
The lymphatic drainage aspect of facial massage shouldn’t be overlooked. Gentle downward strokes along your neck help eliminate toxins and reduce facial puffiness. Your face appears more sculpted and defined before you even apply contouring products. Many women report that regular morning massage has improved their skin’s overall appearance, reducing the amount of makeup needed to look polished.
How hydration changes everything
Internal hydration shows on your face more than any topical product can compensate for. Dehydrated skin looks dull, emphasizes fine lines, and causes makeup to appear patchy or flaky regardless of application technique.
Starting your day with a glass of water jumpstarts hydration from within. By the time you apply makeup, your skin cells are plumper and more reflective. This internal moisture creates the ideal surface for makeup application, allowing products to blend seamlessly rather than sitting on top of dry patches.
Consider these hydration boosters for maximum glow:
- Morning Water Ritual: Drink 16 ounces of room temperature water immediately upon waking
- Hydrating Mists: Keep facial mist handy for refreshing skin before and after makeup
- Humidifier Benefits: Use overnight to maintain skin’s moisture levels while you sleep
- Sheet Mask Prep: Apply a hydrating mask while getting ready for special occasions
- Water-Rich Foods: Include cucumber, watermelon, and citrus fruits in your breakfast
The combination of internal and external hydration creates that plump, bouncy skin texture that reflects light beautifully. No amount of highlighting powder can replicate the glow of genuinely well-hydrated skin. This foundation of moisture makes every subsequent makeup step more effective, allowing you to use less product while achieving better results.
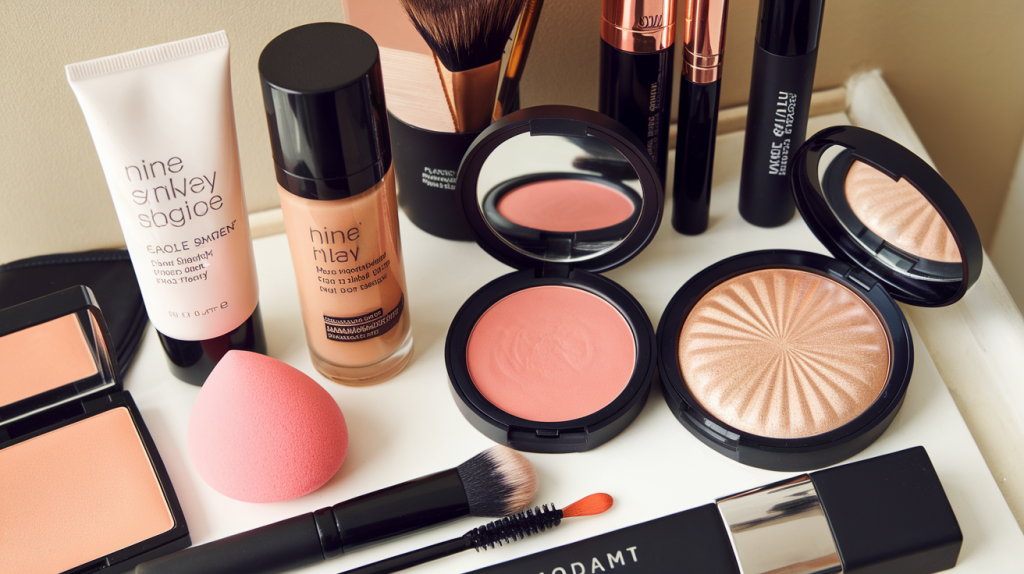
Which Base Products Create Natural Radiance?

Your choice of base products sets the stage for everything that follows. The right formulations and application methods mean the difference between skin that looks naturally luminous and makeup that sits obviously on the surface.
Choosing between tinted moisturizer and foundation
The eternal debate between coverage levels often misses the point entirely. Natural glow comes not from choosing the lightest possible coverage, but from selecting the right formula for your skin’s daily needs. Some days call for the sheer wash of tinted moisturizer, while others benefit from foundation’s perfecting abilities.
Tinted moisturizers excel at creating that your-skin-but-better effect. They contain enough pigment to even out minor discoloration while maintaining visible skin texture. This transparency allows your natural characteristics – freckles, slight color variations – to show through, creating authenticity that full coverage can never achieve. The moisturizing component means one less step in your routine while providing hydration that keeps skin looking fresh throughout the day.
Foundation offers more flexibility in coverage and finish. Modern formulas range from barely-there to full coverage, with finishes from matte to luminous. The trick lies in choosing one that mimics your skin’s natural finish on its best days. If your skin tends toward dryness, avoid matte formulas that emphasize texture. For oily skin, skip the ultra-dewy foundations that will slide off by noon.
Mix and match approaches often work best. You might use tinted moisturizer most days but reach for foundation when you need extra coverage for events or photos. Some women combine both – foundation where they need coverage with tinted moisturizer everywhere else. This customized approach ensures you’re never wearing more makeup than necessary while still addressing your specific concerns.
The art of color matching your skin
Perfect color matching forms the foundation of natural-looking makeup, yet most women wear shades that don’t truly match their skin. The wrong shade, whether too light or too dark, immediately signals that you’re wearing makeup rather than showcasing naturally beautiful skin.
Testing shades on your jawline remains the gold standard for finding your match. This area represents the true color of your face and allows you to see how the shade transitions to your neck. Apply three shades you think might work, then step outside or near a window. Natural light reveals undertones that store lighting obscures. The shade that disappears into your skin is your winner.
Undertones matter as much as depth of color. Cool undertones have pink or blue hints, warm undertones show yellow or golden notes, while neutral undertones balance both. Using foundation with the wrong undertone creates an ashy or orange cast that no amount of blending can fix. When in doubt, neutral undertones work for most people and tend to be more forgiving.
Where to apply concealer strategically
Strategic concealer placement can transform your entire face without looking heavy or obvious. Instead of spackling it everywhere you see imperfection, focus on key areas that make the biggest impact on your overall appearance.
The inner corners of eyes deserve priority. Darkness here makes you look tired regardless of how much sleep you got. A small dot of concealer one shade lighter than your foundation, blended outward in a V shape, opens up the entire eye area. This single adjustment often eliminates the need for extensive under-eye coverage.
Red areas around the nose require different treatment than dark circles. Using the same shade as your foundation, or even slightly warmer, neutralizes redness without creating the obvious light patches that scream “concealer.” Pat gently rather than rubbing to maintain coverage while achieving a natural blend.
Spot concealing blemishes works better than broad coverage. Tiny amounts of product applied directly to the center of imperfections, then gently pressed (not rubbed) into skin, provides coverage without creating texture. Building thin layers proves more effective than one thick application that can slide off or cake up.
How to blend seamlessly with fingers or tools
Your blending method impacts the final result as much as the products themselves. While beauty influencers push expensive brushes and sponges, your fingers often create the most natural finish for everyday makeup.
Fingers warm products, making them more pliable and easier to blend into skin. The natural oils on your fingertips help products meld with your skin rather than sitting on top. Patting motions, rather than rubbing, preserve coverage while creating seamless edges. This technique works particularly well with cream and liquid formulas that benefit from body heat.
When you do reach for tools, damp beauty sponges excel at creating that second-skin finish. The moisture prevents products from being absorbed into the sponge while helping them melt into skin. Bouncing motions, rather than dragging, maintain coverage while eliminating visible edges. Focus on pressing products into skin rather than moving them around the surface.
Setting powder dos and don’ts
Powder can enhance or destroy natural glow depending on application. Heavy-handed powdering creates the flat, cakey look that ages faces and emphasizes texture. Strategic application preserves luminosity while ensuring longevity.
Focus powder only where you actually get oily or where makeup tends to break down. For most women, this means the T-zone and around the nostrils. Skip powdering areas where you want to maintain dewiness, like cheekbones and the center of your forehead. This selective approach maintains dimension and life in your complexion.
The type of powder matters too. Finely-milled, translucent powders work best for setting without adding coverage or color. Avoid powders with shimmer or obvious light-reflecting particles – these often emphasize texture rather than creating natural glow. A light dusting with a fluffy brush beats heavy application with a powder puff every time.
Press powder into areas that need maximum longevity, like under eyes or around the nose, but dust lightly everywhere else. Some makeup artists recommend using setting spray instead of powder for truly natural-looking glow. The liquid formula locks makeup in place without adding the layer of product that powder creates.
How Should You Add Warmth and Dimension?
Color brings life to your complexion, transforming a flat base into dimensional, healthy-looking skin. The strategic placement of blush, bronzer, and highlighter creates the illusion of natural flush and sun-kissed warmth without looking painted on.
The placement of cream blush for natural flush
Cream blush revolutionizes how natural color appears on skin. Unlike powder formulas that sit on top, cream products meld with your base, creating flush that seems to come from within. The key lies not just in the formula but in understanding where natural flush occurs on your unique face shape.
Real blushing happens when blood rushes to the apples of your cheeks and spreads outward. Mimicking this pattern creates authenticity that precise placement on cheekbones can’t achieve. Smile naturally (not the forced cheese-smile for photos), and notice where your cheeks naturally round. This spot, typically more forward on the face than you might expect, serves as your starting point.
Application technique matters enormously with cream formulas. Warm the product on the back of your hand first, then use your ring finger – the weakest and therefore gentlest – to pat color onto skin. Start with the tiniest amount imaginable. You can always build intensity, but removing excess cream blush often means starting your base over. Pat the product into skin rather than rubbing, which can disturb foundation underneath.
The magic happens in the blending. After placing color on the apples, use clean fingers to diffuse edges outward and slightly upward. This creates graduation from intense color at the center to barely-there at the edges. No harsh lines should be visible. If you can see where blush stops and starts, you need more blending.
Some women layer cream blush under powder blush for longevity without sacrificing the natural finish. The cream provides that from-within glow while a light dusting of powder blush in the same shade locks it in place. This technique works particularly well for long days or special events where you need makeup to last but still look fresh.
Why bronzer placement matters
Bronzer should mimic where sun naturally hits and warms your face, not create stripes or obvious contour lines. Understanding the difference between bronzing and contouring prevents that muddy, dirty look that makes faces appear older rather than sun-kissed.
Think about where you actually tan when spending time outdoors. The sun hits your forehead, nose, cheeks, and chin – basically, the highest points of your face. Bronzer belongs in these areas, applied with a light hand to create subtle warmth. Sweeping bronzer into the hollows of cheeks or along your jawline might create shadow, but it doesn’t look like natural sun exposure.
Choose bronzer shades carefully based on your skin tone. The perfect shade is only one to two shades darker than your natural color and should lean warm rather than cool or gray. Cool-toned bronzers read as dirt on skin rather than warmth. Test bronzer the same way you test foundation – blend it along your jawline and check in natural light.
The highlighter sweet spots
Highlighter can elevate your entire look when placed correctly or ruin it when overdone. The goal isn’t to look like a disco ball but to enhance areas where light naturally hits, creating subtle luminosity that suggests healthy, youthful skin.
Less is absolutely more with highlighter. Start with the tiniest amount on your finger or brush, then build gradually. The tops of cheekbones, just above where you placed blush, catch light beautifully. But instead of striping highlighter along the entire cheekbone, concentrate it on the highest point – usually aligned with the outer corner of your eye.
The bridge of your nose deserves a tiny dot of highlighter, not a stripe down the entire length. This creates the illusion of a refined, sculpted nose without obvious shimmer. Skip this step entirely if your nose tends to get oily, as highlighter will only emphasize shine in an unflattering way.
Consider these strategic highlight placements for natural glow:
- Inner Eye Corners: A tiny tap brightens the entire eye area
- Cupid’s Bow: Creates fuller-looking lips without overlining
- Brow Bone: Just under the arch, not the entire under-brow area
- Chin Center: A small dot adds dimension without looking oily
- Collar Bones: For special occasions when wearing revealing necklines
Blending techniques that look real
Seamless blending separates amateur makeup from professional-looking application. Harsh lines or obvious demarcations between products instantly reveal that you’re wearing makeup rather than possessing naturally gorgeous skin.
The secret lies in working with transition zones rather than defined edges. Where bronzer meets bare skin, where blush fades out, where highlighter begins – these areas need special attention. Use a clean, fluffy brush or your fingers to soften these boundaries until you can’t tell exactly where one product ends and another begins.
Circular motions work better than back-and-forth sweeping for natural blending. This technique diffuses product in all directions, preventing those telltale stripe marks. Work from the outside in, gradually decreasing pressure as you blend toward the center of your face. This creates natural graduation that mimics how color naturally appears on skin.
Building color gradually
Patience in building color pays off with results that last all day without looking heavy. The temptation to load up product for immediate impact often backfires, creating clown-like color that’s difficult to tone down.
Start with products that are slightly less pigmented or dilute highly pigmented ones. Mix cream blush with a tiny bit of moisturizer or foundation for a more subtle wash of color. This gives you more control and room for error while building to your desired intensity.
Layer different formulas for complexity that mimics natural skin. A cream base with powder on top, or even multiple shades of the same product, creates depth that single-color application can’t achieve. Your skin isn’t one uniform color, so your makeup shouldn’t be either.
Wait between layers to assess true color. What might look perfect immediately after application can oxidize or intensify as it sets. Give products a minute to settle before adding more. This patience prevents the common mistake of overapplication that becomes apparent only after leaving the house.
What Final Touches Complete Your Glowing Look?
The finishing details transform good makeup into great makeup. These final steps pull everything together, creating polish without compromising the natural radiance you’ve carefully built.
The brow grooming that frames everything
Eyebrows frame your entire face, yet they’re often either overlooked or overdone in pursuit of trendy shapes. Well-groomed brows that follow your natural architecture do more for your appearance than any other single makeup step.
Start by brushing brows upward with a clean spooky to see their natural shape and identify sparse areas. This simple step often reveals that you need less product than you thought. Many women over-fill brows because they haven’t properly dispersed the existing hairs first.
When filling is necessary, choose products one shade lighter than your hair for the most natural result. Dark brows can overpower carefully created natural makeup, drawing attention away from your glowing complexion. Use hair-like strokes rather than coloring in blocks of space. Each stroke should follow the direction of natural hair growth for authenticity.
The beginning of brows should be softer than the arch and tail. Starting with heavy product at the inner corners creates that obvious drawn-on look. Instead, begin filling about a quarter of the way into the brow, then use whatever product remains on your brush or pencil to softly define the inner portion. This graduated approach mimics how natural brows grow – sparser at the beginning and fuller through the body.
Lip colors that complement natural glow
Your lip choice can support or sabotage the natural radiance you’ve created. Heavy, matte lipsticks often look jarring against dewy, natural skin, while the right shade enhances your overall glow without stealing focus.
The most universally flattering approach involves finding your perfect “my lips but better” shade. This color enhances your natural lip tone rather than covering it completely. Pinch your lips gently – the color that appears is your ideal natural shade. Look for lipsticks, glosses, or tints that match this tone.
Texture matters as much as color when creating cohesive makeup. Satin or glossy finishes complement glowing skin better than flat matte formulas. If you prefer the longevity of matte lipstick, add a tiny dot of clear gloss to the center of your bottom lip. This creates dimension and ties into your overall luminous look without sacrificing staying power.
Why mascara makes the difference
A single coat of mascara opens eyes and creates definition that makes everything else pop. Yet heavy, clumpy lashes can destroy the natural aesthetic you’ve carefully constructed. The goal is enhanced lashes that look like yours, just better.
Focus on separation rather than volume for the most natural effect. Wiggling the mascara wand at the base of lashes, then sweeping upward, deposits product where it creates the most impact without loading up the tips. This technique defines eyes without creating spider lashes that scream artificial.
Brown mascara often works better than black for natural makeup looks. The softer tone defines without creating harsh contrast, especially for women with lighter coloring. Black mascara can look severe against minimal makeup, drawing attention to itself rather than enhancing your overall appearance.
Skip bottom lashes entirely or use the tiniest amount of product. Heavy lower lash mascara ages eyes and creates shadows that counteract the brightening work you’ve done with concealer. If you must define lower lashes, use the tip of the wand to carefully separate and barely coat them.
Setting spray versus powder
The final step determines whether your glow lasts all day or fades within hours. While powder has been the traditional setting method, modern setting sprays often preserve natural luminosity better.
Setting sprays lock makeup in place while maintaining the finish you’ve created. Unlike powder, which can mattify and flatten, setting spray preserves dimension and dewiness. Hold the bottle at arm’s length and mist in an X and T formation across your face. This ensures even coverage without oversaturating any area.
Some women prefer combining methods for customized longevity. A light powder application to the T-zone followed by all-over setting spray provides oil control where needed while maintaining glow elsewhere. This hybrid approach works particularly well for combination skin that needs different treatment in different zones.
The two-minute touch-up routine
Knowing how to refresh your glow midday prevents that worn-off, tired look by evening. Smart touch-ups maintain your morning radiance without adding layers of product that can look cakey.
Blotting papers remove excess oil without disturbing makeup underneath. Press gently rather than rubbing, focusing on areas that tend to get shiny. This removes oil while preserving the coverage and glow you created earlier. Following up with a light mist of setting spray reactivates products and refreshes luminosity.
Keep touch-up products minimal. A cream blush that doubles as lip color, pressed powder for shine control, and mascara for definition cover most midday needs. Trying to recreate your entire morning routine in an office bathroom usually results in overdone makeup that looks worse than slight fading would.
The best touch-up might be no touch-up at all. Natural makeup often looks better as it wears throughout the day, melding with your skin and creating an authentic lived-in glow. Unless you have an important evening event, consider letting your makeup evolve naturally. The slight fading and settling often creates an effortless beauty that perfect application can’t achieve.
Your Radiant Routine Simplified
Creating natural glow doesn’t require professional skills or expensive products – just understanding how to work with your skin rather than against it. The five steps outlined here build on each other, from preparing the perfect canvas to adding those final touches that bring everything together. Your unique features deserve enhancement, not coverage, and this simplified approach delivers exactly that.
The beauty of this routine lies in its adaptability. Some mornings you might skip certain steps entirely, while special occasions call for the full treatment. Once you master these techniques, you’ll develop an intuition for what your skin needs each day, adjusting products and application methods accordingly. Natural radiance isn’t about perfection – it’s about healthy, glowing skin that looks like the best version of you.
Frequently Asked Questions
Q: How long should this entire routine take once I get comfortable with it?
A: Most women complete this full routine in 7-10 minutes once they’ve practiced a few times. The prep takes about 2 minutes, base products 2-3 minutes, color products another 2 minutes, and final touches about 2 minutes. Streamlined product choices and efficient techniques make all the difference.
Q: Can I achieve natural glow if I have oily skin?
A: Absolutely. Oily skin can look beautifully luminous with the right approach. Focus on controlling oil in the T-zone while maintaining dewiness on cheekbones and other high points. Use oil-free, water-based products and set strategically rather than powdering your entire face.
Q: What’s the biggest mistake women make when trying to create natural glow?
A: Using too much product is the number one issue. Natural radiance comes from light reflecting off skin, not off layers of makeup. Start with less than you think you need and build gradually. You can always add more, but removing excess often means starting over.
Q: Should I use different techniques for daytime versus evening makeup?
A: The basic techniques remain the same, but evening lighting allows for slightly more intensity. You might add an extra layer of blush or highlighter for nighttime, when artificial lighting requires more definition. Natural light during the day reveals everything, so keeping application lighter prevents an overdone look.
Q: How do I know if my skin looks naturally glowy or just oily?
A: Natural glow appears on the high points where light would naturally hit – cheekbones, nose bridge, cupid’s bow. Oiliness shows up as uniform shine across larger flat areas like the forehead or cheeks. If you’re glowing in the right places and controlled elsewhere, you’ve achieved the perfect balance.
Q: What if cream products always seem to disturb my foundation?
A: The key is working in thin layers and allowing each to set before adding the next. Also, ensure your base products are compatible – water-based foundations work best with water-based cream products. Patting rather than rubbing and using clean fingers prevents disrupting layers underneath.
Q: Can women over 50 achieve this natural glow look?
A: Mature skin often looks most beautiful with this approach. The key adjustments involve extra hydration during prep and avoiding shimmer-heavy highlighters that can emphasize texture. Cream products and strategic placement create youthful luminosity at any age.
Q: Do I really need different products for each step, or can some multitask?
A: Many products can pull double duty. Cream blushes work beautifully on lips, highlighter can brighten inner eye corners, and tinted moisturizer might eliminate the need for separate moisturizer and foundation. Experiment to find your perfect minimal collection.