
Long hair offers endless possibilities, but without the right cut, it can feel heavy, flat, and lifeless. Layered haircuts transform lengthy locks into dynamic, movement-filled styles that catch the eye and turn heads. The magic happens when skilled scissors create graduated lengths throughout your hair, bringing dimension and personality to what might otherwise be a simple curtain of strands.
Finding the perfect layered cut for your long hair involves more than just asking for “layers” at the salon. Different layering techniques create vastly different effects – from subtle movement to dramatic angles, from soft romance to edgy texture. Your face shape, hair texture, lifestyle, and personal style all play crucial roles in determining which layered approach will make you shine. The right layers can slim your face, add volume where you want it, reduce bulk where you don’t, and give you styling options you never knew existed.
In the following sections, we’ll explore five stunning layered haircuts that work beautifully with long hair. Each style offers its own unique benefits and aesthetic, ensuring you’ll find one that resonates with your personal vision. Whether you prefer subtle sophistication or bold statements, these cuts will help you maximize your long hair’s potential and create a look that’s unmistakably yours.
- What Makes Layered Haircuts Perfect for Long Hair
- The Classic Long Layers: Your Gateway to Effortless Style
- Face-Framing Layers: The Instant Facelift Effect
- Choppy Textured Layers: For the Bold and Beautiful
- V-Shaped Layers: The Dramatic Statement Cut
- Final Thoughts on Your Perfect Layered Look
- Frequently Asked Questions
What Makes Layered Haircuts Perfect for Long Hair
The relationship between layers and long hair resembles a perfect partnership where each element enhances the other. Layers breathe life into lengthy strands by creating movement that prevents hair from hanging limp and lifeless. This movement happens naturally as different lengths interact, creating gentle waves and curves even in straight hair textures.
How layers add movement and dimension
Movement in hair comes from varying lengths that respond differently to gravity and styling. Shorter pieces spring up while longer sections flow down, creating a cascading effect that catches light beautifully. This dimensional quality makes hair appear fuller and more vibrant, even without any styling products or tools. The interplay between different lengths also helps hair move more freely, preventing that heavy, stuck-to-the-head look that plagues many long-haired women.
The weight reduction benefit
One of the most immediate benefits you’ll notice with layered cuts is how much lighter your hair feels. Strategic layering removes bulk without sacrificing length, making your hair easier to manage and style. This weight reduction particularly helps women with thick hair who struggle with heaviness causing headaches or neck strain. The removal of excess weight also allows natural texture to emerge, whether that’s waves, curls, or enhanced straightness.
Versatility in styling options
Layered long hair opens up a world of styling possibilities that single-length cuts simply can’t match. You can enhance the layers for a tousled, beachy look, smooth them out for sleek sophistication, or play up the texture for an edgy vibe. Updos become more interesting with varying lengths creating natural texture and volume. Even simple ponytails look more polished when shorter layers frame the face while longer pieces create the tail.
The beauty of layers lies in their adaptability to different occasions and moods. Professional settings call for smooth, polished layers achieved with a round brush and blow dryer. Weekend adventures might inspire air-dried texture enhanced with sea salt spray. Date nights could feature romantic waves created by wrapping sections around a curling iron. Each styling approach highlights the layers differently, essentially giving you multiple haircuts in one.
Face-framing advantages
Perhaps no benefit of layered cuts surpasses their ability to flatter facial features. Skillfully placed layers can minimize a prominent forehead, balance a strong jawline, or create the illusion of higher cheekbones. The key lies in customizing layer placement to work with, not against, your natural face shape. Round faces benefit from layers that start below the chin to create length. Square faces soften with layers that begin around the cheekbone. Oval faces can handle layers starting almost anywhere, while heart-shaped faces look best with layers beginning near the collarbone.
Maintenance considerations
While layered cuts offer numerous advantages, they do require regular maintenance to look their best. Plan on visiting your stylist every 8-12 weeks to maintain the shape and prevent layers from growing out unevenly. Between appointments, proper care keeps layers looking fresh. Use lightweight conditioners that won’t weigh down shorter pieces. Apply styling products strategically – lighter formulas on upper layers, slightly heavier ones on longer sections. Regular trims prevent split ends from traveling up the hair shaft and compromising the layered shape.
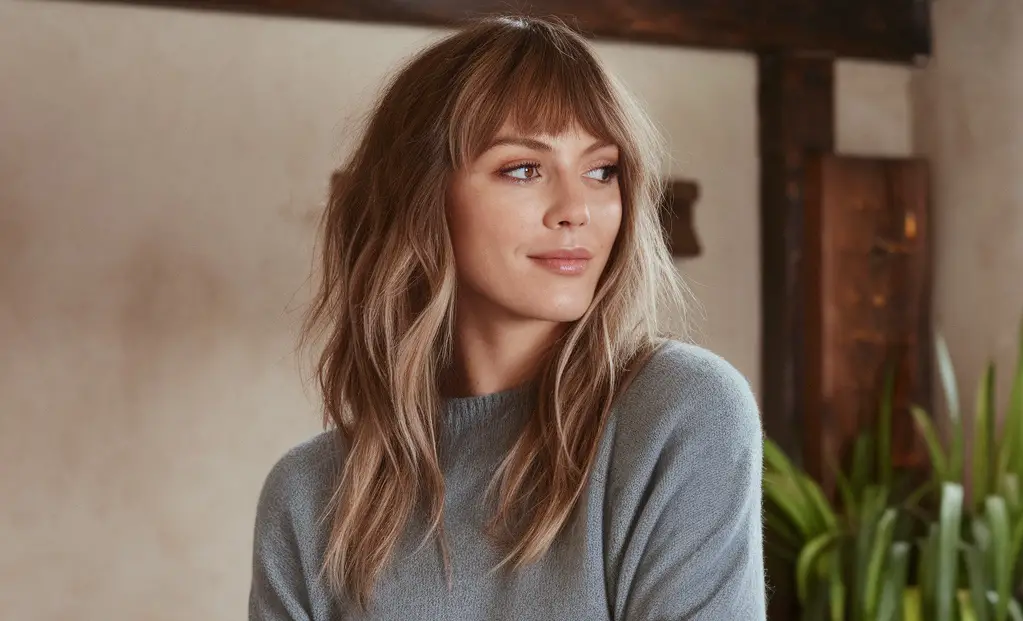
The Classic Long Layers: Your Gateway to Effortless Style
Classic long layers represent the most universally flattering approach to adding dimension to lengthy hair. This timeless technique creates subtle graduation throughout the hair, typically starting around the shoulder blades and continuing down to the ends. The result looks naturally beautiful rather than obviously “styled,” making it perfect for women who want enhancement without high maintenance.
What defines classic long layers
The hallmark of classic long layers lies in their seamless blending. Unlike more dramatic layering techniques, classic layers flow into each other so smoothly that individual layers become nearly invisible. The shortest pieces typically fall no higher than the collarbones, maintaining the overall long hair aesthetic while adding crucial movement. Your stylist achieves this effect through point cutting or slide cutting techniques that create soft, feathered ends rather than blunt lines.
Hair density plays a significant role in how classic layers appear. Fine hair benefits from longer layers that maintain as much density as possible while still creating movement. Thick hair can handle slightly shorter starting points and more aggressive layering to remove bulk. Medium-density hair offers the most flexibility, allowing for various layer placements depending on your desired outcome.
Best face shapes for this cut
While classic long layers work well for most face shapes, certain facial structures particularly benefit from this cut. Oval faces find their natural balance enhanced by the gentle movement of classic layers. The soft graduation draws the eye vertically, maintaining the oval shape’s inherent harmony. Round faces appear more elongated when classic layers start below the chin, creating a lengthening effect that slims the overall appearance.
Square and rectangular face shapes soften beautifully with classic long layers. The curved lines created by the graduated lengths counteract angular jawlines and create a more feminine silhouette. Heart-shaped faces benefit from classic layers that add fullness through the lower half of the hair, balancing a wider forehead with a narrower chin. The key for all face shapes lies in customizing where the shortest layers fall to enhance your best features.
Styling techniques for classic layers
The beauty of classic long layers shines through various styling approaches, each highlighting different aspects of the cut. For everyday wear, many women find that air drying with a lightweight styling cream produces gorgeous, effortless results. Simply apply product to damp hair, gently scrunching to encourage natural texture, then allow hair to dry naturally. This method works particularly well for women with natural waves or curls.
Heat styling opens up additional possibilities for classic layers:
Smooth and Sleek: Use a round brush while blow-drying, pulling sections taut to create glossy, polished layers
Beachy Waves: Wrap random sections around a large barrel curling iron, leaving ends out for a modern finish
Volume Boost: Flip hair upside down while blow-drying, then use velcro rollers on the crown for extra lift
Straight and Swingy: Flat iron hair in sections, giving a slight curve at the ends to show off the layer graduation
How to communicate with your stylist
Getting the classic long layers you envision requires clear communication with your hairstylist. Start by showing photos of styles you like, but also point out what specifically appeals to you about each image. Discuss your daily styling routine honestly – if you’re a wash-and-go person, make sure your stylist knows to create layers that look good with minimal effort.
Important points to cover during your consultation include where you want the shortest layer to fall, how much overall length you’re willing to sacrifice, and any areas where you want to maintain density. Mention if you have any cowlicks or growth patterns that might affect how layers lie. Your stylist should also consider your hair’s natural texture and how it behaves when cut shorter in certain areas.
Daily maintenance tips
Maintaining classic long layers doesn’t require extensive effort, but a few key practices keep them looking salon-fresh. Start with the right shampoo and conditioner for your hair type, focusing conditioner primarily on the mid-lengths and ends to avoid weighing down shorter layers. Once or twice weekly, use a deep conditioning treatment to keep all lengths healthy and manageable.
Sleeping on a silk or satin pillowcase reduces friction that can cause frizz and disturb your layer pattern. When hair needs refreshing between washes, focus dry shampoo at the roots and use a small amount of smoothing serum on the mid-lengths to revive the layered shape. Regular micro-trims every 6-8 weeks prevent layers from growing out unevenly and maintain the cut’s intended silhouette.
Face-Framing Layers: The Instant Facelift Effect
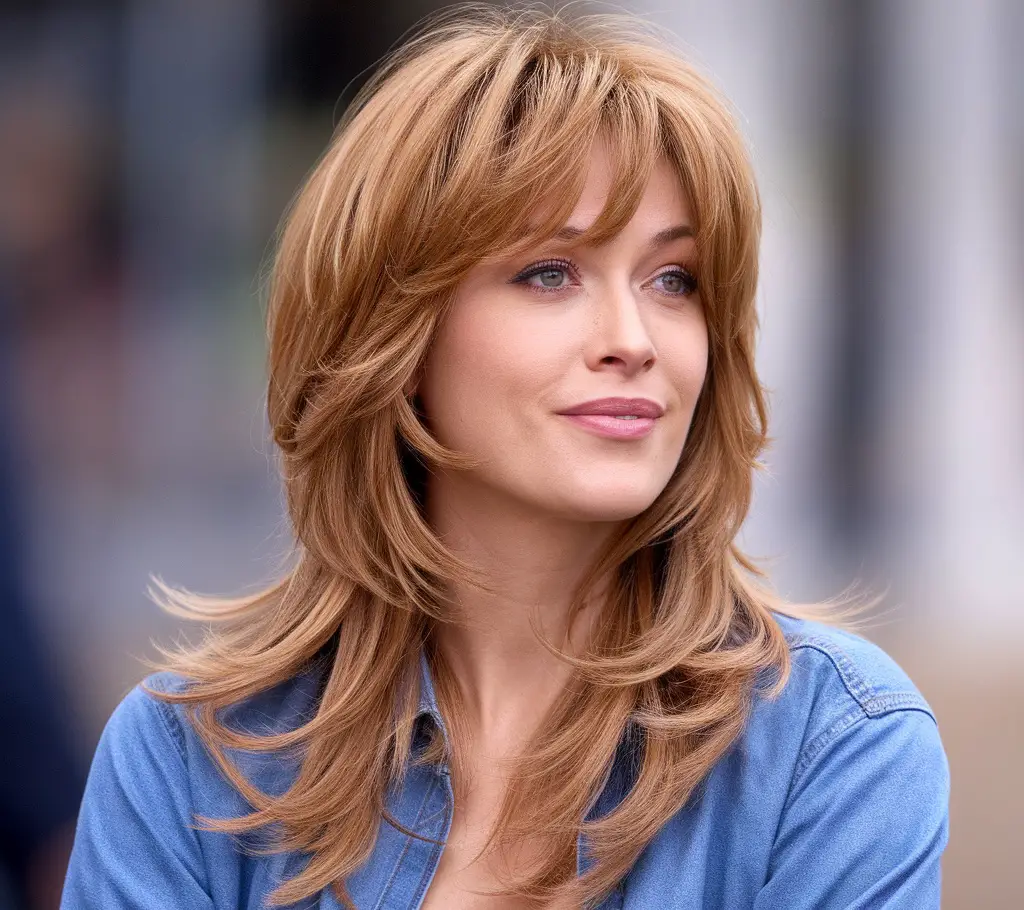
Face-framing layers work like strategic contouring for your hair, drawing attention to your best features while subtly minimizing areas of concern. These carefully placed shorter pieces around the face create movement and dimension exactly where they’ll have the most flattering impact. Unlike all-over layering, face-framing focuses specifically on the hair that falls around your face, leaving the back length largely intact.
Understanding face-framing layer placement
The art of face-framing layers lies in precise placement tailored to each individual’s facial structure. These layers typically begin somewhere between the cheekbones and chin, with the exact starting point determined by what features you want to enhance or soften. The graduation should be subtle enough to blend seamlessly with the rest of your hair while creating enough variation to add movement and interest around your face.
Professional stylists often use a combination of techniques to achieve perfect face-framing layers. Point cutting creates soft, wispy ends that move naturally. Slide cutting produces longer, more dramatic angles. Some stylists prefer using a razor for the softest possible finish, though this technique works best on certain hair textures. The angle at which layers are cut also matters tremendously – steeper angles create more dramatic framing, while gentler angles produce subtle enhancement.
Consider your hair’s natural growth patterns when planning face-framing layers. Hair that grows forward from the crown will naturally fall into face-framing positions, while hair that grows straight back might need more aggressive layering to achieve the same effect. Cowlicks near the hairline can actually work to your advantage with face-framing layers, creating natural lift and movement.
Customizing layers for your face shape
Each face shape benefits from different face-framing strategies. Round faces look best when the shortest layers hit below the chin, creating vertical lines that elongate the face. Adding subtle layers that sweep away from the face, rather than curving inward, prevents adding width to already full cheeks. The goal is creating the illusion of an oval shape through strategic hair placement.
Square faces soften dramatically with face-framing layers that begin around the cheekbone or jawline. These layers should have plenty of movement and curve to counteract angular features. Avoid layers that end right at the jaw corner, as this can emphasize squareness. Instead, opt for lengths that fall just above or below this point. Adding some wispy pieces around the temples also helps soften a strong forehead.
Long or rectangular faces need face-framing layers that add width rather than length. Starting layers around the cheekbones and adding volume through the sides creates better proportion. Avoid very long, straight face-framing pieces that would further elongate the face. Instead, encourage wave or curl in these sections to add horizontal dimension.
The difference between subtle and dramatic framing
Subtle face-framing layers blend almost imperceptibly with the rest of your hair, creating gentle movement that enhances without obviously changing your overall style. These conservative layers typically vary no more than 2-3 inches from your overall length and feature very gradual transitions. Subtle framing works wonderfully for professional environments or women who prefer understated elegance.
Dramatic face-framing layers make a bold statement with significantly shorter pieces around the face that create high contrast with back lengths. Think of the difference between gentle wisps and defined, angular pieces that might be 6-8 inches shorter than your longest layer. Dramatic framing suits women who love making a style statement and don’t mind the extra styling effort required to make these layers look intentional rather than grown-out.
Styling methods to enhance the effect
Face-framing layers reach their full potential with proper styling techniques. The most flattering approach often involves creating slight bends or waves in these pieces to add movement and prevent them from hanging flat against the face. A 1.5-inch curling iron or flat iron can create beautiful bends – simply wrap the section around the tool and pull through slowly, creating a ribbon-like wave.
For everyday styling that takes mere minutes:
- Apply a volumizing mousse to damp face-framing sections
- Blow dry while brushing layers away from the face
- Once dry, use a flat iron to create a subtle flip at the ends
- Finish with a light-hold hairspray to maintain shape without stiffness
Women with naturally wavy or curly hair can enhance face-framing layers by applying curl-defining cream to damp hair and either air drying or using a diffuser. The key is encouraging the natural texture while ensuring the face-framing pieces don’t shrink up too much and appear disconnected from the rest of the hair.
Growing out face-framing layers gracefully
Eventually, you might decide to grow out your face-framing layers, whether to try a new style or return to one length. This process requires patience and strategic trimming. Rather than letting layers grow completely untouched, regular “dusting” appointments remove split ends while gradually reducing the difference between layer lengths. Your stylist can also adjust the angle of layers during this process, making them less noticeable as they grow.
During the growing-out phase, styling becomes crucial for avoiding awkward stages. Pin back pieces that hit unflattering lengths, or incorporate them into braids and twists. Headbands and decorative clips can control rebellious sections while adding style. Many women find that this transition period actually introduces them to new styling techniques they continue using even after achieving their desired length.
Choppy Textured Layers: For the Bold and Beautiful
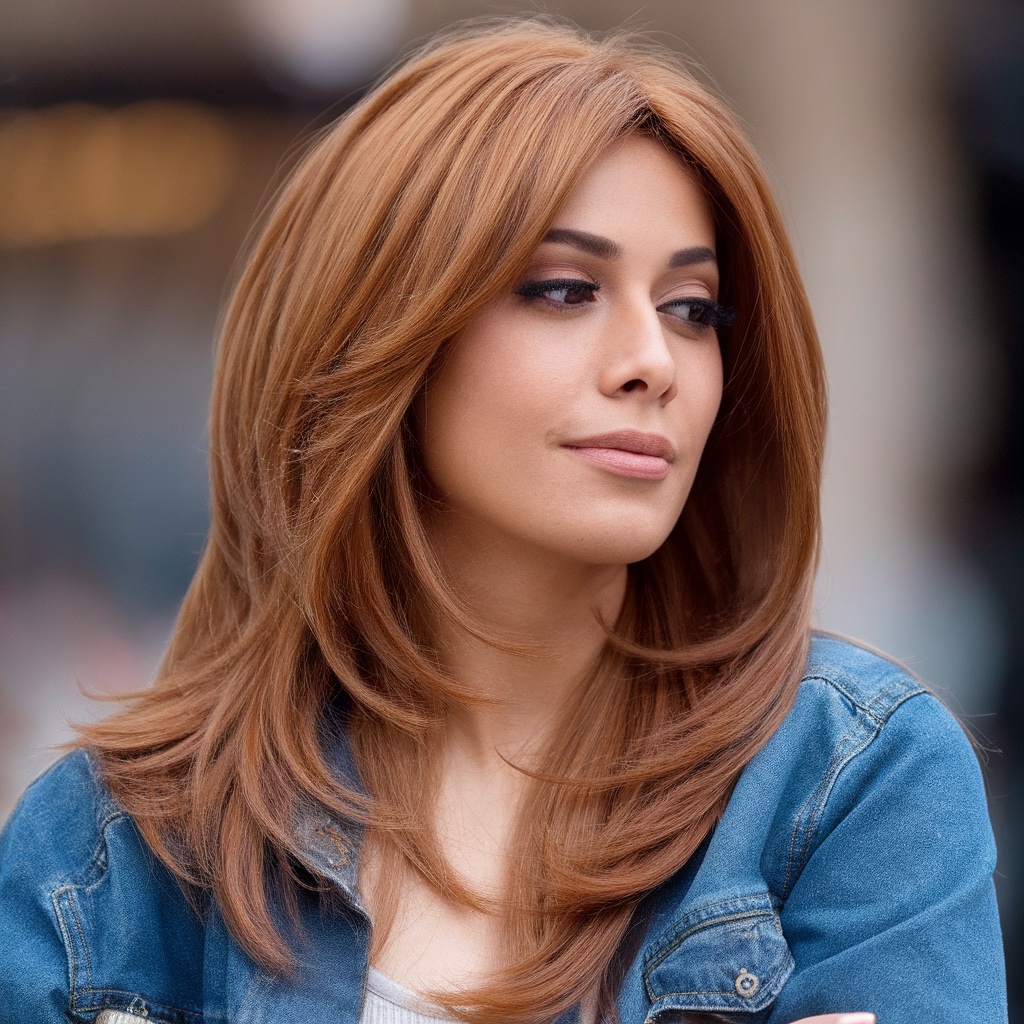
Choppy textured layers inject serious personality into long hair, creating an effortlessly cool vibe that’s both modern and timeless. This cutting technique produces intentionally uneven, piece-y layers that add massive texture and movement. Unlike the seamless blending of classic layers, choppy layers celebrate their distinctness, creating a lived-in look that appears both deliberate and carefree.
What sets choppy layers apart
The defining characteristic of choppy layers lies in their intentional imperfection. Rather than smooth transitions between lengths, choppy layers feature distinct, disconnected pieces that create texture through contrast. Your stylist achieves this effect through various techniques including point cutting at dramatic angles, texturizing shears, and even straight-across cuts at different lengths throughout the hair.
This approach to layering works particularly well for women who want to add edge to their long hair without sacrificing length. The choppiness can be as subtle or dramatic as you prefer – from slightly piece-y ends to full-on shag-inspired texture throughout. The beauty of this technique lies in its versatility and ability to be customized for different comfort levels and styling commitments.
Hair texture plays a crucial role in how choppy layers perform. Straight hair showcases the technical precision of the cut, with each layer clearly defined. Wavy hair develops incredible texture and movement with choppy layers, often requiring minimal styling. Curly hair becomes more manageable with strategic choppy layering that removes bulk while enhancing the natural curl pattern. Each texture brings its own advantages to this cutting style.
Creating texture without damaging hair
While the term “choppy” might sound harsh, skilled stylists create this texture without compromising hair health. The key lies in using sharp, high-quality shears and cutting techniques that seal the hair cuticle rather than fraying it. Point cutting, when done correctly, actually helps prevent split ends by creating clean, angled cuts that are less likely to split than blunt ends.
Modern texturizing techniques have evolved far beyond old-school thinning shears that could damage hair. Today’s stylists use methods like:
Channel Cutting: Creating texture by cutting channels within sections of hair
Twist Cutting: Twisting sections before cutting to create natural-looking texture
Slide Cutting: Using the blade to slide along the hair shaft for soft texture
Notching: Creating small notches in the hair ends for piece-y separation
Regular maintenance keeps choppy layers looking intentional rather than damaged. Deep conditioning treatments help maintain hair health despite the increased styling that textured cuts often require. Protein treatments can be particularly beneficial for maintaining strength in hair that’s been extensively layered.
Best hair types for choppy layers
While choppy layers can work for various hair types, certain textures particularly shine with this cut. Medium to thick hair density provides the best canvas for choppy layers, as there’s enough hair to create visible texture without sacrificing too much volume. Fine hair can absolutely rock choppy layers, but the approach needs modification – focusing texture at the ends rather than throughout prevents the hair from appearing too thin.
Straight to wavy hair showcases choppy layers beautifully, as the texture differences remain visible and defined. Very curly or coily hair can benefit from choppy layering techniques, but the approach differs significantly. For these textures, choppy layers focus more on removing bulk and creating shape rather than visible piece-y texture, as the curl pattern naturally creates its own texture.
Styling products that enhance texture
The right products make all the difference in bringing out the best in choppy textured layers. Texturizing sprays and sea salt sprays add grit and enhance separation between layers without weighing hair down. Apply these to damp hair and scrunch to encourage natural texture, or spray onto dry hair and tousle with fingers for instant piece-y definition.
For more defined texture, consider these product categories:
Texture Paste: Provides medium hold with matte finish for separated, piece-y looks
Dry Texture Spray: Adds instant grit and volume to clean or day-old hair
Wave Enhancing Foam: Encourages natural movement while defining choppy layers
Light-Hold Wax: Perfect for defining individual pieces without stiffness
Application technique matters as much as product choice. Rather than distributing product evenly throughout hair, focus on areas where you want the most texture visible. Warm products between palms before applying, and use a scrunching, twisting motion to enhance the choppy effect. Less is often more – you can always add more product, but over-application kills the effortless vibe that makes choppy layers so appealing.
Maintaining the edgy look
Choppy textured layers require regular maintenance to keep their edge without looking unkempt. Plan salon visits every 6-10 weeks to refresh the texture and prevent layers from growing out into shapelessness. Between appointments, several techniques help maintain the choppy aesthetic.
Refresh day-old hair by lightly misting with water and scrunching in a small amount of texture product. This reactivates the choppy pieces without requiring a full restyle. When heat styling, use tools in unconventional ways – wrap random sections around a curling iron in different directions, or use a flat iron to create bends and kinks rather than smooth strands. The goal is enhancing the cut’s inherent texture rather than fighting against it.
Nighttime care helps preserve choppy texture for multiple days. Loosely tie hair in a high, soft scrunchie to maintain volume and prevent flattening. In the morning, shake out hair and use fingers to separate and redefine choppy pieces. This lived-in approach actually enhances the appeal of choppy layers, which look best with a bit of natural messiness.
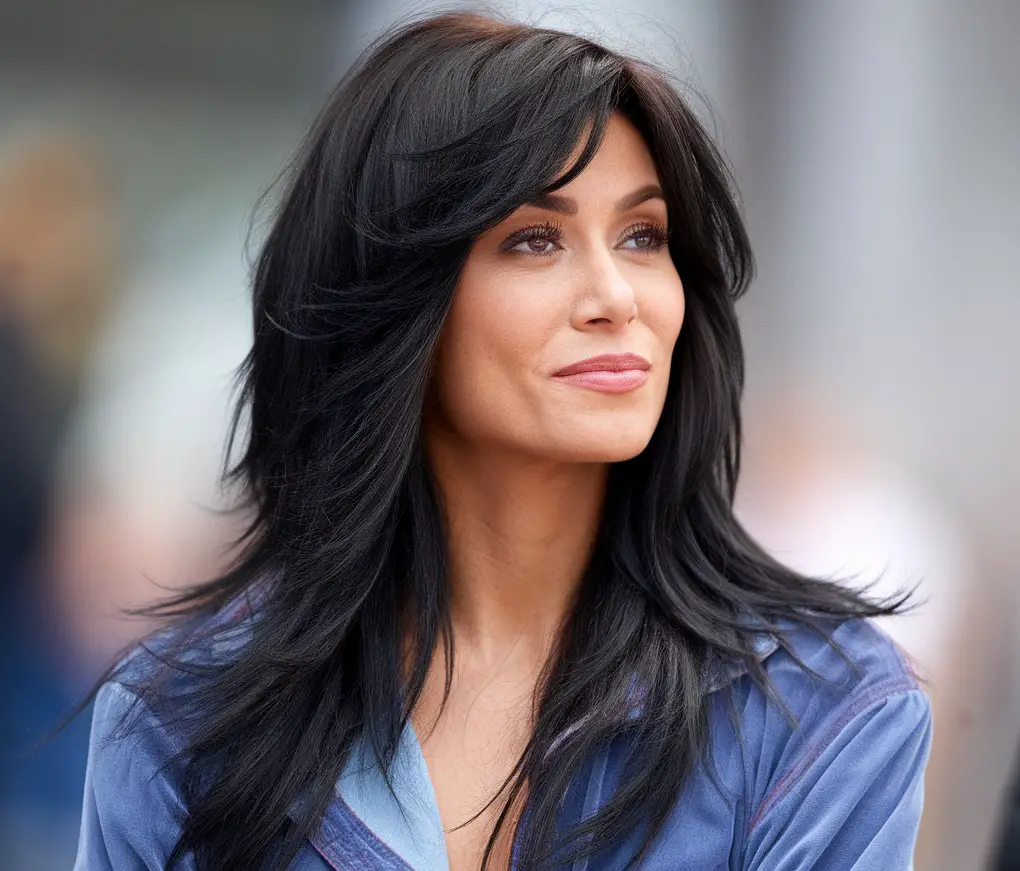
V-Shaped Layers: The Dramatic Statement Cut
V-shaped layers create one of the most visually striking silhouettes in long hair styling. This dramatic technique forms a distinct V shape when viewed from behind, with the center back maintaining maximum length while the sides graduate to shorter lengths. The result is a bold, geometric look that adds incredible movement and creates the illusion of even longer hair.
Understanding the V-shape structure
The architecture of V-shaped layers requires precise cutting to achieve the signature silhouette. Starting from a center point at the back, hair gradually becomes shorter as it moves toward the sides, creating diagonal lines that form a V. This isn’t simply about cutting hair shorter on the sides – it’s about creating a specific angle and maintaining proper weight distribution throughout the cut.
The angle of the V can vary from subtle to extreme, depending on personal preference and hair characteristics. A gentle V might feature only a few inches difference between the center and sides, while a dramatic V could have differences of 6-8 inches or more. The transition between lengths can be smooth and blended or more defined and geometric, each creating a different visual impact.
Proper sectioning is crucial for achieving a symmetrical V shape. Stylists typically work with diagonal sections that follow the intended angle of the cut. This technical approach ensures both sides match perfectly and the V point sits exactly where intended. The cutting angle also matters – hair must be cut at specific angles to ensure it falls correctly when dry and styled.
Who should consider V-shaped layers
V-shaped layers particularly flatter certain body types and personal styles. Women with broader shoulders find that V-shaped layers create a balancing vertical line that draws the eye downward. The dramatic back view also suits those who frequently wear their hair down and want to make a statement from behind. If you love the look of long hair but want something more interesting than one length, V-shaped layers offer the perfect solution.
This cut works beautifully for various hair textures, though each requires different considerations. Straight hair showcases the precision of the V shape most clearly, making it ideal for those who want the full geometric impact. Wavy hair softens the V shape slightly while adding romantic movement. Curly hair creates a more organic interpretation of the V, with curls naturally varying the exact shape while maintaining the overall silhouette.
Consider your lifestyle before committing to dramatic V-shaped layers. This cut looks best when hair is worn down, as ponytails and updos can appear uneven due to the varying lengths. If you frequently wear your hair up for work or activities, a subtle V might be more practical than an extreme version. The dramatic difference in lengths also means growing out this cut takes commitment and patience.
The visual lengthening effect
One of the most appealing aspects of V-shaped layers is their ability to make hair appear longer than it actually is. The eye naturally follows the longest point – the center V – creating an illusion of extra length. This optical effect is particularly striking when hair moves, as the varying lengths create a cascading waterfall effect that emphasizes vertical lines.
The lengthening illusion works best when the V is cut and styled properly. Hair should be well-conditioned to ensure smooth fall and minimize frizz that could disrupt the clean lines. Regular trims maintain the sharp V point, as split ends or uneven growth can muddy the shape and reduce the lengthening effect. Color can also enhance this illusion – subtle highlights through the longer sections draw the eye downward.
Styling tips for maximum impact
V-shaped layers reach their full potential with styling that emphasizes the dramatic shape. Blow drying with a large round brush while pulling hair straight down maintains the V silhouette while adding smoothness and shine. Focus on keeping the center back sections as straight and long as possible while allowing the sides to show their graduated lengths.
Creating waves or curls in V-shaped layers requires strategic placement to maintain the shape’s integrity:
Loose Waves: Use a large barrel curling iron, wrapping sections away from the face and leaving the last few inches straight
Beach Texture: Apply sea salt spray and twist sections while damp, allowing the V shape to peek through the texture
Sleek and Straight: Flat iron in downward sections, following the V angle for emphasized geometry
Romantic Curls: Create looser curls in the shorter side sections and tighter curls in the longer center for balanced volume
For special occasions, V-shaped layers create stunning half-up styles. The varying lengths add natural volume and interest to any updo portion while the flowing V below creates drama. Braids also look particularly beautiful with this cut, as the graduated lengths create naturally tapered ends without needing to be cut that way.
Transitioning from other layer styles
Moving from traditional layers to V-shaped requires a thoughtful approach. If starting from one-length hair, the transition is straightforward – your stylist simply needs to create the V shape without worrying about blending existing layers. However, transitioning from U-shaped or classic layers requires strategic cutting to avoid awkward stages.
The process typically happens over 2-3 appointments, gradually increasing the V angle while maintaining an attractive shape throughout. During transition, styling becomes crucial for disguising any unevenness. Curling or waving hair can camouflage lengths that don’t quite fit the intended V shape yet. Strategic trimming of only certain sections helps achieve the desired shape more quickly while maintaining overall length in key areas.
Many women find that experiencing V-shaped layers opens their minds to more dramatic styling choices. The bold nature of this cut often inspires experimentation with different styling techniques, hair accessories, and even color placement. Once you’ve grown comfortable with the statement-making nature of V-shaped layers, other dramatic styles seem less intimidating.
Final Thoughts on Your Perfect Layered Look
Choosing between these five layered haircuts for your long hair ultimately comes down to your personal style, maintenance preferences, and how bold you want to be with your look. Each offers unique benefits – from the versatile wearability of classic long layers to the dramatic impact of V-shaped cuts. The key is understanding how each style will work with your specific hair texture, face shape, and lifestyle requirements.
Take time to consider which aspects matter most to you. Do you prioritize easy maintenance and styling versatility? Classic long layers or subtle face-framing might be your answer. Are you ready to make a statement and don’t mind regular salon visits? Choppy textured or dramatic V-shaped layers could transform your entire look. Remember that great hair isn’t just about following trends – it’s about finding what makes you feel confident and beautiful every single day. Trust your instincts, communicate clearly with your stylist, and prepare to fall in love with your refreshed long hair.
Frequently Asked Questions
Q: How often should I trim my layered long hair to maintain the shape?
A: Most layered cuts require trimming every 8-12 weeks to maintain their shape and prevent layers from growing out unevenly. Choppy and V-shaped styles might need attention every 6-8 weeks.
Q: Will layers make my thin long hair look even thinner?
A: When done correctly, layers can actually make thin hair appear fuller by adding movement and dimension. The key is working with a skilled stylist who understands how to maintain density while creating shape.
Q: Can I still wear my hair in a ponytail with dramatic layers?
A: Yes, but the look will be different from a blunt cut ponytail. Shorter layers will create wispy pieces around your face, and V-shaped cuts might result in a tapered ponytail. Many women love this softer, more romantic ponytail look.
Q: What’s the difference between texturizing and layering?
A: Layering creates different lengths throughout your hair for movement and shape. Texturizing removes weight from within the hair sections without necessarily changing length, creating piece-y or wispy effects.
Q: How do I know which layered cut will suit my face shape best?
A: Consider what features you want to enhance or minimize. Round faces benefit from layers starting below the chin, square faces soften with layers around the cheekbones, and oval faces can handle most layer placements.
Q: Can curly hair have the same layered cuts as straight hair?
A: Curly hair can have all these cuts, but they’ll look different due to curl shrinkage and texture. Your stylist should adjust the technique and length to account for how your curls will spring up when dry.
Q: Will layers help reduce the weight of my thick long hair?
A: Absolutely. Layers are one of the best ways to remove bulk from thick hair while maintaining length. The weight reduction can help with styling manageability and reduce strain on your neck and scalp.
Q: What styling tools are essential for maintaining layered long hair?
A: A good blow dryer with a concentrator nozzle, a large round brush, and either a flat iron or curling iron will cover most styling needs. Quality matters more than quantity with tools.
Q: How do I prevent my layers from looking stringy or separated?
A: Keep hair healthy with regular conditioning treatments, use appropriate products for your hair type, and avoid over-processing with heat or chemicals. Stringy appearance often indicates damage or incorrect product use.