Thin hair presents its own set of challenges, particularly when you’re searching for a haircut that creates the appearance of fuller, thicker locks. Many women with finer strands find themselves caught between wanting length and needing volume, often settling for styles that leave their hair looking limp or lifeless. The right haircut, however, can completely transform thin hair, creating body, movement, and the illusion of density through strategic cutting techniques and thoughtful styling approaches.
The relationship between hair structure and perceived volume goes beyond simple length choices. Your hair’s natural texture, growth patterns, and even the way light reflects off your strands all play crucial roles in how full your hair appears. Professional stylists understand these nuances and use specific cutting techniques to maximize what nature gave you. Whether you prefer short, sassy styles or shoulder-grazing lengths, there’s a volume-boosting cut that will work with your hair type rather than against it.
Finding your perfect volume-creating haircut requires understanding which styles naturally add body to finer strands. The following sections will guide you through five gorgeous options specifically chosen for their ability to boost volume in thin hair. From pixie cuts that maximize lift to strategic layering techniques that create movement and dimension, you’ll discover exactly which styles will give your hair the fullness you’ve been seeking. Let’s uncover the haircuts that will transform your thin hair into a voluminous, head-turning style.
Why Certain Cuts Create the Illusion of Fuller Hair
Understanding the mechanics behind volume-creating haircuts helps you make informed decisions about your next salon visit. The way scissors move through your hair, the angles at which sections are cut, and even the tools your stylist chooses all contribute to the final result. Smart cutting techniques can make thin hair appear significantly fuller without adding any actual density to your strands.
How strategic layering adds dimension
Layers work like magic for thin hair, but only when executed correctly. Short layers throughout the crown area lift hair away from the scalp, creating height and preventing that flat, plastered-down look. The key lies in keeping layers subtle enough to maintain the appearance of thickness while still providing movement. Too many layers can actually make hair look thinner, so finding the right balance becomes essential.
Your stylist should focus on creating layers that work with your natural hair movement. This means cutting with the grain of your hair rather than against it, allowing each layer to support the ones beneath. The result? Hair that appears to have more substance and body throughout, rather than concentrated weight at the bottom that pulls everything down.
The science behind volume-creating techniques
Hair appears thicker when light bounces off it at multiple angles. Certain cutting techniques create varied surfaces that reflect light differently, giving the optical illusion of increased density. Texturizing shears, when used sparingly, can create micro-layers that catch light and add visual interest without removing too much precious hair.
The direction of the cut also matters significantly. Cutting hair at a 45-degree angle rather than straight across creates pieces that stack on top of each other, building volume from within. This technique works particularly well for women with straight, fine hair that tends to lie flat against the head.
Which cutting angles work best for thin hair
Graduation cutting, where hair gradually increases in length from shorter to longer, creates a stacked effect that builds volume naturally. This technique works especially well at the back of the head, where many women with thin hair struggle to achieve fullness. The graduated sections push against each other, creating lift without requiring constant teasing or product application.
Point cutting, another angle-based technique, involves cutting into the hair at an angle rather than straight across. This creates softer edges that blend seamlessly while adding texture and movement. For thin hair, point cutting prevents harsh lines that can make sparse areas more noticeable.
The role of texture in creating fullness
Natural texture serves as your secret weapon in the volume game. If your hair has even the slightest wave or bend, the right cut can enhance this texture to create the appearance of fuller hair. Cuts that work with your natural texture require less styling time and hold their shape better throughout the day.
Women with stick-straight thin hair benefit from cuts that incorporate subtle texture through the cutting process itself. Razor cutting, when done with a light hand, can create piece-y texture that adds visual interest and prevents hair from clumping together in thin sheets. However, this technique requires an experienced stylist who understands how to use it without compromising hair density.
How length affects perceived volume
The weight of long hair naturally pulls everything downward, working against your volume goals. Shorter cuts automatically create more lift at the roots simply because there’s less weight dragging hair down. This doesn’t mean you must go super short, but understanding this principle helps you make realistic decisions about length versus volume.
Medium lengths often provide the sweet spot for thin hair. These cuts maintain enough length for versatility in styling while avoiding the weight that compromises volume. The ends of medium-length cuts can be styled to flip out or curl under, creating width and the illusion of fullness where you need it most. Strategic length choices combined with the right cutting techniques set the foundation for achieving your volume goals.
The Pixie Cut That Transforms Fine Hair
Short hair creates instant volume for those willing to take the plunge. A well-executed pixie cut removes the weight that pulls fine hair down, allowing natural lift at the roots to shine through. This dramatic change often surprises women who’ve struggled with limp, longer styles for years.
Why shorter lengths maximize volume potential
Physics plays a huge role in how your hair behaves. Less length means less weight, and less weight translates directly to more lift. Fine hair responds particularly well to this principle because each strand lacks the internal structure to support longer lengths without falling flat.
The pixie cut takes advantage of your hair’s natural growth patterns. Hair grows outward from the scalp before gravity takes over, and shorter cuts capture this natural lift before weight becomes an issue. You’ll notice immediate volume at the crown and sides, areas where longer styles typically fall flat. This inherent volume requires minimal styling effort, making pixies surprisingly low-maintenance for the right person.
Consider how much time you currently spend trying to add volume to longer hair. Between root-lifting sprays, round brushing, and constant touch-ups throughout the day, maintaining volume in long, fine hair becomes exhausting. Pixie cuts eliminate most of this effort while delivering better results.
Styling techniques for maximum lift at the roots
Your morning routine with a pixie cut can be refreshingly simple. Start with damp hair and apply a lightweight volumizing mousse from roots to tips. The key word here is lightweight – heavy products will weigh down your carefully crafted cut. Work the product through with your fingers, focusing on the crown area where you want maximum height.
Blow-drying technique makes all the difference with short cuts. Direct the airflow against your natural growth pattern to create lift. This means drying hair forward if it naturally grows backward, or pushing it to one side if it typically falls to the other. The contradiction creates tension at the roots that translates to all-day volume.
A small round brush becomes your best friend for finishing touches. Use it to create slight bends and flips that add visual interest while maintaining volume. Focus on the pieces around your face and crown, as these areas frame your features and create the overall silhouette of your style.
Heat-free options work wonderfully for pixies too. Velcro rollers placed strategically at the crown while you finish getting ready add incredible lift without damage. Simply remove them before leaving and tousle with your fingers for an effortlessly volumized look.
Which face shapes pair best with pixie variations
Round faces benefit from pixie cuts with height at the crown and longer pieces around the face. This elongating effect balances proportions while the shortened sides prevent added width. Ask your stylist for an asymmetrical approach that creates vertical lines rather than horizontal ones.
Square faces shine with softer pixie variations. Wispy bangs and textured edges soften angular features while maintaining the volume benefits of short hair. The goal involves creating curves and movement that complement your natural bone structure without overwhelming it.
Heart-shaped faces can handle almost any pixie variation, but side-swept bangs work particularly well. These face shapes already have natural width at the forehead that shorter cuts enhance beautifully. Focus volume at the crown rather than the sides to maintain balanced proportions.
Oval faces enjoy the most flexibility with pixie cuts:
- Classic Pixie: Clean lines with subtle texture work beautifully
- Choppy Pixie: Piece-y layers add interest without overwhelming features
- Side-Swept Pixie: Dramatic side parts create asymmetrical interest
- Textured Crop: Slightly longer on top with shorter sides for contrast
The maintenance schedule for keeping your cut fresh
Pixie cuts require regular maintenance to keep their shape and volume-boosting properties. Plan for salon visits every 4-6 weeks, depending on how quickly your hair grows. This might seem frequent, but maintaining the precise shape that creates volume is essential for this style’s success.
Between salon visits, small adjustments keep your cut looking fresh. Trim any pieces that grow faster than others, particularly around the ears and neckline. These areas can quickly look unkempt and drag down the overall appearance of your cut. Many salons offer quick bang or neckline trims between full appointments.
The grow-out phase deserves consideration before committing to a pixie. If you decide to grow it out later, you’ll go through several awkward stages that require patience and creative styling. However, many women find that once they experience the volume and ease of a pixie cut, they never want to go back to longer styles.
Product recommendations for daily styling
Product selection can make or break your pixie cut’s volume potential. Start with a volumizing shampoo and conditioner specifically formulated for fine hair. These products cleanse without weighing hair down and provide a good foundation for styling.
Dry shampoo becomes invaluable for maintaining volume between washes. Fine hair tends to get oily quickly, and oil kills volume faster than anything else. A quick spray at the roots absorbs excess oil and adds texture that supports lift. Choose a formula that doesn’t leave white residue, particularly if you have darker hair.
Texturizing sprays and powders add grip and grit that fine hair lacks naturally. These products create separation between strands, preventing them from clumping together and looking thin. Apply sparingly at first – you can always add more, but over-application leads to stiff, unnatural-looking hair.
For finishing, a lightweight hairspray provides hold without the helmet effect. Look for flexible hold formulas that allow movement while maintaining your style. The goal involves supporting volume, not freezing it in place. Remember that with pixie cuts, less is often more when it comes to product application.
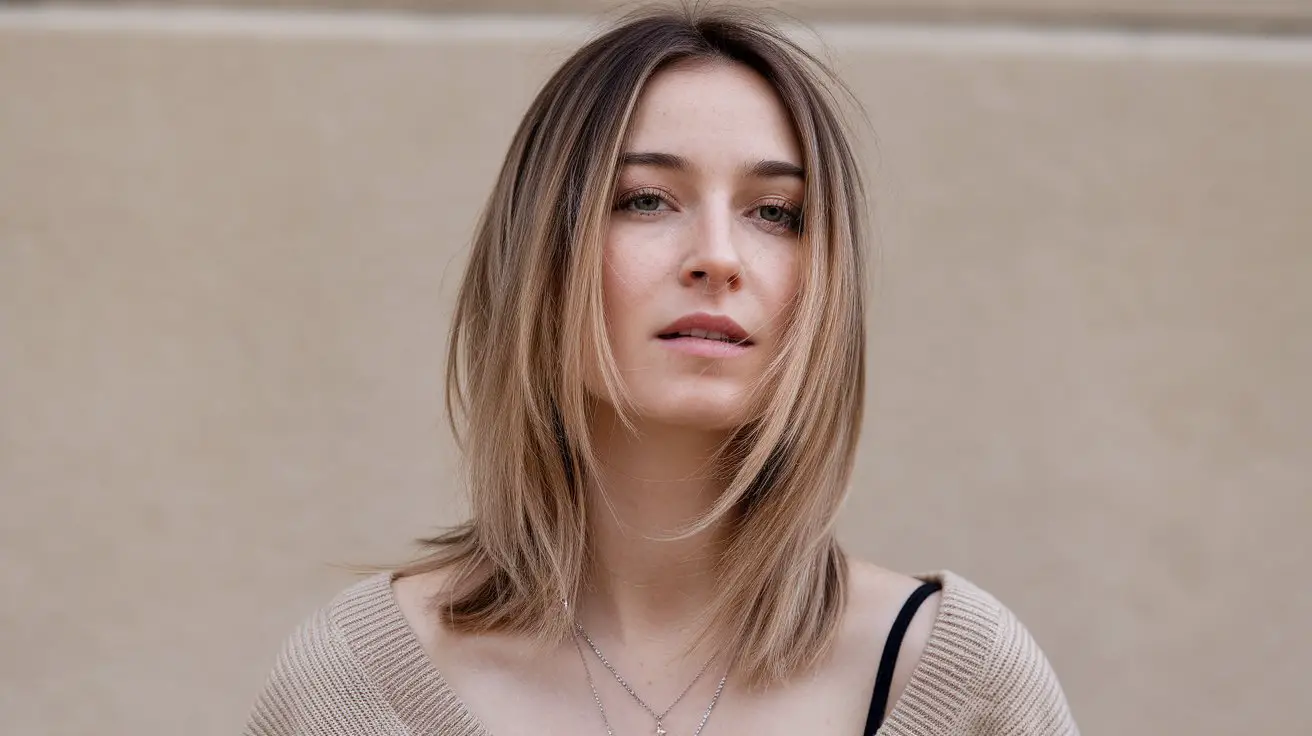
Bob Variations That Add Body and Movement
The bob stands as one of the most versatile haircuts for women with thin hair, offering countless variations that each bring their own volume-boosting benefits. This timeless cut can be customized to work with your specific hair texture and density, creating fullness through clever cutting techniques rather than relying solely on styling products. The beauty of a bob lies in its ability to look polished with minimal effort while providing the structure thin hair needs to appear fuller.
Classic bob versus textured variations for thin hair
A classic bob cut with clean, blunt lines creates the illusion of thickness through its solid edge. This works because the uniform length makes hair appear denser at the bottom, drawing the eye to a strong perimeter rather than any sparse areas higher up. Women with very fine, straight hair often find this option gives them the most dramatic improvement in perceived thickness.
Textured bobs take a different approach to creating volume. Instead of relying on weight at the bottom, these cuts incorporate subtle layers and piece-y sections throughout. The variation in lengths creates movement and prevents hair from lying flat against the head. This style particularly suits women whose fine hair has a bit of natural wave or movement to enhance.
The choice between classic and textured often comes down to your lifestyle and styling preferences. Classic bobs require more precise styling to maintain their sleek appearance but look incredibly polished when done right. Textured variations offer more flexibility and forgiveness in styling, making them ideal for women who prefer a wash-and-go approach.
Your hair’s natural behavior should guide this decision. If your hair tends to stick straight no matter what you do, a classic bob might give you better results. For hair with natural bends or cowlicks, working with that texture through a more piece-y cut often yields superior volume.
The perfect length for your hair density
Chin-length bobs create maximum fullness for very fine hair. This length removes excess weight while maintaining enough hair to style and shape. The ends hit at a point where they can be flipped under or out, creating width exactly where thin hair needs it most.
Collar-bone length bobs work well for women with moderate density who want more length options. This cut maintains versatility – you can wear it straight, wavy, or pulled back – while still benefiting from the volume-enhancing properties of a structured cut. The key lies in keeping the back shorter than the front, creating a subtle angle that adds visual interest.
Jaw-length cuts offer a middle ground that suits most face shapes and hair types. This length provides enough swing and movement to create the illusion of fullness without requiring extensive styling. The ends naturally turn under at this length, creating a rounded shape that appears fuller than straight cuts.
How graduation creates visual thickness
Graduated bobs, where the back is cut shorter and gradually increases in length toward the front, create incredible volume through their very structure. The shorter sections at the back push forward, creating lift and preventing the flat-against-the-head look that plagues many women with thin hair.
The angle of graduation makes a significant difference in the final result. A subtle graduation adds gentle volume without dramatically changing your overall length. Steep angles create more dramatic volume but require more maintenance to keep their shape. Discuss with your stylist which angle will best achieve your volume goals while fitting your maintenance preferences.
This cutting technique works particularly well for women with thin hair because it builds volume from the inside out. Rather than relying on products or heat styling to create lift, the cut itself provides structure and support. You’ll notice the difference immediately after washing, even before any styling products are applied.
Styling methods that prevent flat results
Your blow-drying technique determines whether your bob looks full or falls flat. Start by applying a root-lifting product to damp hair, concentrating on the crown and any areas where you lack natural volume. Flip your head upside down and rough-dry until hair is about 80% dry. This technique lifts hair away from the scalp and creates volume at the roots that lasts throughout the day.
Round brushing adds polish while maintaining volume. Section your hair horizontally and work from bottom to top. As you dry each section, lift the hair up and away from your head rather than pulling it down. This upward motion creates lift that gravity would otherwise eliminate. Focus extra attention on the crown area, where volume makes the biggest visual impact.
Velcro rollers transform a flat bob into a bouncy, voluminous style without the damage of hot tools. After blow-drying, set sections in large rollers and let them cool completely. This technique locks in volume and creates subtle bends that add visual thickness:
- Crown sections: Roll straight back for maximum height
- Side sections: Roll away from your face for a flattering frame
- Back sections: Roll under to create that classic bob shape
- Front pieces: Roll according to your desired part and style
For days when you’re short on time, dry shampoo applied before bed works wonders. Spray it at your roots, sleep on it, and wake up to volume that would typically take significant morning effort to achieve.
When to choose blunt versus layered edges
Blunt edges create a strong, defined line that makes thin hair appear thicker and healthier. This option works best for women with fine hair that’s relatively healthy and even in density. The solid edge draws attention and creates a focal point that distracts from any thinner areas higher up on your head.
Layered edges offer movement and prevent the triangular shape that some women experience with blunt cuts. If your hair tends to stick out at the bottom rather than curving under, layers might be your solution. These softer edges blend more naturally and require less precise styling to look polished.
Consider your commitment to styling when making this choice. Blunt edges need regular trims every 6-8 weeks to maintain their impact. Any unevenness or split ends become immediately noticeable and detract from the thickness illusion. Layered edges grow out more gracefully and can go slightly longer between salon visits.
Your hair’s natural texture also influences this decision. Stick-straight hair often benefits from blunt edges that create a strong visual statement. Hair with natural movement or wave might look better with layers that enhance existing texture rather than fighting against it.
Layered Lobs for Natural Volume
The lob – that perfect middle ground between a bob and longer hair – has revolutionized how women with thin hair approach their cuts. This versatile length hits the sweet spot where you maintain styling options while eliminating the excess weight that drags fine hair down.
The optimal length for thin hair lobs
Finding your ideal lob length requires considering both your hair’s behavior and your lifestyle needs. For most women with thin hair, the sweet spot falls between the bottom of the neck and just past the shoulders. This range provides enough length for ponytails and updos while avoiding the weight that compromises volume in longer styles.
The relationship between your height and lob length matters more than many realize. Petite women often find that lobs ending right at the collarbone create the most flattering proportions. Taller women can typically handle slightly longer variations without overwhelming their frame or sacrificing volume. Your stylist can help determine the exact length that balances your proportions while maximizing fullness.
Consider how your hair behaves at different lengths. Some women find their hair develops more natural wave and body at medium lengths, while others discover that keeping things slightly shorter prevents stringy-looking ends. Pay attention to how your current cut behaves as it grows to identify your optimal length range.
Strategic layer placement for maximum effect
Layer placement in a lob makes the difference between voluminous success and a flat disappointment. Starting layers too high can create a choppy, disconnected look that actually emphasizes thinness. Beginning them around the cheekbones or lower maintains density while adding necessary movement.
Internal layers, invisible from the outside but crucial for volume, deserve special attention. These hidden layers remove weight from within the hair mass, allowing the outer layers to move more freely. Your stylist should focus these internal cuts on areas where your hair naturally falls flat, typically around the crown and sides.
The front sections of your lob require different treatment than the back. Face-framing layers that start around the jaw create movement without sacrificing the fullness you’ve worked to achieve. These pieces can be styled away from your face for width or toward it for a slimming effect, providing versatility without compromising volume.
Back layers need careful consideration to avoid the dreaded triangle shape. Rather than uniform layering, your stylist should create graduated layers that maintain fullness at the bottom while removing weight from the top sections. This approach creates natural movement and body throughout the entire cut.
Texturizing techniques that won’t compromise density
Texturizing thin hair requires a delicate touch and an experienced hand. Over-texturizing remains one of the biggest mistakes made with fine hair, leaving it looking even thinner and struggling to hold any style. The goal involves creating movement and preventing hair from clumping together without removing too much precious density.
Slide cutting, where scissors glide down the hair shaft at an angle, creates soft movement without the harsh lines of traditional layering. This technique works beautifully for lobs because it maintains length while adding subtle texture throughout. The result looks natural and effortless rather than obviously cut or styled.
Channel cutting involves creating vertical sections within the hair to add movement. Rather than removing hair from the entire head, this technique targets specific areas where movement will create the most impact. For thin hair, less is definitely more with this approach.
Point cutting the ends prevents them from looking thin or stringy while adding the texture needed for volume. This technique creates a slightly piece-y effect that catches light differently, making hair appear fuller and more dynamic.
Daily styling routines that maintain volume
Your morning routine sets the tone for all-day volume. Begin with freshly washed hair when possible, as oil accumulation kills volume faster than any other factor. On non-wash days, concentrate dry shampoo at the roots before bed, allowing it to absorb oils overnight and create texture for the morning.
The products you layer make a significant difference:
- Volumizing Mousse: Applied to damp roots for lift and hold
- Heat Protectant Spray: Essential for preventing damage that leads to breakage
- Texturizing Spray: Adds grip between strands for better volume retention
- Light-Hold Hairspray: Locks in style without weighing hair down
Blow-drying with purpose transforms a lob from flat to fabulous. Section your hair and dry each part with intention. Lift sections straight up from your head and direct heat from roots to ends. This technique fights gravity and creates lasting volume. For the sides and back, dry hair in the opposite direction from how it naturally falls.
The cool shot button on your blow dryer serves a crucial purpose. After drying each section with heat, hit it with cool air to lock in the shape and volume. This often-overlooked step makes the difference between volume that lasts an hour versus all-day fullness.
How to prevent the dreaded triangle shape
Triangle-shaped hair – narrow at the top and wide at the bottom – frequently plagues women with thin hair who choose medium-length cuts. This unflattering silhouette occurs when weight accumulates at the bottom while the top sections lack volume and support.
Preventing this shape starts with the cut itself. Your stylist should remove weight from the interior sections while maintaining a strong perimeter. This balance creates movement without sacrificing the fullness that makes lobs attractive for thin hair. Regular maintenance every 8-10 weeks keeps this balance intact.
Styling techniques also combat triangular tendencies. Focus volume-building efforts on the crown and upper sections rather than the ends. Use smaller sections when blow-drying the top of your head and larger sections toward the bottom. This approach concentrates lift where you need it most while preventing additional width at the bottom.
Product distribution plays a crucial role too. Apply volumizing products primarily to your roots and mid-lengths, using minimal product on the ends. Heavy products on the lower sections only add to the triangle effect. Instead, use a lightweight oil or serum sparingly on the very ends to prevent dryness without adding weight.
Creating a slight bend or wave throughout your lob also helps avoid the triangle shape. Even subtle waves add width at multiple points rather than concentrating it at the bottom. Hot tools, overnight braids, or twist-and-pin methods all achieve this effect. The key involves creating movement that starts above the chin line, distributing visual weight more evenly throughout your cut.
Shag Cuts That Create Texture Without Sacrificing Fullness
The modern shag has evolved far from its 1970s origins, becoming a sophisticated option for women with thin hair who want both texture and volume. Today’s versions use updated cutting techniques that add incredible movement while maintaining the density fine hair needs to look its fullest.
Modern shag variations for fine hair
Contemporary shags focus on controlled chaos rather than the wild, overly layered cuts of decades past. For thin hair, this means incorporating texture strategically while keeping enough weight to prevent stringy, separated sections. The modern approach involves fewer, more purposeful layers that work together to create volume and movement.
The “lived-in” shag has become particularly popular for fine hair. This variation features softer layers that blend seamlessly, creating texture without obvious lines or gaps. The cut looks intentionally undone but maintains structure, perfect for women who want an effortless appearance without sacrificing fullness. Your stylist achieves this by using a combination of point cutting and razor work, carefully controlling how much hair is removed from each section.
Curtain bangs paired with shag layers frame the face beautifully while adding volume at the crown. These face-framing pieces start shorter in the center and gradually lengthen toward the sides, creating automatic lift and movement around your face. For thin hair, curtain bangs offer the additional benefit of making the overall style appear fuller without requiring the commitment of a full fringe.
The micro shag takes a minimalist approach perfect for very fine hair. Instead of dramatic layers throughout, this cut concentrates texture at specific points – usually the crown and ends – while maintaining density everywhere else. This selective texturing creates movement and prevents the helmet-like appearance that can plague fine hair, without removing too much precious volume.
The balance between layers and maintaining density
Creating a successful shag for thin hair requires walking a tightrope between adding texture and preserving thickness. Your stylist must understand exactly where to place layers for maximum impact without creating gaps or thin spots. This typically means concentrating layers in areas where your hair naturally has more density while leaving sparser areas relatively untouched.
The length of layers matters enormously for thin hair. Shorter layers at the crown create height and volume, but they must be long enough to blend with the layers below. If the graduation between layers is too dramatic, you’ll see through the hair to the scalp – exactly what you’re trying to avoid. Subtle transitions between layer lengths maintain the illusion of thickness while still providing movement.
Weight removal should happen strategically rather than uniformly. Areas where hair grows thicker can handle more layering, while naturally thin sections need preservation. This customized approach means no two shags look exactly alike, as each cut responds to individual growth patterns and density variations.
Styling products that enhance natural texture
The right products transform a shag from flat to fantastic without weighing down fine hair. Start with a volumizing shampoo that cleanses without stripping natural oils. Fine hair needs some natural oil for texture and manageability, so avoid clarifying shampoos except for occasional deep cleaning.
Sea salt sprays create the piece-y texture that makes shags so appealing. However, traditional formulas can be too heavy for fine hair. Look for lightweight versions that add texture without stickiness or crunch. Apply to damp hair, focusing on mid-lengths and ends rather than roots where you want maximum volume.
Texture powders have revolutionized styling for fine-haired shag wearers. These nearly weightless products add grip and separation that fine hair lacks naturally:
- Application method: Sprinkle directly onto roots for volume
- Amount needed: Start with tiny amounts – you can always add more
- Best areas: Crown, part line, and anywhere you want extra lift
- Activation: Scrunch and tousle to distribute and activate
Lightweight defining creams help enhance any natural wave or movement in your shag. Choose formulas specifically designed for fine hair that won’t leave residue or weigh down your carefully crafted layers. Work the product through damp hair with your fingers, scrunching upward to encourage texture formation.
Heat-free methods for adding body
Preserving your hair’s health while styling your shag ensures long-term volume and fullness. Heat damage makes thin hair even more fragile and prone to breakage, reducing density over time. Fortunately, shags respond beautifully to heat-free styling methods that enhance texture while protecting hair integrity.
Overnight styling methods work particularly well for shag cuts. Try the twisted bun technique: divide damp hair into sections, twist each section, and pin into small buns around your head. Sleep on a silk pillowcase to prevent frizz, and release the buns in the morning for natural, voluminous waves that enhance your shag’s texture.
Braiding creates different textures depending on the technique used. Loose braids result in gentle waves, while tighter plaits create more defined texture. For shags, try mixing braid sizes – smaller braids near the face and larger ones in back – to create varied texture that looks intentionally undone.
The scrunching method using a microfiber towel or cotton t-shirt enhances natural texture without heat. After applying styling products to damp hair, repeatedly scrunch sections upward, holding for a few seconds each time. This technique encourages wave formation and adds volume at the roots. Allow hair to air dry while periodically scrunching to maintain texture as it dries.
Customizing the shag for your hair type
Fine, straight hair benefits from shags with more dramatic layering at the crown combined with subtle graduation throughout the rest of the cut. This approach creates movement where straight hair typically lies flattest while maintaining enough length and weight to prevent a thin appearance. Your stylist might incorporate slight asymmetry to add visual interest and prevent the style from looking too uniform.
Wavy, fine hair already has texture to work with, so the shag should enhance rather than create movement. Longer layers that follow your natural wave pattern prevent frizz while adding definition. The cut should remove just enough weight to allow waves to spring up without becoming unmanageable. Focus texturizing efforts on areas where waves tend to fall flat or lose definition.
Color can enhance your shag’s volume-boosting properties. Strategic highlights create depth and dimension that make thin hair appear fuller. Babylights around the face and crown catch light differently than your base color, creating visual texture even when hair is styled smooth. However, remember that processing can damage fine hair, so work with a colorist who understands how to achieve results without compromising hair health.
Your lifestyle and styling commitment should influence your shag customization. If you prefer minimal styling, ask for a cut that air-dries well with just product application. For those who enjoy styling, a shag with more dramatic layers provides endless possibilities for creating different looks. Be honest with your stylist about your routine so they can tailor the cut accordingly.
Your Volume Journey Starts Now
The transformation from flat, lifeless hair to a voluminous, confident style begins with choosing the right cut for your specific needs. Each of these five gorgeous options – from the bold pixie to the textured shag – offers unique advantages for creating fullness in thin hair. Your perfect cut depends on factors including your face shape, lifestyle, natural texture, and personal style preferences. The key lies in working with a skilled stylist who understands the particular challenges of fine hair and can customize any of these cuts to maximize your hair’s potential.
Remember that achieving lasting volume goes beyond just the initial cut. Regular maintenance appointments, proper product selection, and adapted styling techniques all play crucial roles in maintaining the fullness these cuts provide. Whether you choose the dramatic change of a pixie or the versatile elegance of a layered lob, commitment to caring for your chosen style ensures you’ll enjoy volume-boosted hair that turns heads and boosts your confidence every single day.
Frequently Asked Questions
Q: How often should I wash thin hair to maintain volume?
A: Washing every 2-3 days typically works best for thin hair. Daily washing can strip natural oils that provide texture and hold, while waiting too long allows oil buildup that weighs hair down and kills volume.
Q: Will cutting my thin hair shorter actually make it look thicker?
A: Yes, shorter cuts remove weight that pulls hair down, allowing natural lift at the roots. The reduced length also makes existing density appear more concentrated, creating the illusion of thicker, fuller hair.
Q: Which type of layers work best for very fine hair?
A: Long, subtle layers starting around the cheekbones or lower work best for very fine hair. Short, choppy layers can create gaps and make hair appear thinner, while gentle graduation maintains density while adding movement.
Q: Can I still have bangs with thin hair?
A: Absolutely! Wispy, textured bangs or curtain bangs work beautifully with thin hair. Avoid heavy, blunt bangs that require too much hair from your overall density. Side-swept or curtain styles add face-framing volume without sacrificing fullness elsewhere.
Q: What’s the biggest mistake people make when cutting thin hair?
A: Over-layering or excessive texturizing ranks as the most common mistake. Removing too much hair in an attempt to create movement actually makes hair appear thinner and can result in stringy, lifeless styles.
Q: Should thin hair be cut wet or dry?
A: Cutting thin hair dry often yields better results because stylists can see exactly how the hair naturally falls and where volume is needed. Dry cutting also prevents taking off too much length, which commonly happens with wet cutting.
Q: How do I know if my stylist understands thin hair?
A: A knowledgeable stylist will discuss your hair’s density patterns, ask about your styling routine, and explain how their cutting approach will create volume. They should mention techniques like weight removal, graduation, and strategic layering rather than just general cutting.
Q: Can color treatments help thin hair look fuller?
A: Strategic highlights and lowlights create dimension that makes hair appear thicker. However, over-processing damages fine hair, potentially causing breakage that reduces density. Work with a colorist experienced in treating fine hair.