Creating the appearance of longer hair doesn’t always require months of patient growing or expensive extensions. The right haircut can instantly transform how long your hair looks, using clever cutting techniques that trick the eye into seeing extra inches. Professional stylists have mastered these optical illusions through strategic layering, precise angles, and weight distribution that elongates your hair’s silhouette.
Many women believe that keeping hair all one length will make it look longest, but this common misconception often leads to hair that appears shorter and heavier than it actually is. The truth lies in understanding how our eyes perceive length and movement. Strategic cuts remove bulk in specific areas while maintaining length in others, creating vertical lines that draw the eye downward and give the impression of cascading, longer locks.
The following sections will reveal three specific haircuts that create this lengthening magic, along with the styling techniques that maximize their effect. You’ll discover how face-framing layers, V-shaped cuts, and even certain shorter styles can make your hair appear significantly longer than its actual measurement. Let’s uncover these professional secrets that will transform your hair’s appearance without waiting for it to grow.
- Why Certain Haircuts Create the Illusion of Length
- The Long Layered Cut with Face-Framing Pieces
- The V-Shaped Cut for Maximum Length Perception
- The Graduated Bob That Defies Expectations
- Styling Techniques That Enhance Length for Any Cut
- Your Path to Instantly Longer-Looking Locks
- Frequently Asked Questions
Why Certain Haircuts Create the Illusion of Length
The magic behind length-enhancing haircuts lies in understanding visual perception and how our eyes interpret shapes and lines. Hair that’s cut with precision and purpose can appear several inches longer than hair that’s simply trimmed straight across. This phenomenon happens because of the way light reflects off different angles and how movement affects our perception of where hair ends.
How layers affect visual perception
Layers do more than add movement to your hair – they create vertical lines that guide the eye downward. When cut correctly, they remove weight from areas that would otherwise make hair appear boxy or triangular. The graduated lengths create a waterfall effect that suggests continuous length even when the actual longest point might be shorter than you’d expect.
The role of hair texture and weight distribution
Weight distribution plays a crucial role in how long your hair appears. Hair that’s too heavy at the bottom creates a blunt line that stops the eye abruptly. By removing strategic amounts of weight through texturizing techniques, stylists can create hair that flows and moves in ways that suggest greater length. Fine hair benefits from weight removal at the ends, while thick hair needs internal weight reduction to prevent the pyramid effect that makes hair look shorter.
Strategic cutting angles that elongate
The angle at which hair is cut dramatically affects its appearance. Diagonal and curved cutting lines create an illusion of continuation beyond where the hair actually ends. These angles work with your natural hair fall to create shapes that lead the eye downward rather than across. A skilled stylist will adjust these angles based on your hair’s natural growth patterns and density.
Think about how a staircase appears longer when viewed from an angle rather than straight on. Your hair works the same way. Angled cuts create depth and dimension that flat cuts cannot achieve, making each strand appear to travel a longer distance from root to tip.
Color placement and its impact on perceived length
While we’re focusing on cuts, it’s worth noting that color placement can enhance or diminish the lengthening effects of any haircut. Darker colors at the roots transitioning to lighter ends create a vertical gradient that extends the eye’s journey down the hair shaft. This technique, combined with the right cut, can add the appearance of several extra inches.
The way light hits different sections of your hair also matters. Layers cut at varying angles catch light differently, creating highlights and shadows that add depth. This interplay of light and shadow creates visual interest that keeps the eye moving downward, reinforcing the perception of length.
The Long Layered Cut with Face-Framing Pieces
The long layered cut with face-framing pieces stands as one of the most effective haircuts for creating the illusion of extra length. This versatile style works by combining longer layers throughout with shorter pieces around the face, creating a cascading effect that draws the eye continuously downward.
What defines this versatile haircut
This cut features layers that start around the cheekbones or jawline and gradually lengthen toward the back. The face-framing pieces are cut separately from the rest of the layers, typically starting shorter and blending seamlessly into the longer lengths. The key lies in the careful graduation of these layers – they shouldn’t appear choppy or disconnected but should flow naturally into one another.
The longest layers typically extend several inches below the shoulders, while the internal layers are cut at various lengths to remove bulk without sacrificing the overall length appearance. This creates movement and prevents the hair from looking like one solid mass, which would actually make it appear shorter.
How face-framing layers trick the eye
Face-framing pieces work as visual anchors that establish a starting point for the eye’s journey down your hair. By beginning with shorter pieces near your face, you create a reference point that makes the longer pieces appear even more dramatic in comparison. It’s similar to how a tall building looks even taller when surrounded by shorter structures.
These strategic pieces also create negative space around your face, which prevents your hair from appearing boxy or square. The gentle curve from short to long mimics natural hair growth patterns and creates a softer, more elongated silhouette that suggests flowing length.
Best hair types for this style
While this cut can be adapted for most hair types, it particularly shines on medium to thick hair with slight natural texture. The layers help manage volume while the face-framing pieces add movement where it’s most visible. Women with straight hair will find this cut adds much-needed dimension, while those with wavy hair will discover their natural texture is enhanced rather than fighting against the cut.
Fine hair can also benefit from this style, though the approach differs slightly. For finer textures, fewer layers are cut, and they’re placed more strategically to maintain density while still creating the lengthening effect. The face-framing pieces for fine hair are cut with more precision to avoid creating gaps or thin spots.
Consider your lifestyle and styling commitment too. This cut looks beautiful air-dried with minimal product, but it truly maximizes its lengthening potential with some basic styling techniques.
Styling techniques that maximize the lengthening effect
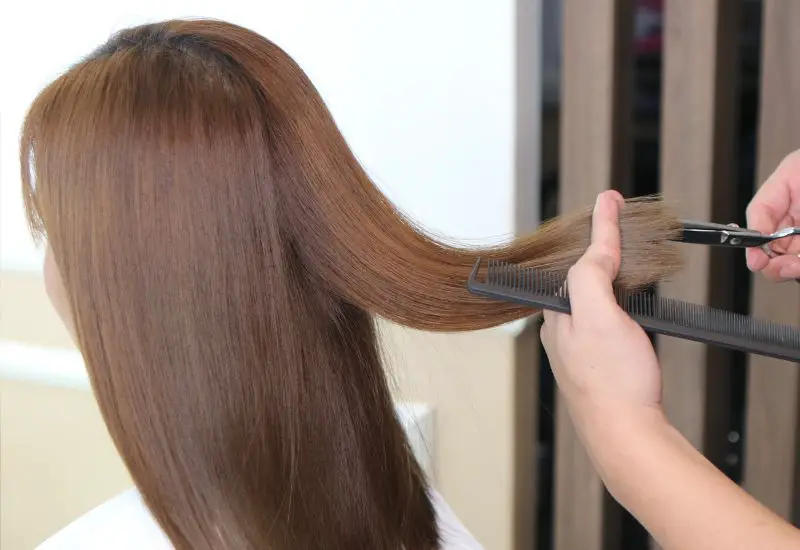
The way you style this cut can add or subtract perceived inches from your hair. Start by applying a lightweight smoothing product from mid-length to ends while hair is damp. This creates a sleek base that prevents frizz from interrupting the visual flow of your layers.
When blow-drying, always direct the airflow downward, following the hair from roots to ends. Use a round brush to create slight tension, which stretches each section and creates a smoother surface that appears longer. Focus extra attention on those face-framing pieces, ensuring they curve gently away from your face rather than flipping outward, which would create width instead of length.
For days when you want maximum length illusion, try this technique: after blow-drying, use a flat iron to gently smooth just the top layer of hair, leaving the underneath sections with their natural texture. This creates a sleek overlay that appears to extend further down while maintaining volume and movement underneath.
Maintenance tips for preserving the illusion
Regular trims every 8-10 weeks keep this cut looking its best and maintaining its lengthening properties. Between salon visits, focus on keeping your hair healthy and smooth. Split ends and damage create frizz and texture that interrupt the clean lines necessary for the length illusion.
Deep conditioning treatments once a week help maintain the sleek appearance that maximizes perceived length. Pay special attention to the ends, which need to look healthy and defined for the cut to work its magic. Using a silk pillowcase or loose braid while sleeping prevents tangles that can make layers appear disconnected and shorter.
The V-Shaped Cut for Maximum Length Perception
The V-shaped cut represents one of the most dramatic ways to make hair appear significantly longer without actually growing it out. This bold cutting technique creates a distinctive point at the back that naturally elongates the entire hair silhouette, making it a favorite among women who want to maximize their length potential.
Understanding the V-shape structure
A V-shaped cut features hair that’s longest at the center back and gradually becomes shorter toward the sides, creating a dramatic V formation when viewed from behind. Unlike a U-shape or straight-across cut, this style creates a focal point that draws the eye to the longest section of hair. The angle of the V can range from subtle to dramatic, depending on personal preference and hair characteristics.
The structure works because it eliminates the horizontal line that typically signals where hair ends. Instead, the diagonal lines created by the V-shape suggest continuation, making the brain perceive the hair as extending beyond its actual endpoint. This optical illusion is particularly effective when hair is worn straight or with gentle waves.
Professional stylists achieve this shape through precise sectioning and cutting techniques. The hair is typically parted down the center back, and each side is cut at a specific angle that creates the desired V formation. The sharper the angle, the more dramatic the lengthening effect, though very sharp Vs require more maintenance to preserve their shape.
Why this cut makes hair look dramatically longer
The V-shape exploits several visual principles that contribute to perceived length. First, it creates strong vertical lines that lead the eye downward from the crown to the pointed tip. These lines are uninterrupted by horizontal elements that would typically stop the eye’s movement. Second, the graduated lengths from side to center create a sense of depth and dimension that flat cuts cannot achieve.
Additionally, the way hair naturally falls with this cut enhances the illusion:
Directional Flow: Hair naturally wants to fall toward the center point, creating converging lines that emphasize length
Shadow Play: The layered edges create shadows that add depth and make hair appear fuller and longer
Movement Patterns: When you walk or turn your head, the V-shape creates a swaying motion that emphasizes vertical rather than horizontal movement
Visual Weight: The concentration of length at the center back creates a weighted point that appears to pull the hair downward
The psychology of perception also plays a role. Our brains are programmed to follow points and angles, so the V naturally leads our vision downward in a way that suggests greater length than actually exists.
Who benefits most from this style
Women with thick, straight to wavy hair often see the most dramatic results with a V-shaped cut. The natural weight of thick hair helps maintain the shape while creating the smooth lines necessary for maximum impact. Those with hair that falls at least to mid-back will see the most noticeable lengthening effect, as the V requires some initial length to create its distinctive shape.
Medium-density hair also works beautifully with this cut, especially when combined with long layers that enhance the V formation. The key is having enough hair to create clear definition without the shape looking sparse or stringy at the pointed tip.
Fine hair can work with a modified V-shape, though the angle should be less dramatic to maintain fullness at the ends. Women with very curly or coily hair might find this cut less effective for creating length illusion, as the natural curl pattern can obscure the clean lines that make the V-shape effective.
Styling methods that enhance the V-shape
Proper styling transforms a good V-cut into a stunning display of apparent length. Start with freshly washed hair and apply a thermal protectant from mid-shaft to ends. The goal is creating smooth, defined lines that emphasize the cut’s geometry.
For straight styling, section hair horizontally and blow-dry each section with a paddle brush, maintaining tension to create maximum smoothness. Once dry, use a flat iron on medium heat, working in vertical sections from the sides toward the center back. This technique reinforces the V-shape while creating the sleek finish that best shows off the cut’s lengthening properties.
Creating subtle waves requires a different approach. Use a large barrel curling iron or wand, wrapping sections away from your face and leaving the ends straight. This creates elongated S-waves that follow the V-shape without disrupting its lines. The key is keeping waves loose and stretched rather than tight and bouncy, which would create width instead of length.
Common mistakes to avoid with this cut
Several styling and maintenance errors can diminish the lengthening effects of a V-shaped cut. Over-layering is perhaps the most common mistake. While some internal layers can add movement, too many will destroy the clean lines that make this cut effective. The perimeter should remain relatively solid to maintain the distinctive V formation.
Another frequent error is neglecting regular trims. The V-shape requires precision to look its best, and even small amounts of uneven growth can disrupt the angle. Aim for trims every 6-8 weeks, asking your stylist to maintain the angle while removing any damage.
Avoid heavy products that weigh down the hair and obscure the cut’s shape. Thick creams and oils might smooth the hair, but they can also make it appear limp and lifeless, eliminating the movement that enhances perceived length. Stick to lightweight serums and sprays that provide control without heaviness.
Heat damage presents another challenge. The smooth, healthy appearance necessary for this cut to work requires careful heat styling. Always use protectant products and avoid excessive heat that creates frizz and breaks up the clean lines of the V formation.
The Graduated Bob That Defies Expectations
The graduated bob might seem counterintuitive when discussing haircuts that create length, yet this shorter style can actually make your overall hair appear longer through clever angle manipulation and proportion play. This sophisticated cut uses graduation techniques that create vertical lines and movement patterns typically associated with much longer styles.
How a shorter cut can actually look longer
The graduated bob works its magic through careful angle creation that starts shorter at the nape and gradually lengthens toward the front. This diagonal line creates an optical illusion where the eye follows the progression from short to long, perceiving greater overall length than actually exists. Unlike a standard bob that creates a horizontal line, the graduated version eliminates that length-stopping effect.
The cut’s structure also affects how we perceive the wearer’s proportions. By keeping the back shorter and the front longer, it creates a sleek silhouette that elongates the neck and makes the front sections appear to cascade further down than they actually do. This is particularly effective when the longest pieces fall somewhere between the chin and collarbone.
The science behind graduated angles
Graduated cutting involves precise angle work that creates a stacked effect at the back while maintaining length at the front. The typical angle ranges from 45 to 90 degrees, with steeper angles creating more dramatic graduation. This technique removes weight from the back sections while preserving it in the front, creating a forward-moving shape that suggests continuation.
The technical execution involves cutting each section at a slightly different angle, creating a seamless blend from short to long. This graduation can be subtle or dramatic, but the key is maintaining smooth transitions that don’t create visible steps or lines. The result is hair that appears to flow forward and downward rather than sitting static at one length.
When viewed from the side, the graduated bob creates a diagonal line from the nape to the front sections. This angle tricks the brain into following the line beyond where it actually ends, similar to how a pointing arrow makes us look in its indicated direction. The effect is particularly pronounced when the graduation is combined with subtle layering that adds movement.
Ideal candidates for this surprising style
Women with fine to medium hair density often achieve the best results with a graduated bob. The graduation technique adds volume at the crown while maintaining sleekness through the lengths, creating fullness without bulk. This makes fine hair appear thicker while still maintaining the clean lines necessary for the lengthening effect.
Those with straight to gently wavy hair will find this cut most effective for creating length illusion. The natural fall of straighter textures showcases the graduated angles without disruption, while gentle waves add movement that enhances the forward flow. Very curly or coily textures might find the graduation gets lost in the curl pattern, though skilled stylists can adapt the technique for various textures.
Face shape also plays a role in maximizing this cut’s potential. Women with round or square faces benefit from the elongating effects of the angled front pieces, while those with longer face shapes might prefer a less dramatic graduation to maintain balance.
Styling tricks that elongate the silhouette
The right styling approach can make a graduated bob appear significantly longer than its actual measurement. Begin with damp hair and apply a volumizing mousse at the roots, concentrating on the crown area. This creates lift that emphasizes the graduation and prevents the style from falling flat.
Use a round brush while blow-drying, directing the hair forward and down rather than under. This technique reinforces the forward movement of the cut and creates smooth lines that enhance the lengthening effect. Pay special attention to the front sections, ensuring they lie smooth and sleek rather than flipping outward.
For extra length illusion, try this professional technique: after blow-drying, use a flat iron to create a very subtle bend inward at the ends of the front sections. This creates a curve that leads the eye downward and inward, suggesting the hair continues beyond what’s visible. The bend should be barely noticeable – too much curve will create width instead of length.
Here are essential tools and products for maximizing the graduated bob’s lengthening potential:
Root Lift Spray: Applied before blow-drying to create height at the crown that emphasizes graduation
Paddle Brush: For smoothing front sections while maintaining the angular lines
Texturizing Spray: Adds grip and movement without weight, enhancing the cut’s natural flow
Shine Serum: Creates a reflective surface that makes hair appear longer and healthier
Sectioning Clips: Allow precise styling of each graduated section for maximum effect
Variations that work for different face shapes
The graduated bob can be customized to flatter various face shapes while maintaining its lengthening properties. For round faces, a steeper graduation with longer front pieces that extend past the jawline creates vertical lines that slim and elongate. The key is keeping the sides sleek and avoiding volume at the widest part of the face.
Square faces benefit from a softer graduation with gentle curves rather than sharp angles. The front pieces should be long enough to soften the jawline while the graduated back creates height that balances proportions. Adding subtle layers through the front sections creates movement that prevents the cut from appearing too severe.
Heart-shaped faces work well with a moderate graduation that maintains some length at the sides. This prevents the style from making the chin appear too pointed while still creating the elongating effect. The graduation should start slightly lower on the head to avoid adding too much volume at the crown.
For oval faces, almost any variation of the graduated bob works effectively. These balanced proportions allow for experimentation with different angles and lengths. A dramatic graduation with very short back sections and collar-bone length front pieces creates maximum impact, while a subtle graduation offers a more conservative approach.
Styling Techniques That Enhance Length for Any Cut
Beyond choosing the right haircut, specific styling techniques can add the appearance of several inches to any hair length. These methods work by manipulating texture, creating optical illusions, and using tools strategically to stretch and elongate your hair’s appearance.
Heat styling methods that stretch appearance
Heat styling remains one of the most effective ways to create instant length, as it temporarily stretches the hair shaft while smoothing the cuticle. The key lies not just in the tools you use, but in how you use them to create maximum elongation.
When blow-drying, the technique matters more than the dryer itself. Start with hair that’s 60-70% dry to minimize heat exposure while maintaining control. Section hair horizontally, starting at the nape, and use a concentrator nozzle to direct airflow from roots to ends. Maintain constant tension with your brush, literally stretching each section as you dry. This physical stretching combined with heat sets the hair in an elongated position.
The angle at which you hold your blow dryer affects the result significantly. Pointing the nozzle downward at a 45-degree angle smooths the cuticle and encourages hair to lie flat and long. Pointing it upward or perpendicular creates volume but can make hair appear shorter and fuller. For maximum length appearance, keep that downward angle consistent throughout your styling session.
Flat ironing offers another opportunity to create length. Rather than simply clamping and pulling straight down, use a technique called “chase the iron.” Place a fine-tooth comb directly above the flat iron and move both down the hair shaft together. The comb creates additional tension that stretches the hair while the iron sets it in place. This method can make hair appear up to an inch longer than standard flat ironing.
Product application for sleek results
The right products applied correctly can make the difference between hair that looks its actual length and hair that appears significantly longer. Product selection should focus on smoothing and weight without heaviness – a delicate balance that requires understanding your hair’s specific needs.
Start with a leave-in treatment that provides slip and moisture. Apply it to damp hair using the “prayer hands” method – smooth the product between your palms and glide them down your hair from mid-length to ends. This technique ensures even distribution while encouraging hair to lie in the same direction, creating a unified, elongated appearance.
Serums and oils should be warmed between your palms before application. Focus on the last few inches of hair, as this is where frizz and damage are most likely to disrupt the lengthening illusion. Use a downward motion when applying, never scrunching or working product upward, which would create texture and reduce apparent length.
For fine hair that needs lengthening without weight, try this professional trick: mix a drop of lightweight oil with your regular styling cream. This combination provides enough slip for smooth styling without the heaviness that can make fine hair appear limp and shorter.
Blow-drying directions that matter
The direction you blow-dry your hair has a profound impact on how long it appears. Most people dry their hair haphazardly, missing the opportunity to add inches through strategic directional drying.
Begin at the crown, lifting sections straight up and drying from underneath. This creates volume at the root that makes the lengths appear to fall from a higher point. Once the roots are dry, switch to downward drying, following the hair’s natural fall line. Never dry hair in an upward or outward direction if length is your goal – this creates volume and width that makes hair appear shorter.
For the sides, dry hair forward toward your face first, then redirect it back. This technique creates smooth cuticles and eliminates any kinks or bends that might interrupt the visual flow of your hair. The front sections should be dried at a slight angle toward your face, creating face-framing pieces that enhance the overall lengthening effect.
Pay special attention to the nape area. This often-neglected section can make or break your length illusion. Dry it completely flat against your neck, using a brush to smooth any shorter pieces that might stick out. These rebellious pieces create visual noise that disrupts the clean lines necessary for maximum apparent length.
Overnight techniques for effortless length
Several overnight methods can help you wake up with hair that appears longer without any morning heat styling. These techniques work by setting hair in elongated positions while you sleep, allowing gravity and time to do the work that heat usually accomplishes.
The loose low braid method works particularly well for creating stretched, elongated waves. Before bed, apply a small amount of leave-in conditioner to damp or dry hair. Create a very loose braid starting at the nape of your neck, securing it with a silk scrunchie to prevent creasing. The key is keeping the braid loose enough to create gentle waves rather than crimps. In the morning, release the braid and run your fingers through – you’ll have elongated waves that appear longer than your natural texture.
For those with straight or slightly wavy hair, the wrap method creates incredible length. Part hair down the center back and bring each section forward over your shoulders. Smooth each section with a wide-tooth comb, then wrap it around your head, securing with bobby pins. Cover with a silk scarf or bonnet. This method keeps hair smooth and stretched throughout the night.
Consider these additional overnight techniques for different hair types:
Pineapple Method: Gather hair very loosely at the very top of your head, creating height that stretches the lengths
Silk Pillowcase: Reduces friction that creates frizz and tangles, maintaining smooth, long-looking hair
Twisted Bun: Create a very loose, low twisted bun that stretches hair while preventing tangles
Pin Curls: Set just the ends in large pin curls to create subtle movement without sacrificing length
Tools that make a visible difference
Investing in the right tools can dramatically improve your ability to create the appearance of longer hair. While technique matters most, quality tools make achieving and maintaining lengthened styles much easier.
A boar bristle brush mixed with nylon bristles offers the perfect combination for length-enhancing styling. The boar bristles smooth the cuticle and distribute natural oils, creating shine that makes hair appear longer and healthier. The nylon bristles provide enough grip to create tension during blow-drying. Use this brush in long, smooth strokes from roots to ends, never stopping midway through the hair shaft.
The size of your round brush affects how your hair appears. Larger barrel brushes (3 inches or more in diameter) create gentle bends and waves that maintain length, while smaller brushes create tighter curls that make hair appear shorter. For maximum length, choose the largest brush your hair length allows you to use comfortably.
Consider a blow dryer with multiple heat and speed settings. The ability to customize your drying experience means you can use lower heat for longer without damage, maintaining the healthy appearance necessary for the length illusion. Cool shot buttons help set styles in elongated positions.
Wide-tooth combs deserve a place in your length-maximizing toolkit. Use them on wet hair to detangle without creating the tension that leads to breakage. Broken pieces and split ends create frizz and texture that interrupt smooth lines, making hair appear shorter than it is.
Your Path to Instantly Longer-Looking Locks
The journey to longer-looking hair doesn’t require patience or extensions – just the right cut and styling knowledge. These three transformative haircuts work with optical illusions and strategic techniques to add the appearance of significant length to your existing hair. Whether you choose the flowing long layers, dramatic V-shape, or surprisingly effective graduated bob, each option offers a unique approach to maximizing your hair’s length potential.
The real magic happens when you combine the perfect cut with proper styling techniques. From the way you blow-dry to the products you choose, every decision either enhances or diminishes your haircut’s lengthening effects. Armed with this knowledge, you can work with your stylist to select and maintain the cut that best suits your hair type and lifestyle, finally achieving that longer-looking hair you’ve been dreaming about without the wait.
Frequently Asked Questions
Q: Can these haircuts work on very short hair, like pixie length?
A: Unfortunately, these specific cuts require at least shoulder-length hair to create their lengthening effects. For pixie-length hair, growing it to at least bob length would be necessary before these techniques become effective.
Q: How often should I trim my hair to maintain the lengthening effect?
A: Most length-enhancing cuts require trimming every 6-10 weeks. The V-shaped cut needs the most frequent maintenance at 6-8 weeks, while long layers can stretch to 10 weeks between trims.
Q: Will these haircuts work on extremely curly or coily hair?
A: The long layered cut can be adapted for curly hair, but the V-shape and graduated bob work best on straight to wavy textures. Curly and coily hair types might need modified versions or different techniques altogether to create length illusion.
Q: Which of these three cuts requires the least daily styling?
A: The long layered cut with face-framing pieces requires the least daily maintenance. It looks good air-dried and maintains its lengthening properties even with minimal styling, unlike the other two options.
Q: Can I achieve these lengthening effects with damaged or split ends?
A: No, damaged ends create frizz and texture that interrupt the clean lines necessary for these illusions to work. Healthy, smooth ends are essential for maximizing the lengthening effects of any of these cuts.
Q: Do these haircuts work better with certain hair colors?
A: While all colors can work, solid colors or subtle gradients from dark roots to lighter ends enhance the lengthening effect. High-contrast highlights or choppy color placement can interrupt the visual flow and make hair appear shorter.
Q: Is it possible to add extensions with these cuts?
A: Yes, all three cuts can incorporate extensions, though they work best with the long layered cut and V-shape. The graduated bob typically doesn’t need extensions since its lengthening effect comes from the angle rather than actual length.
Q: Which cut makes the most dramatic difference in apparent length?
A: The V-shaped cut typically creates the most dramatic lengthening effect, especially on thick, straight hair. It can make hair appear 3-4 inches longer than it actually measures.